AUDIOTEK AT-578T
AUDIOTEK AT-578T 6.2-inch 2DIN Touchscreen Car Stereo User Manual
Model: AT-578T
Introduction
This manual provides comprehensive instructions for the installation, operation, and maintenance of your AUDIOTEK AT-578T 6.2-inch 2DIN Touchscreen Car Stereo. Please read this manual thoroughly before using the product to ensure proper function and to prevent damage. Keep this manual for future reference.
Safety Information
- Do not operate the unit in a manner that distracts you from driving. Always prioritize road safety.
- Ensure all wiring is correctly connected to prevent short circuits or damage to the vehicle's electrical system.
- Consult a professional for installation if you are unsure about any wiring procedures.
- Avoid exposing the unit to extreme temperatures, direct sunlight for prolonged periods, or excessive moisture.
- Do not attempt to disassemble or modify the unit. This may void the warranty and cause damage.
Package Contents
Verify that all items are present in the package:
- AUDIOTEK AT-578T Car Stereo Unit
- Remote Control
- Power/Speaker Wiring Harness
- Mounting Brackets (2)
- Trim Frame
- Rear View Camera with Cables (if included in your package)
- User Manual (this document)

Figure 1: Included accessories for the car stereo unit.

Figure 2: Optional rear view camera and its connection cables.
Product Overview
Front Panel
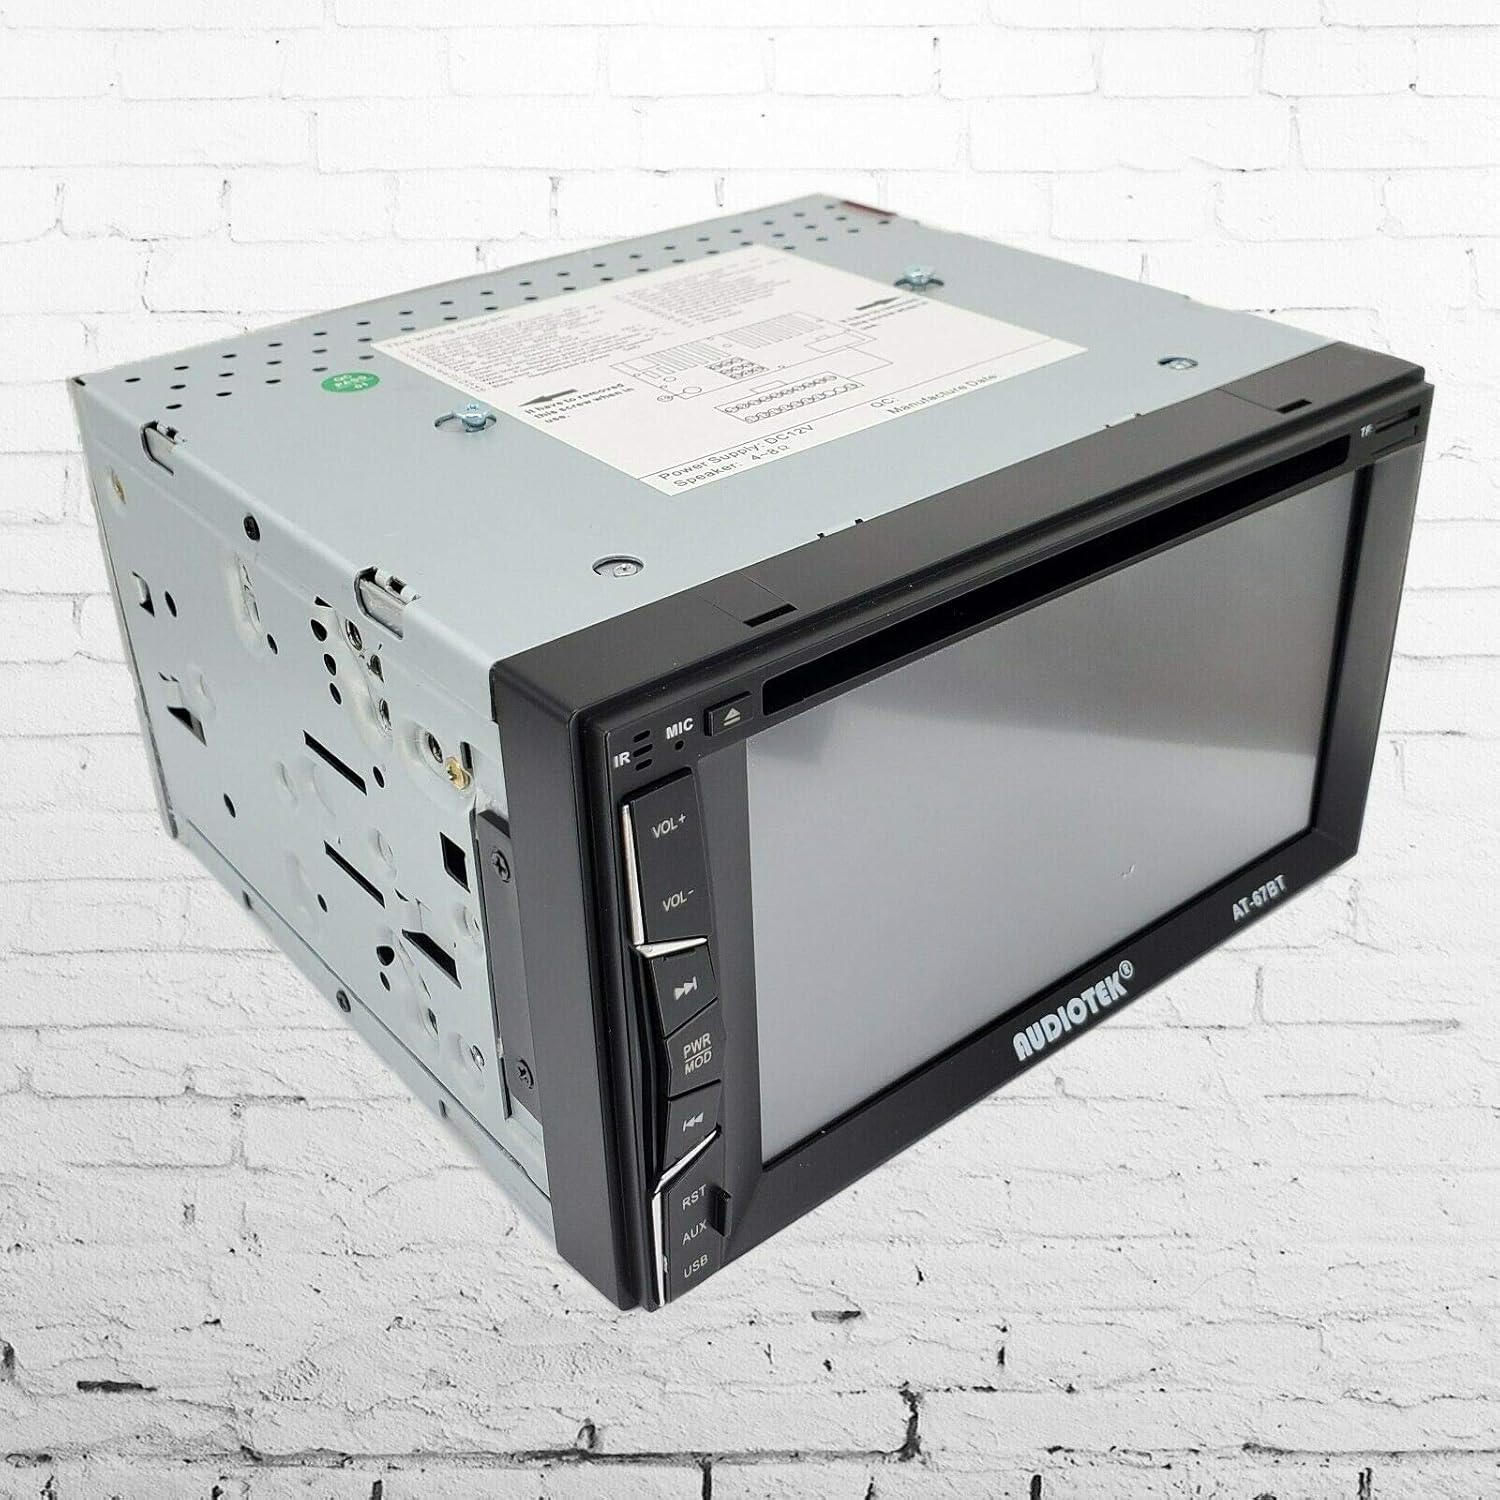
Figure 3: Front view of the car stereo unit.
The front panel features a 6.2-inch digital TFT touchscreen display. On the left side, you will find physical buttons for common functions:
- Power/Mode Button: Turns the unit on/off and cycles through input modes (Radio, DVD, USB, SD, Bluetooth, AV-IN).
- Volume Up/Down: Adjusts the audio output level.
- Mute: Silences the audio output.
- EQ: Accesses equalizer settings.
- USB Port: For connecting USB storage devices.
- SD Card Slot: For inserting SD memory cards.
- AUX Input: 3.5mm jack for external audio sources.
- Reset Button: Small button to reset the unit to factory settings (requires a thin object like a pen tip).
Rear Panel and Connections

Figure 4: Rear view of the car stereo unit with connection ports.
The rear panel houses all necessary connections for power, speakers, and external devices.
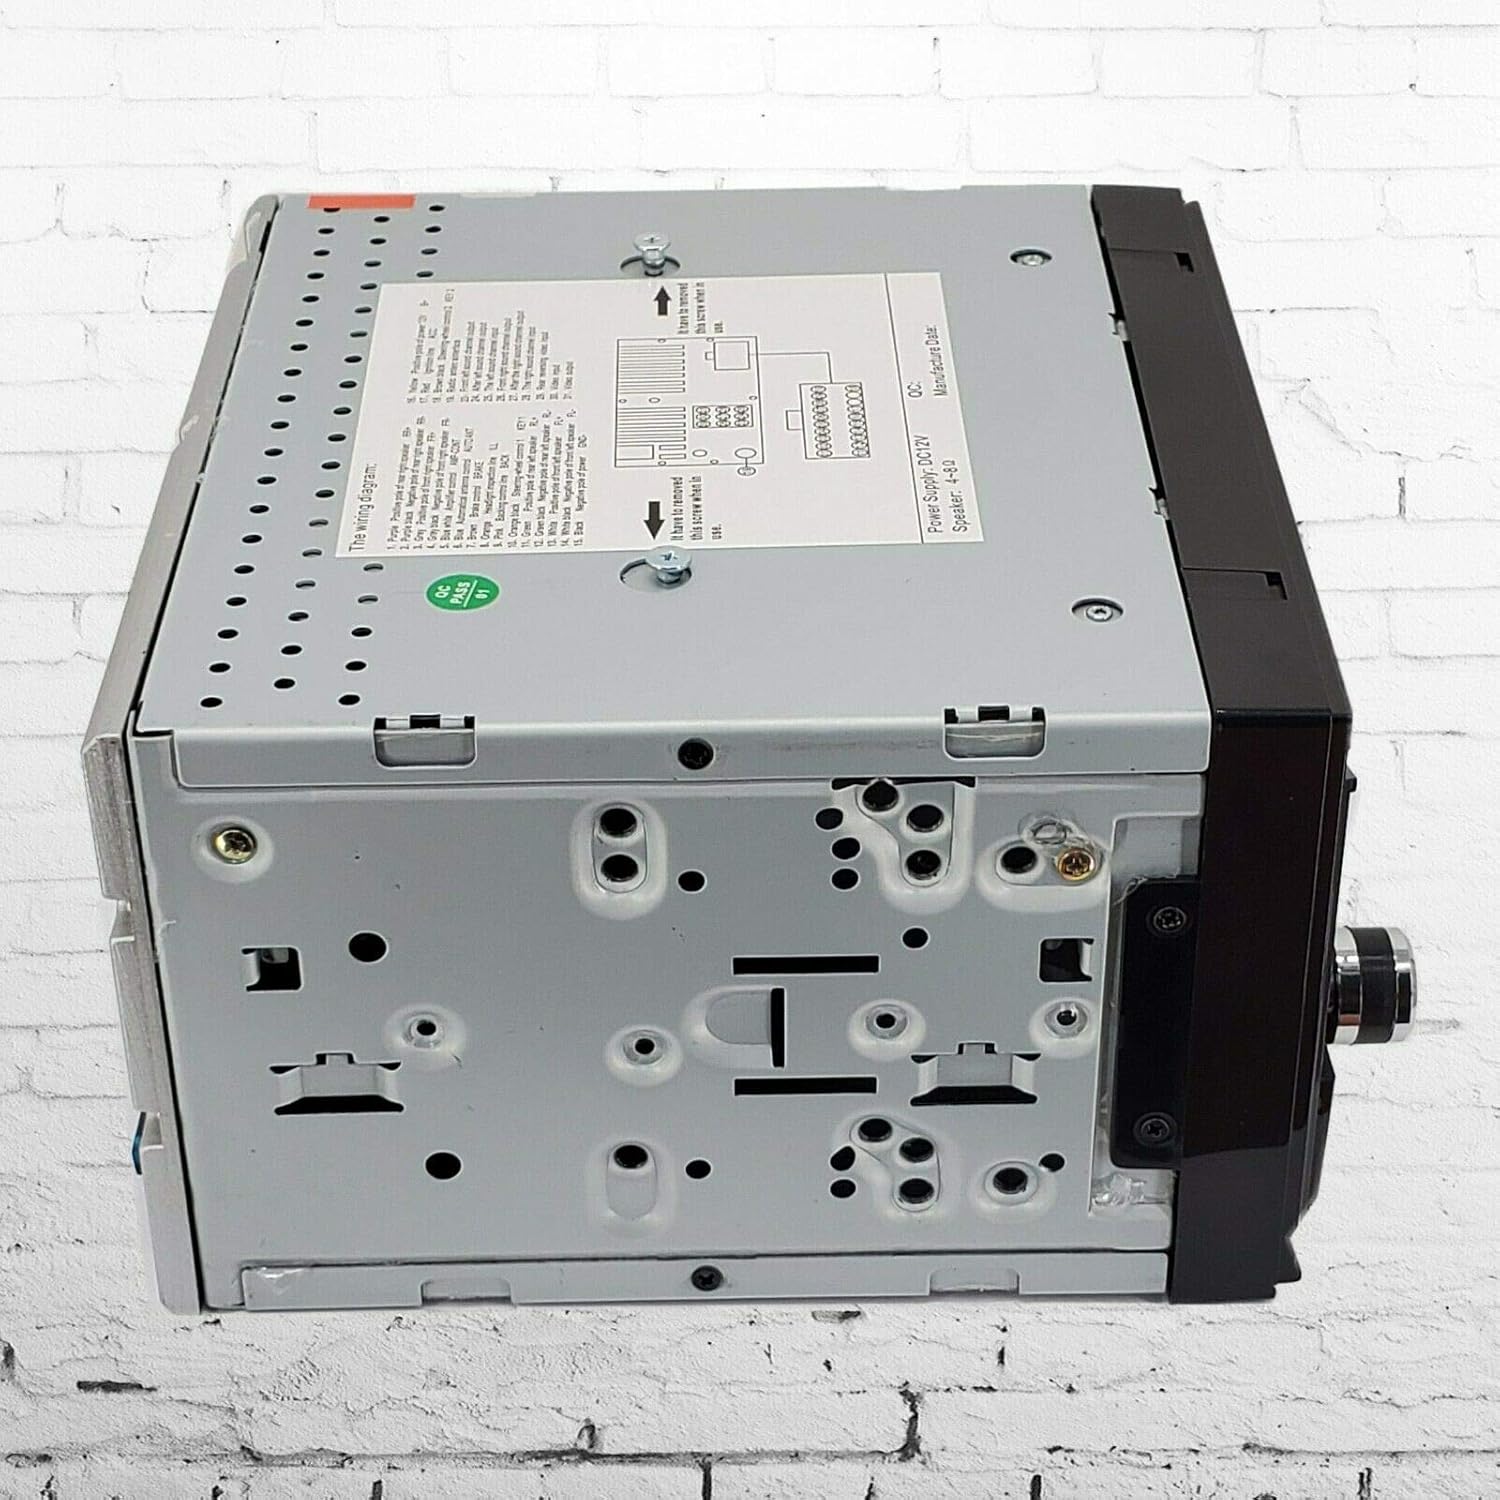
Figure 5: Side view of the car stereo unit.
Setup and Installation
Proper installation is crucial for optimal performance and safety. If you are not confident in performing the installation yourself, seek professional assistance.
Wiring Diagram
Refer to the wiring diagram provided on the unit's chassis and the included wiring harness. Ensure all connections are secure and correctly matched.
- Yellow (B+): Connect to constant 12V power supply.
- Red (ACC): Connect to switched 12V accessory power.
- Black (GND): Connect to vehicle chassis ground.
- Blue (ANT): Connect to power antenna or amplifier remote turn-on.
- Orange (ILL): Connect to vehicle illumination wire.
- Brown (REV): Connect to reverse light trigger for rear camera activation.
- Speaker Wires: Connect to corresponding vehicle speakers (e.g., White/White-Black for Front Left, Gray/Gray-Black for Front Right, Green/Green-Black for Rear Left, Purple/Purple-Black for Rear Right). Ensure correct polarity.
- Steering Wheel Control (SWC) Wires: Connect to vehicle's steering wheel control interface (if applicable).
Mounting the Unit
- Remove the existing car stereo from the dashboard.
- Attach the included mounting brackets to the sides of the AUDIOTEK AT-578T unit using screws.
- Slide the unit into the dashboard opening, securing it with the mounting brackets.
- Connect all necessary wiring harnesses and antenna cable to the rear of the unit.
- Test the unit's functionality before fully reassembling the dashboard.
- Install the trim frame around the unit for a finished look.
Rear Camera Installation (Optional)
If your package includes a rear camera:
- Mount the camera at the rear of your vehicle, typically near the license plate, ensuring a clear view.
- Connect the camera's power wire to the vehicle's reverse light power supply.
- Run the video cable from the camera to the 'CAM IN' (or similar) RCA input on the rear of the car stereo.
- Connect the reverse trigger wire (Brown wire on the main harness) from the stereo to the vehicle's reverse light signal.
Operating Instructions
Basic Operation
- Power On/Off: Press the PWR/MODE button to turn the unit on. Press and hold to turn off.
- Mode Selection: Briefly press the PWR/MODE button to cycle through available input sources (Radio, DVD, USB, SD, Bluetooth, AV-IN).
- Volume Adjustment: Use the VOL+ and VOL- buttons on the front panel or remote control.
- Mute: Press the MUTE button to silence the audio. Press again to restore.
Radio (FM) Operation
- Select RADIO mode.
- Use the touchscreen or remote to scan for stations or select preset stations.
- Press BAND to switch between FM bands.
- Press AS/PS to auto-scan and store stations.
Media Playback (DVD/MP5/USB/SD)
- Insert a DVD disc into the slot, or a USB drive into the USB port, or an SD card into the SD card slot.
- The unit should automatically switch to the corresponding mode. If not, select the mode manually.
- Use the touchscreen controls for playback (Play, Pause, Skip, Fast Forward/Rewind).
- Supported formats include MP5, MP3, and various video formats.
Bluetooth Operation
- Select BLUETOOTH mode.
- On your mobile device, search for Bluetooth devices and select "AUDIOTEK" or a similar name.
- Enter the pairing code (usually "0000" or "1234") if prompted.
- Once paired, you can make/receive calls and stream audio from your device.
- Use the touchscreen to manage calls (answer, end, dial) and control music playback.
Rear Camera Input
When the vehicle is shifted into reverse gear, the unit will automatically display the rear camera feed on the screen, provided the camera is correctly installed and wired.
Steering Wheel Control
If your vehicle has steering wheel controls and they are connected to the unit, you may need to configure them through the unit's settings menu. Refer to the on-screen menu for specific steps to map functions.
Maintenance
- Cleaning the Screen: Use a soft, lint-free cloth to gently wipe the touchscreen. Do not use abrasive cleaners or solvents.
- General Cleaning: Wipe the unit's exterior with a dry or slightly damp cloth.
- Disc Care: Handle DVD discs by their edges. Keep them clean and free of scratches to ensure proper playback.
- Firmware Updates: Check the manufacturer's website periodically for any available firmware updates.
Troubleshooting
| Problem | Possible Cause | Solution |
|---|---|---|
| Unit does not power on. | Incorrect wiring; Blown fuse; No power supply. | Check power (Yellow, Red, Black) connections. Inspect vehicle's fuse box and unit's fuse. |
| No sound. | Volume too low; Mute activated; Incorrect speaker wiring. | Increase volume. Deactivate mute. Verify speaker connections and polarity. |
| Bluetooth does not connect. | Device not in pairing mode; Incorrect pairing code; Interference. | Ensure Bluetooth is enabled on both devices. Re-attempt pairing. Move closer to the unit. |
| Rear camera image not displayed. | Camera not powered; Video cable loose; Reverse trigger not connected. | Check camera power and video cable connections. Ensure the Brown reverse trigger wire is connected. |
| Disc/USB/SD not playing. | Unsupported format; Damaged media; Incorrect mode selected. | Verify media format. Try a different disc/USB/SD. Select the correct input mode. |
Specifications
| Feature | Specification |
|---|---|
| Display Type | 6.2-inch LCD Touchscreen |
| Power Output | 200W (Peak) |
| Media Playback | DVD, MP5, MP3, USB, SD |
| Connectivity | Bluetooth, USB 2.0, SD Card Slot, AV-IN, Rear Camera Input |
| Radio Tuner | FM |
| Remote Control | Yes (Wireless) |
| Compatible Devices | Smartphone, Speaker |
| Model Number | AT-578T |
| UPC | 613464919551 |
Warranty and Support
This product is covered by a manufacturer's warranty. Please refer to the warranty card included with your purchase or contact AUDIOTEK customer support for detailed information regarding warranty terms and conditions.
For technical assistance, troubleshooting not covered in this manual, or service inquiries, please contact AUDIOTEK customer support through their official website or the contact information provided with your product documentation.
Ask a question about this manual
Ask about setup, troubleshooting, compatibility, parts, safety, or missing instructions. Manuals+ will review the question and use this page’s manual context to help answer it.