Introduction
This manual provides instructions for the installation, operation, and maintenance of your GCP T6 Pro TH6220U2000 Digital Programmable Thermostat. This thermostat is designed to control your heating and cooling system efficiently, offering programmable schedules and precise temperature control.
The TH6220U2000 is compatible with various HVAC systems, including standard efficient gas forced air, high efficacy gas forced air, oil forced air, electric forced air, hot water fan coil, geothermal heat pump, and air-to-air heat pump systems.
Product Overview
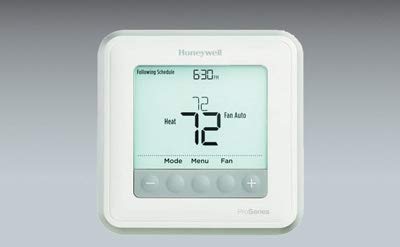
Image: Front view of the GCP T6 Pro TH6220U2000 Digital Programmable Thermostat, showing its digital display and control buttons.
Setup and Installation
Proper installation is crucial for the optimal performance of your thermostat. It is recommended that a qualified HVAC technician install this device. If you are performing the installation yourself, ensure you follow all local electrical codes.
Safety Precautions:
- Turn off power to the heating/cooling system at the circuit breaker before installation.
- Read all instructions carefully before proceeding.
- Handle the thermostat with care to avoid damage.
Wiring:
The TH6220U2000 thermostat requires specific wiring connections depending on your HVAC system type. Refer to the wiring diagrams provided in the packaging for detailed instructions. Ensure all wires are securely connected to the correct terminals.
Mounting:
- Remove the old thermostat (if applicable) and mark the wire connections.
- Mount the new thermostat base plate to the wall using the provided screws.
- Connect the wires to the appropriate terminals on the new base plate.
- Attach the thermostat faceplate to the base plate.
Initial Power-Up and Configuration:
After installation, restore power to your HVAC system. The thermostat will power on and may prompt you for initial setup, such as date, time, and system type configuration. Follow the on-screen instructions to complete the setup.
Operating Instructions
The TH6220U2000 features a digital display and intuitive button controls for easy operation.
Display Overview:
The main display shows the current room temperature, set temperature, system mode, fan mode, and time/day. Backlighting ensures visibility in various lighting conditions.
Setting Temperature:
Use the Up and Down arrow buttons to adjust the desired temperature. The thermostat will maintain this temperature until the next scheduled change or manual override.
System Modes:
Press the Mode button to cycle through available system modes:
- Heat: The system will only heat to maintain the set temperature.
- Cool: The system will only cool to maintain the set temperature.
- Auto: The thermostat automatically switches between heating and cooling to maintain the set temperature range. This feature is known as Auto Changeover.
- Off: The heating and cooling system is turned off.
Fan Modes:
Press the Fan button to select fan operation:
- Auto: The fan runs only when the heating or cooling system is active.
- On: The fan runs continuously, regardless of heating or cooling activity.
Programming Schedules:
The TH6220U2000 is a programmable thermostat, allowing you to set custom heating and cooling schedules for different times of the day and days of the week. Consult the detailed programming section in the full manual (if available) or the on-screen menu for specific steps to create and modify schedules. This feature helps optimize energy usage.
Maintenance
Your GCP T6 Pro thermostat requires minimal maintenance to ensure continued optimal performance.
Cleaning the Thermostat:
Wipe the exterior of the thermostat with a soft, damp cloth. Do not use abrasive cleaners or solvents, as these can damage the finish and internal components.
Battery Replacement:
While the TH6220U2000 is typically hardwired, some installations may include battery backup or require batteries for certain functions. If your thermostat uses batteries, replace them annually or when a low battery indicator appears on the display. Refer to the full installation guide for specific battery type and replacement instructions.
Troubleshooting
If you encounter issues with your thermostat, try the following troubleshooting steps:
- No Power/Blank Display: Check the circuit breaker for your HVAC system. Ensure the thermostat is properly seated on its base plate and all wiring connections are secure. If batteries are used, replace them.
- Incorrect Temperature Readings: Ensure the thermostat is not exposed to direct sunlight, drafts, or heat sources (e.g., lamps, appliances) that could affect its temperature sensor.
- System Not Responding (Heating/Cooling): Verify that the system mode is set correctly (Heat, Cool, or Auto). Check if the fan mode is set to Auto. Ensure the set temperature is above the room temperature for heating or below for cooling.
- Scheduling Issues: Confirm that the current time and day are set correctly on the thermostat. Review your programmed schedule for any conflicts or incorrect settings.
If problems persist after attempting these steps, contact a qualified HVAC technician for assistance.
Specifications
| Feature | Detail |
|---|---|
| Model Number | TH6220U2000 |
| Display Size | 5.44 Square Inch |
| Ambient Temperature Range | 32 to 120°F (0 to 49°C) |
| Setting Temperature Range (Heat) | 40 to 90°F (4.5 to 32°C) |
| Setting Temperature Range (Cool) | 50 to 99°F (10 to 37°C) |
| Special Features | Auto Changeover, Programmable |
| Control Type | Button Control |
| Control Method | Remote |
| Style | Digital |
| Backlight | Yes |
| Item Weight | 16 ounces (1 pound) |
| Connectivity Protocol | Wi-Fi |
Warranty Information
Specific warranty details for the GCP T6 Pro TH6220U2000 thermostat are typically provided with the product packaging or can be found on the manufacturer's official website. Please refer to these resources for information regarding warranty duration, coverage, and claims procedures.
Support
For technical assistance, installation questions, or further support regarding your GCP T6 Pro TH6220U2000 thermostat, please contact your installer or refer to the manufacturer's support channels. Contact information is usually available in the product documentation or on the official GCP website.