
Introduction
Thank you for choosing the SportTronic ST-X6 Xbike Compact Folding Exercise Bike. This manual provides essential information for the safe assembly, operation, and maintenance of your new fitness equipment. Please read this manual thoroughly before use and keep it for future reference. The ST-X6 is designed for home use, offering a quiet, stable, and effective workout experience to strengthen your cardiovascular system, joints, and muscles.

Image: The SportTronic ST-X6 Xbike in its fully assembled, unfolded state, ready for use.
Safety Information
- Consult your physician before starting any exercise program.
- Keep children and pets away from the equipment during use.
- Place the exercise bike on a flat, stable surface. Ensure adequate space around the bike.
- Inspect the equipment for loose or worn parts before each use. Do not use if damaged.
- Wear appropriate exercise clothing and footwear.
- Do not exceed the maximum user weight of 110 kg (242 lbs).
- Stop exercising immediately if you feel faint, dizzy, or experience pain.
- Ensure all bolts and nuts are securely tightened before use.
Package Contents
The SportTronic ST-X6 Xbike package includes the following components:
- ST-X6 Xbike main frame
- Seat and backrest assembly
- Handlebar assembly with heart rate sensors and console
- Pedals (left and right)
- Stabilizer bars (front and rear)
- Assembly hardware (bolts, washers, nuts, tools)
- User Manual
Setup and Assembly
Follow these general steps to assemble your ST-X6 Xbike. Refer to the included assembly diagram for detailed instructions.
- Unpack Components: Carefully remove all parts from the packaging and lay them out on a clean, flat surface. Verify all parts are present according to the package contents list.
- Attach Stabilizer Bars: Secure the front and rear stabilizer bars to the main frame using the provided bolts and nuts. Ensure they are firmly tightened.
- Install Pedals: Attach the left and right pedals to their respective crank arms. Note that the left pedal typically tightens counter-clockwise and the right pedal clockwise.
- Assemble Seat and Backrest: Mount the seat and backrest onto the seat post. Adjust the height as needed and secure it.
- Attach Handlebar and Console: Connect the handlebar assembly, including the console, to the main frame. Ensure all cables for the console and heart rate sensors are properly connected.
- Final Check: Double-check all connections, bolts, and nuts to ensure they are secure before first use.
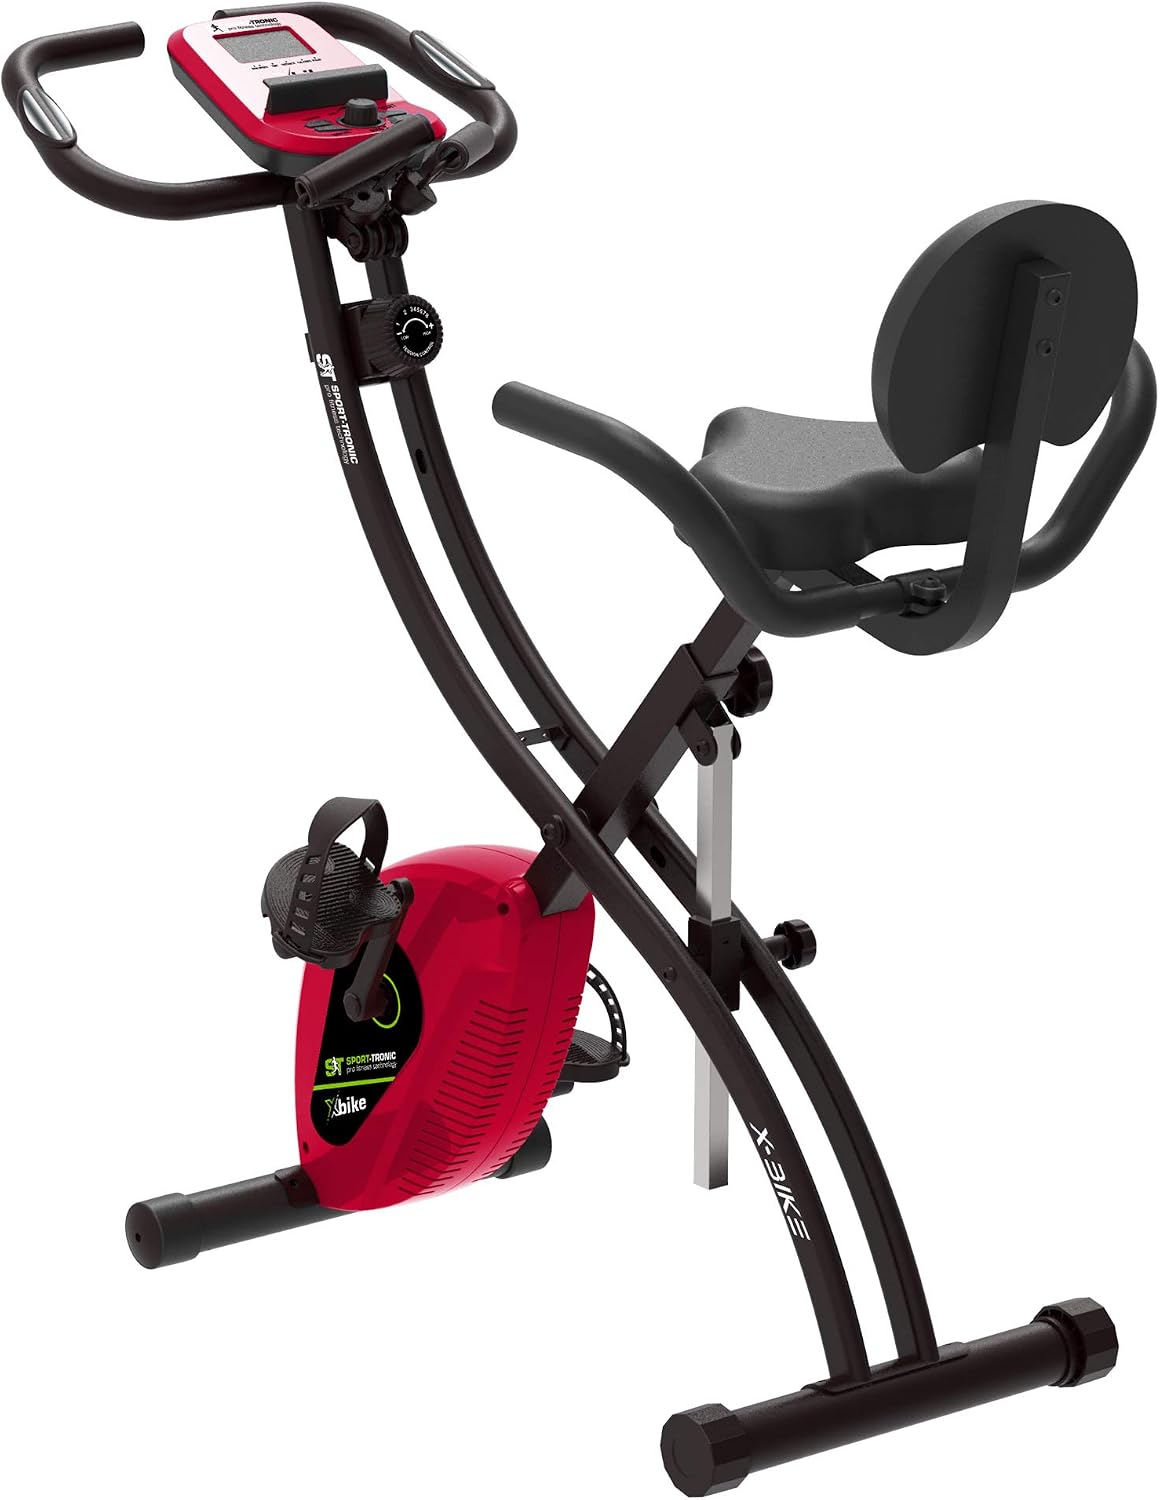
Image: A view of the ST-X6 Xbike highlighting the console, handlebars with heart rate sensors, and the adjustable seat with backrest.

Image: Front view of the ST-X6 Xbike, illustrating the pedals, crank, and front stabilizer bar.
Operating Instructions
1. Console Functions

Image: Detailed view of the ST-X6 Xbike's LCD display and control buttons.
The ST-X6 features an LCD display that tracks your workout progress.
- TIME: Displays the duration of your current workout.
- SPEED: Shows your current cycling speed.
- DISTANCE: Tracks the distance covered during your workout.
- CALORIES: Estimates the calories burned during your session.
- PULSE (Heart Rate): Displays your current heart rate when holding the sensors.
- SCAN: Automatically cycles through all display functions every few seconds.
- MODE Button: Press to select specific display functions or to activate/deactivate SCAN mode.
- RESET Button: Press and hold to clear all workout data.
2. Resistance Adjustment
The ST-X6 Xbike offers 8 levels of magnetic resistance. To adjust the resistance, turn the resistance knob located below the console.
- Turn clockwise to increase resistance (harder workout).
- Turn counter-clockwise to decrease resistance (easier workout).
3. Heart Rate Monitoring
To measure your heart rate, firmly grip the pulse sensors on the handlebars with both hands. Your heart rate will be displayed on the console after a few seconds. Ensure your hands are clean and dry for accurate readings.
4. Tablet Holder Usage

Image: The ST-X6 Xbike console featuring a smartphone securely placed in the integrated tablet holder.
The integrated tablet holder allows you to place your smartphone or tablet for entertainment or workout apps during your exercise session. Simply place your device into the designated slot on the console.
5. Seat Height Adjustment
Adjust the seat height to ensure a comfortable and effective pedaling position.
- Loosen the adjustment knob located on the seat post.
- Slide the seat post up or down to the desired height.
- Tighten the adjustment knob firmly to secure the seat in place.
Maintenance
- Cleaning: Wipe down the exercise bike with a damp cloth after each use to remove sweat and dust. Do not use abrasive cleaners.
- Inspection: Regularly check all bolts, nuts, and moving parts for tightness and wear. Tighten any loose fasteners.
- Lubrication: No specific lubrication is required for the magnetic resistance system.
- Storage: Store the bike in a cool, dry place away from direct sunlight and moisture.
Troubleshooting
| Problem | Possible Cause | Solution |
|---|---|---|
| Console not displaying data. | Loose cable connection; dead batteries. | Check all cable connections to the console. Replace console batteries. |
| Inaccurate heart rate reading. | Hands not firmly on sensors; dry hands. | Ensure firm, consistent contact with sensors. Slightly moisten hands if too dry. |
| Bike is unstable or wobbles. | Uneven surface; loose stabilizer bolts. | Place bike on a level surface. Tighten all bolts on stabilizer bars. |
| Resistance not changing. | Resistance cable disconnected or damaged. | Inspect the resistance cable connection to the knob and the flywheel mechanism. Contact customer support if damaged. |
Specifications
- Model: ST-X6
- Brand: SportTronic
- Resistance System: Magnetic, 8 levels
- Flywheel Weight: 1.5 kg
- Display Functions: Time, Speed, Distance, Calories, Pulse, Scan
- Max User Weight: 110 kg (242 lbs)
- Unfolded Dimensions (L x W x H): Approximately 115 x 53 x 107 cm (45.3 x 20.9 x 42.1 inches)
- Folded Dimensions (L x W x H): Approximately 55 x 53 x 136 cm (21.7 x 20.9 x 53.5 inches)
- Item Weight: 18 kg (39.68 lbs)
- Material: Polyurethane (PU) for seat, metal frame
- Power Source: Battery-powered (for console)
- Special Features: Adjustable resistance, Foldable design, Tablet holder, Heart rate sensors
Folding and Storage
The ST-X6 Xbike is designed for compact storage.
- Fold the Frame: Locate the folding pin or knob on the main frame (usually near the center joint). Pull or loosen it to allow the frame to fold.
- Collapse the Bike: Carefully fold the front and rear sections of the bike towards each other until it reaches its compact folded position.
- Secure: Re-engage the folding pin or tighten the knob to secure the bike in its folded state.
- Transport: Use the integrated transport wheels (if available, mentioned in description) to easily move the folded bike.
- Storage: Store the folded bike in a dry, safe place. Its compact dimensions (55 x 53 x 136 cm) allow it to fit behind a cabinet or in a corner.

Image: The ST-X6 Xbike shown in its compact, folded configuration, ready for storage.
Warranty and Support
For warranty information or technical support, please refer to the warranty card included with your product or contact SportTronic customer service. Keep your purchase receipt as proof of purchase.
For further assistance, please visit the official SportTronic website or contact their support channels.