
1. Introduction
The Varomorus Metal Precision Manual Seeder is a versatile tool designed for planting various vegetables, including oats, cucumbers, tomatoes, beets, onions, radishes, carrots, greens, and lettuce. It is suitable for use in both greenhouses and open ground. This manual provides essential information for the proper assembly, operation, and maintenance of your seeder.
Key features of this seeder include:
- Crafted from high-quality metal for durability and long-lasting performance.
- Adjustable row distance for flexible planting configurations.
- Universal tool for planting different kinds of seeds.
- Compact and durable construction.
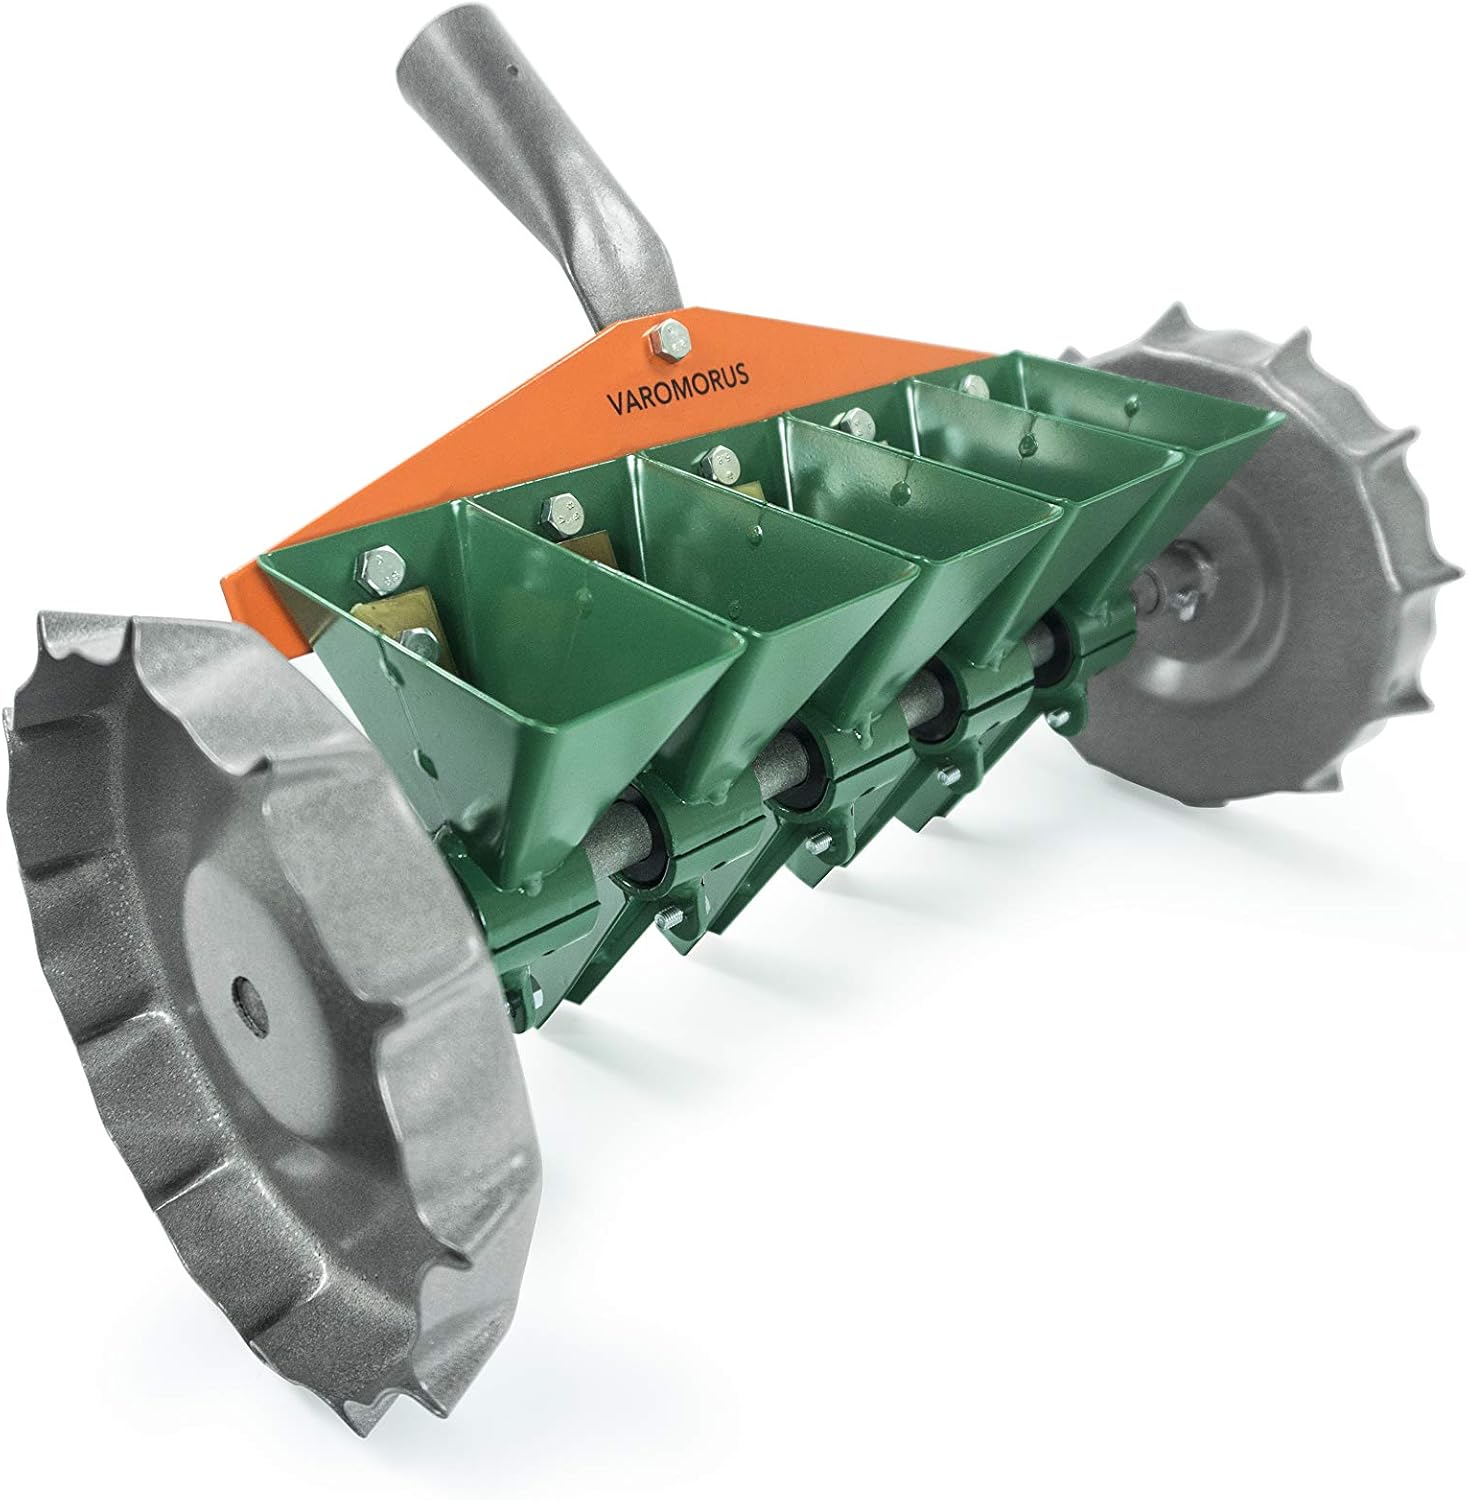
Image 1.1: Angled view of the Varomorus 5-Row Manual Seeder, showcasing its metal construction and five seed hoppers.
2. Setup and Preparation
Before operating the seeder, proper setup is crucial for achieving the desired sowing rate and seed distribution.
2.1. Attaching the Handle
Attach a suitable handle (not included, typically a standard pole) to the designated attachment point on the seeder's frame. Ensure it is securely fastened for safe operation.
2.2. Selecting and Installing Sowing Drums
To set the necessary sowing rate, select the appropriate sowing drum for your specific seed type. The seeder is provided with a set of sowing drums and comes with 20 nozzles, including options for radish, onion, beet, and carrot seeds. Each drum has calibrated deepenings designed to hold a specific number of seeds.

Image 2.1: The included set of 20 nozzles, categorized for beet, carrot, radish, and onion seeds, demonstrating the variety of seed sizes they accommodate.
Place the selected sowing drum into the bunker (seed hopper). The seeder's function relies on the rotation of this sowing drum, where seeds fall into its calibrated deepenings.
2.3. Adjusting the Brush Limiter
Adjust the position of the sowing brush limiter according to the desired amount of seed to be dropped. The brush stopper ensures that one or a few seeds (depending on its regulation) are released into each deepening of the sowing drum. This adjustment directly influences the density of sowing.
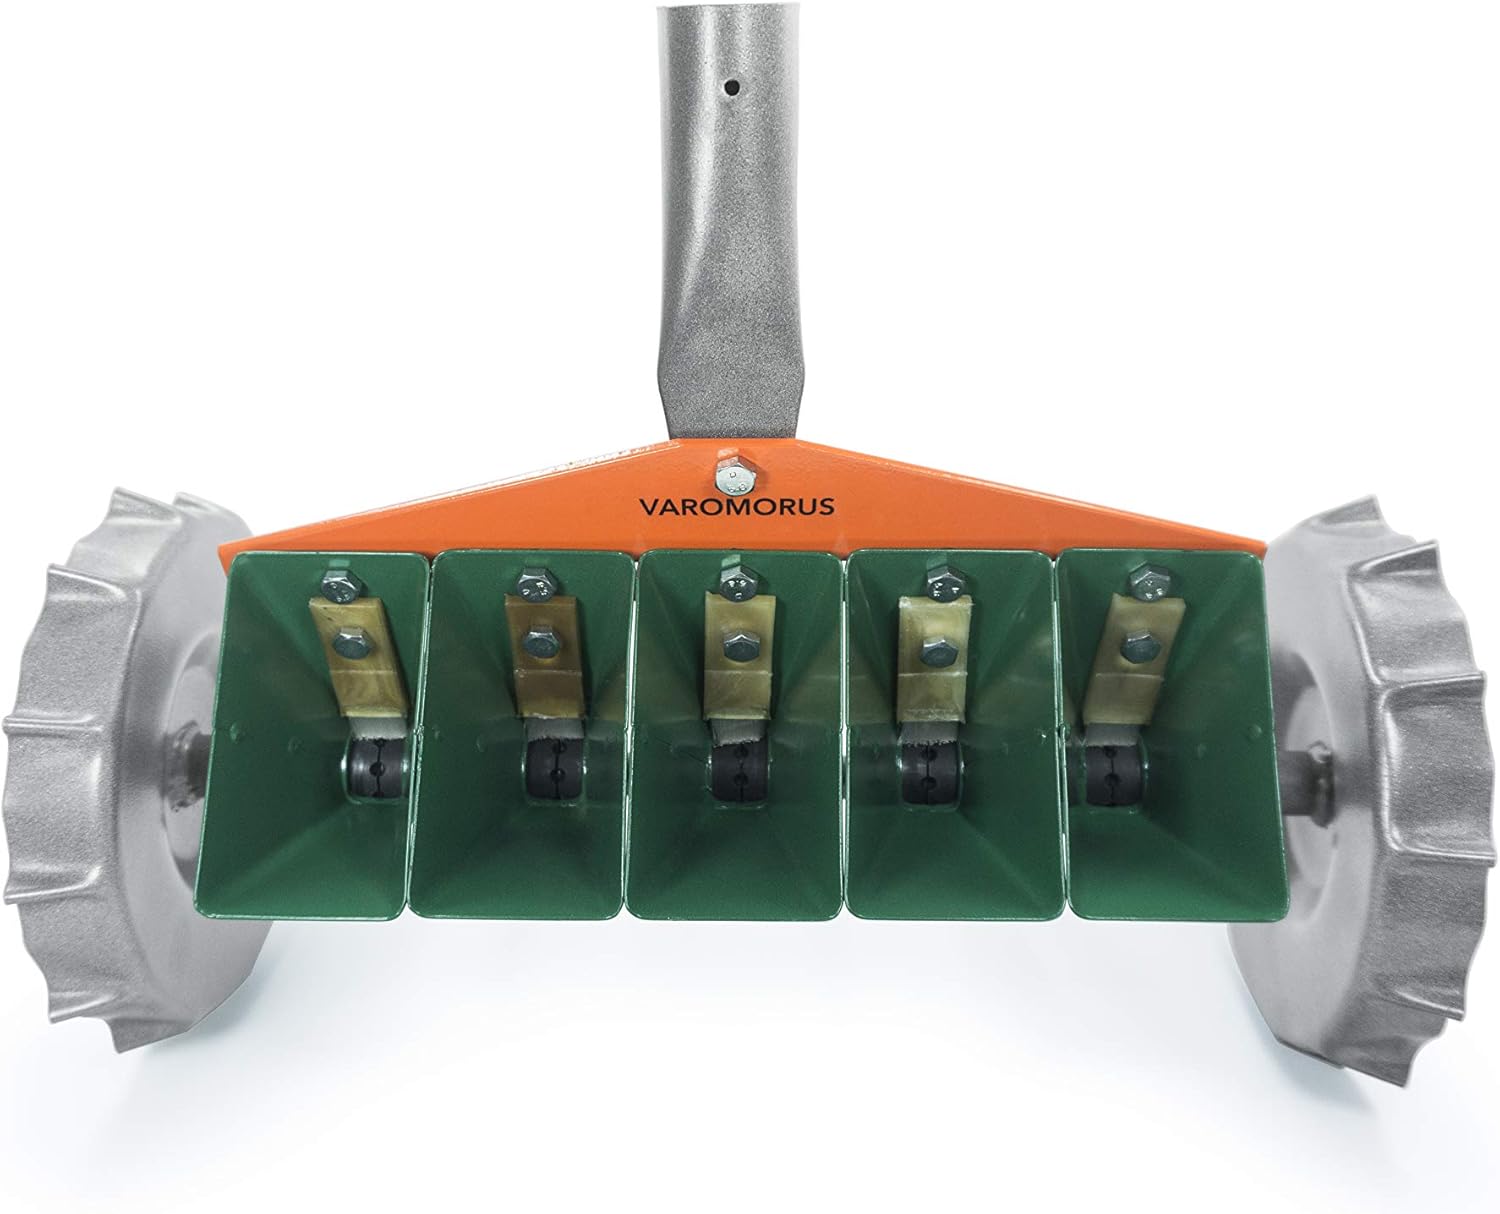
Image 2.2: A close-up of the seeder's hoppers, showing the brush limiters and seed ejectors in place, ready for seed distribution.
2.4. Checking Sowing Rate
After installing the drum and adjusting the brush limiter, check and correct the sowing rate by rolling the seeder with seeds along a flat surface. This allows you to observe the seed distribution and make any necessary fine-tune adjustments before actual planting.
3. Operating Instructions
The principle of the seeder's functioning is based on the rotation of the sowing drum. The seed of the crop gets into its calibrated deepening. The brush stopper leaves in every deepening of sowing drum one seed or few (depending on its regulation) which is thrown down into the furrow by the flip-out ejector of the original construction.
3.1. Planting Process
- Fill the seed hoppers with your chosen seeds.
- Position the seeder at the start of your planting row.
- Gently pull the seeder along the prepared soil. The wheels will turn the sowing drums, and seeds will be deposited at the set intervals.
- Maintain a consistent speed and direction for uniform planting.
Video 3.1: Demonstration of the Varomorus SMK 5-Row Seeder in operation, showing the rotation of the wheels and the seed distribution mechanism.
3.2. Sowing Density
The density of sowing depends on the space between deepenings in the sowing hub and the regulation of the brush stopper. Experiment with different settings on a test patch to achieve your desired plant spacing.
4. Maintenance
To ensure the longevity and optimal performance of your Varomorus seeder, follow these general maintenance guidelines:
- Cleaning: After each use, thoroughly clean the seed hoppers, sowing drums, and ejectors to remove any residual seeds or soil. This prevents clogging and ensures smooth operation for future use.
- Storage: Store the seeder in a dry place to prevent rust and corrosion, especially given its metal construction.
- Inspection: Periodically inspect all bolts and connections to ensure they are tight. Tighten any loose fasteners as needed.
- Lubrication: While not explicitly stated, light lubrication of moving parts (axles, wheel bearings) with a suitable lubricant can help maintain smooth operation.
5. Troubleshooting
This section addresses common issues you might encounter with your manual seeder.
5.1. Uneven Seed Distribution or Clogging
- Incorrect Drum/Nozzle: Ensure the correct sowing drum/nozzle is installed for the size of your seeds. Seeds too large or too small for the openings can cause blockages or inconsistent drops.
- Brush Limiter Adjustment: Verify that the brush limiter is correctly adjusted. If it's too tight, it might prevent seeds from falling; if too loose, it might allow too many seeds.
- Moisture/Debris: Check for moisture or debris inside the hoppers or around the sowing drums, which can cause seeds to clump or stick. Clean thoroughly if necessary.
- Seeder Level: Ensure the seeder is kept level during operation. Tilting can cause seeds to accumulate on one side, leading to uneven distribution or clogging.
5.2. Wheels Not Turning Smoothly
- Soil Conditions: Very wet or clumpy soil can impede wheel movement. Ensure the soil is adequately prepared and not overly moist.
- Loose Connections: Check that the bolts holding the hoppers to the frame are not overly tightened, allowing the wheels to spin freely.
- Debris in Axle: Inspect the axle and wheel areas for any accumulated soil or plant debris that might be obstructing rotation.
6. Specifications
| Feature | Detail |
|---|---|
| Product Dimensions | 14.57 x 7.09 x 7.09 inches |
| Item Weight | 6.5 pounds (2950 Grams) |
| Brand | Varomorus |
| Model Number | 5-REIHEN |
| Material | Fully metal (stamped steel profile) |
| Color | Green, Orange, Silver |
| Special Feature | Depth Adjustment |
| Bunker Width | 2.3 inches / 60 mm |
| Included Accessories | Brush limiter, flip-out seed ejector, set of sowing drums, brushes, 20 nozzles |
7. Warranty and Support
No specific warranty or detailed support information is provided in the product description. For any inquiries regarding warranty, parts, or technical support, please contact the manufacturer, Varomorus, directly or refer to your purchase documentation.


