1. Important Safety Instructions
Read all instructions before using this appliance to reduce the risk of fire, electric shock, or injury. Keep this manual for future reference.
- Electrical Safety: Ensure the appliance is connected to a properly grounded outlet. Do not use extension cords.
- Ventilation: Maintain adequate space around the unit for proper air circulation. Blocked vents can lead to overheating.
- Flammable Materials: Do not store explosive substances or flammable materials inside the refrigerator.
- Children Safety: Supervise children to ensure they do not play with the appliance. Old refrigerators can pose entrapment hazards.
- Cleaning: Always unplug the appliance before cleaning or performing maintenance.
- Refrigerant: This appliance contains R600a refrigerant. Handle with care and ensure proper disposal according to local regulations.
2. Product Overview
The Vremi Beverage Refrigerator VRM050660N is designed to keep your beverages chilled. It features a glass door, adjustable shelves, and a digital thermostat for precise temperature control.
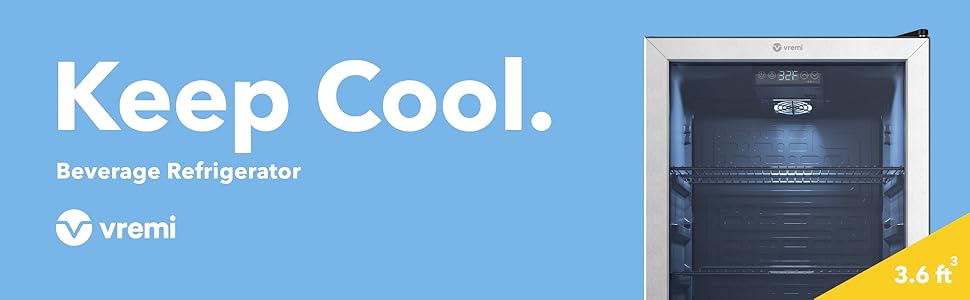
Figure 2.1: Front view of the Vremi Beverage Refrigerator.
Key Features:
- Capacity: Holds 110-130 standard beverage cans (3.6 cubic feet).
- Digital Thermostat: Easy-to-use controls for precise temperature settings.
- Adjustable Shelves: Removable wire shelves for flexible storage configurations.
- Reversible Door: Door hinge can be reversed to open from either the left or right side.
- Adjustable Feet: Ensures stability on uneven surfaces.
- Glass Door: Triple-layered glass door for insulation and visibility.
- LED Lighting: Internal white LED light for illumination.
3. Setup
3.1 Unpacking
- Remove all packaging materials, including foam and adhesive tape.
- Inspect the refrigerator for any damage during transit. Report any damage to the retailer immediately.
- Clean the interior and exterior of the unit with a soft cloth and mild detergent before use.
3.2 Placement
- Place the refrigerator on a firm, level surface.
- Ensure there is at least 5 inches (12.7 cm) of space at the back and sides for proper ventilation.
- Avoid placing the unit in direct sunlight or near heat sources (e.g., ovens, radiators).
- Do not install in areas where the temperature will drop below 50°F (10°C) or rise above 90°F (32°C).

Figure 3.1: Product dimensions for placement planning.
3.3 Leveling the Unit
The refrigerator is equipped with adjustable feet to ensure it is level. Proper leveling is crucial for efficient operation and door alignment.
- Turn the leveling feet clockwise to raise the unit or counter-clockwise to lower it.
- Use a level to ensure the appliance is perfectly balanced.

Figure 3.2: Adjusting the leveling feet for stability.
3.4 Initial Power-On
After placing and leveling the unit, wait at least 24 hours before plugging it into a power outlet. This allows the refrigerant to settle, preventing potential damage to the cooling system.
4. Operating Instructions
4.1 Powering On/Off
Plug the power cord into a grounded electrical outlet. The unit will power on automatically. To turn off, press and hold the power button on the control panel.
4.2 Temperature Control
The refrigerator features a digital thermostat located inside the unit, above the top shelf. The temperature can be set between 32°F (0°C) and 50°F (10°C).
- Press the 'Set' button to activate temperature adjustment.
- Use the 'Up' and 'Down' arrows to select your desired temperature.
- The display will flash the set temperature and then return to the current internal temperature.
- To switch between Fahrenheit (°F) and Celsius (°C), press and hold the 'F/C' button.

Figure 4.1: Digital thermostat control panel.
4.3 Loading Beverages
Arrange beverages to allow for proper air circulation. Overloading can hinder cooling efficiency. The adjustable shelves can be repositioned or removed to accommodate various bottle and can sizes.

Figure 4.2: Example of beverage loading, demonstrating capacity.

Figure 4.3: Adjustable shelves for flexible storage.
4.4 Internal LED Lighting
The internal white LED light can be turned on or off using the light button on the control panel. This provides visibility inside the unit.

Figure 4.4: Internal white LED lighting for visibility.
5. Maintenance
5.1 Cleaning
Regular cleaning helps maintain the appearance and efficiency of your refrigerator.
- Interior: Unplug the unit. Wash the interior surfaces and removable shelves with a solution of mild detergent and warm water. Rinse thoroughly and dry completely before plugging the unit back in.
- Exterior: Clean the exterior with a soft cloth and mild detergent. For the glass door, use a glass cleaner. Avoid abrasive cleaners or solvents.
- Door Gasket: Clean the door gasket regularly to ensure a proper seal.
5.2 Defrosting
This appliance features an automatic defrost system. Frost buildup on the evaporator will melt during the compressor's off-cycle and drain into a drip tray at the back of the unit, where it evaporates.
5.3 Power Outage
In case of a power outage, keep the refrigerator door closed to maintain the internal temperature for as long as possible. Avoid opening the door unnecessarily.
5.4 Long-Term Storage
If the refrigerator will not be used for an extended period:
- Unplug the unit from the power outlet.
- Empty all contents and clean the interior thoroughly.
- Leave the door slightly ajar to prevent odors and mold growth.
6. Troubleshooting
Review the following common issues and solutions before contacting customer support.
| Problem | Possible Cause | Solution |
|---|---|---|
| Refrigerator does not operate. | No power, tripped circuit breaker, power button off. | Check power connection, reset circuit breaker, press power button. |
| Unit is not cold enough. | Temperature set too high, door not closed properly, excessive door openings, poor ventilation, unit overloaded. | Lower temperature setting, ensure door is sealed, reduce door openings, ensure proper clearance, do not overload. |
| Excessive noise. | Unit not level, loose parts, compressor cycling. | Adjust leveling feet, check for loose components, compressor noise is normal during operation. |
| Door does not close completely. | Unit not level, door gasket dirty/damaged, shelves out of place. | Level the unit, clean or replace gasket, reposition shelves. |
7. Specifications
| Specification | Detail |
|---|---|
| Model Number | VRM050660N |
| Brand | Vremi |
| Product Dimensions (D x W x H) | 18.7" x 18.89" x 33.74" |
| Capacity | 3.6 Cubic Feet (approx. 110-130 cans) |
| Installation Type | Undercounter |
| Number of Doors | 1 |
| Defrost System | Automatic |
| Finish Type | Glossy |
| Shelf Type | Removable shelves |
| Cooling Method | Compressor |
| Number of Shelves | 3 |
| Adjustable Temperature Control | Yes |
| UPC | 855601006179 |
8. Warranty and Support
For warranty information or technical support, please refer to the warranty card included with your product or contact Vremi customer service directly. Keep your purchase receipt for warranty claims.
Customer Service: Please visit the Vremi website or contact their support team for assistance with product inquiries, parts, or service.