
Hitec RCD 44298
Hitec X2 AC Plus Vertical Multi Charger User Manual
Model: 44298
1. Introduction
This manual provides essential information for the safe and efficient operation of your Hitec X2 AC Plus Vertical Multi Charger. Please read this manual thoroughly before using the charger to ensure proper setup and to prevent damage to the device or connected batteries.
The Hitec X2 AC Plus Vertical is a compact, high-performance multi-charger designed for simultaneous charging and discharging of two battery packs. It supports both AC and DC input power, making it versatile for various charging environments.
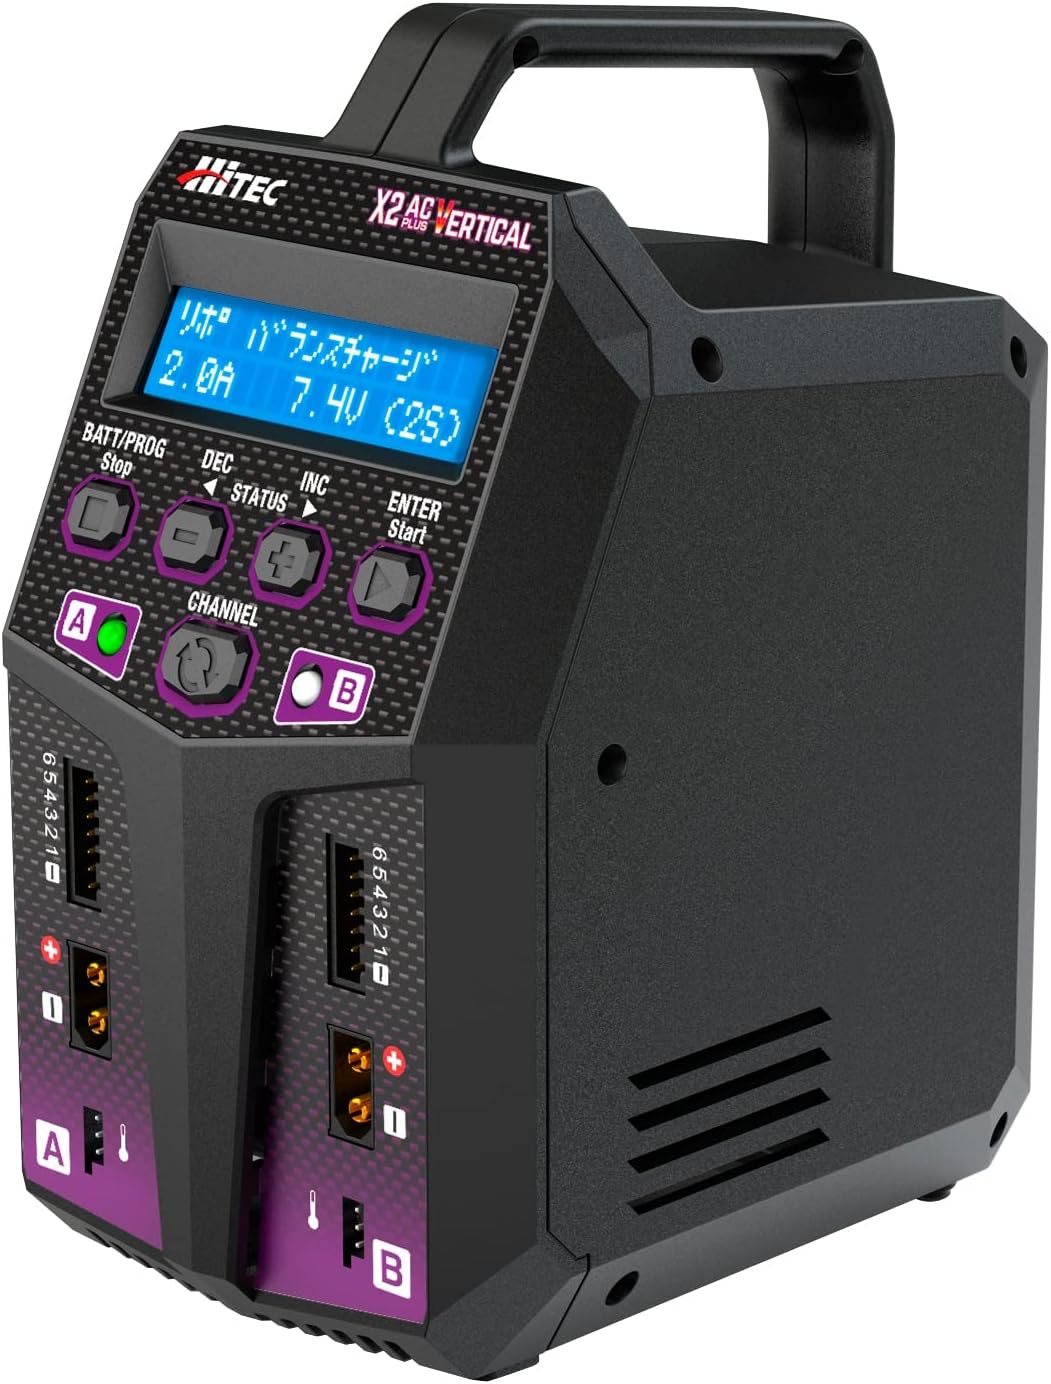
Figure 1: Front view of the Hitec X2 AC Plus Vertical Multi Charger, showing the display, control buttons, and dual charging ports.
2. Safety Precautions
Always observe the following safety guidelines to prevent injury or damage:
- Never leave the charger unattended during operation.
- Ensure proper ventilation around the charger to prevent overheating.
- Do not attempt to charge damaged or swollen batteries.
- Use only compatible battery types and settings. Refer to battery manufacturer specifications.
- Keep the charger away from moisture, heat, and direct sunlight.
- Disconnect power before cleaning or performing maintenance.
3. Specifications
| Feature | Detail |
|---|---|
| Input Voltage | AC 100-240V / DC 11-18V |
| Charge Circuit Power | Max 100W x 2 (Total 200W) |
| Discharge Circuit Power | Max 10W x 2 |
| Charge Current Range | 0.1-12.0A x 2 |
| Discharge Current Range | 0.1-2.0A x 2 |
| Balance Current | Max 500mA/cell |
| LiPo/LiFe/Li-ion/Li-HV Cell Count | 1-6 cells |
| NiMH/NiCd Cell Count | 1-15 cells |
| Pb Battery Voltage | 2-20V |
| Display | 2x16 LCD with backlight |
| Dimensions | 178 x 135 x 96 mm |
| Weight | 850g |

Figure 2: Close-up of the charger's display and control buttons, highlighting the 2x16 LCD and the 4+1 button layout for independent channel operation.
4. Package Contents
Verify that all items are present in the package:
- Hitec X2 AC Plus Vertical Main Unit
- XT60 Cable (2-pin T-type) x 1
- XT60 Cable (Tamiya type) x 1
- Balance Conversion Cord (for Tamiya Li-Fe) x 1
- Balance Conversion Board (JST-XH type) x 2
- AC Input Cable x 1
- Instruction Manual

Figure 3: All included accessories and cables that come with the Hitec X2 AC Plus Vertical Multi Charger.
5. Setup
5.1 Power Connection
The X2 AC Plus Vertical supports both AC and DC power inputs.
- AC Power: Connect the supplied AC input cable to the AC input port on the charger and then to a wall outlet.
- DC Power: Connect a DC power source (e.g., 12V car battery or power supply) to the DC input port on the charger. Ensure correct polarity.
Once powered on, the LCD display will illuminate, and the charger will be ready for operation.
5.2 Connecting Batteries
The charger features two independent charging channels (A and B).
- Identify the main discharge port (e.g., XT60) and the balance port (if applicable) on your battery.
- Connect the main discharge plug of the battery to the corresponding main output port (XT60 type) on Channel A or B of the charger.
- If using a balance charge, connect the battery's balance plug to the balance port on the charger for the selected channel. Ensure the balance plug is inserted correctly to avoid damage.
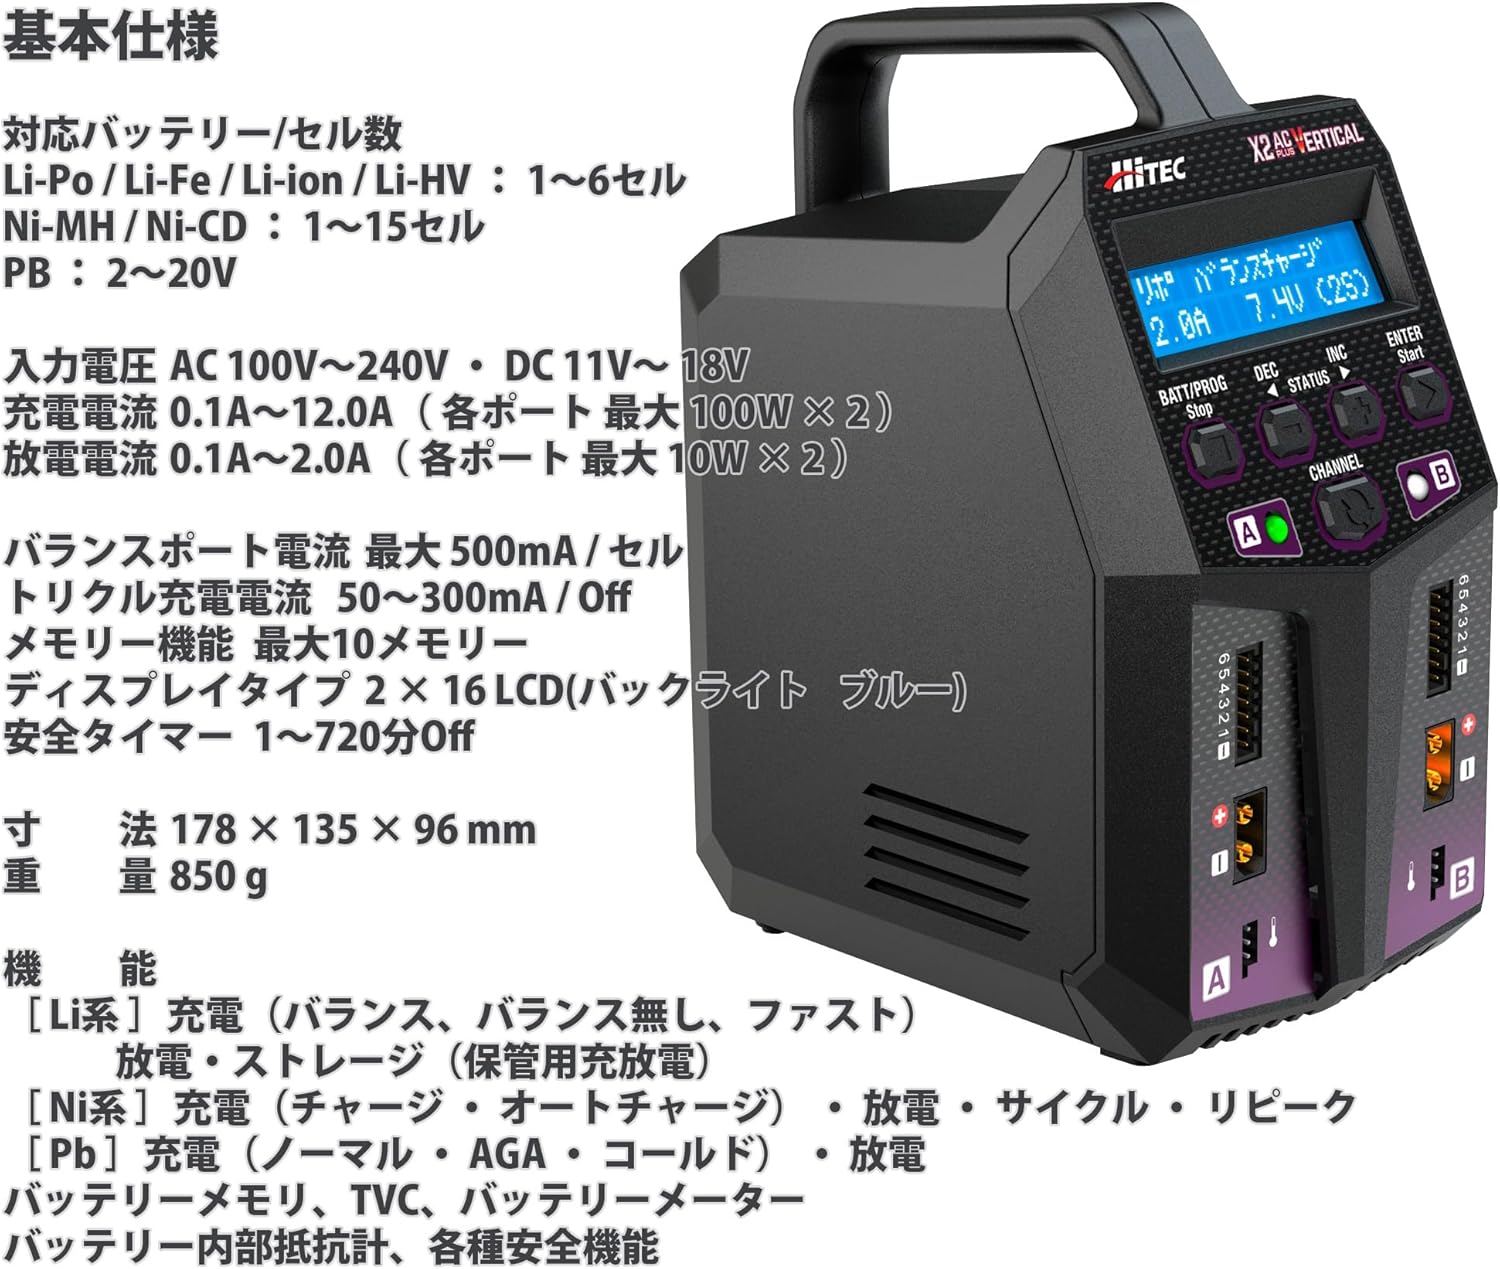
Figure 4: Close-up view of the XT60 main output ports and balance ports for both Channel A and Channel B on the charger.
6. Operating Instructions
6.1 Navigating the Menu
The charger uses a 4+1 button interface for navigation:
- BATT/PROG (Stop): Enters the program menu or stops an ongoing process.
- DEC (<): Decreases values or moves left in menus.
- INC (>): Increases values or moves right in menus.
- STATUS: Displays current status during operation.
- ENTER (Start): Confirms selection or starts a process.
- CHANNEL A/B: Selects the active charging channel.

Figure 5: Detailed view of the charger's LCD display and control buttons, showing the layout for easy navigation and channel selection.
6.2 Charging a Battery
- Select Channel: Press the "CHANNEL A" or "CHANNEL B" button to select the desired charging channel.
- Enter Program Menu: Press the "BATT/PROG" button.
- Select Battery Type: Use "DEC" or "INC" to navigate to the correct battery type (e.g., LiPo, NiMH, Pb) and press "ENTER".
- Select Operation Mode: Choose "Charge", "Balance Charge", "Fast Charge", "Storage", or "Discharge" as needed. For most LiPo batteries, "Balance Charge" is recommended. Press "ENTER".
- Set Parameters: Adjust the charge current (Amps) and cell count/voltage using "DEC" and "INC". Press "ENTER" to confirm each setting.
- Start Process: Once all parameters are set, the display will show a confirmation screen. Press and hold "ENTER" to start the charging process.
- Monitor Progress: The display will show real-time charging data. You can press "STATUS" to cycle through different information screens.
- Stop Process: To stop charging at any time, press the "BATT/PROG" button.
Note: The charger can charge two batteries simultaneously, each on its own channel with independent settings.
7. Maintenance
- Cleaning: Use a soft, dry cloth to clean the charger's exterior. Do not use solvents or abrasive cleaners.
- Storage: Store the charger in a cool, dry place away from direct sunlight and extreme temperatures.
- Inspection: Regularly inspect cables and connectors for signs of wear or damage. Replace any damaged components immediately.
8. Troubleshooting
| Problem | Possible Cause | Solution |
|---|---|---|
| Charger does not power on. | No power supply; loose connection; faulty power cable. | Check power cable connection; try a different outlet/power source; ensure DC input polarity is correct. |
| "Connection Break" error. | Battery not connected properly; damaged cable. | Ensure main and balance leads are securely connected; inspect cables for damage. |
| "Cell Error" or "Voltage Error". | Incorrect cell count setting; battery voltage too low/high; damaged battery. | Verify cell count setting matches battery; check battery voltage with a meter; do not charge severely damaged batteries. |
| Charger gets hot during operation. | Normal operation; insufficient ventilation; excessive charge current. | Ensure adequate airflow around the charger; reduce charge current if necessary. |
9. Warranty and Support
For warranty information and technical support, please contact Hitec RCD customer service or visit their official website. Keep your purchase receipt as proof of purchase.
Hitec RCD Official Website: www.hitecrcd.com
Ask a question about this manual
Ask about setup, troubleshooting, compatibility, parts, safety, or missing instructions. Manuals+ will review the question and use this page’s manual context to help answer it.