
Introduction
This manual provides instructions for the safe and efficient operation and maintenance of your VIVOSUN 1.35 Gallon Pump Sprayer. Please read this manual thoroughly before first use and retain it for future reference.
Safety Information
Always observe the following safety precautions when using the sprayer:
- Keep out of reach of children.
- Avoid contact with eyes and skin.
- Use in a well-ventilated area.
- Do not ingest or inhale contents.
- Do not point at people or animals.
- Pressure may build up – always release pressure before opening the tank or performing maintenance.
Package Contents
Verify that all components are present in your package:
- Sprayer Tank (1.35 Gallon / 5 Liter)
- Pump Assembly with Handle
- Spraying Wand with Trigger and Hose (50 inches long)
- Adjustable Nozzles (Basic, Fan, Dual)
- Shoulder Strap
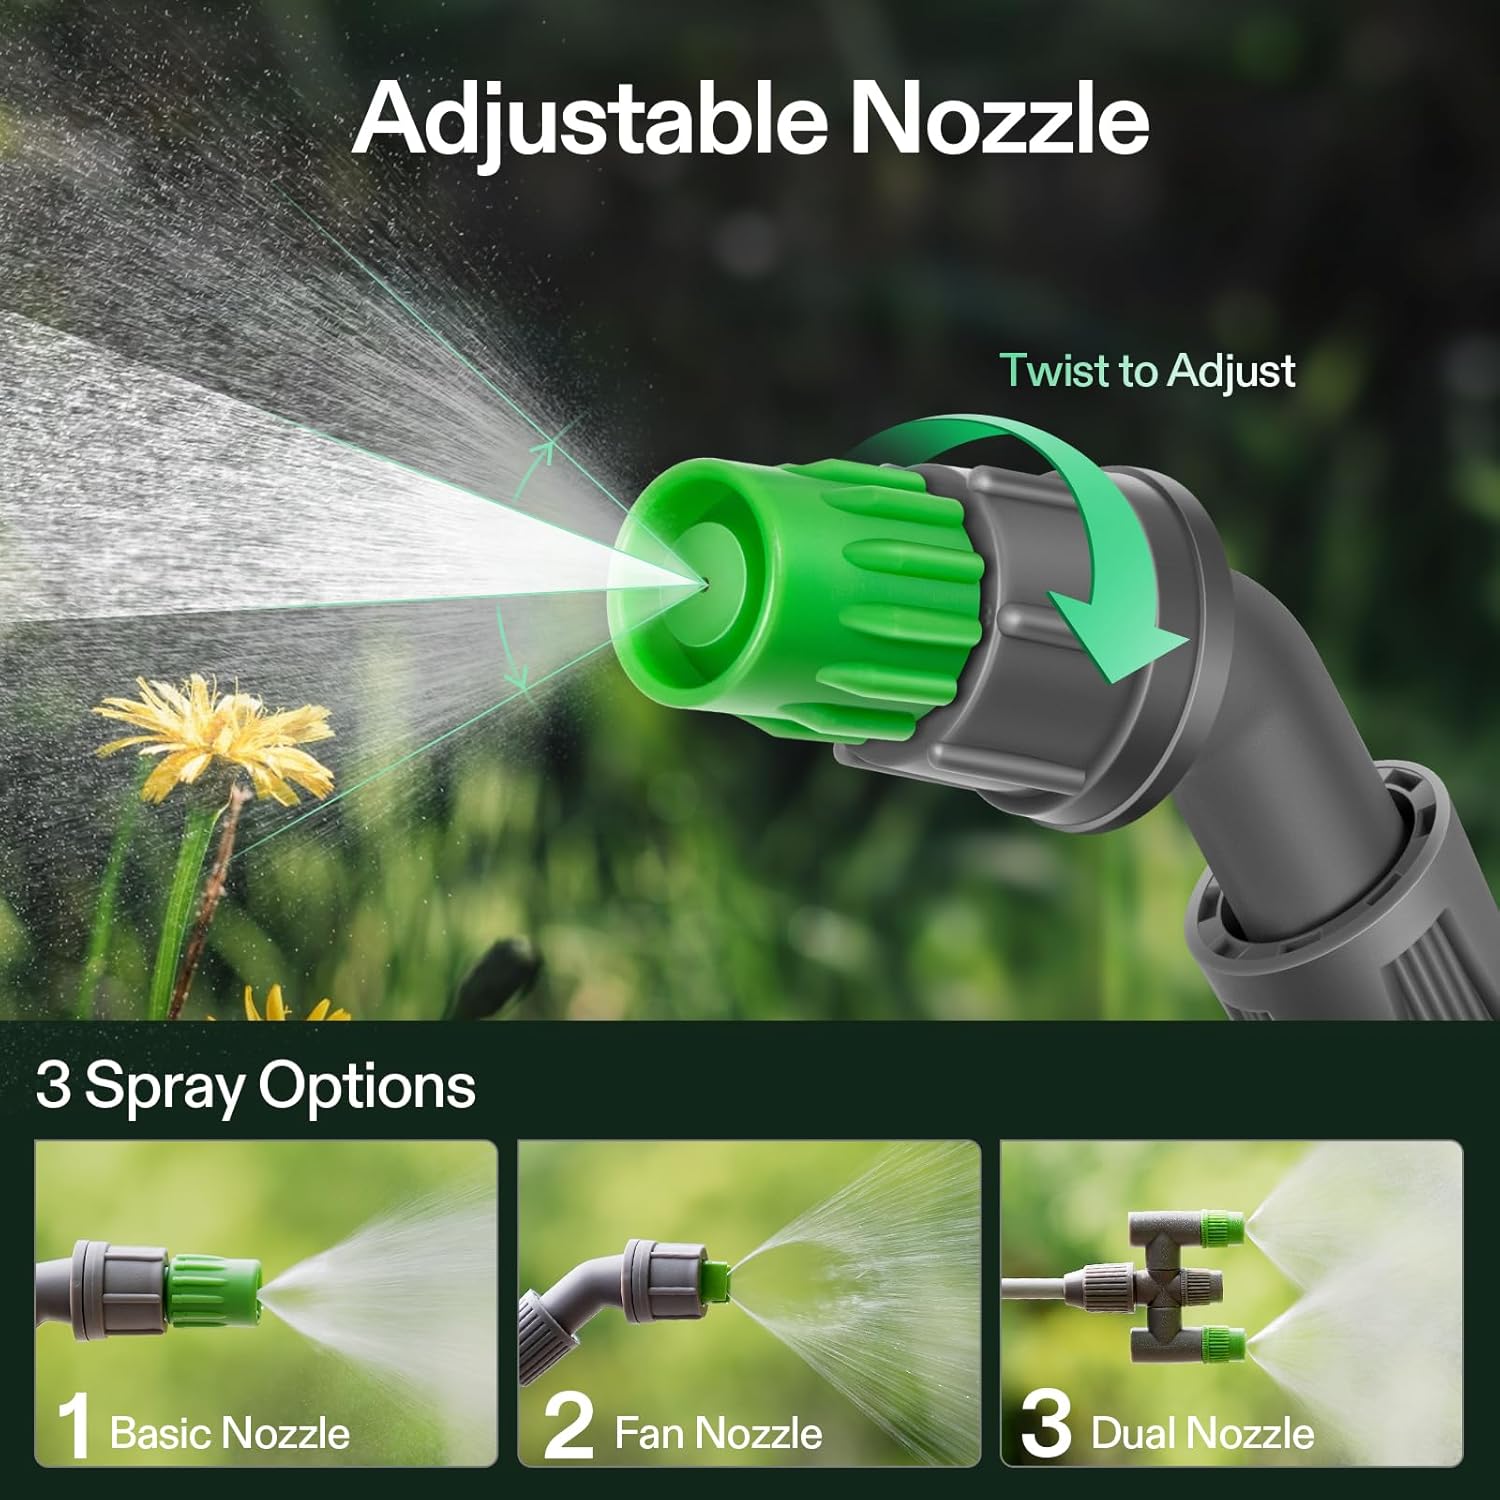
Image: All components of the VIVOSUN 1.35 Gallon Pump Sprayer, including the tank, pump, wand, hose, and various nozzles.
Setup Instructions
Follow these steps to assemble your sprayer:
- Attach the Hose: Securely connect the hose to the sprayer tank and the spraying wand. Ensure all connections are hand-tight to prevent leaks.
- Attach the Shoulder Strap: Connect the shoulder strap to the designated attachment points on the sprayer tank for comfortable carrying.
- Select and Attach Nozzle: Choose the desired nozzle (Basic, Fan, or Dual) and securely attach it to the end of the spraying wand.

Image: Visual guide for assembling the sprayer, including connecting the hose and attaching the pump handle.
Operating Instructions
1. Filling the Tank
- Ensure the pressure is fully released by pulling the red pressure relief valve.
- Unscrew the pump assembly by rotating the handle counter-clockwise.
- Carefully pour the desired liquid into the translucent tank, observing the calibration marks for accurate measurement. Do not exceed the "Max" fill line.
- Screw the pump assembly back onto the tank, ensuring it is tightly sealed.
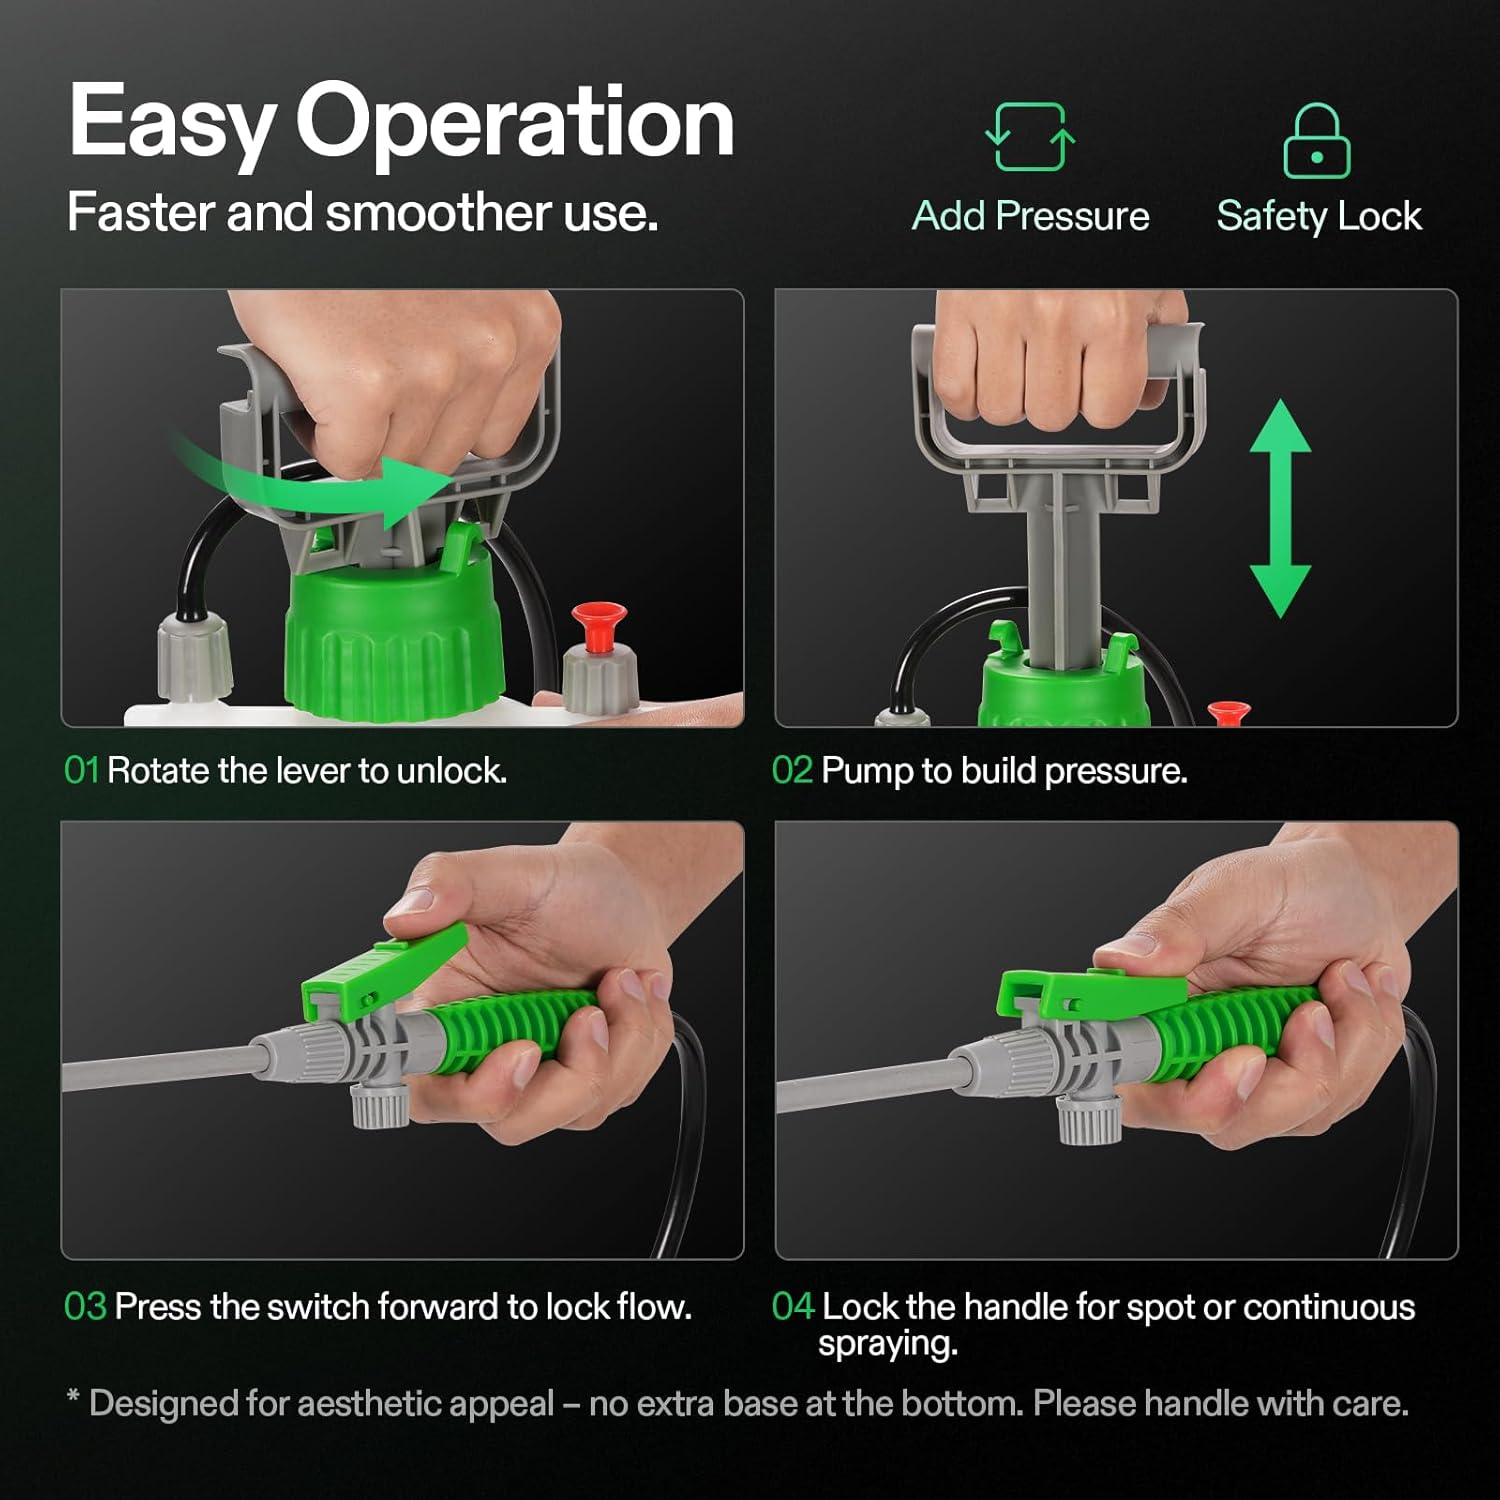
Image: The translucent tank of the sprayer with clear liquid level indicators for precise filling, along with the ergonomic handle and adjustable shoulder strap.
2. Building Pressure
- With the pump assembly securely tightened, pump the handle up and down repeatedly to build pressure inside the tank.
- Continue pumping until resistance is felt, indicating sufficient pressure. Do not over-pressurize.

Image: A close-up of the pressure gauge on the sprayer, showing the recommended pressure range for effective operation.
Video: Demonstrates the process of pumping the sprayer to build pressure and adjusting the nozzle for different spray patterns.
3. Spraying
- Aim the nozzle towards the target area.
- Press the trigger on the spraying wand to release the spray.
- For continuous spraying, push the trigger forward to lock it in place. Release by pulling it back.
- Adjust the nozzle tip by twisting it to change the spray pattern from a fine mist to a direct stream.
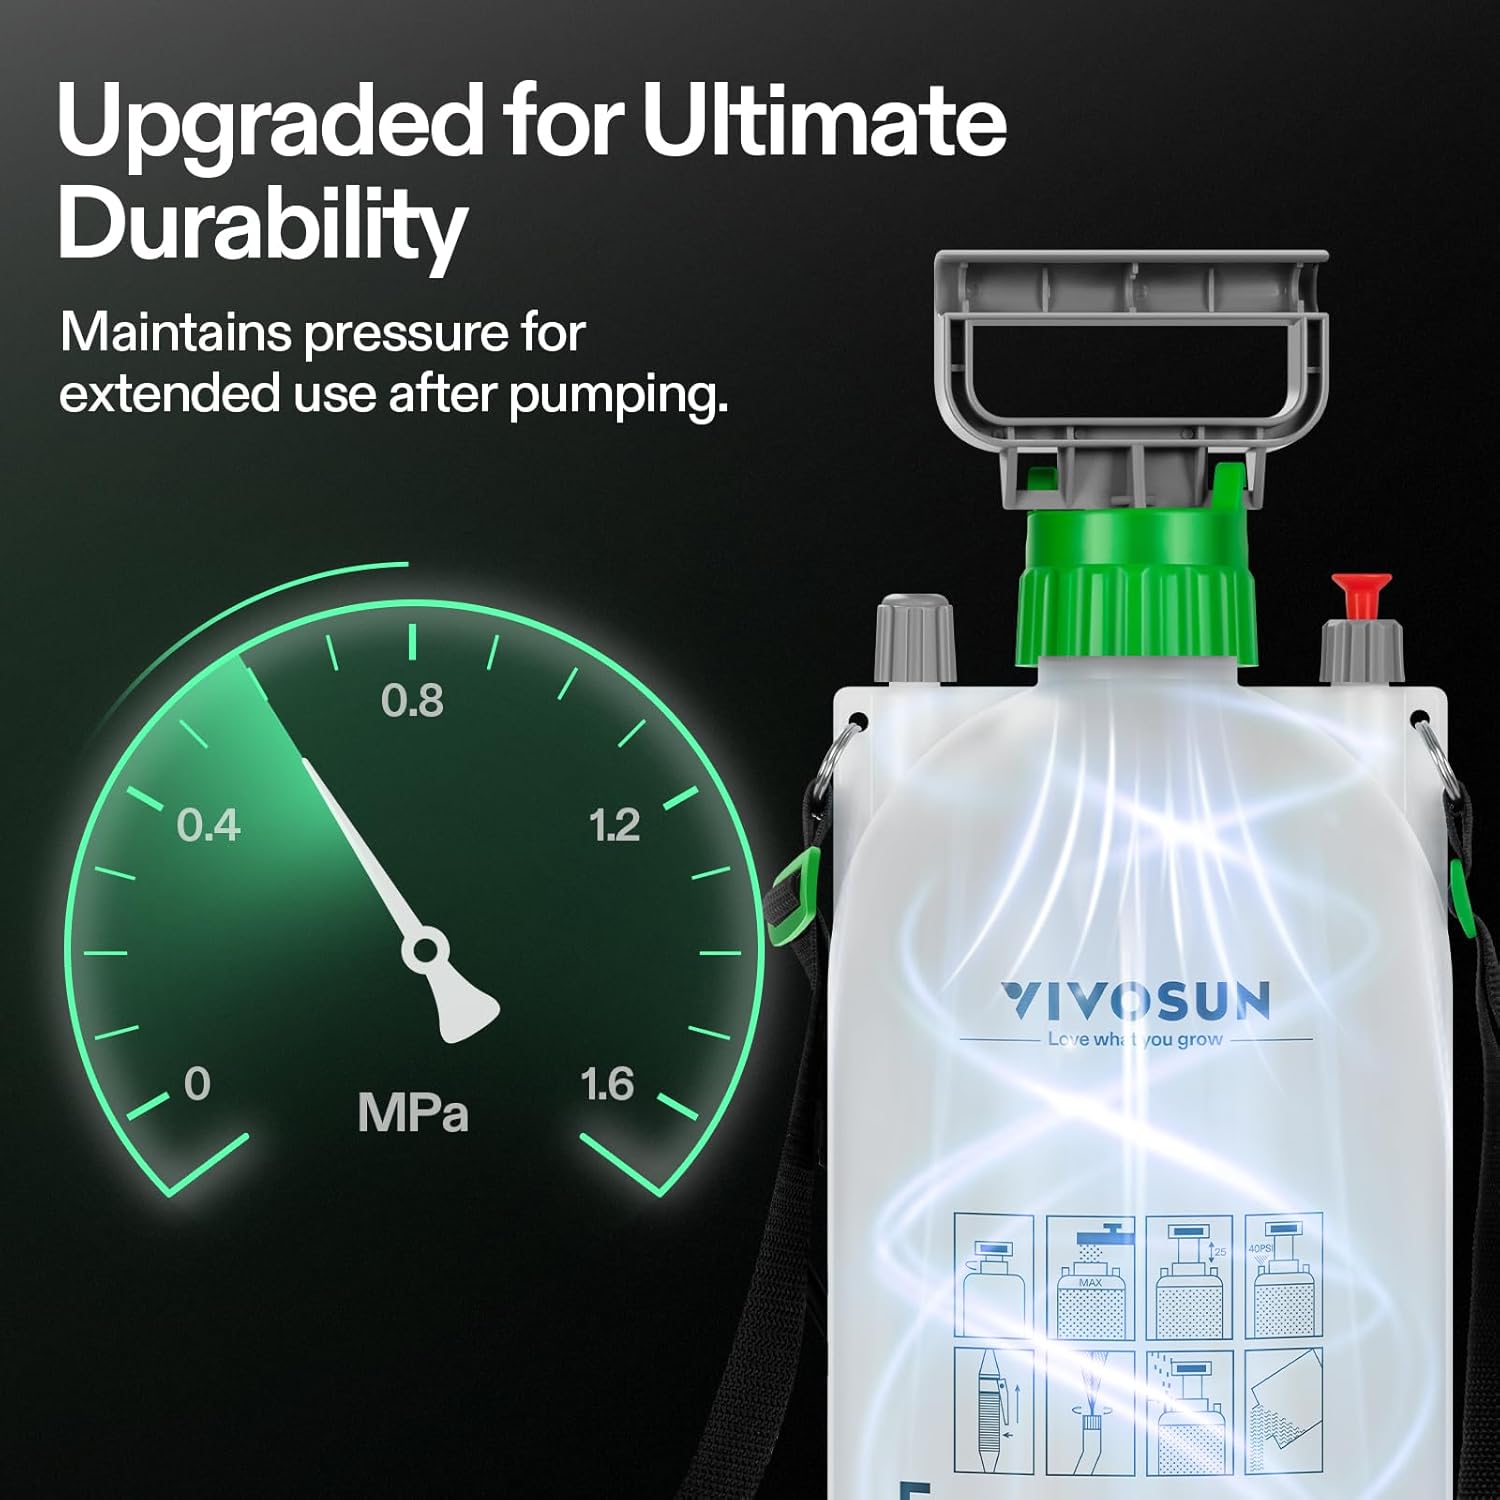
Image: Various applications of the sprayer, including general garden spraying, nutrient application, weed control, and pest treatment.
Maintenance
1. After Each Use
- Release Pressure: Always release any remaining pressure in the tank by pulling the red pressure relief valve before storing or refilling.
- Empty and Rinse: Empty any unused liquid from the tank. Rinse the tank, hose, and wand thoroughly with clean water. Pump clean water through the nozzle to clear any residue.
- Clean Nozzles: If nozzles become clogged, remove them and clean with water.

Image: Detail of the fluorine rubber sealing ring, emphasizing the need to rinse with clean water after use to maintain durability and prevent leaks.
2. Storage
Store the sprayer in a cool, dry place, away from direct sunlight and freezing temperatures. Ensure the tank is empty and clean before storage.
Troubleshooting
Refer to the table below for common issues and their solutions:
| Problem | Possible Cause | Solution |
|---|---|---|
| No spray or weak spray | Low pressure; Clogged nozzle; Loose connections. | Pump more to build pressure; Clean the nozzle; Tighten all connections. |
| Leaking from connections | Loose connections; Damaged O-rings. | Tighten connections; Inspect and replace O-rings if damaged. |
| Pump handle difficult to operate | Dry pump shaft; Debris in pump. | Lubricate the pump shaft with silicone grease; Clean the pump mechanism. |
Specifications
Key technical details of your VIVOSUN Pump Sprayer:
| Feature | Detail |
|---|---|
| Brand | VIVOSUN |
| Model Name | Pump Pressure Sprayer |
| Model Number | SX |
| Tank Volume | 1.35 Gallons (5 Liters) |
| Hose Length | 50 Inches |
| Wand Length | 22.2 Inches |
| Material | Brass, High Density Polyethylene (HDPE), Polypropylene (PP), Stainless Steel |
| Item Weight | 0.4 Kilograms (0.88 lbs) |
| Maximum Pressure | 43.5 PSI |
| Power Source | Manual Winding |

Image: Detailed specifications and dimensions of the sprayer, including the three types of nozzles provided.
Warranty and Support
VIVOSUN products are designed for durability and performance. For any questions, technical assistance, or warranty claims, please contact VIVOSUN customer support through their official channels. Refer to your purchase documentation for specific warranty terms and contact information.