1. Introduction
This manual provides essential information for the safe operation, maintenance, and setup of your CRAFTSMAN CMEW020 Benchtop Jointer. Please read and understand all instructions before operating the tool. Retain this manual for future reference.
The CRAFTSMAN CMEW020 is a 10 Amp benchtop jointer designed for edging, flattening, and face jointing of various wood types. It features a variable speed range and a two-knife cutter head for efficient material processing.
2. General Safety Information
WARNING: Read all safety warnings, instructions, illustrations, and specifications provided with this power tool. Failure to follow all instructions listed below may result in electric shock, fire, and/or serious injury.
- Always wear eye protection, hearing protection, and a dust mask when operating the jointer.
- Ensure the work area is clean, well-lit, and free from obstructions.
- Keep children and bystanders away while operating a power tool.
- Do not operate power tools in explosive atmospheres, such as in the presence of flammable liquids, gases, or dust.
- Always disconnect the power cord before making adjustments, changing accessories, or storing the tool.
- Use push sticks or push blocks when jointing small or narrow workpieces. Never use your hands to feed material close to the cutter head.
- Ensure the cutter head guard is always in place and functioning correctly.
- Do not force the tool. Use the correct tool for your application.
- Maintain tools with care. Keep cutting tools sharp and clean.
- Check for misalignment or binding of moving parts, breakage of parts, and any other condition that may affect the tool's operation.
3. Product Overview
Familiarize yourself with the key components of your CRAFTSMAN CMEW020 Benchtop Jointer.
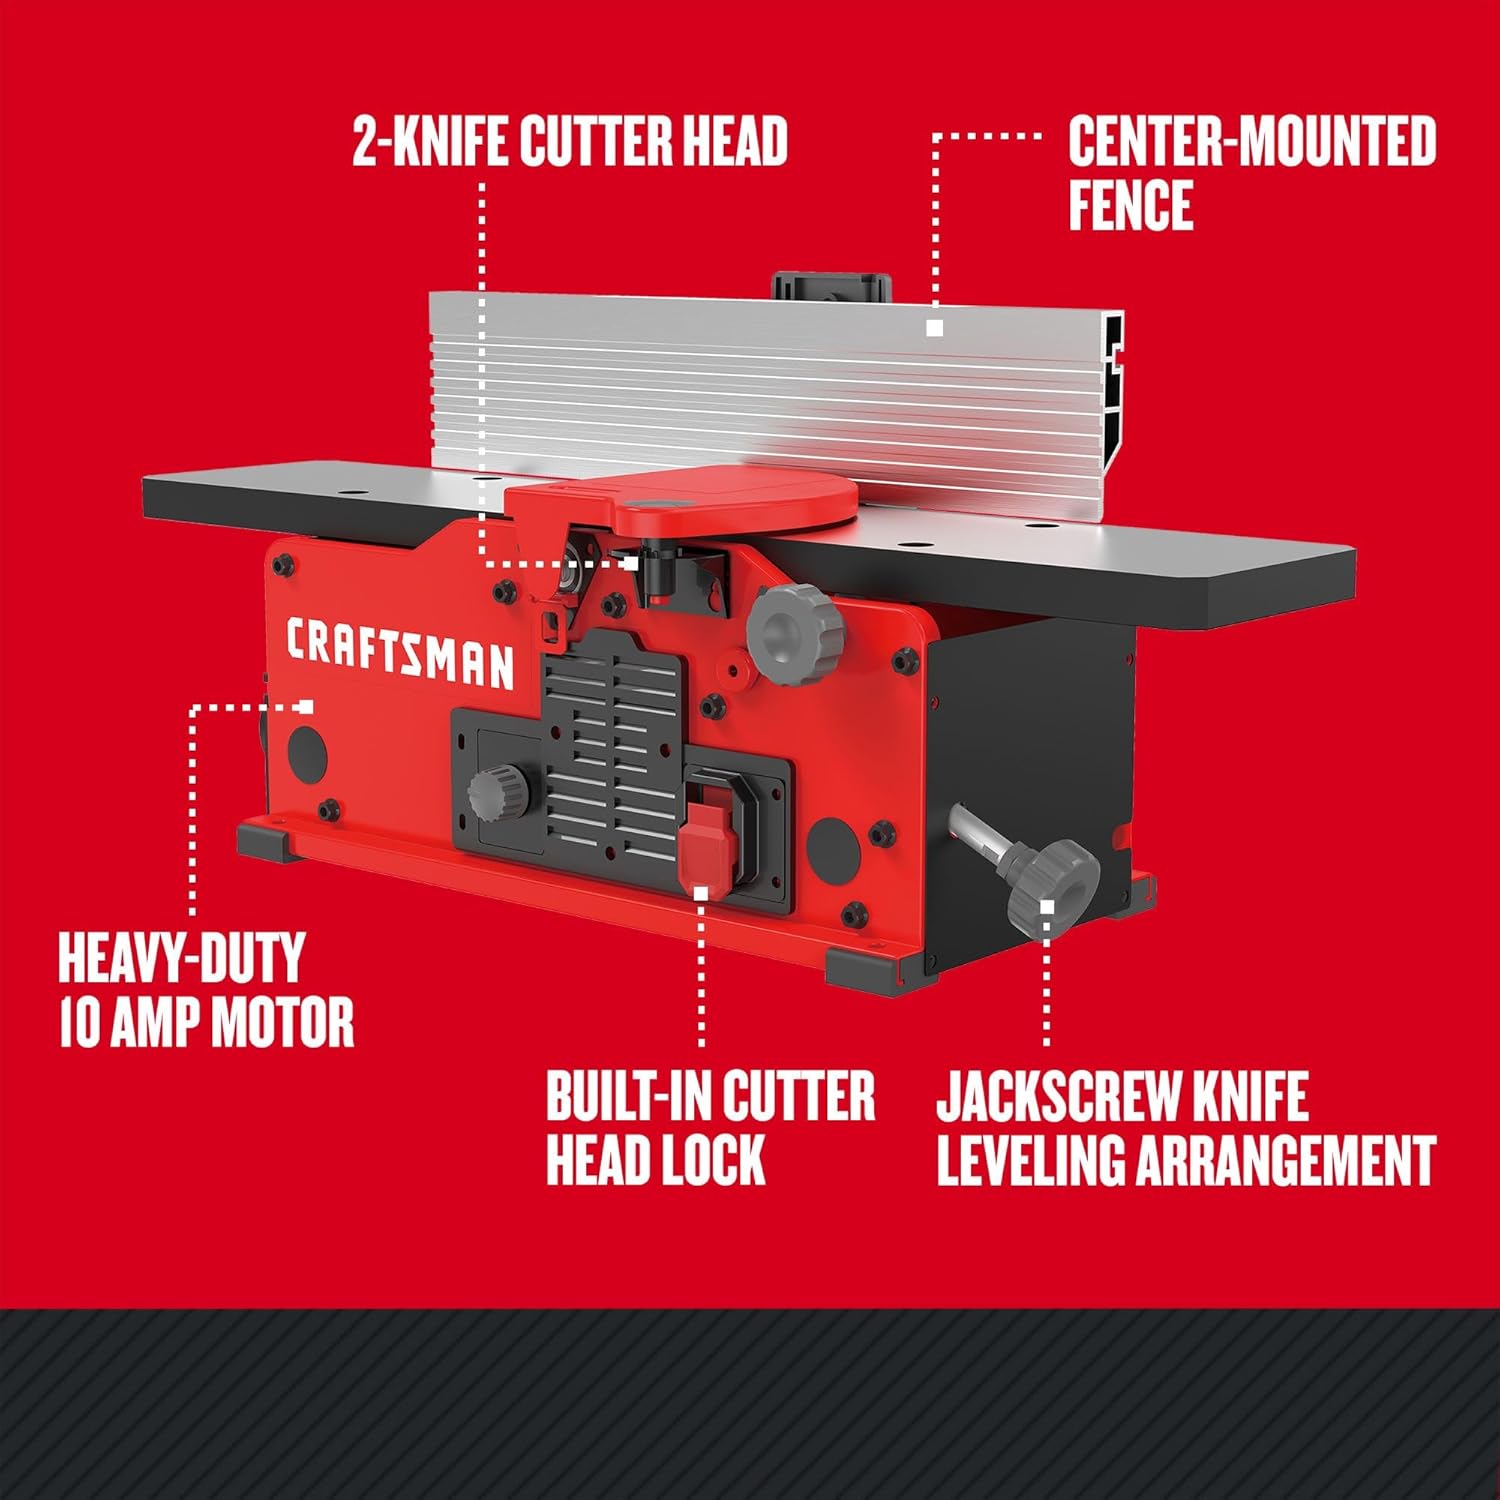
Figure 3.1: Overview of the CRAFTSMAN CMEW020 Benchtop Jointer with labeled parts including the 2-knife cutter head, center-mounted fence, heavy-duty 10 Amp motor, built-in cutter head lock, and jackscrew knife leveling arrangement.
- 2-Knife Cutter Head: Equipped with two knives for efficient material removal.
- Center-Mounted Fence: Provides support and accuracy for edge jointing.
- Heavy-Duty 10 Amp Motor: Delivers power for jointing both hard and soft woods.
- Built-in Cutter Head Lock: Secures the cutter head for safe knife replacement and adjustment.
- Jackscrew Knife Leveling Arrangement: Facilitates easy and precise knife replacement and adjustment.
- Variable Speed Control: Allows adjustment of RPM for different material types and sizes.
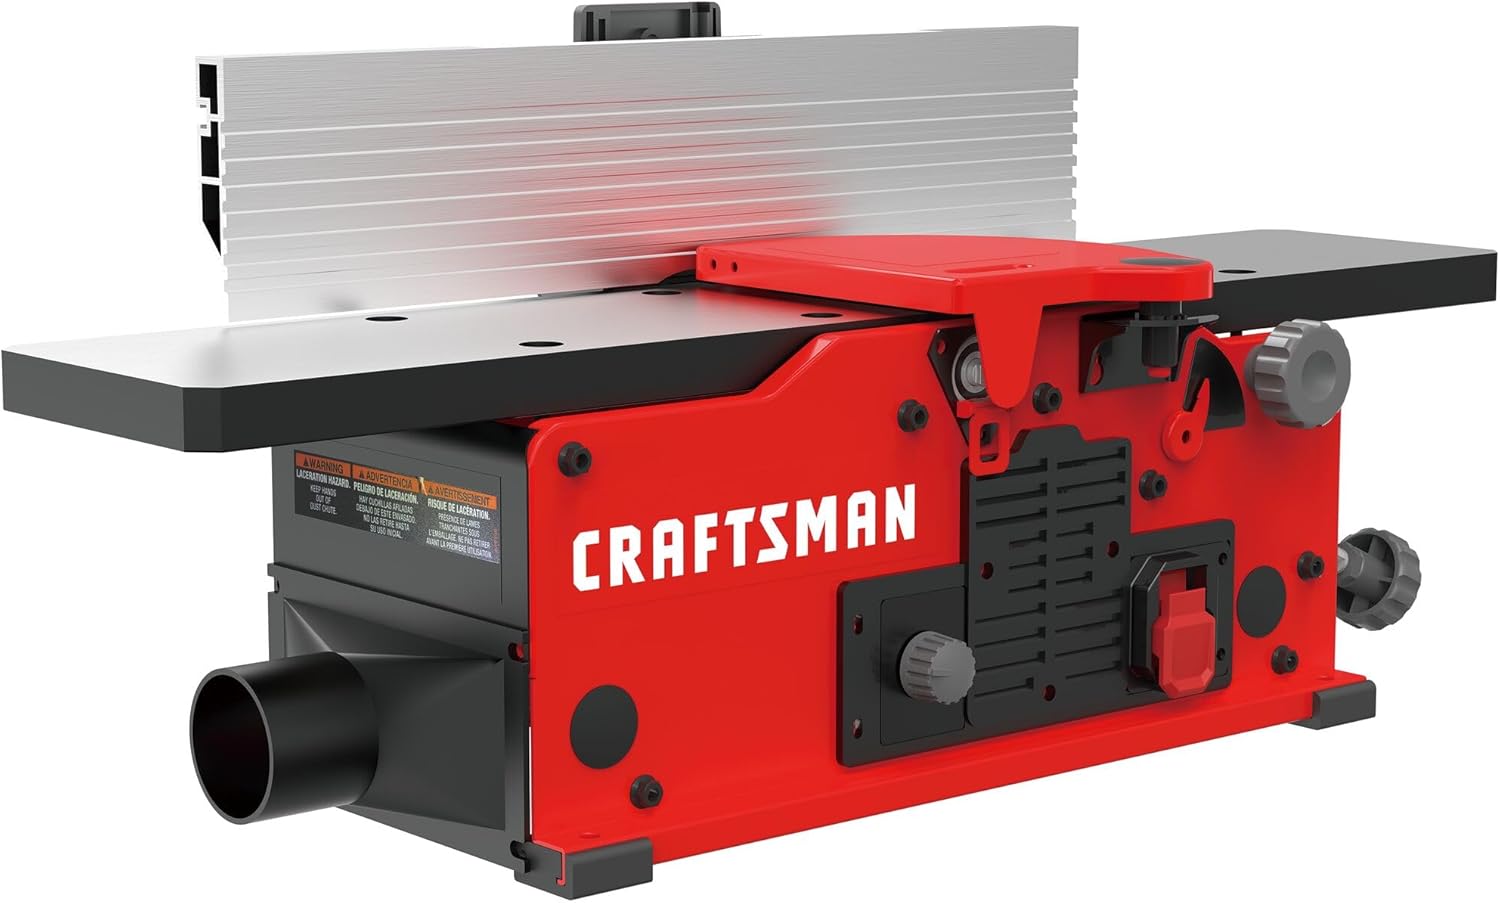
Figure 3.2: Front angled view of the CRAFTSMAN CMEW020 Benchtop Jointer, highlighting its compact design and dust port.
4. Setup
Proper setup is crucial for safe and accurate operation. Allow approximately one hour for initial assembly and calibration.
4.1 Unpacking and Assembly
- Carefully remove all components from the packaging.
- Inspect the jointer for any shipping damage. Report any damage immediately to your retailer.
- Assemble any detached components according to the included assembly guide (if separate).
4.2 Bench Mounting
Securely mount the jointer to a stable workbench using appropriate fasteners. Ensure the workbench can support the weight and vibrations of the jointer during operation.
4.3 Fence Calibration
The fence must be accurately set to 90 degrees relative to the jointer bed for precise jointing. Use a reliable machinist square for this adjustment.
- Loosen the fence locking knobs.
- Place a machinist square on the outfeed table and against the fence.
- Adjust the fence until it is perfectly perpendicular to the outfeed table.
- Tighten the fence locking knobs securely.
- Verify the setting with the machinist square.
4.4 Outfeed Table Adjustment
The outfeed table should be level with the highest point of the cutter knives. This is critical for producing straight, flat edges.
- Ensure the power is disconnected.
- Rotate the cutter head manually to bring one knife to its highest point.
- Place a straightedge across the outfeed table and over the cutter head.
- Adjust the outfeed table height until the straightedge just barely touches the knife at its highest point, without lifting the straightedge off the outfeed table.
- Repeat for the other knife.
5. Operating Instructions
Follow these steps for safe and effective operation of your jointer.
5.1 Preparing the Workpiece
- Inspect wood for knots, nails, screws, or other foreign objects.
- Ensure the workpiece is free of excessive warp or twist that could cause kickback.
- For best results, use wood that is relatively straight and free of defects.
5.2 Setting Depth of Cut
Adjust the infeed table to control the depth of cut. A shallow cut is generally recommended for initial passes and for harder woods.
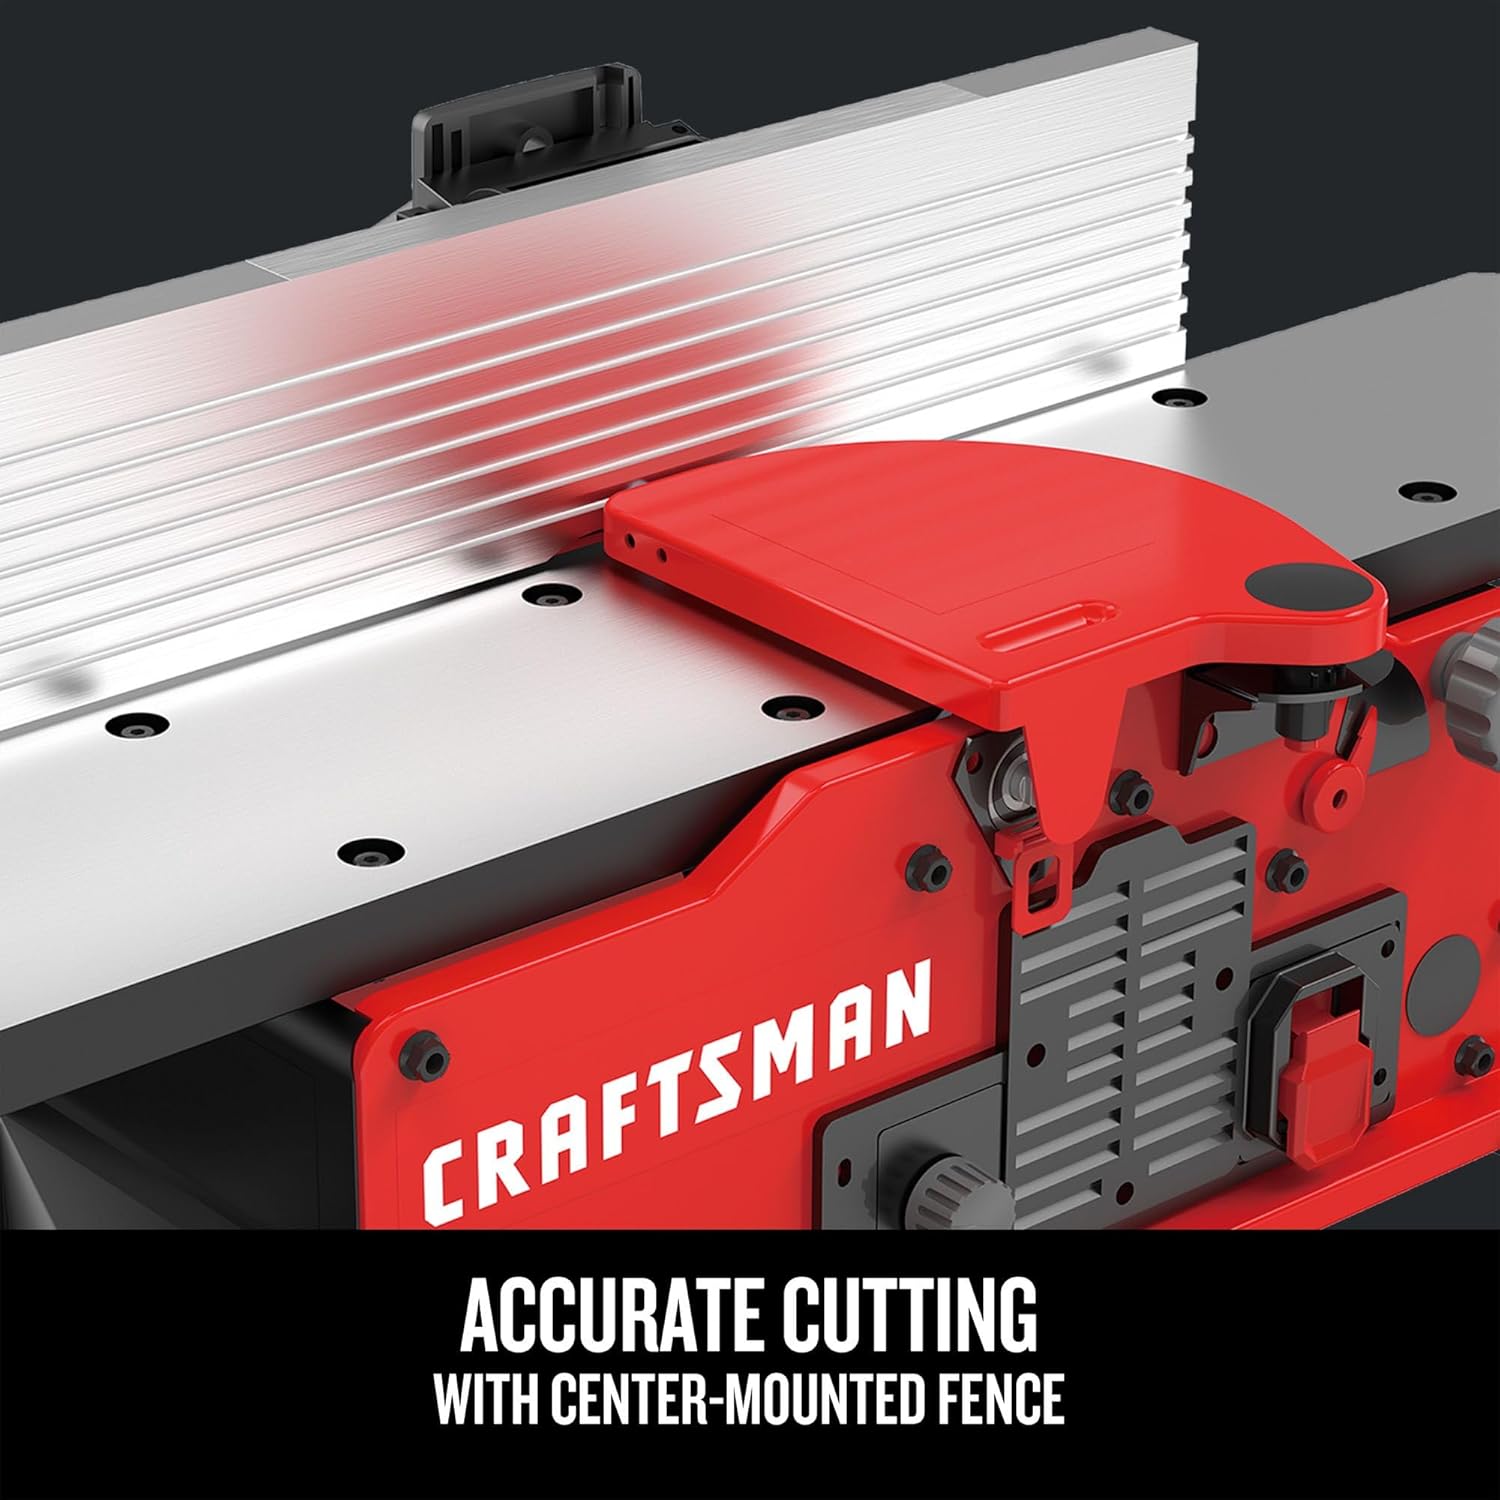
Figure 5.1: Close-up view of the jointer bed and fence, illustrating the setup for accurate cutting.
5.3 Variable Speed Adjustment
The jointer features a variable speed range of 6,000 to 11,000 RPM (cutter head speed of 12,000 to 22,000 cuts per minute). Select the appropriate speed based on the material's size and hardness.

Figure 5.2: Detail of the variable speed control dial, allowing adjustment from 6,000 to 11,000 RPM.
5.4 Jointing Procedure
- Ensure the cutter head guard is in place and functioning.
- Turn on the jointer and allow it to reach full speed.
- Place the workpiece flat on the infeed table, against the fence.
- Using push blocks or push sticks, steadily feed the workpiece over the cutter head. Maintain firm downward pressure on both the infeed and outfeed tables.
- Once the leading edge of the workpiece is past the cutter head and onto the outfeed table, shift pressure to the outfeed table.
- Continue feeding until the entire workpiece has passed over the cutter head.
- Repeat passes as necessary, adjusting the depth of cut for each pass, until the desired flatness or edge is achieved.
CAUTION: Never joint material shorter than 10 inches (25 cm) without a specialized jig or fixture. Always use push blocks for safety.
6. Maintenance
Regular maintenance ensures optimal performance and extends the life of your jointer.
6.1 Cleaning
- Disconnect power before cleaning.
- Regularly clear wood chips and dust from the dust chute and around the cutter head. Accumulation can impede performance and cause blockages.
- Wipe down tables and fence with a dry cloth. Apply a thin coat of paste wax to the tables to reduce friction and prevent rust.
6.2 Knife Replacement and Adjustment
The two-knife cutter head features a jackscrew knife leveling arrangement for easy replacement and adjustment.
- Disconnect the jointer from power.
- Engage the built-in cutter head lock.
- Carefully remove the old knives using the appropriate tools.
- Install new knives, ensuring they are seated correctly.
- Use the jackscrew mechanism to precisely level the knives with the outfeed table, following the procedure in Section 4.4.
- Disengage the cutter head lock and replace the cutter head guard.
WARNING: Jointer knives are extremely sharp. Handle with extreme care to prevent injury.
7. Troubleshooting
This section addresses common issues you might encounter with your jointer.
| Problem | Possible Cause | Solution |
|---|---|---|
| Motor does not start or stops during operation. |
|
|
| Rough or uneven cut. |
|
|
| Wood chips accumulating in dust chute. |
|
|
| Fence not square to table. |
|
|
8. Specifications
| Model Number | CMEW020 |
| Motor | 10 Amp |
| Variable Speed Range | 6,000 to 11,000 RPM |
| Cutter Head Speed | 12,000 to 22,000 cuts per minute |
| Cutter Head Type | 2-Knife |
| Fence Type | Center-mounted |
| Power Source | AC/DC Corded |
| Item Weight | 40 pounds |
| Package Dimensions | 31.5 x 12.2 x 11.42 inches |
9. Warranty Information
This CRAFTSMAN CMEW020 Benchtop Jointer comes with a 3 Year Limited Warranty. For specific terms and conditions, please refer to the warranty card included with your product or visit the official CRAFTSMAN website. This warranty typically covers defects in material or workmanship.
10. Support
For technical assistance, replacement parts, or service inquiries, please contact CRAFTSMAN customer support. You can typically find contact information on the CRAFTSMAN official website or on the product packaging.
When contacting support, please have your model number (CMEW020) and serial number (if applicable) ready.
Visit the official CRAFTSMAN Store for more information: CRAFTSMAN Store