Introduction
Thank you for choosing the XSQUO Useful Tech Electronic Safe Smart Box 17CI. This manual provides essential information for the proper installation, operation, and maintenance of your electronic safe. Please read these instructions carefully before use to ensure optimal performance and security. Keep this manual for future reference.
Product Overview
The XSQUO Useful Tech Electronic Safe Smart Box 17CI is designed to provide secure storage for your valuables in both home and office environments. It features a robust alloy steel construction, a programmable electronic keypad, and an emergency key access system.

Image 1: The XSQUO Useful Tech Electronic Safe Smart Box 17CI, shown with included accessories such as batteries, emergency keys, and mounting hardware.

Image 2: Visual representation of key features including 1.7 liters capacity, carpeted interior, double security system, LED battery indicator, compact size, and easy assembly with included materials.

Image 3: Diagram illustrating the external dimensions of the safe: 23 cm (width), 17 cm (height), and 17 cm (depth).
Package Contents
- 1 x XSQUO Useful Tech Electronic Safe Smart Box 17CI
- 2 x Emergency Keys
- 4 x AA Batteries
- Mounting Hardware (screws and wall anchors)
- User Manual
Setup
1. Battery Installation
- Locate the battery compartment on the inside of the safe door.
- Open the battery cover.
- Insert the 4 AA batteries, ensuring correct polarity (+/-).
- Close the battery cover. The safe will emit a beep, indicating successful power-up.
2. Initial Code Setting
The safe comes with a factory default code. It is highly recommended to change this immediately.
- With the safe door open, locate the red reset button on the inside of the door, near the hinge.
- Press the red reset button. The safe will beep, and the yellow indicator light on the keypad will illuminate.
- Within 5 seconds, enter your desired new code (3 to 8 digits) on the keypad.
- Press the 'A' or '#' button to confirm. The safe will beep twice, and the yellow light will turn off, indicating the new code is set.
- Test the new code with the door open to ensure it works correctly before closing the safe.
3. Mounting the Safe
The safe can be securely mounted to a wall or floor using the provided hardware.
- Choose a suitable location for mounting.
- Open the safe door and remove the carpet lining to expose the pre-drilled mounting holes (2 on the back, 2 on the bottom).
- Position the safe and mark the drilling points on the wall or floor through the holes.
- Drill pilot holes using an appropriate drill bit for your mounting surface.
- Insert the wall anchors (if mounting into drywall or masonry).
- Align the safe with the drilled holes and secure it using the provided screws. Ensure the safe is firmly attached.
Operating Instructions
1. Opening the Safe with PIN
- Enter your 3 to 8 digit personal identification number (PIN) on the keypad.
- Press the 'A' or '#' button to confirm.
- If the code is correct, the green indicator light will illuminate, and you will hear a beep.
- Within 5 seconds, turn the knob clockwise to open the safe door.
2. Opening the Safe with Emergency Key
The emergency key should be used if you forget your PIN, the batteries are depleted, or the electronic system malfunctions. Store emergency keys outside the safe.
- Locate the emergency keyhole, usually hidden behind a small cover or panel on the keypad assembly.
- Remove the cover.
- Insert the emergency key into the keyhole and turn it counter-clockwise.
- While holding the key turned, rotate the main knob clockwise to open the safe door.
- Once open, remove the key.
3. Changing the PIN
Follow the same steps as 'Initial Code Setting' (Section 3.2) to change your PIN at any time.
4. Closing and Locking the Safe
- Close the safe door.
- Turn the knob counter-clockwise until the door is securely latched. The safe will automatically lock.
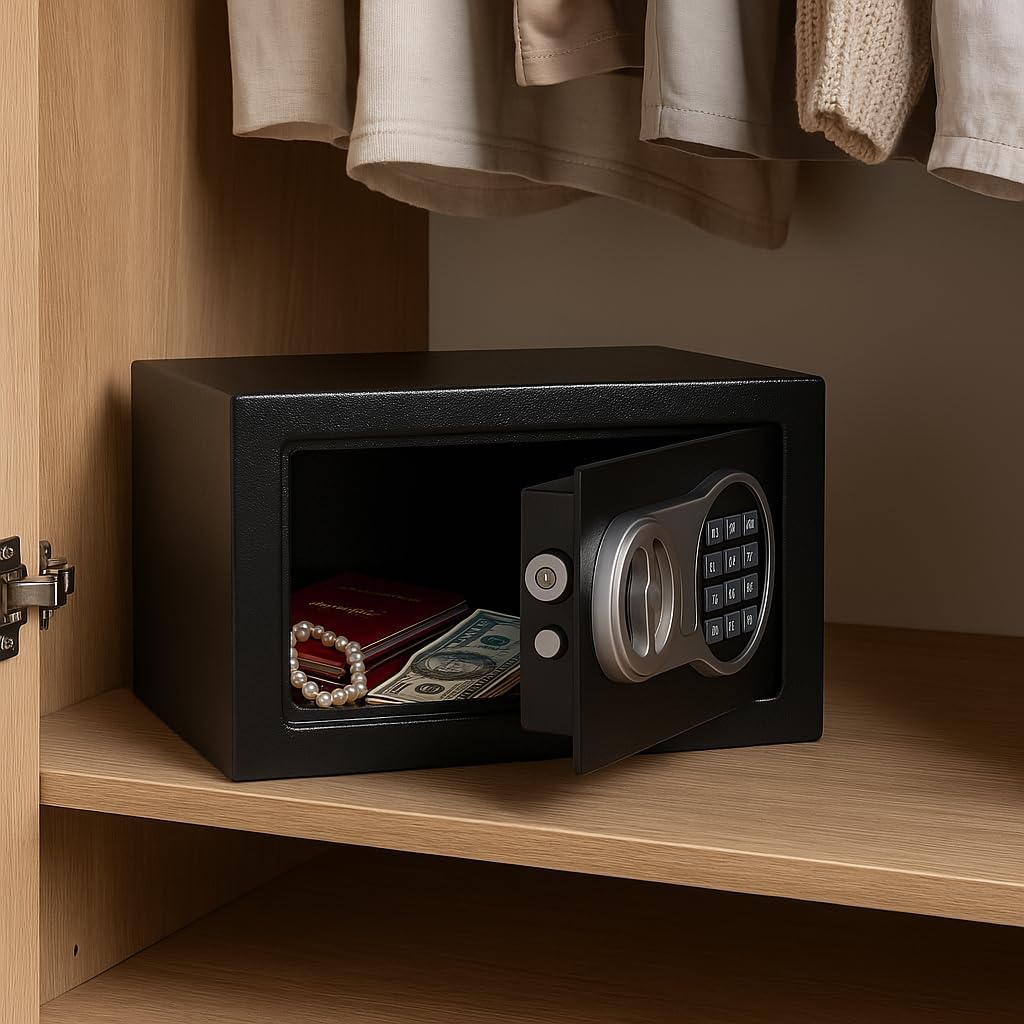
Image 4: The electronic safe with its door open, positioned inside a closet, demonstrating its compact size and suitability for discreet placement.

Image 5: The electronic safe closed and placed on a desk, illustrating its unobtrusive design for office or home study environments.

Image 6: The electronic safe with its door open, revealing a stack of banknotes inside, demonstrating its capacity for securing valuables.

Image 7: The electronic safe placed on a nightstand next to a bed, highlighting its versatility for placement in various personal spaces.
Maintenance
- Battery Replacement: When the red indicator light flashes or the safe emits continuous beeps during operation, it indicates low battery power. Replace all 4 AA batteries promptly. Use only alkaline batteries.
- Cleaning: Clean the safe's exterior with a soft, damp cloth. Avoid abrasive cleaners or solvents that could damage the finish or electronic components.
- Keypad Care: Keep the keypad dry and free from dust or debris.
- Emergency Keys: Store emergency keys in a secure location away from the safe and out of reach of unauthorized individuals. Do not store them inside the safe.
Troubleshooting
| Problem | Possible Cause | Solution |
|---|---|---|
| Safe does not open with PIN. | Incorrect PIN entered. Batteries are low or dead. Electronic system malfunction. | Re-enter PIN carefully. Replace batteries. Use emergency key to open. |
| Keypad does not respond. | Batteries are dead or incorrectly installed. | Check battery polarity. Replace batteries. Use emergency key to open. |
| Red light flashes or continuous beeps. | Low battery power. | Replace all 4 AA batteries immediately. |
| Cannot close the safe door. | Obstruction in the door frame. Locking bolts are extended. | Check for any items blocking the door. Ensure the knob is turned to retract bolts before closing. |
| Emergency key does not work. | Key is not fully inserted or turned correctly. | Ensure the key is fully inserted and turned firmly counter-clockwise while rotating the knob. |
Specifications
- Model: Smart Box 17CI
- Manufacturer Part Number: 8487497377020
- Material: Alloy Steel (1 mm body, 3 mm door)
- External Dimensions (H x W x D): 170 x 230 x 170 mm (6.7 x 9.1 x 6.7 inches)
- Internal Dimensions (H x W x D): 165 x 225 x 165 mm (6.5 x 8.9 x 6.5 inches)
- Capacity: 1.7 Liters
- Weight: 3.25 kg (7.17 lbs)
- Lock Type: Electronic Keypad (3-8 digit PIN) and Emergency Key
- Bolts: Double bolt set, 13.5 mm diameter
- Power Source: 4 x AA Batteries (included)
- Features: LED status indicator (Open/Low Battery/Alert), Reset button for code change, Easy installation (2 holes back, 2 holes bottom)
Warranty and Support
XSQUO Useful Tech products are manufactured to high-quality standards. For warranty information or technical support, please refer to the contact details provided with your purchase documentation or visit the official XSQUO Useful Tech website. Please retain your proof of purchase for warranty claims.