
1. Introduction
This manual provides essential instructions for the installation, operation, and maintenance of your SRJTEK LCD Screen Replacement for the Amazon Kindle Fire HD 10 (7th Gen, 2017, model SL056ZE). This product is designed to replace a broken or malfunctioning screen, restoring full display and touch functionality to your device. Please read all instructions carefully before proceeding with installation.
2. Package Contents
Verify that all items are present in your package:
- 1x SRJTEK LCD Screen and Digitizer Assembly (10.1 inch)
- 1x Opening Tools Kit (includes various small screwdrivers, pry tools, and suction cup)
- 1x Double-sided Adhesive Sticker

This image illustrates the complete package contents: the SRJTEK LCD screen replacement, a disassembly tool card, double-sided adhesive, and a set of small screwdrivers and pry tools necessary for the installation process.
3. Important Precautions
- Fragility: The screen replacement is made of glass and is very fragile. Handle with extreme care during unpacking and installation to prevent cracks or damage.
- Professional Installation Recommended: Installing an LCD screen requires specialized skills. It is highly recommended to seek professional repair services to ensure proper installation and avoid damage to your device or the new screen.
- Battery Disconnection: Before installing the new screen, always disconnect the battery connector from the motherboard. Failure to do so may cause damage to the device.
- Warranty Exclusion: Any screen damage occurring during the installation process is not covered under warranty.
- Tool Quality: The included tools are standard and may not be suitable for all situations or provide the durability of professional-grade tools.
4. Setup (Installation Guide)
Follow these general steps for screen replacement. Specific disassembly instructions for your Amazon Kindle Fire HD 10 (7th Gen) should be referenced from a reliable external guide or professional technician.
- Power Off Device: Ensure your tablet is completely powered off before beginning.
- Disassemble Tablet: Carefully open the tablet casing using appropriate tools.
- Disconnect Battery: Locate and disconnect the battery connector from the motherboard to prevent electrical damage.
- Remove Old Screen: Gently detach the old, damaged screen assembly. This often involves heating the edges to soften adhesive and carefully prying it away. Be cautious of glass shards if the screen is shattered.
- Clean Frame: Thoroughly clean any residual adhesive from the tablet frame.
- Connect New Screen (Test First): Connect the flex cable ribbon of the new SRJTEK LCD screen to the motherboard. Do not fully assemble the screen yet.
- Reconnect Battery: Reconnect the battery connector.
- Power On and Test: Power on your tablet and perform a thorough test of the new screen's display and touch functionality (see Section 5).
- Final Assembly: If the screen functions correctly, power off the device, disconnect the battery again, and apply the double-sided adhesive to the tablet frame. Carefully position and secure the new screen assembly.
- Reassemble Tablet: Reconnect the battery, and reassemble the tablet casing.
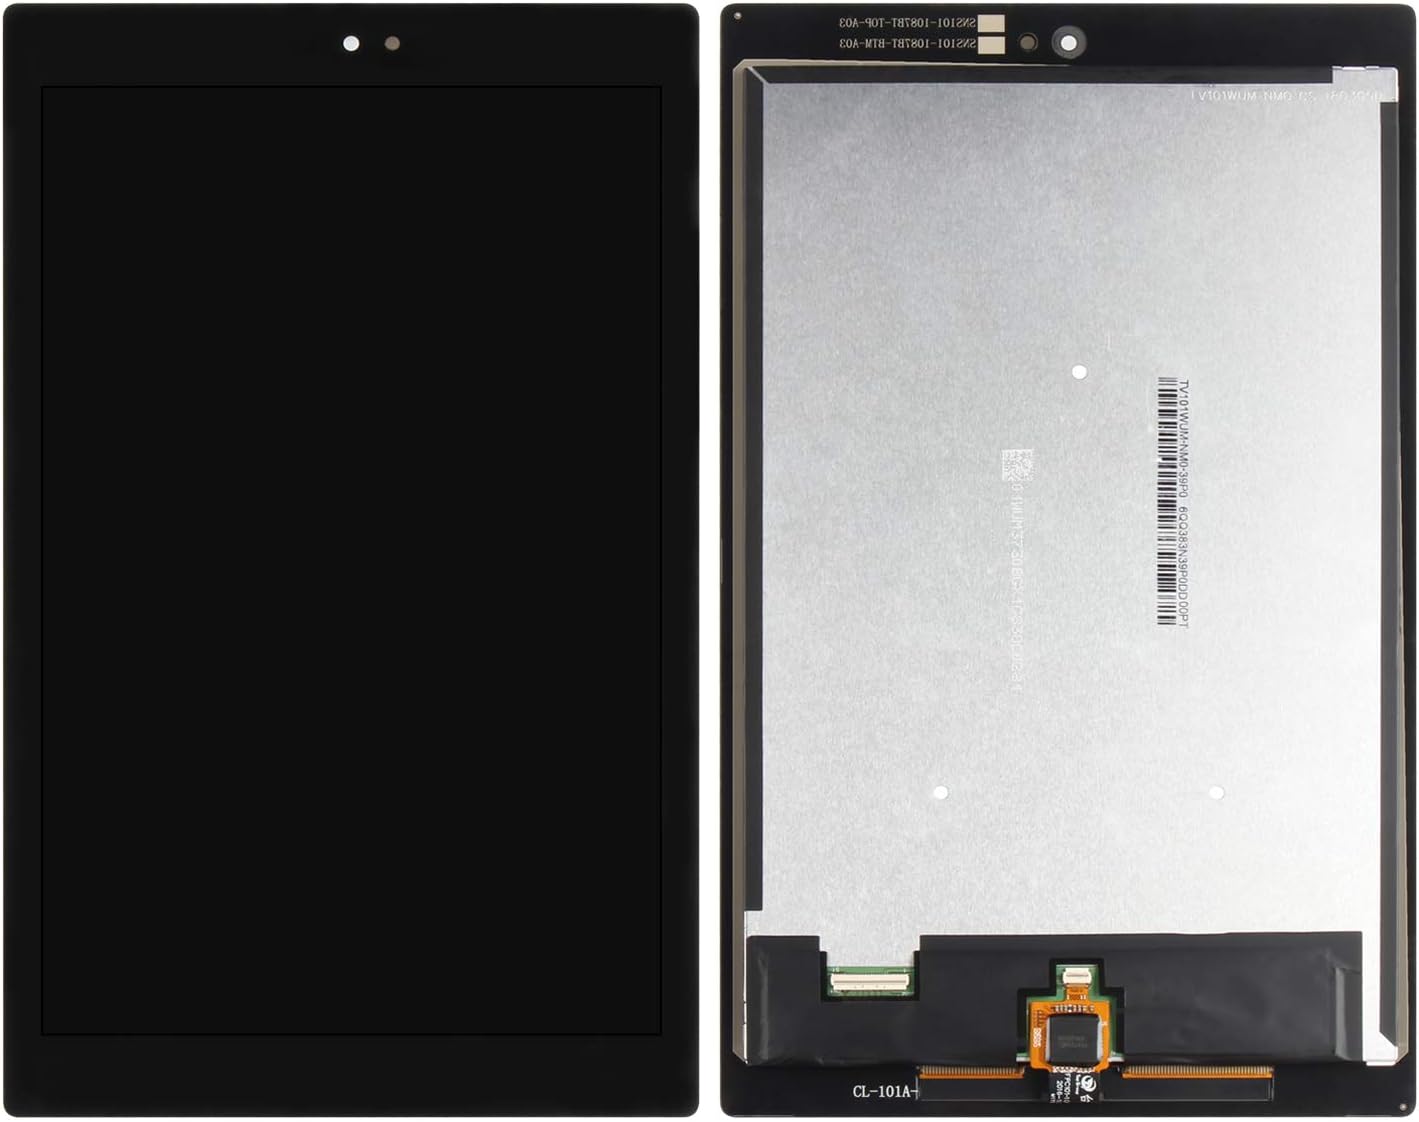
This image displays both the front (display side) and the back (component side) of the SRJTEK LCD screen replacement. The front shows the black display panel, while the back reveals the flex cables and connectors for installation.

A detailed view of the reverse side of the screen assembly, highlighting the delicate flex cables and their connectors. These cables are essential for connecting the new screen to the tablet's motherboard.

This image provides a closer look at the primary ribbon connector located on the back of the screen assembly, which is crucial for establishing the display and touch functionality with the tablet's internal components.
5. Operating (Testing the Screen)
After connecting the new screen and battery (before final assembly), perform the following tests:
- Display Check: Power on the tablet. Verify that the display shows clear images, without any dead pixels, lines, or abnormal colors.
- Touch Functionality: Test the touch screen across its entire surface. Drag an icon around the screen to ensure touch response in all areas. Test multi-touch gestures if applicable.
- Brightness Adjustment: Check if the screen brightness can be adjusted normally.
If any issues are observed during testing, power off the device, disconnect the battery, and re-check all cable connections before retesting. If problems persist, refer to the Troubleshooting section.
6. Maintenance
To ensure the longevity and optimal performance of your new screen:
- Cleaning: Use a soft, lint-free cloth, slightly dampened with water or a screen-specific cleaner, to gently wipe the screen. Avoid harsh chemicals, abrasive materials, or excessive moisture.
- Protection: Consider using a screen protector to guard against scratches and minor impacts.
- Handling: Avoid dropping the tablet or applying excessive pressure to the screen, as this can cause damage.
7. Troubleshooting
If you encounter issues after installation, consider the following:
- Screen Not Working / No Display:
- Ensure all flex cables are securely and correctly connected to the motherboard.
- Verify the battery connector is properly attached.
- Confirm the tablet is receiving power and can turn on.
- If the issue persists, the screen itself might be faulty, or there could be damage to the motherboard. Professional diagnosis is recommended.
- Touch Screen Unresponsive:
- Check the digitizer flex cable connection.
- Ensure there is no debris or foreign material between the screen and the frame.
- A hard reset of the tablet might resolve minor software glitches.
- Backlight Bleed / Bright Spots:
- Some aftermarket screens may exhibit minor backlight inconsistencies, especially when dimmed. This can be a characteristic of the panel and may not indicate a defect.
- Installation Tools Broke:
- The provided tools are basic. For more robust repairs, professional-grade tools are often necessary.
8. Specifications
| Feature | Detail |
|---|---|
| Product Type | LCD Screen and Touch Screen Digitizer Assembly |
| Compatibility | Amazon Kindle Fire HD 10 (7th Gen, 2017, Model SL056ZE) |
| Screen Size | 10.1 inches |
| Item Weight | 10.6 ounces |
| Package Dimensions | 10.71 x 8.54 x 0.94 inches |
| Manufacturer | SRJTEK |
9. Warranty
SRJTEK products come with a 6-month warranty. This warranty covers quality problems arising from non-human factors. If you experience any such issues within 6 months of purchase, SRJTEK will provide a new exchange or a refund.
Please note that damage incurred during the installation process or due to improper handling is not covered under this warranty.
10. Support
For any questions, concerns, or issues regarding your SRJTEK LCD Screen Replacement, please do not hesitate to contact the SRJTEK customer service team. Our friendly customer service professionals are available to assist you and will typically reply within 24 hours.
You can usually find contact information on the product packaging or through the retailer's website where you purchased the item.