1. Introduction
The Comimark XY-WJ01 is a versatile delay relay module featuring a digital LED display for precise timing control. This module is designed for various industrial control applications requiring timed switching operations, including delay, cycle, and trigger functions. It offers multiple operating modes and adjustable parameters to suit diverse requirements.

Figure 1: Front view of the Comimark XY-WJ01 Delay Relay Module, showing the digital display and control buttons.
2. Safety Information
Please read and understand all safety instructions before installing or operating the XY-WJ01 module. Failure to follow these instructions may result in electric shock, fire, or damage to the product.
- Ensure power is disconnected before making any wiring connections.
- This module operates with a coil voltage of up to 30 Volts and a maximum switching voltage of 30 Volts. Do not exceed these ratings.
- Installation should be performed by qualified personnel familiar with electrical wiring and safety standards.
- Avoid exposing the module to moisture, extreme temperatures, or corrosive environments.
- Do not attempt to modify or disassemble the module.
3. Product Features
- Digital LED display for clear time indication.
- Multiple timing modes: delay, cycle, and trigger.
- Adjustable time parameters for various applications.
- Compact design for PCB mounting.
- Normally Open (NO) contact type.
4. Setup and Installation
The XY-WJ01 module is designed for PCB mounting with through-hole connectors. Follow these steps for proper installation:
- Power Supply Connection: Connect the power supply to the V+ and V- terminals. The module requires a DC power source within the specified coil voltage range (up to 30V). Ensure correct polarity.
- Load Connection: Connect the device to be controlled to the relay's output terminals. The relay has a Normally Open (NO) contact type. Refer to the module's markings for load connections.
- Trigger Input (Optional): If using a trigger function, connect the trigger signal to the 3-pin trigger socket. The center pin of this socket is connected directly to the negative (ground) of the supply voltage.
- Mounting: Securely mount the module onto a PCB using its designated mounting points.
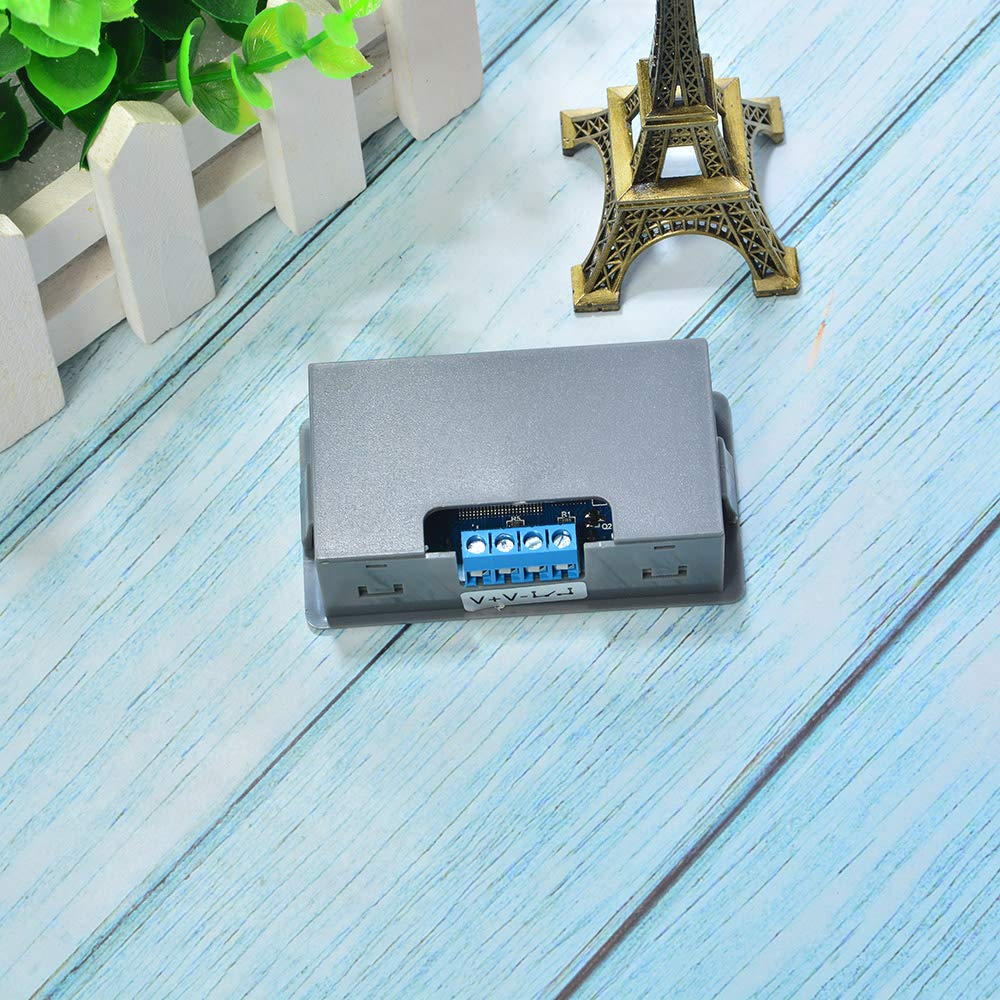
Figure 2: Rear view of the Comimark XY-WJ01 Delay Relay Module, showing power and load connection terminals.
5. Operating Instructions
The XY-WJ01 module features a digital LED display and several control buttons for setting parameters and operating modes.
5.1. Button Functions
- SET Button: Enters parameter setting mode or confirms selections.
- UP/DOWN Buttons: Adjusts time values or navigates through modes.
- Power Button: Toggles power or backlight. Press and hold for 3 seconds to keep the display backlight ON.
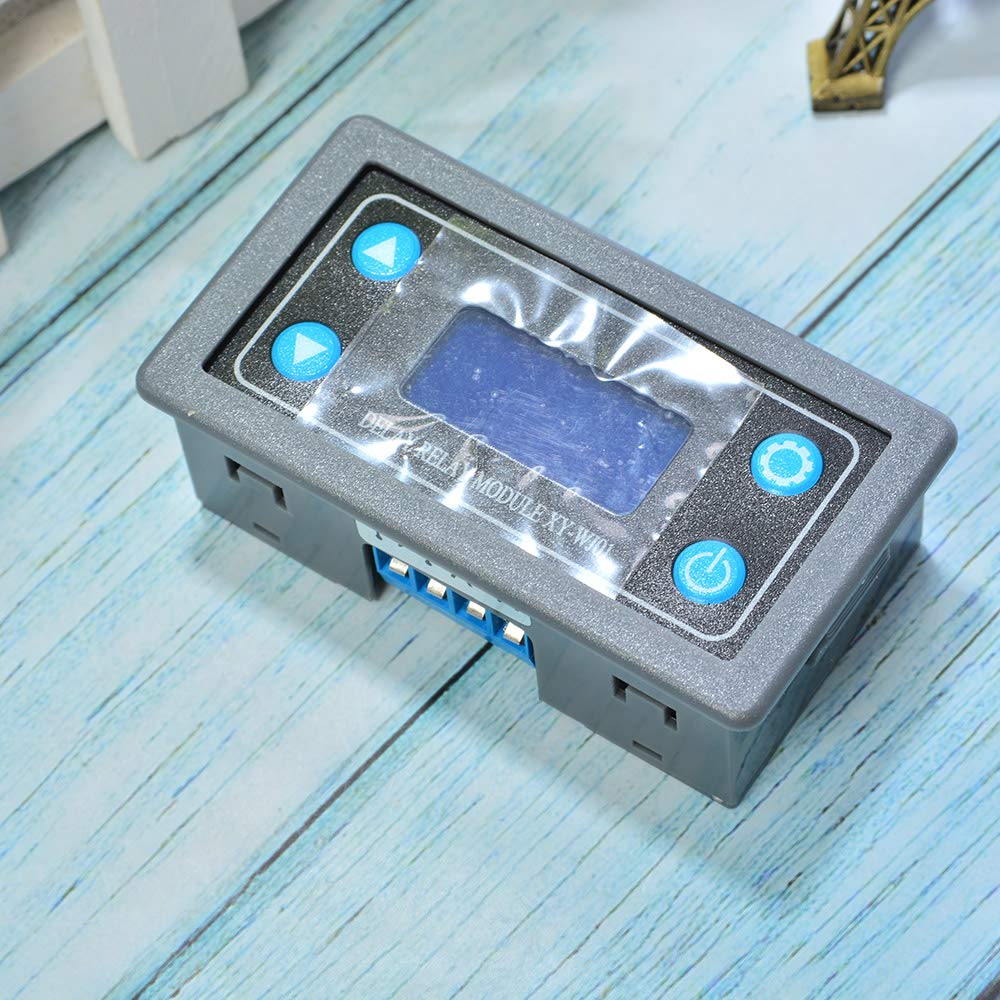
Figure 3: Close-up of the module's digital LED display and control buttons.
5.2. Operating Modes
The module supports various timing modes, typically designated as P1-P6 or similar. Refer to the specific mode definitions for detailed operation. Common modes include:
- Delay ON/OFF: The relay activates or deactivates after a set delay time.
- Cycle Timing: The relay cycles ON and OFF for specified durations repeatedly.
- Trigger Delay: The timing sequence starts upon receiving an external trigger signal.
5.3. Parameter Setting
To set timing parameters:
- Press the SET button to enter parameter setting mode. The display will show the current mode or parameter.
- Use the UP and DOWN buttons to select the desired mode (e.g., P1, P2) or adjust the time values.
- Press SET again to confirm the selection and move to the next parameter (if applicable, such as ON time, OFF time, or number of cycles).
- Once all parameters are set, press and hold the SET button (or wait for timeout) to save the settings and exit the setting mode.
Note on Backlight: The display backlight automatically turns OFF after approximately 5 minutes of inactivity to save power. The timer continues to function as programmed. To keep the backlight continuously ON, press and hold the Power button for 3 seconds.
6. Specifications
| Feature | Specification |
|---|---|
| Brand | Comimark |
| Model Number | XY-WJ01 (Internal: LY528) |
| Connector Type | Through Hole |
| Contact Material | Silver |
| Contact Type | Normally Open (NO) |
| Mounting Type | PCB Mount |
| Operation Mode | Automatic |
| Coil Voltage | Up to 30 Volts DC |
| Maximum Switching Voltage | 30 Volts |
| Number of Terminals | 2 (for power/load, plus 3-pin trigger) |
| Item Weight | 1.69 ounces (approx. 48g) |
| Package Dimensions | 5.47 x 3.82 x 1.14 inches |
7. Troubleshooting
If you encounter issues with your Comimark XY-WJ01 module, refer to the following common troubleshooting steps:
- Module not powering on:
- Check power supply connections (V+, V-) for correct polarity and secure contact.
- Verify the power supply voltage is within the specified range (up to 30V DC).
- Ensure the power supply is functional.
- Relay not activating/deactivating:
- Confirm the operating mode and parameters are set correctly.
- Check load connections and ensure the load is functional.
- If using a trigger, verify the trigger signal is correctly applied to the 3-pin socket.
- Ensure the maximum switching voltage and current ratings are not exceeded by the load.
- Display is blank or erratic:
- Check power supply stability.
- If the backlight is off, press the Power button briefly to reactivate it, or press and hold for 3 seconds to keep it on.
- Ensure the module is not exposed to extreme temperatures or electromagnetic interference.
- Module stopped working after a short period:
- This could indicate an internal fault or damage due to incorrect wiring or exceeding electrical limits. Disconnect power immediately and inspect for any visible damage. If the issue persists, the module may require replacement.
8. Maintenance
The Comimark XY-WJ01 Delay Relay Module requires minimal maintenance. To ensure optimal performance and longevity:
- Keep the module clean and free from dust and debris. Use a soft, dry cloth for cleaning.
- Ensure proper ventilation if installed in an enclosed space to prevent overheating.
- Regularly inspect wiring connections for looseness or corrosion.
- Avoid exposing the module to strong vibrations or mechanical shocks.
9. Warranty and Support
Information regarding the warranty period and specific support contacts for the Comimark XY-WJ01 Delay Relay Module is not provided in the available product data. Please refer to your purchase documentation or contact your retailer for details on warranty coverage and technical support.