1. Introduction
Thank you for choosing the Barton Portable Electric Automatic Tumble Dryer. This compact and efficient appliance is designed for convenient clothes drying in various settings, including apartments, dormitories, and RVs. Featuring a digital timer and multiple drying modes, it offers flexibility to suit different fabric types and load sizes. Please read this manual thoroughly before operation to ensure safe and optimal performance.

Image: Front view of the Barton Portable Electric Automatic Tumble Dryer with the door closed.
2. Safety Instructions
To reduce the risk of fire, electric shock, or injury, adhere to the following safety precautions:
- Electrical Safety: Ensure the dryer is connected to a properly grounded 110V electrical outlet. Do not use extension cords or adapters. Disconnect power before servicing or cleaning.
- Ventilation: The dryer must be properly vented to the outdoors or to an approved indoor vent kit. Ensure the exhaust hose is not kinked or blocked. Adequate airflow is crucial to prevent overheating and fire hazards.
- Lint Filter: Clean the lint filter before or after every load. A clogged lint filter reduces drying efficiency and increases fire risk.
- Flammable Materials: Do not dry articles that have been previously cleaned, washed, soaked, or spotted with gasoline, dry-cleaning solvents, or other flammable or explosive substances.
- Rubber and Plastic Items: Do not dry articles containing foam rubber or rubber-like materials.
- Supervision: Do not allow children to play on or in the dryer. Close supervision is necessary when the dryer is used near children.
- Installation: Install the dryer according to the instructions in this manual. Ensure the dryer is placed on a stable, level surface.

Image: Side view of the dryer, highlighting the exhaust hose connection and caution labels.
3. Package Contents
Verify that all components are present in the package:
- Barton Portable Electric Automatic Tumble Dryer
- Exhaust connector
- Plastic Spacer
- User Manual
4. Setup
4.1 Placement
Place the dryer on a firm, level surface capable of supporting its weight (approximately 47.16 lbs). Ensure there is adequate space around the dryer for ventilation and access. Do not block the air intake or exhaust vents.
4.2 Exhaust Hose Installation
- Attach the provided exhaust connector to the dryer's exhaust port, typically located at the rear.
- Connect the exhaust hose to the connector.
- Direct the other end of the exhaust hose to an outdoor vent or an approved indoor vent kit. Ensure the hose is as straight as possible to maximize airflow and prevent lint buildup.
4.3 Power Connection
Plug the dryer into a standard 110V, 3-prong grounded electrical outlet. Do not use adapters or extension cords.
5. Operating Instructions
5.1 Loading Clothes
- Open the dryer door.
- Load clothes into the drum. For optimal drying performance, do not overload the dryer. It is recommended to half-fill the drum with wet laundry to allow items to tumble freely. The maximum capacity is 2.8 kg.
- Close the dryer door securely.
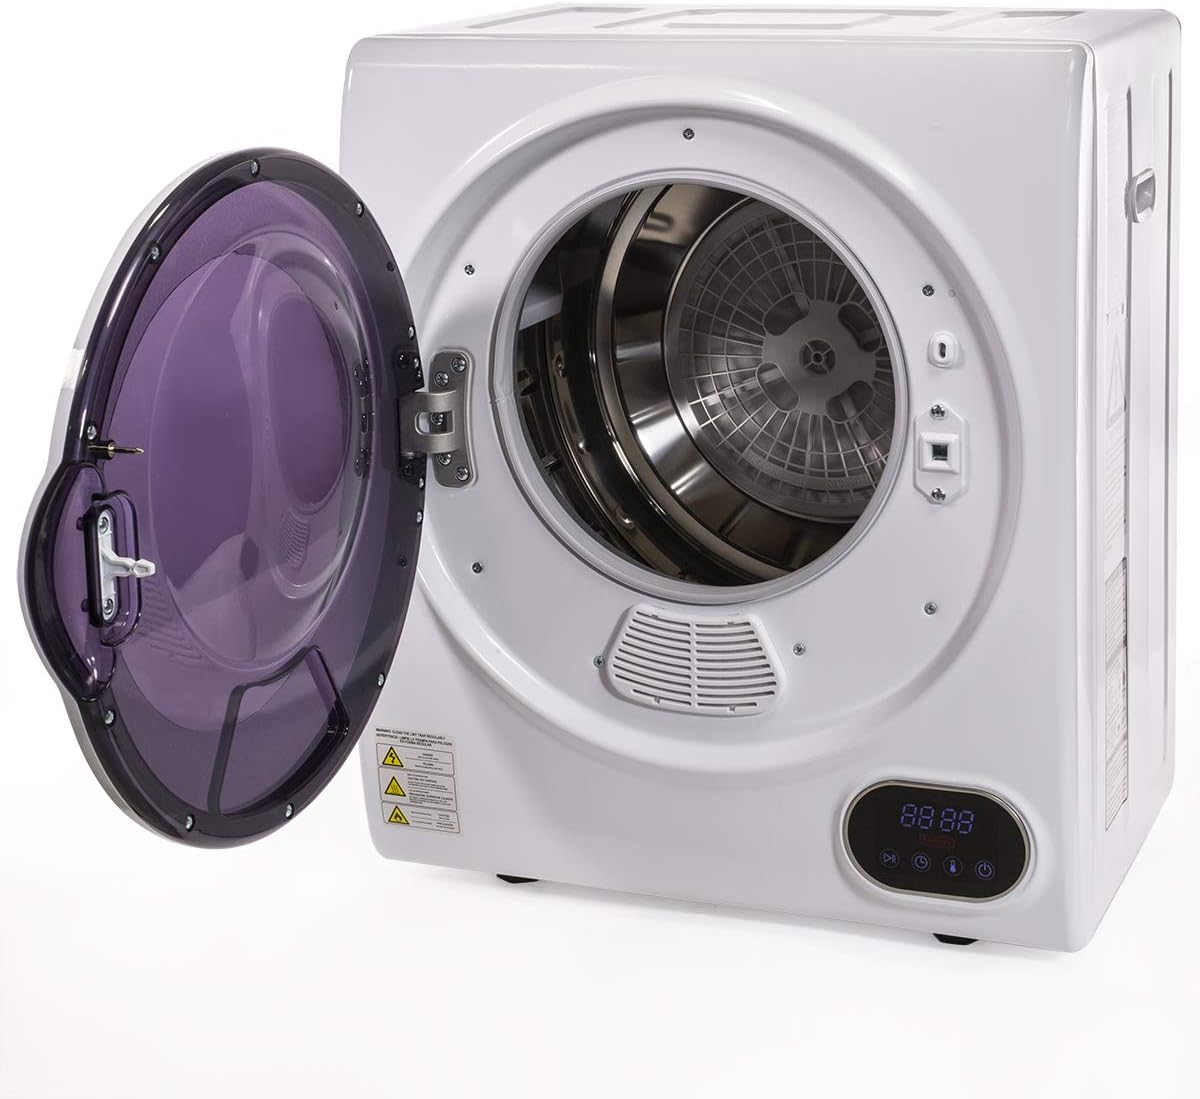
Image: Front view of the dryer with the door open, showing the drum interior.
5.2 Control Panel Overview
The digital control panel allows you to select drying time and mode.

Image: Close-up of the digital control panel with buttons for Power, Start/Pause, Timer, and Mode.
- Power Button: Press to turn the dryer on or off.
- Start/Pause Button: Press to start or pause the drying cycle.
- Timer Button: Use to adjust the drying time.
- Mode Button: Selects different drying modes based on fabric type or desired dryness level. Refer to the display for current mode.
5.3 Starting a Drying Cycle
- Press the Power button to turn on the dryer.
- Use the Timer button to set the desired drying duration.
- Press the Mode button to select the appropriate drying mode for your laundry.
- Press the Start/Pause button to begin the drying cycle.
The dryer will automatically shut off once the cycle is complete or if it detects overheating.
6. Maintenance
6.1 Cleaning the Lint Filter
The lint filter is located inside the dryer drum, near the door opening. It is essential to clean the lint filter before or after every load to maintain drying efficiency and prevent fire hazards.
- Ensure the dryer is off and unplugged.
- Remove the lint filter by pulling it out.
- Remove any accumulated lint by hand or with a soft brush.
- Reinsert the lint filter firmly into its slot.

Image: Interior view of the dryer drum, highlighting the lint filter area.
6.2 Cleaning the Exterior
Wipe the exterior of the dryer with a soft, damp cloth. Do not use abrasive cleaners or solvents.
6.3 Cleaning the Interior Drum
Occasionally, wipe the interior of the drum with a damp cloth. For stubborn stains, a mild household cleaner can be used, followed by wiping with a clean, damp cloth.
7. Troubleshooting
| Problem | Possible Cause | Solution |
|---|---|---|
| Dryer does not start | No power; Door not closed; Start button not pressed | Check power cord connection and outlet; Ensure door is fully closed; Press the Start/Pause button. |
| Clothes not drying effectively | Overloaded dryer; Clogged lint filter; Blocked exhaust hose; Incorrect drying time/mode | Reduce load size; Clean lint filter; Check exhaust hose for obstructions; Adjust drying time or mode. |
| Unusual noise during operation | Foreign object in drum; Dryer not level | Check drum for loose items; Ensure dryer is on a stable, level surface. |
| Dryer stops unexpectedly | Overheating protection activated; Power interruption | Clean lint filter and check ventilation; Check power supply. |
8. Specifications
| Brand | Barton |
| Model Name | Digital Automatic Dryer Machine |
| Form Factor | Front Load |
| Capacity | 2.8 Kilograms |
| Color | White |
| Power | 850W |
| Item Dimensions (D x W x H) | 15.5"D x 19.75"W x 23.25"H |
| Item Weight | 47.16 Pounds |
| Material Type | Aluminum, Metal, Stainless Steel |
| UPC | 812365032417 |
| ASIN | B07XTR7W2L |

Image: Diagram showing the dimensions of the dryer (19.75"W x 15.5"D x 23.25"H).
9. Warranty & Support
9.1 Manufacturer's Warranty
This Barton Portable Electric Automatic Tumble Dryer is covered by a 60 Days Manufacturer's Warranty from the date of purchase. This warranty covers defects in materials and workmanship under normal use. It does not cover damage resulting from misuse, accident, alteration, or unauthorized repair.
9.2 Customer Support
For warranty claims, technical assistance, or any questions regarding your product, please contact Barton customer support. Refer to the contact information provided with your purchase documentation or visit the official Barton website for support details.