1. Introduction
This manual provides detailed instructions for the installation, operation, and maintenance of your CR Mod Plus 1 External Toilet Cistern. Please read this manual thoroughly before installation and use to ensure proper function and safety. Keep this manual for future reference.
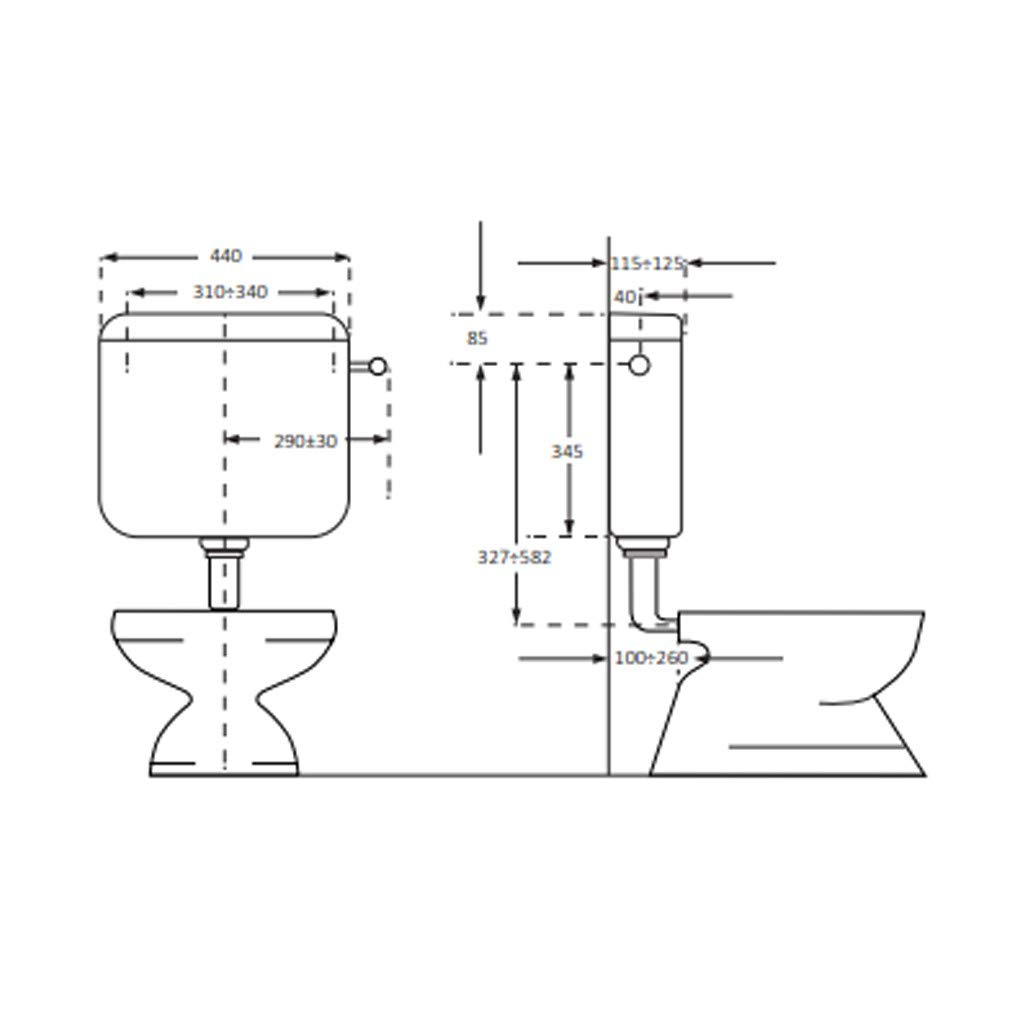
Image 1.1: Front view of the CR Mod Plus 1 External Toilet Cistern. This image shows the overall design of the white cistern with the flush button visible on the top right.
2. Safety Information
Always follow basic safety precautions when installing or maintaining plumbing fixtures. Failure to do so may result in personal injury or property damage.
- Ensure the water supply is turned off before beginning any installation or maintenance.
- Wear appropriate personal protective equipment, such as gloves and eye protection.
- If you are unsure about any part of the installation process, consult a qualified plumber.
- Do not use abrasive cleaners or solvents on the cistern's surface.
- Keep small parts out of reach of children.
3. Package Contents
Verify that all components are present before starting the installation:
- CR Mod Plus 1 External Toilet Cistern unit
- Wall fixing kit (screws, wall plugs)
- Drain pipe (diameter 50x40 mm)
- Connection gaskets
- Mounting template
- 3/8'' compact float valve (pre-installed)
4. Setup and Installation
The CR Mod Plus 1 cistern is designed for low-level or medium-level installations. Follow these steps for proper setup:
- Prepare the Installation Area: Ensure the wall surface is clean, dry, and capable of supporting the cistern's weight when full. Turn off the main water supply to the toilet.
- Positioning: Determine the desired height for the cistern (low-level or medium-level). Use the provided mounting template to mark the drilling points on the wall.
- Drill Holes: Drill holes at the marked positions using an appropriate drill bit for your wall type. Insert the wall plugs.
- Mount the Cistern: Secure the cistern to the wall using the provided wall fixing kit. Ensure it is level and firmly attached.
- Connect Water Supply: The cistern features a water inlet for right or left connection. Connect the 3/8'' water supply line to the float valve. Ensure all connections are tight to prevent leaks.
- Connect to WC: Attach the 50x40 mm drain pipe from the cistern to the toilet bowl inlet. Use the provided connection gaskets to ensure a watertight seal.
- Check for Leaks: Slowly turn on the main water supply and allow the cistern to fill. Inspect all connections for any signs of leakage. Tighten connections as necessary.
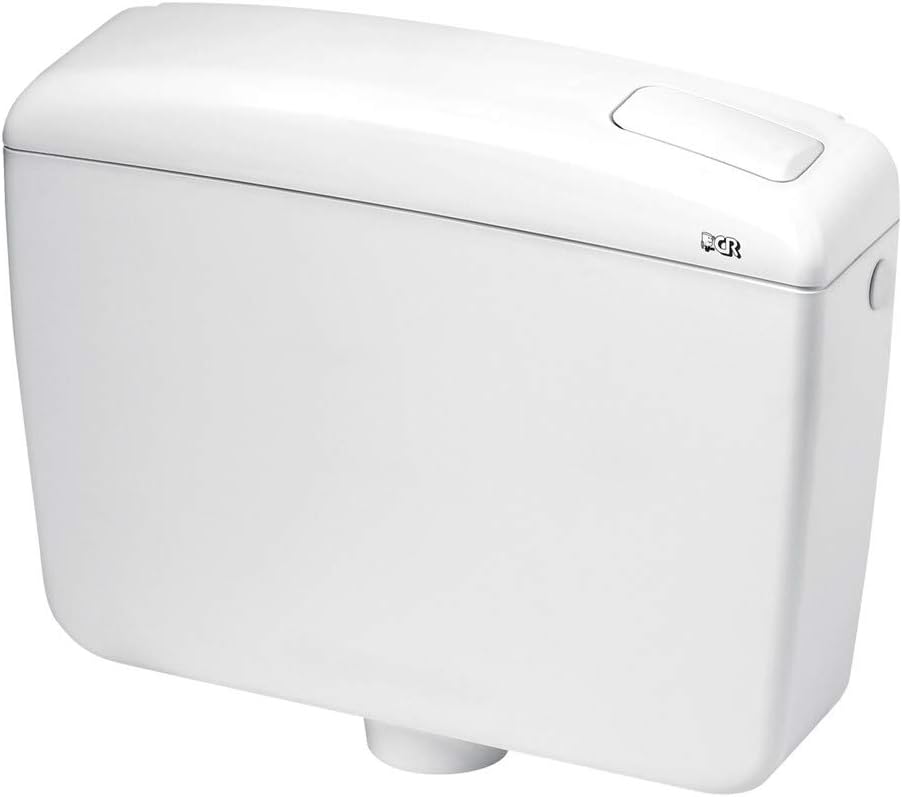
Image 4.1: Close-up view of the top right section of the cistern, highlighting the flush button and the CR brand logo. This detail shows the mechanism for water activation.
5. Operating Instructions
The CR Mod Plus 1 cistern features a single start/stop flush button for water saving.
- To Flush: Press the flush button located on the top of the cistern.
- To Stop Flush (Water Saving): Press the flush button a second time while water is still flowing to stop the flush prematurely, saving water.
- Capacity Adjustment: The 9-liter capacity can be adjusted internally by modifying the float mechanism. Refer to the internal mechanism diagram (not provided in this manual) for specific adjustment points if needed. This adjustment should only be performed by a qualified person.
6. Maintenance
Regular maintenance ensures the longevity and optimal performance of your cistern.
- Cleaning: Clean the exterior of the cistern with a soft cloth and mild, non-abrasive detergent. Do not use harsh chemicals, abrasive pads, or solvents, as these can damage the ABS shell.
- Internal Components: Periodically check the float valve and flush mechanism for any debris or mineral buildup. If necessary, turn off the water supply, drain the cistern, and clean the components.
- Gaskets: Inspect connection gaskets for wear or damage. Replace them if leaks occur or if they show signs of deterioration.
7. Troubleshooting
| Problem | Possible Cause | Solution |
|---|---|---|
| Cistern not filling | Water supply off; float valve obstructed; inlet valve faulty. | Check water supply; clear obstructions from float valve; replace inlet valve if necessary. |
| Cistern continuously running | Float valve not sealing; flush mechanism faulty; water level too high. | Adjust float level; clean or replace float valve; inspect flush mechanism for debris. |
| Leaks from connections | Loose connections; damaged gaskets. | Tighten connections; replace worn or damaged gaskets. |
| Weak flush | Water level too low; obstruction in drain pipe. | Adjust water level (float); clear drain pipe obstruction. |
8. Specifications
- Model: Mod Plus 1
- Brand: CR
- Type: External Toilet Cistern
- Installation: Low-level or Medium-level
- Capacity: 9 liters (adjustable)
- Material: ABS with anti-aging treatment
- Insulation: Anti-condensation and sound-insulating
- Water Connection: Right or Left (3/8'' float valve)
- Flush Mechanism: Single start/stop button
- Drain Pipe Diameter: 50x40 mm
- Item Weight: 5 kg
- ASIN: B07XJ5WHMZ
- First Available: February 12, 2020
9. Warranty and Support
For warranty information or technical support, please contact your retailer or visit the official CR brand store. Keep your purchase receipt as proof of purchase.
CR Brand Store: Visit CR Store on Amazon.it