1. Product Overview
The Stream Electronics 16 Pin JENSEN UV9 Wiring Harness Plug is a replacement component designed for specific JENSEN UV9 automotive audio systems. This harness facilitates the connection between your vehicle's electrical system and the JENSEN UV9 head unit, ensuring proper power, speaker, and accessory functions. It is manufactured to high-quality standards to provide a reliable connection.
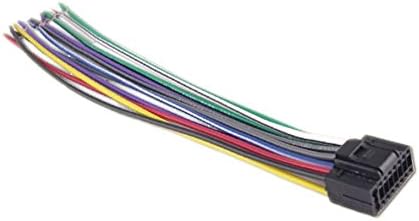
This image displays the 16-pin JENSEN UV9 wiring harness plug, featuring a black plastic connector on the right and a bundle of multi-colored wires extending to the left. Each wire is individually insulated with distinct colors, indicating different functions for connection.
Key Features:
- Direct replacement for JENSEN UV9 models.
- High-quality construction for durability.
- Ensures proper electrical connectivity for audio systems.
2. Setup and Installation
Installation of a wiring harness requires careful attention to electrical connections. It is highly recommended that installation be performed by a qualified automotive audio technician to ensure correct wiring and prevent damage to your vehicle's electrical system or the head unit.
General Installation Steps (Professional Installation Recommended):
- Safety First: Disconnect the vehicle's negative battery terminal before beginning any electrical work to prevent short circuits.
- Access Head Unit: Carefully remove the existing head unit from the dashboard to access the wiring connections.
- Identify Wires: Match the wires on the new 16-pin JENSEN UV9 harness to the corresponding wires from your vehicle's wiring harness. Refer to your vehicle's specific wiring diagram and the JENSEN UV9 head unit manual for accurate color codes and functions. Common wire functions include:
- Yellow: Constant 12V (Battery)
- Red: Switched 12V (Accessory/Ignition)
- Black: Ground
- Blue: Power Antenna/Remote Turn-On
- Speaker Wires (e.g., White/White-Black, Gray/Gray-Black, Green/Green-Black, Purple/Purple-Black)
- Connect Wires: Securely connect the wires using appropriate methods such as crimp connectors, solder, or heat-shrink tubing. Ensure all connections are insulated to prevent short circuits.
- Plug In Harness: Once all individual wire connections are made, plug the 16-pin connector into the back of the JENSEN UV9 head unit.
- Test System: Reconnect the vehicle's negative battery terminal. Turn on the vehicle and test the head unit's functionality (power, audio output, radio, etc.) before reassembling the dashboard.
- Reassemble: Carefully reassemble the dashboard and secure the head unit in its position.
3. Operating Instructions
Once the 16 Pin JENSEN UV9 Wiring Harness Plug is correctly installed, its operation is integrated with the JENSEN UV9 head unit. The harness itself does not require separate operational steps. Its function is to provide the necessary electrical pathways for the head unit to operate as designed.
Refer to your JENSEN UV9 head unit's specific instruction manual for detailed operating procedures, including power on/off, audio source selection, volume control, and other features.
4. Maintenance
The 16 Pin JENSEN UV9 Wiring Harness Plug is designed for long-term reliability and typically requires minimal maintenance once installed correctly.
Maintenance Guidelines:
- Secure Connections: Periodically check (if accessible) that all wire connections remain secure and free from corrosion. Loose connections can lead to intermittent power or audio issues.
- Avoid Stress: Ensure the harness is not subjected to excessive pulling, bending, or pinching, which could damage the wires or the connector.
- Cleanliness: Keep the area around the head unit and harness free from dust and debris, especially if the connections are exposed.
5. Troubleshooting
If you experience issues with your JENSEN UV9 head unit after installing this wiring harness, consider the following troubleshooting steps:
- No Power to Head Unit:
- Check vehicle's fuse box for blown fuses related to the radio or accessory power.
- Verify the constant 12V (Yellow wire) and switched 12V (Red wire) connections are secure and receiving power.
- Ensure the ground wire (Black) has a solid connection to the vehicle chassis.
- No Audio Output:
- Confirm all speaker wires are correctly connected to the head unit and speakers, observing positive and negative polarities.
- Check the head unit's settings to ensure audio output is not muted or set to an incorrect source.
- Intermittent Functionality:
- Inspect all wire connections for looseness or poor insulation.
- Ensure the harness connector is fully seated into the head unit.
- Incorrect Accessory Function (e.g., power antenna not extending):
- Verify the remote turn-on wire (Blue) is correctly connected and receiving signal from the head unit.
If troubleshooting steps do not resolve the issue, it is advisable to consult a professional automotive audio technician.
6. Specifications
| Product Name | 16 Pin JENSEN UV9 Wiring Harness Plug |
| Brand | Stream Electronics |
| Model Compatibility | JENSEN UV9 series head units |
| Connector Type | 16-pin automotive connector |
| Package Dimensions | 5 x 3 x 2 inches |
| Item Weight | 2 pounds |
| Manufacturer | Stream Electronics |
| Date First Available | May 5, 2016 |
7. Warranty and Support
Warranty Information:
This Stream Electronics 16 Pin JENSEN UV9 Wiring Harness Plug comes with a 60 Days Warranty from the date of purchase. This warranty covers manufacturing defects and ensures the product is free from material and workmanship flaws under normal use.
For warranty claims or further details, please retain your proof of purchase.
Customer Support:
For technical assistance, installation questions, or support regarding your Stream Electronics product, please contact Stream Electronics customer service. Refer to the packaging or the Stream Electronics official website for current contact information.