1. Introduction
This manual provides comprehensive instructions for the safe and efficient use of your AEG QX9-1-ANIM Cordless Handheld Vacuum Cleaner. Please read this manual thoroughly before operating the appliance and retain it for future reference. Proper use and maintenance will ensure optimal performance and extend the lifespan of your vacuum cleaner.
2. Safety Information
WARNING: Read all safety warnings and instructions before using this appliance.
- This appliance is intended for domestic use only. Do not use it for commercial or industrial purposes.
- Do not use the vacuum cleaner to pick up water, liquids, hot ashes, sharp objects, or flammable/combustible materials.
- Keep hair, loose clothing, fingers, and all parts of the body away from openings and moving parts.
- Do not operate the vacuum cleaner if it is damaged or malfunctioning. Contact authorized service personnel for repairs.
- Only use the charging adapter supplied with the appliance.
- Do not leave the vacuum cleaner unattended while charging.
- This appliance can be used by children aged 8 years and above and persons with reduced physical, sensory or mental capabilities or lack of experience and knowledge if they have been given supervision or instruction concerning use of the appliance in a safe way and understand the hazards involved. Children shall not play with the appliance. Cleaning and user maintenance shall not be made by children without supervision.
3. Package Contents
Carefully unpack your AEG QX9-1-ANIM vacuum cleaner and check that all items are present and in good condition. The package should contain:
- AEG QX9-1-ANIM Main Unit (Cordless Stick Vacuum)
- Detachable Handheld Unit
- Charging Base
- Upholstery Brush
- Crevice Tool
- Power Adapter
- User Manual (this document)

Image 3.1: AEG QX9-1-ANIM Cordless Handheld Vacuum Cleaner with its charging base, upholstery brush, and crevice tool.
4. Product Overview
Familiarize yourself with the components of your AEG QX9-1-ANIM vacuum cleaner before use.
- Handle: Ergonomically designed for comfortable grip.
- Power Button: To turn the vacuum cleaner on or off.
- Power Mode Selector: To switch between the two available suction power levels.
- Handheld Unit Release Button: Detaches the handheld vacuum for versatile cleaning.
- Dustbin: Collects dust and debris.
- Filter System: Internal filters for efficient dust separation.
- Main Brush Head: Equipped with LED lights for improved visibility and a rotating brush roll.
- Charging Port: Located on the handheld unit for direct charging or on the charging base.
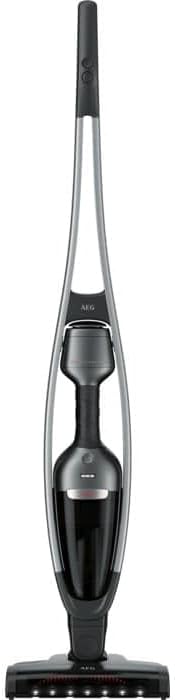
Image 4.1: Front view of the AEG QX9-1-ANIM, highlighting its sleek design and integrated handheld unit.
5. Setup
Follow these steps to set up your vacuum cleaner for first use.
5.1 Assembly
- Insert the main body of the vacuum cleaner into the floor nozzle until it clicks securely into place.
- Ensure the handheld unit is correctly seated within the main body.
5.2 Initial Charging
Before first use, fully charge the vacuum cleaner for approximately 4 hours. The battery indicator lights will show the charging status.
- Place the vacuum cleaner onto the charging base. Ensure the charging contacts align.
- Connect the power adapter to the charging base and then plug it into a wall outlet.
- Alternatively, the handheld unit can be charged directly by plugging the adapter into its charging port.

Image 5.1: The AEG QX9-1-ANIM vacuum cleaner docked on its charging base, ready for charging.
6. Operating Instructions
Your AEG QX9-1-ANIM offers versatile cleaning for various surfaces.
6.1 Powering On/Off and Suction Modes
- Press the power button once to turn the vacuum cleaner on.
- Press the power mode selector button to cycle between the two available suction power levels (Standard and High).
- Press the power button again to turn the vacuum cleaner off.
6.2 Using the Stick Vacuum
For general floor cleaning, use the vacuum in its upright stick configuration. The integrated LED lights on the brush head illuminate the cleaning path, making dust and debris more visible.

Image 6.1: A user operating the AEG QX9-1-ANIM stick vacuum on a hard floor surface.
6.3 Using the Handheld Unit
For cleaning furniture, stairs, or car interiors, detach the handheld unit.
- Press the handheld unit release button to separate the handheld vacuum from the main body.
- Attach the desired accessory (upholstery brush or crevice tool) to the nozzle of the handheld unit.
- After use, reattach the handheld unit to the main body, ensuring it clicks into place.

Image 6.2: The AEG QX9-1-ANIM with its handheld unit detached, demonstrating its versatility.
6.4 Cleaning Under Furniture
The flexible design of the QX9-1-ANIM allows it to reach under low furniture with ease.

Image 6.3: The vacuum cleaner's flexible design allows for easy cleaning under furniture.
7. Maintenance
Regular maintenance ensures your vacuum cleaner operates at peak performance.
7.1 Emptying the Dustbin
Empty the dustbin regularly, ideally after each use, or when the MAX fill line is reached.
- Press the dustbin release button to detach the dustbin from the handheld unit.
- Hold the dustbin over a waste bin and open the dustbin flap to empty its contents.
- Reattach the dustbin to the handheld unit, ensuring it clicks securely.

Image 7.1: Demonstrating the process of emptying the dustbin from the handheld unit.
7.2 Cleaning the Filters
The filters should be cleaned regularly to maintain suction power. Tap them clean or rinse with water as instructed.
- Remove the dustbin and then carefully pull out the filter assembly.
- Separate the inner and outer filters.
- Tap loose dust from both filters. If heavily soiled, rinse them under lukewarm water.
- Allow filters to air dry completely for at least 24 hours before reassembling and placing them back into the vacuum. Do not use a dryer or direct heat.

Image 7.2: The filter assembly removed from the dustbin for cleaning.
7.3 Cleaning the Brush Roll
Periodically check the brush roll for tangled hair or debris, especially if you have pets.
- Turn off the vacuum cleaner.
- Use a pair of scissors or the integrated brush roll cleaning function (if available on your model) to cut and remove tangled hair and fibers.
- Ensure the brush roll spins freely after cleaning.

Image 7.3: Close-up view of the brush roll, which may require periodic cleaning to remove tangled hair and debris.
8. Troubleshooting
If you encounter issues with your vacuum cleaner, refer to the following table for common problems and solutions.
| Problem | Possible Cause | Solution |
|---|---|---|
| Vacuum does not turn on. | Battery is depleted. | Charge the vacuum cleaner fully. |
| Reduced suction power. | Dustbin is full. | Empty the dustbin. |
| Reduced suction power. | Filters are clogged. | Clean or replace the filters. |
| Reduced suction power. | Brush roll is tangled. | Clean the brush roll. |
| Vacuum does not charge. | Power adapter not connected properly. | Ensure the power adapter is securely plugged into the charging base/handheld unit and the wall outlet. |
| Vacuum does not charge. | Charging contacts are dirty. | Clean the charging contacts on both the vacuum and the base with a dry cloth. |
If the problem persists after attempting these solutions, please contact customer support.
9. Specifications
| Feature | Specification |
|---|---|
| Brand | AEG |
| Model Name | QX9-1-ANIM |
| Model Number | 900 277 370 |
| Color | Black, Grey |
| Dimensions (L x W x H) | 110.2 x 25.6 x 13.2 cm |
| Item Weight | 2.75 Kilograms (6.06 pounds) |
| Power | 2100 milliamp_hours |
| Voltage | 230 Volts |
| Number of Speeds | 2 |
| Noise Level | 76 Decibels |
| Runtime | Up to 55 minutes |
| Cleaning Type | Dry |
| Filter Type | Cartridge |
| Surface Recommendation | Hard floor |
| Power Source | Battery Powered |
| Cordless | Yes |
| Battery Type | 1 Lithium-ion (included) |
| Included Components | Charging base, Upholstery brush, Crevice tool |
10. Warranty and Support
Your AEG QX9-1-ANIM vacuum cleaner comes with a manufacturer's warranty. Please refer to the warranty card included in your packaging for specific terms and conditions.
- Spare Parts Availability: Spare parts for this model are available for 2 years from the date of purchase.
- Customer Support: For technical assistance, warranty claims, or to purchase spare parts, please visit the official AEG website or contact your local AEG service center.


