
Introduction
This manual provides detailed instructions for the ORICO USB3.0 4-Bay HDD/SSD Enclosure, Model 6648US3. This device supports up to four 2.5-inch or 3.5-inch SATA hard drives or solid-state drives, offering a total storage capacity of up to 40TB (10TB per bay). It features a standalone offline clone function and high-speed USB3.0 data transfer. Please read this manual thoroughly before use to ensure proper operation and maximize the product's lifespan.
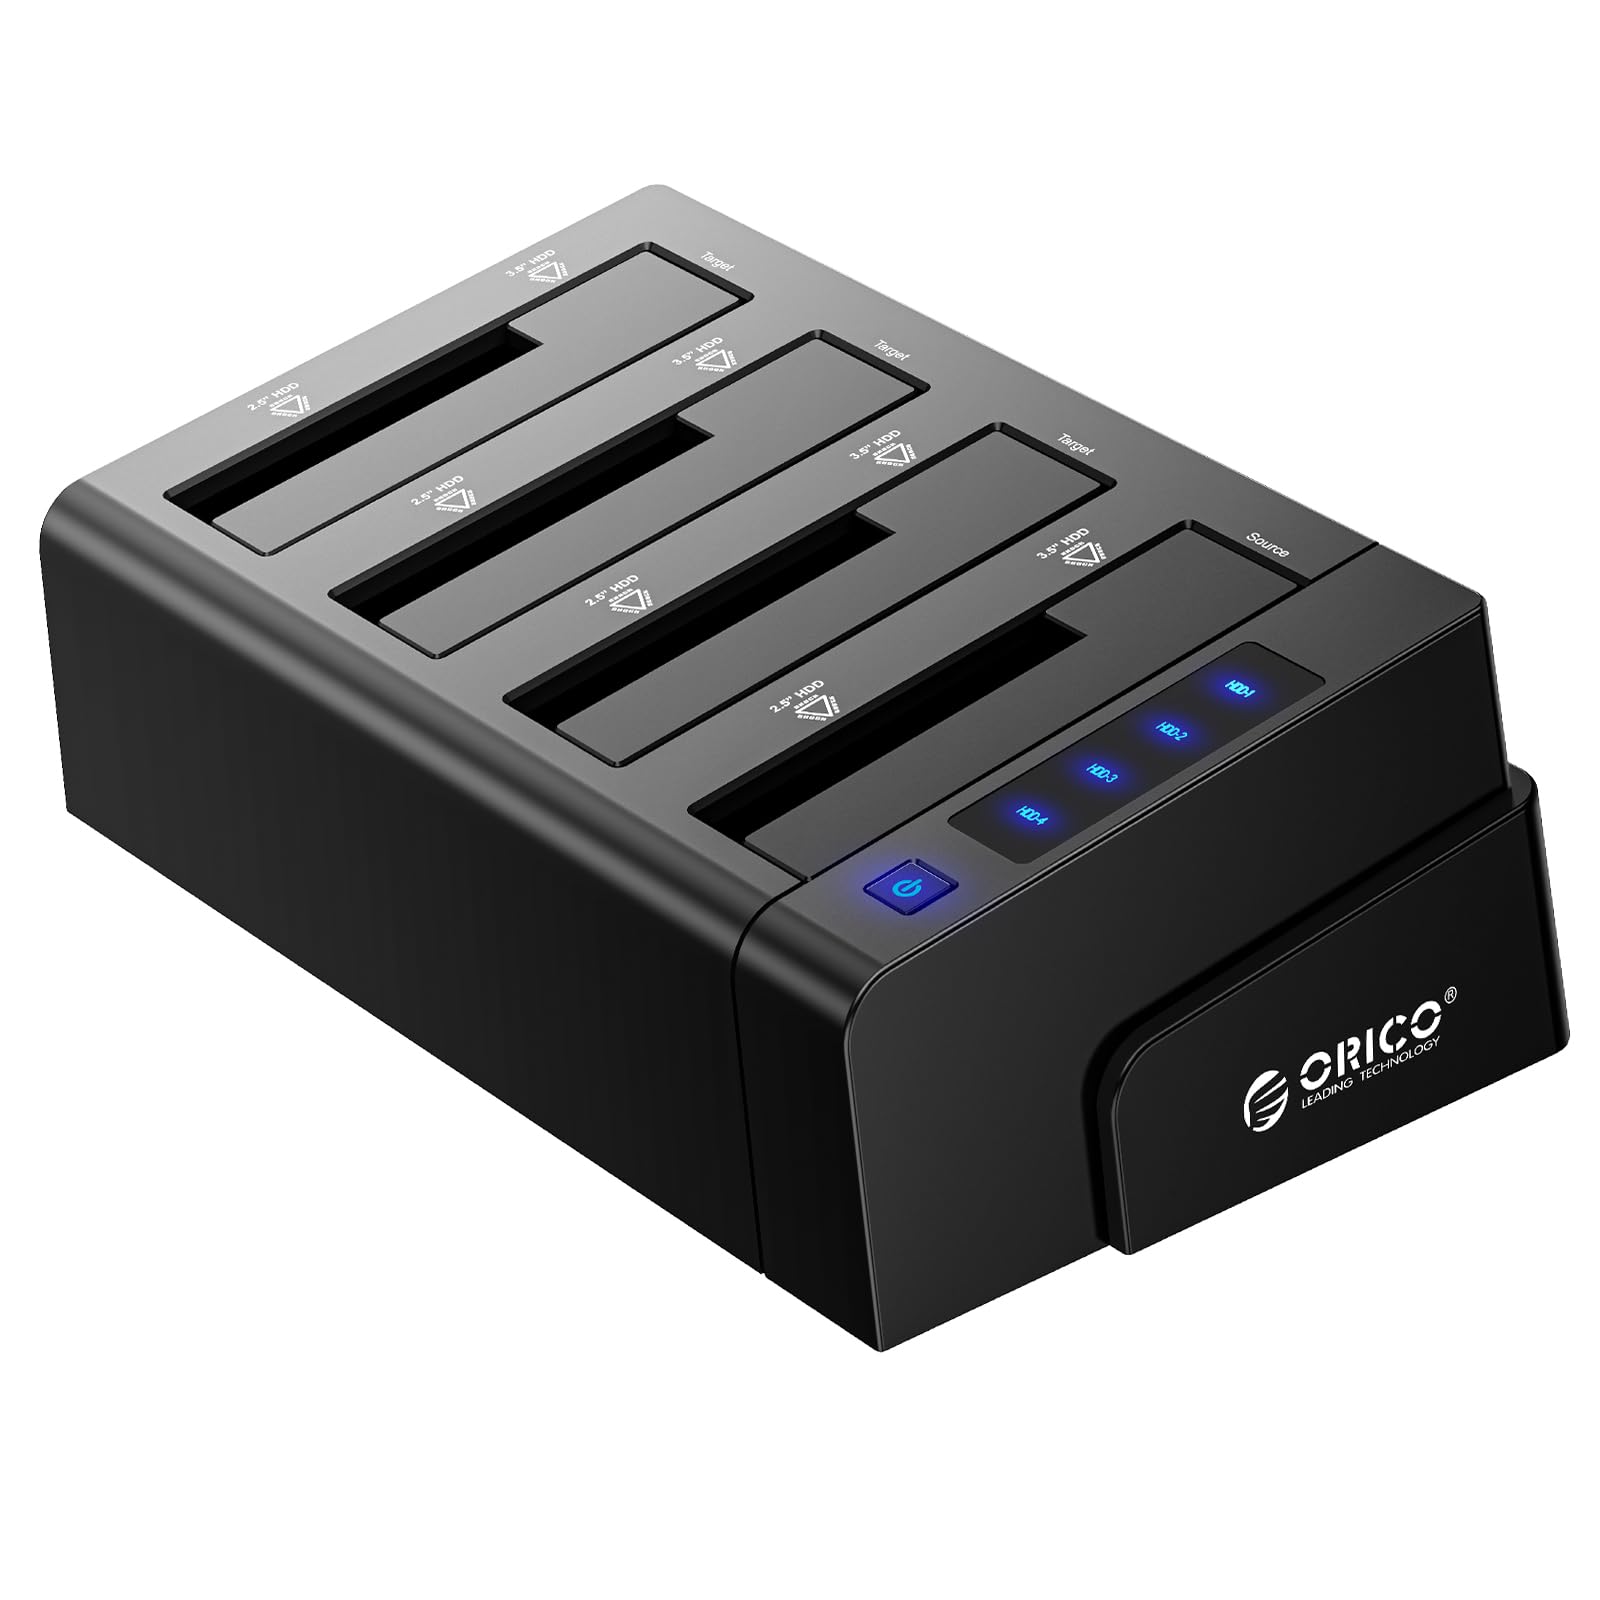
Figure 1: The ORICO 6648US3 4-Bay HDD/SSD Enclosure, showcasing its design with hard drives installed.
Package Contents
- 1x ORICO 4-Bay USB3.0 HDD/SSD Enclosure (Model 6648US3)
- 1x 12V/6.5A Power Adapter (PSE certified)
- 1x USB3.0 Type-B to Type-A Data Cable
- 1x User Manual
Setup Instructions
1. Product Overview and Connections
Familiarize yourself with the enclosure's components and connection ports.
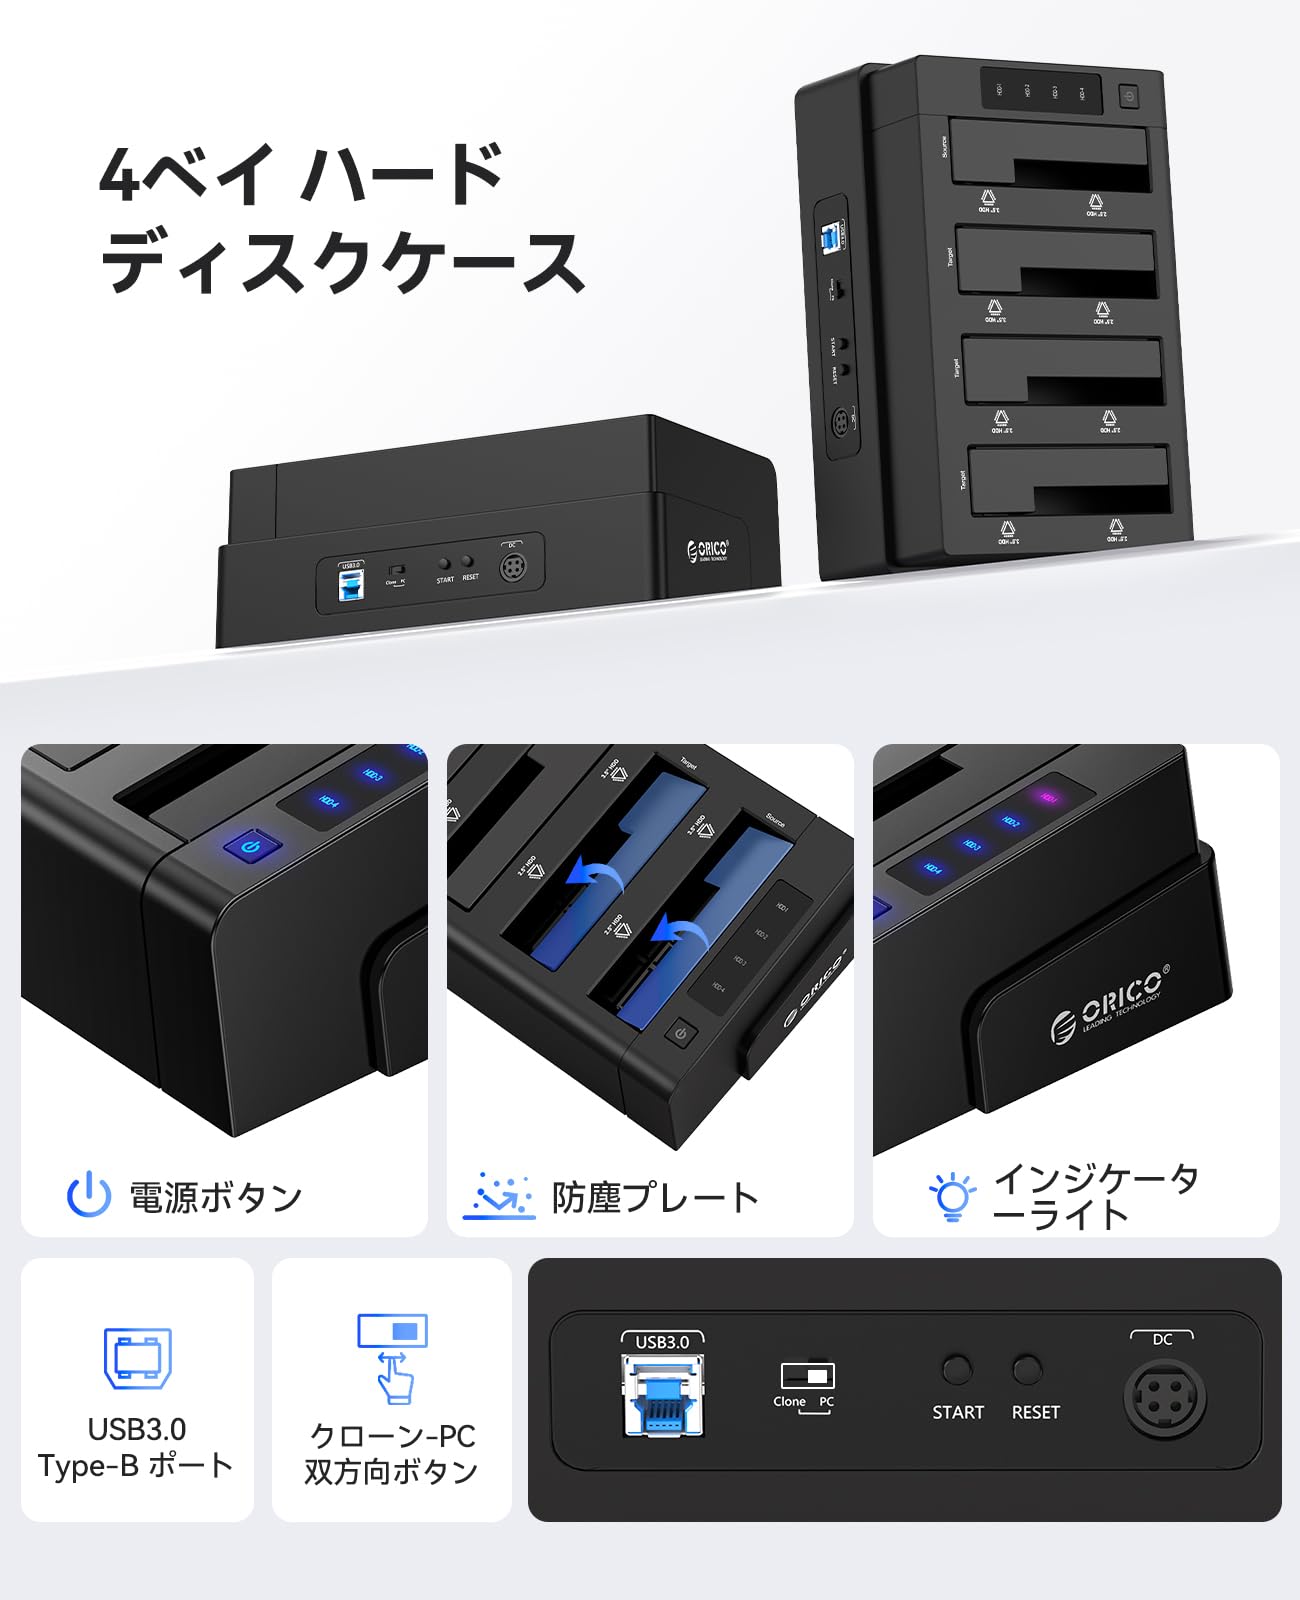
Figure 2: Detailed view of the ORICO 6648US3 enclosure's control panel and rear ports, including the power button, indicator lights, USB3.0 port, clone/PC button, start button, reset button, and DC power input.
- Power Button: Turns the device on/off.
- Dust Cover: Protects drive bays from dust.
- Indicator Lights: Show drive activity and cloning progress.
- USB3.0 Type-B Port: Connects to your computer.
- Clone/PC Button: Toggles between PC mode and clone mode.
- Start Button: Initiates the cloning process.
- Reset Button: Resets the device.
- DC Power Input: Connects to the 12V/6.5A power adapter.
2. Installing Hard Drives/SSDs
The enclosure features a tool-free, inclined design for easy installation and removal of 2.5-inch or 3.5-inch SATA drives.
- Ensure the enclosure is powered off and disconnected from your computer.
- Gently slide your 2.5-inch or 3.5-inch SATA HDD/SSD into an available bay until it firmly connects with the SATA connector.
- Repeat for additional drives as needed. The enclosure supports up to four drives.
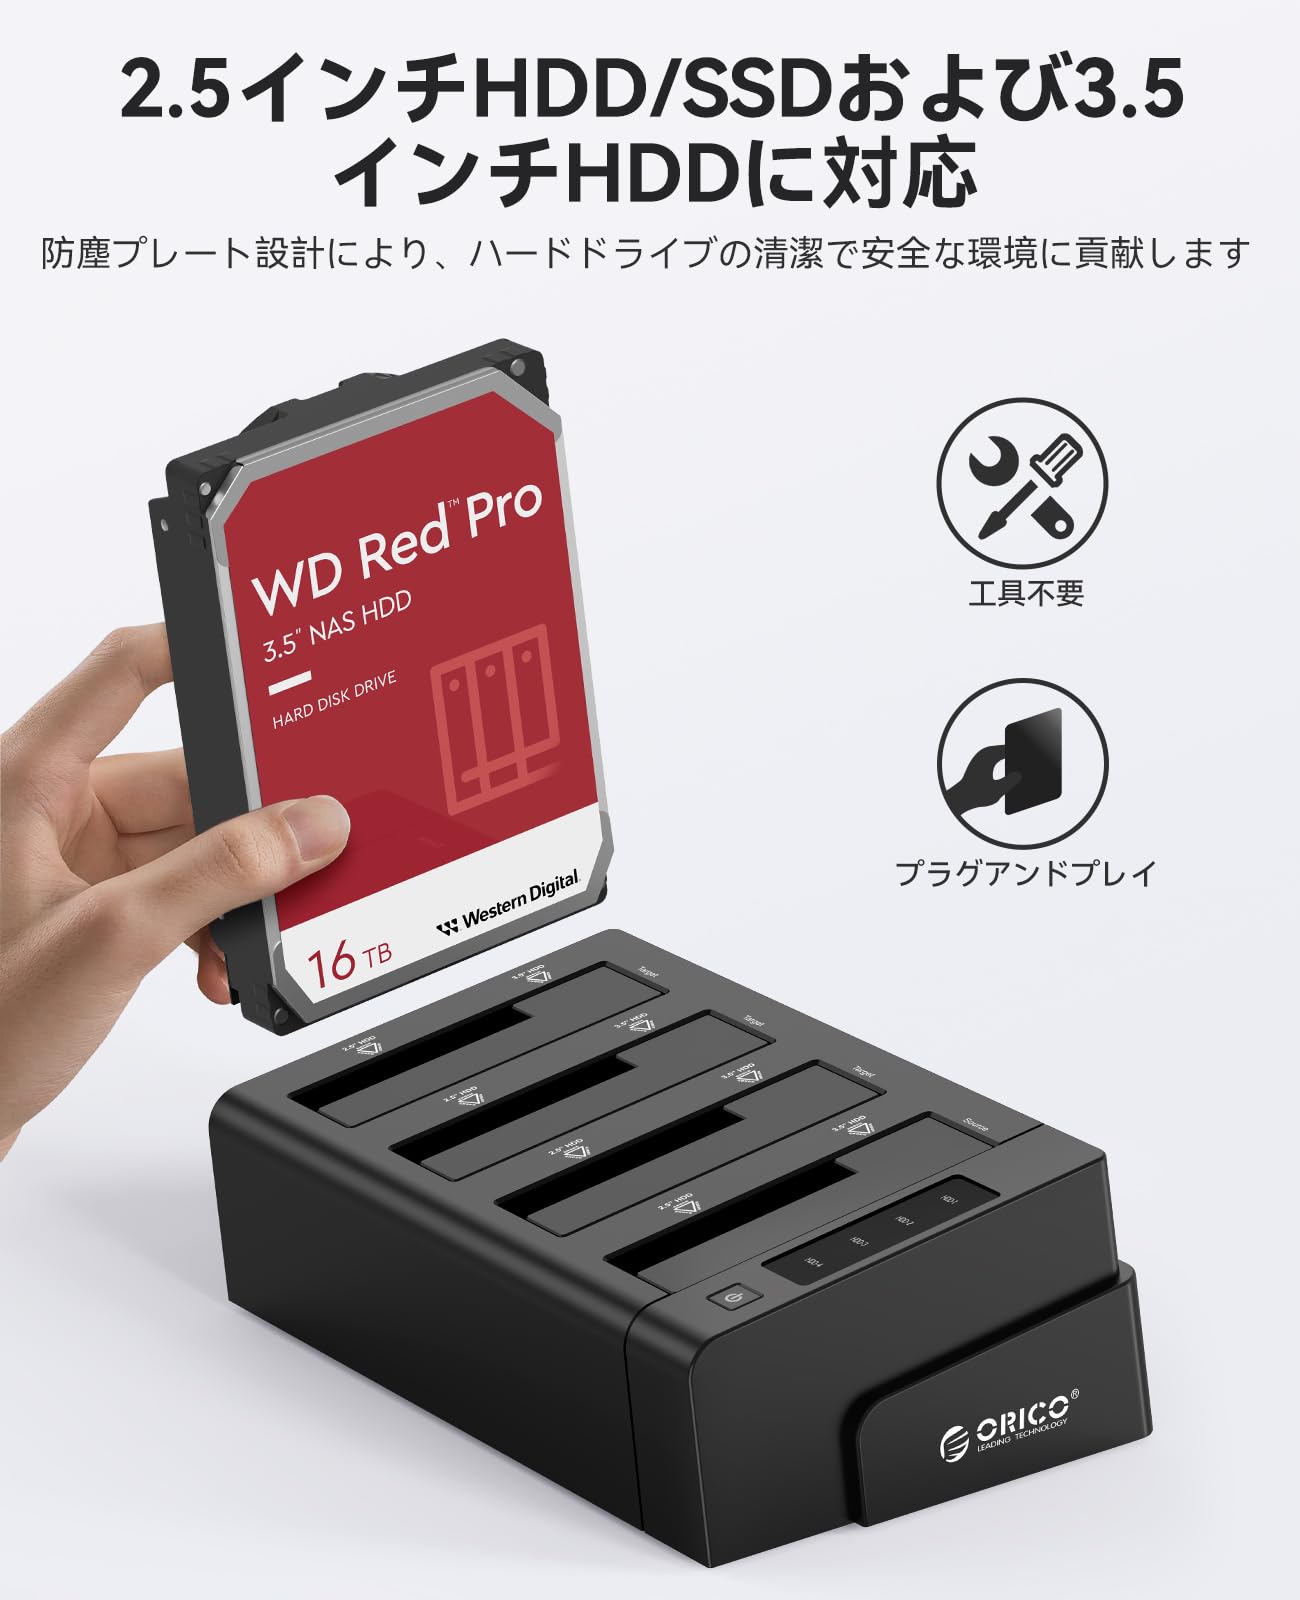
Figure 3: Illustrates the tool-free installation of a 3.5-inch hard drive into one of the enclosure's bays.

Figure 4: The enclosure supports both 2.5-inch and 3.5-inch SATA HDDs/SSDs, highlighting its versatility.
3. Connecting to Power and Computer
- Connect the provided 12V/6.5A power adapter to the DC power input port on the enclosure and then plug it into a power outlet.
- Connect the USB3.0 data cable from the enclosure's USB3.0 Type-B port to an available USB3.0 port on your computer.
- Press the power button on the enclosure to turn it on. The indicator lights will illuminate.
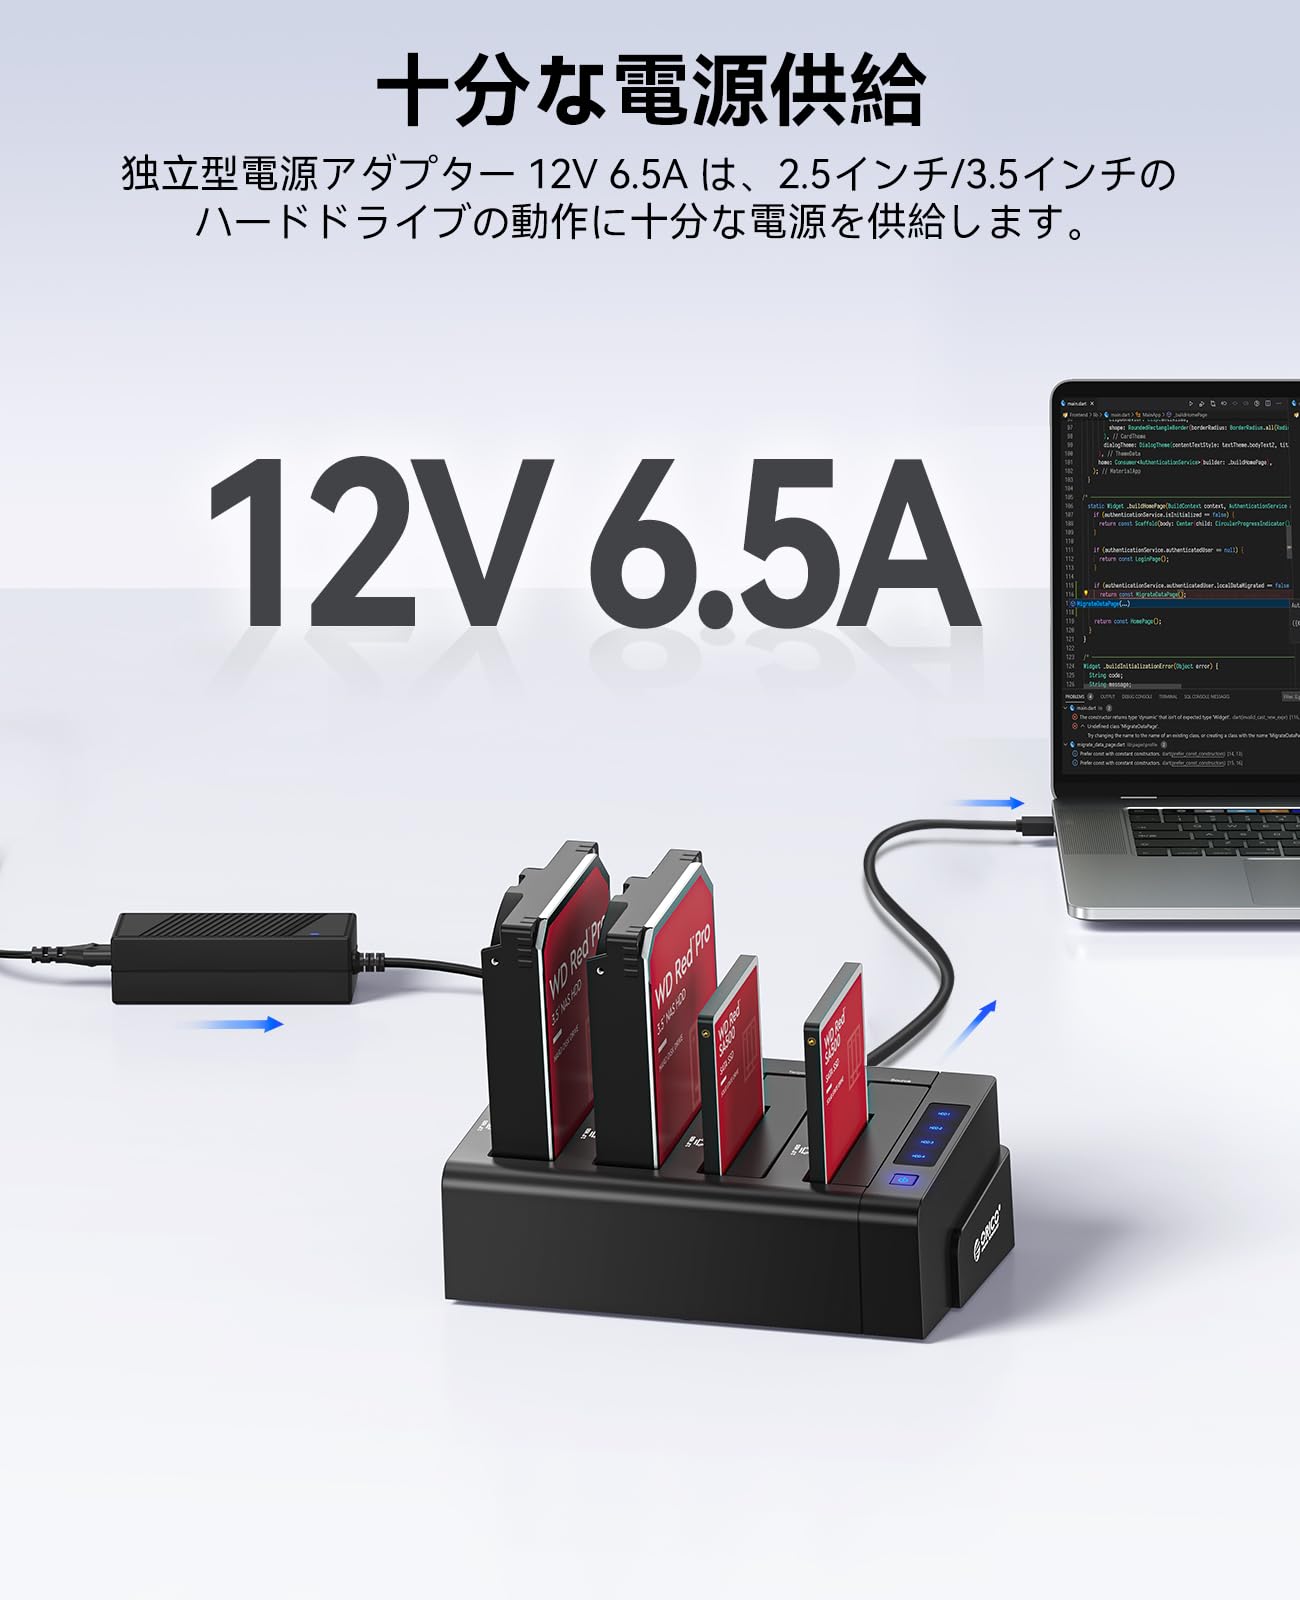
Figure 5: Connecting the enclosure to power and a computer.
The ORICO 6648US3 is driver-free and supports Windows, Mac, and Linux operating systems. Your computer should automatically detect the connected drives.
Operating Instructions
1. PC Mode (Data Transfer)
In PC mode, the enclosure functions as an external multi-bay drive, allowing your computer to access the installed HDDs/SSDs for data storage and retrieval. The maximum data transfer speed is 5Gbps via USB3.0.
- Ensure the enclosure is powered on and connected to your computer via the USB3.0 cable.
- If the drives are new or unformatted, you may need to initialize and format them through your operating system's disk management utility before use. (Refer to "Disk Initialization" section below).
- The drives will appear as separate storage devices on your computer. You can now drag and drop files, or use them for backups.

Figure 6: Demonstrates data transfer in PC mode, achieving speeds up to 5Gbps via USB3.0.
2. Offline Clone Function
The offline clone function allows you to duplicate data from a source drive to up to three target drives without connecting to a computer. This is ideal for creating backups or migrating data.
Important: The capacity of the target drive(s) must be equal to or greater than the source drive. All data on the target drive(s) will be overwritten during the cloning process. Ensure you have backed up any important data on the target drives before proceeding.- Ensure the enclosure is powered off and disconnected from your computer.
- Insert the source drive (the drive you want to copy from) into the first bay (labeled "Source" or "1").
- Insert the target drive(s) (the drive(s) you want to copy to) into the remaining bays (labeled "Target" or "2", "3", "4").
- Power on the enclosure.
- Press and hold the "Clone/PC" button for approximately 3-5 seconds until the indicator lights start flashing.
- Press the "Start" button to begin the cloning process. The indicator lights for each bay will show the cloning progress (25%, 50%, 75%, 100%).
- Once all indicator lights are solid, the cloning process is complete. Power off the enclosure before removing the drives.
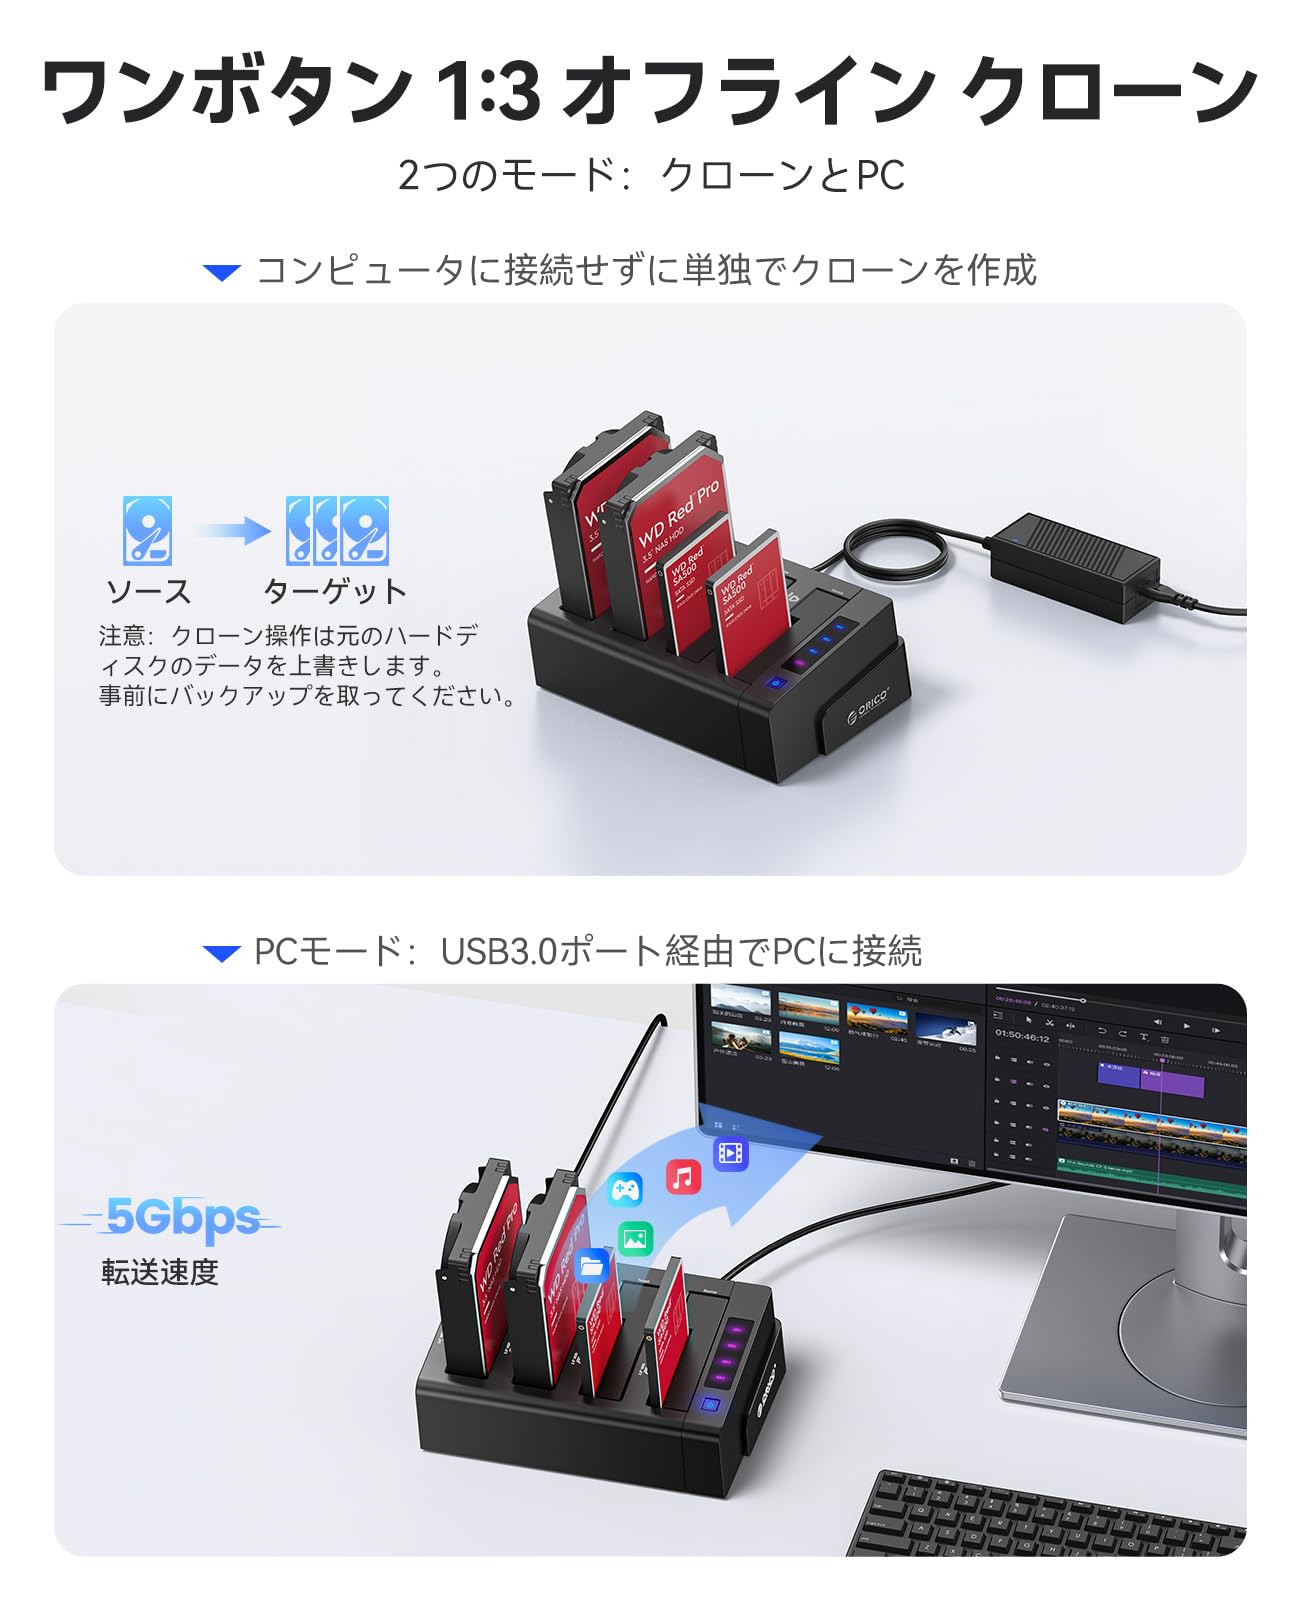
Figure 7: Offline clone function setup.
3. Disk Initialization (for new or unformatted drives)
If you are using new drives or drives that have not been formatted, they will not appear in your computer's file explorer until initialized and formatted. This process is performed via your operating system's Disk Management utility.
- Connect the enclosure to your computer and power it on.
- Open Disk Management:
- Windows: Right-click on "This PC" (or "My Computer"), select "Manage", then "Disk Management".
- Mac: Go to Applications > Utilities > Disk Utility.
- Locate the uninitialized drive(s). They will typically be marked as "Unknown" or "Not Initialized".
- Right-click on the uninitialized drive and select "Initialize Disk". Choose GPT (GUID Partition Table) for drives larger than 2TB, or MBR (Master Boot Record) for drives 2TB or smaller.
- After initialization, right-click on the "Unallocated" space of the drive and select "New Simple Volume" (Windows) or "Erase" (Mac) to create a partition and format it. Follow the on-screen prompts to assign a drive letter and choose a file system (e.g., NTFS for Windows, HFS+ or APFS for Mac).
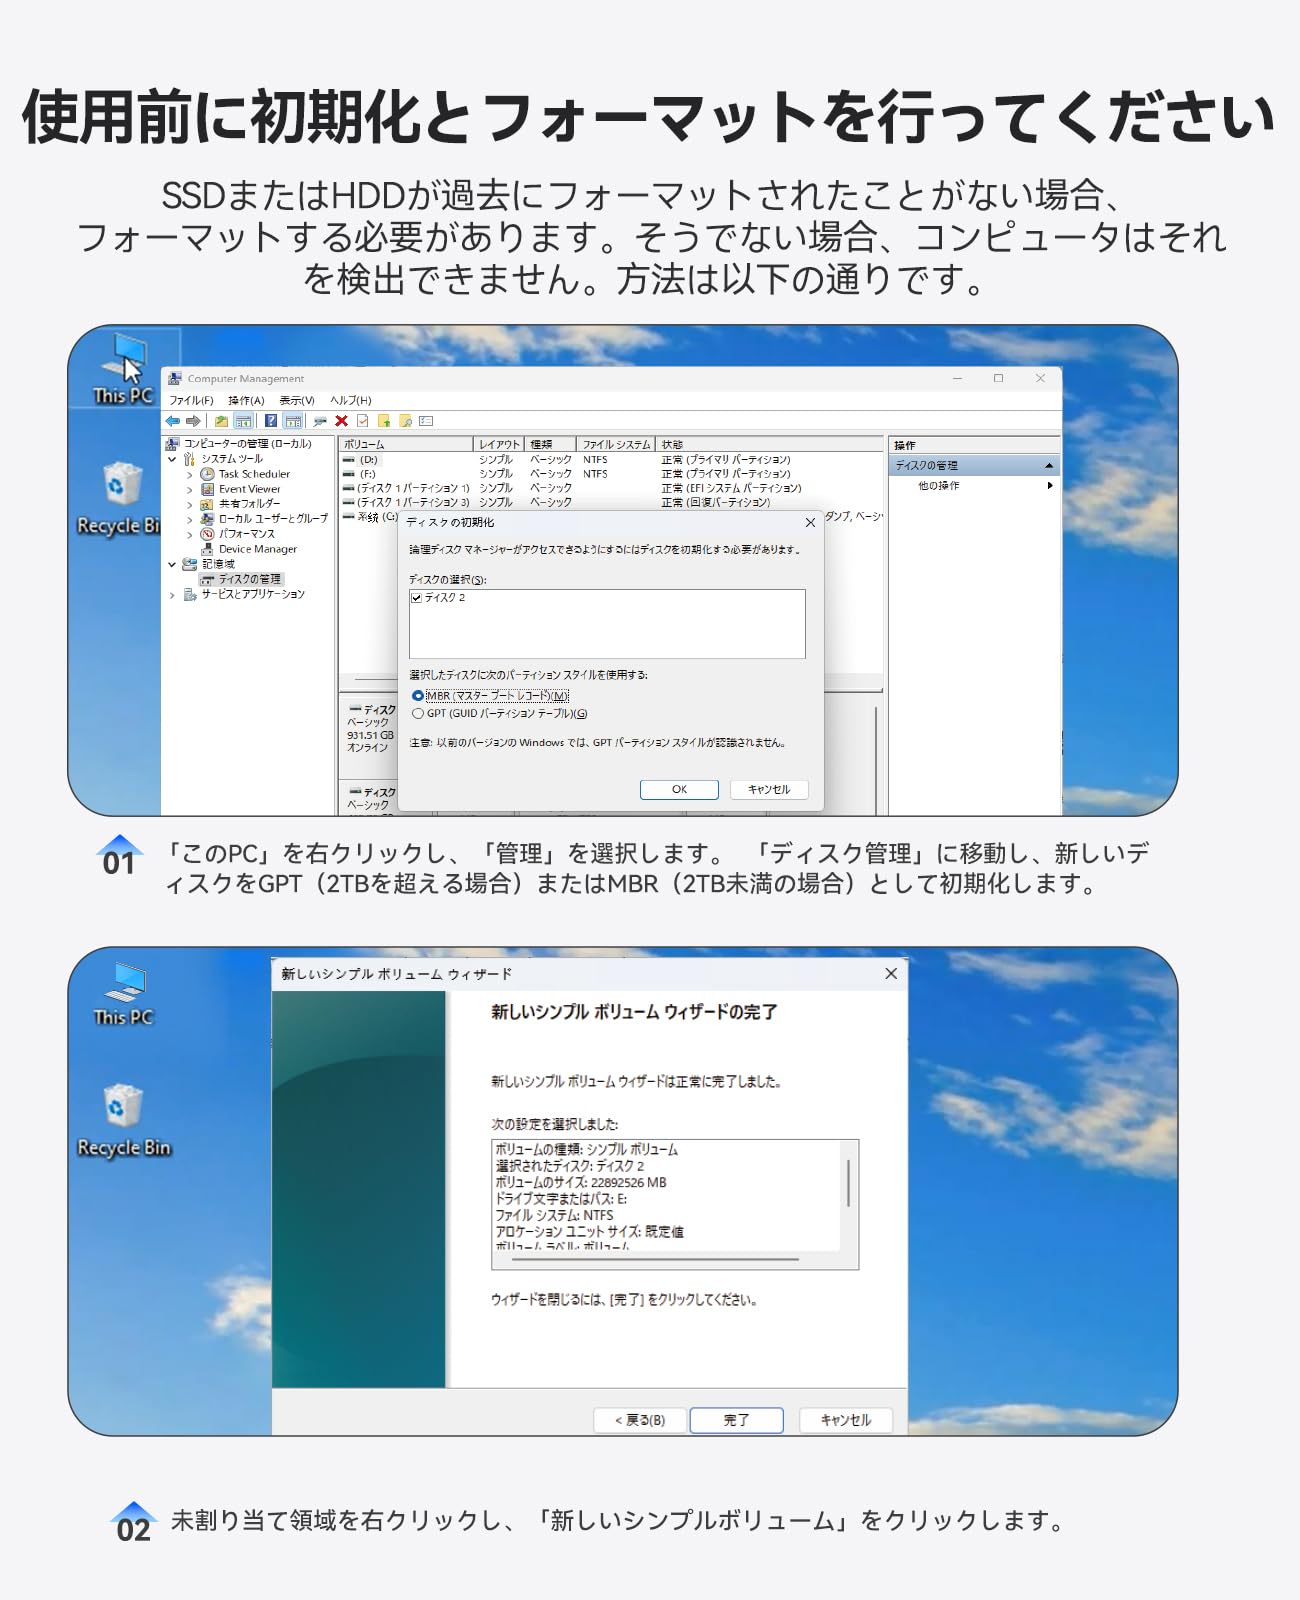
Figure 8: Steps for initializing and formatting a new hard drive using Windows Disk Management.
Maintenance
- Cleaning: Use a soft, dry cloth to clean the exterior of the enclosure. Do not use liquid cleaners or solvents.
- Heat Dissipation: The stand-type design promotes good heat dissipation. Ensure the enclosure is placed in a well-ventilated area and that the vents are not obstructed.
- Dust Protection: The dust covers help protect the drive bays. Keep them in place when drives are not inserted.
- Safe Removal: Always safely eject or unmount drives from your operating system before powering off the enclosure or physically removing drives to prevent data corruption.
- Power Supply: Use only the provided 12V/6.5A power adapter to ensure stable operation and prevent damage.

Figure 9: The enclosure features a design optimized for plug-and-play use and efficient heat dissipation.
Troubleshooting
| Problem | Possible Cause | Solution |
|---|---|---|
| Enclosure does not power on. | Power adapter not connected or faulty. | Ensure the power adapter is securely connected to both the enclosure and a working power outlet. Try a different outlet. |
| Drives not detected by computer. |
|
|
| Offline clone fails or does not start. |
|
|
| Slow data transfer speed. |
|
|
Specifications
| Feature | Detail |
|---|---|
| Brand | ORICO |
| Model | 6648US3 |
| Color | Black |
| Compatible Drives | 2.5-inch / 3.5-inch SATA HDD/SSD |
| Number of Bays | 4 |
| Max Capacity per Bay | 10TB (Total 40TB) |
| Connectivity Interface | USB3.0 Type-B |
| Data Transfer Rate | Up to 5Gbps (USB3.0) |
| Power Adapter | 12V/6.5A (78W) |
| Material | ABS (Acrylonitrile Butadiene Styrene) |
| Dimensions (L x W x H) | 21.7 cm x 14.2 cm x 8 cm |
| Compatible OS | Windows, Mac, Linux |
| Special Features | Offline Clone Function, Hot-Swap, Tool-Free Installation, Anti-slip pads |
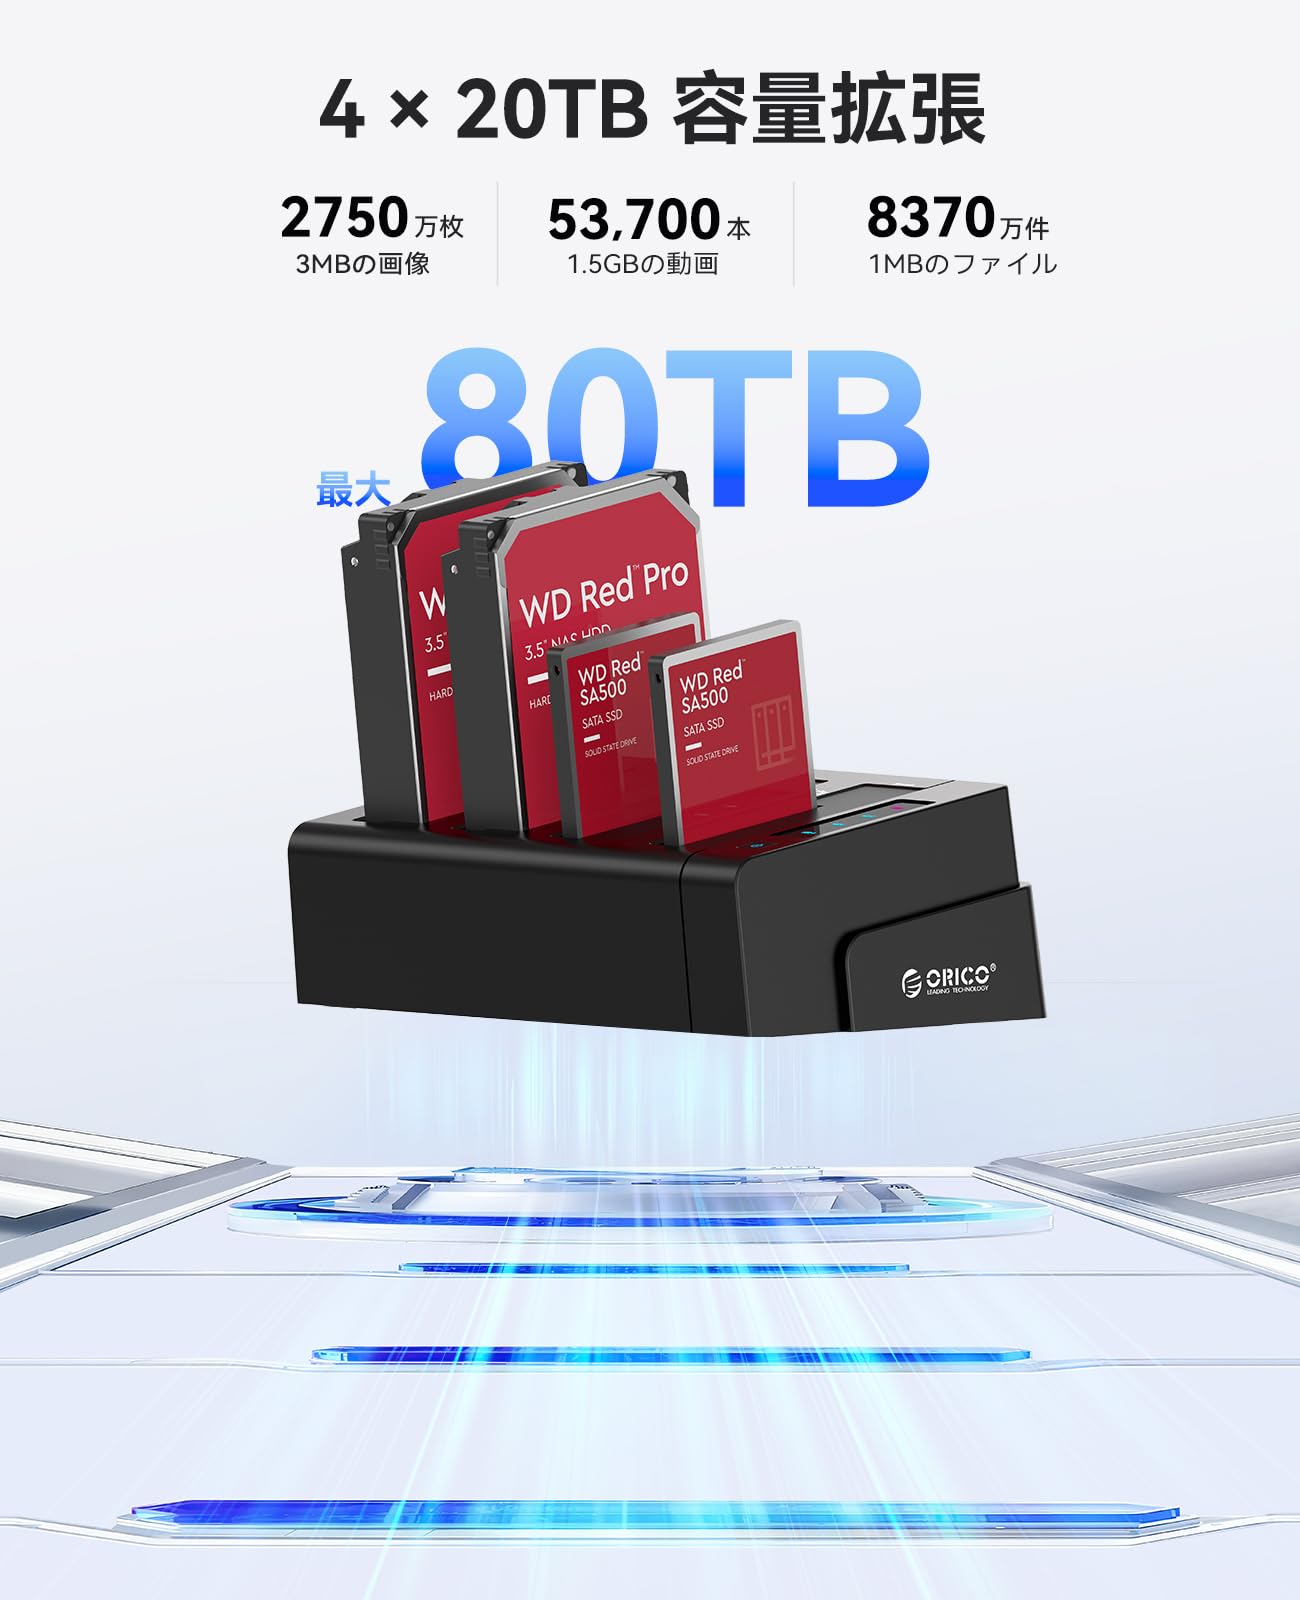
Figure 10: The enclosure supports four drives, each up to 10TB, for a total capacity of 40TB. (Note: The image visually suggests 20TB per drive, but product specifications confirm 10TB per drive.)
Warranty and Support
The ORICO 6648US3 HDD/SSD Enclosure comes with a 12-month warranty from the date of purchase. This warranty covers manufacturing defects and malfunctions under normal use.
For technical support, warranty claims, or any inquiries regarding your product, please contact ORICO customer service through the retailer where you purchased the product or visit the official ORICO website for contact information.
Please retain your proof of purchase for warranty validation.


