
1. Introduction
This manual provides detailed instructions for the safe and effective use of your TRIOCOTTAGE Automatic Egg Incubator. Designed for hatching various poultry eggs, this incubator features automatic egg turning, a built-in egg candler, and precise temperature and humidity control. Please read this manual thoroughly before operation.
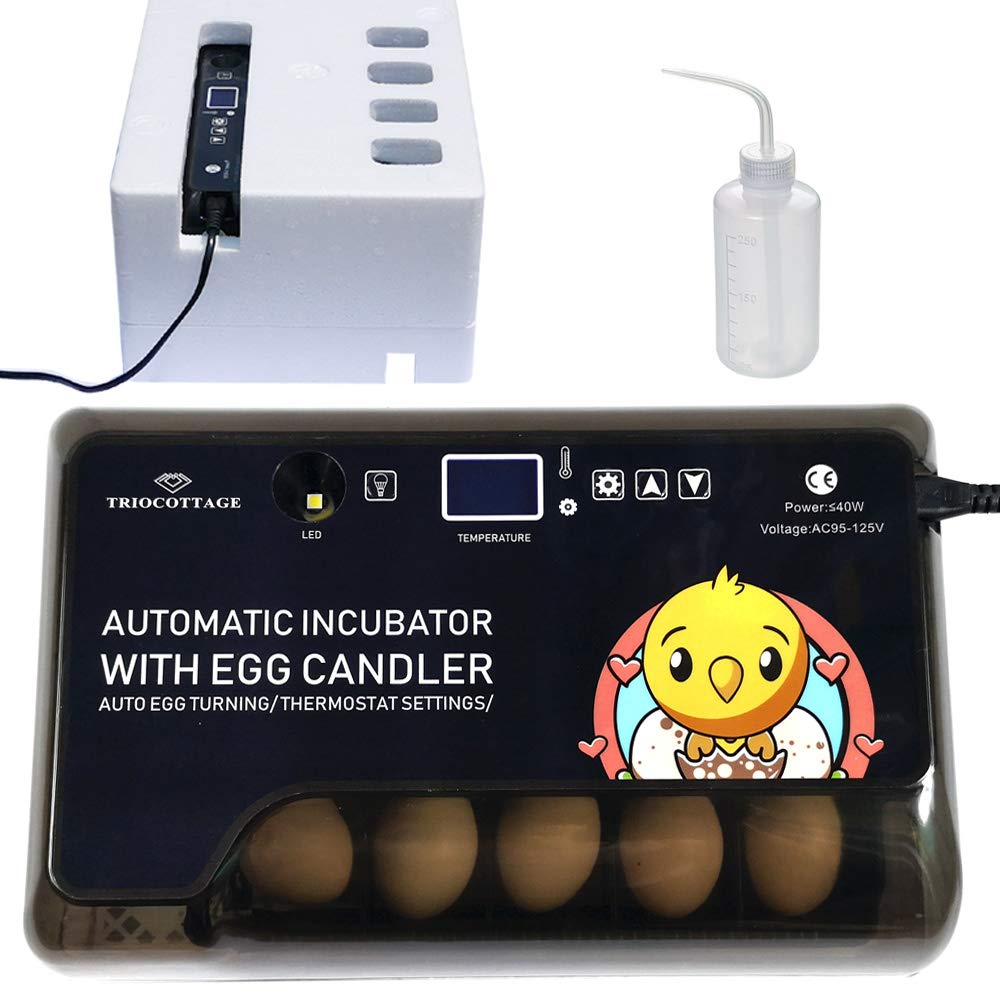
Figure 1: TRIOCOTTAGE Automatic Egg Incubator
Key Features:
- Automatic Egg Turner: Ensures eggs are turned regularly for optimal development.
- Built-in Egg Candler: Allows for easy observation of embryo development.
- Humidity Monitor: Helps maintain appropriate humidity levels.
- Limit Alarm: Alerts users to deviations in environmental conditions.
- Durable Construction: Made from Acrylonitrile Butadiene Styrene (ABS) for long-lasting use.
- Compact Size: Small digital chick hatcher fits easily.
- Easy to Use: Digital display shows temperature and humidity levels for precise control.
2. Product Components
Familiarize yourself with all components before assembly and operation.

Figure 2: Exploded View of Incubator Components
The package includes:
- Insulation Styrofoam Upper Cover
- Incubator Cover and Host
- Egg Turner
- Tray
- Stepped Sinks (Water Container)
- Insulation Styrofoam Bottom Cover
- Hygrometer
- Power Cable
- Water Bottle
- Storage Bag
3. Setup Instructions
Follow these steps to set up your incubator:
- Place the insulation styrofoam bottom cover on a stable, level surface.
- Insert the stepped sinks (water container) into the bottom cover.
- Place the white grid tray on top of the stepped sinks.
- Position the egg turner tray on the white grid tray. Ensure the rocker of the shaft wheel is inserted into the sliding groove of the egg tray for automatic turning functionality.
- Carefully place the eggs into the egg turner.
- Place the incubator cover and host on top, ensuring it is securely seated.
- Connect the power cable to the incubator and then to a power outlet. The automatic turner will activate briefly upon connection.
Video 1: Assembly demonstration of the TRIOCOTTAGE incubator. This video demonstrates the step-by-step assembly process of the TRIOCOTTAGE Automatic Egg Incubator, showing how to place the components correctly.

Figure 3: Automatic Egg Turning Mechanism
4. Operating Instructions
4.1 Temperature and Humidity Control
The incubator features a digital display for monitoring temperature and humidity. Maintain stable conditions for successful hatching.

Figure 4: Adjustable Humidity Levels and Water Bottle
Use the provided water bottle to add water to the stepped sinks to adjust humidity. The incubator supports three levels of humidity:
- Low humidity: 50%~70%
- Medium humidity: 70%~85%
- High humidity: above 85%
The built-in fan ensures forced air circulation for even heat distribution, which is crucial for embryo development.

Figure 5: Forced Air Circulation
4.2 Automatic Egg Turning
The incubator automatically turns eggs every two hours. This feature mimics natural incubation and prevents the embryo from sticking to the shell.
Video 2: TRIOCOTTAGE Incubator with Auto Turner. This video provides an overview of the TRIOCOTTAGE incubator's features, including the automatic egg turner, and shows eggs during the incubation process.
4.3 Egg Candling
Use the built-in LED egg candler to observe the development of the embryo without disturbing the incubation process. This is best done in a dark room.

Figure 6: Built-in Egg Candler in use
5. Egg Capacity Guidelines
The incubator can accommodate various types and sizes of poultry eggs. The capacity varies depending on whether the automatic egg turner is used.

Figure 7: Egg Capacity for Various Poultry Eggs
Capacity with Automatic Turner:
- Chicks: 8~12 eggs
- Quails: 24~35 eggs
- Ducks: 8 eggs
- Geese: 1~3 eggs
Capacity with Manual Turning (Turner Removed):
- Chicks: 26~34 eggs
- Quails: 54~68 eggs
- Ducks: 18~22 eggs
- Geese: 8~10 eggs
Note: When placing giant eggs (e.g., goose eggs), ensure at least 1.4 inches of space between the eggs and the ends of the turner to allow for proper rotation. If you remove the turner to hatch more eggs, you must manually turn the eggs at least twice a day.
Video 3: How many eggs the incubator fits. This video illustrates the egg capacity of the incubator for different sizes of eggs, including goose eggs, and explains how to adjust for larger eggs.
6. Maintenance and Storage
Proper maintenance ensures the longevity and effectiveness of your incubator.
- After each incubation cycle, thoroughly clean all components.
- Air-dry all accessories completely before storage.
- Store the incubator and its components in a dry, clean place.
- The included styrofoam insulation helps maintain stable temperatures, especially in cooler environments. Keep it for future use.

Figure 8: Temperature Stabilizer (Styrofoam)
7. Troubleshooting
If you encounter issues with your incubator, consider the following general troubleshooting steps:
- No Power: Check the power cable connection and ensure the outlet is functional.
- Incorrect Temperature/Humidity: Verify settings and ensure the water reservoir has sufficient water. Consider using an external thermometer/hygrometer for cross-verification.
- Egg Turner Not Functioning: Ensure the shaft wheel is correctly engaged in the egg tray's sliding groove.
- Poor Hatch Rate: Review incubation parameters (temperature, humidity, turning frequency) against recommended values for your specific egg type. Ensure eggs are fertile and stored correctly before incubation.
For persistent issues, refer to the warranty and support information.
8. Specifications
| Feature | Detail |
|---|---|
| Item Weight | 2.65 Pounds |
| Manufacturer | Triocottage |
| Material | Acrylonitrile Butadiene Styrene (ABS) |
| Product Dimensions (L x W x H) | 12.6" x 8.27" x 4.92" |
| First Available Date | March 18, 2021 |
9. Warranty and Support
TRIOCOTTAGE provides the following after-sales support for your incubator:
- Free replacement or refund within 90 days in case of any failure.
- Free repair within one year.
For further assistance or to claim warranty, please contact TRIOCOTTAGE customer service through your purchase platform.