1. Introduction
Thank you for purchasing the Wendry Smart Projector. This portable LED projector is designed to provide a versatile viewing experience for both indoor and outdoor entertainment. This manual will guide you through the setup, operation, and maintenance of your new projector to ensure optimal performance.
2. Package Contents
Please verify that all items listed below are included in your package:
- Wendry Smart Projector Unit
- Remote Control
- Power Adapter
- AV Cable (3-in-1 RCA)
- HDMI Cable
- User Guide
- Cleaning Cloth
- 100-inch Projection Screen
- Wall Mount Hooks for Screen

Figure 2.1: Wendry Smart Projector and included accessories.
3. Product Features
- High-Definition Display: Supports 720P and 1080P resolution for clear and natural images.
- Portability: Small and lightweight design for easy transport and setup.
- Brightness: 3000 lumens for vibrant presentations.
- Multiple Connectivity Options: Includes HDMI, AV, VGA, USB, and Micro SD card slots.
- Integrated Audio: Features a built-in speaker and a headphone jack for external audio.
- Adjustable Projection: Manual focus adjustment, aspect ratio selection (16:9 to 4:3), and a projection distance of 1.0-2.8 meters.
- Long-Life Lamp: Equipped with RGB lamps offering up to 30,000 hours of operational life.

Figure 3.1: High-definition display capabilities.

Figure 3.2: Multiple input interfaces for diverse media devices.
4. Setup
4.1. Initial Placement
Place the projector on a stable, flat surface. Ensure there is adequate ventilation around the unit.
4.2. Power Connection
- Connect the power adapter to the DC IN port on the projector.
- Plug the power adapter into a suitable electrical outlet.
4.3. Connecting Input Sources
Connect your desired media device (e.g., laptop, TV box, game console, USB drive) to the projector using the appropriate port:
- HDMI: For high-definition video and audio.
- USB: For playing media files directly from a USB flash drive.
- AV: For standard definition video and audio using the included AV cable.
- VGA: For connecting older computers or devices.
- Micro SD: For playing media files directly from a Micro SD card.
4.4. Setting Up the Projection Screen
The included 100-inch projection screen can be mounted using the provided hooks and adhesive stickers. Follow the instructions on the screen packaging for proper installation.
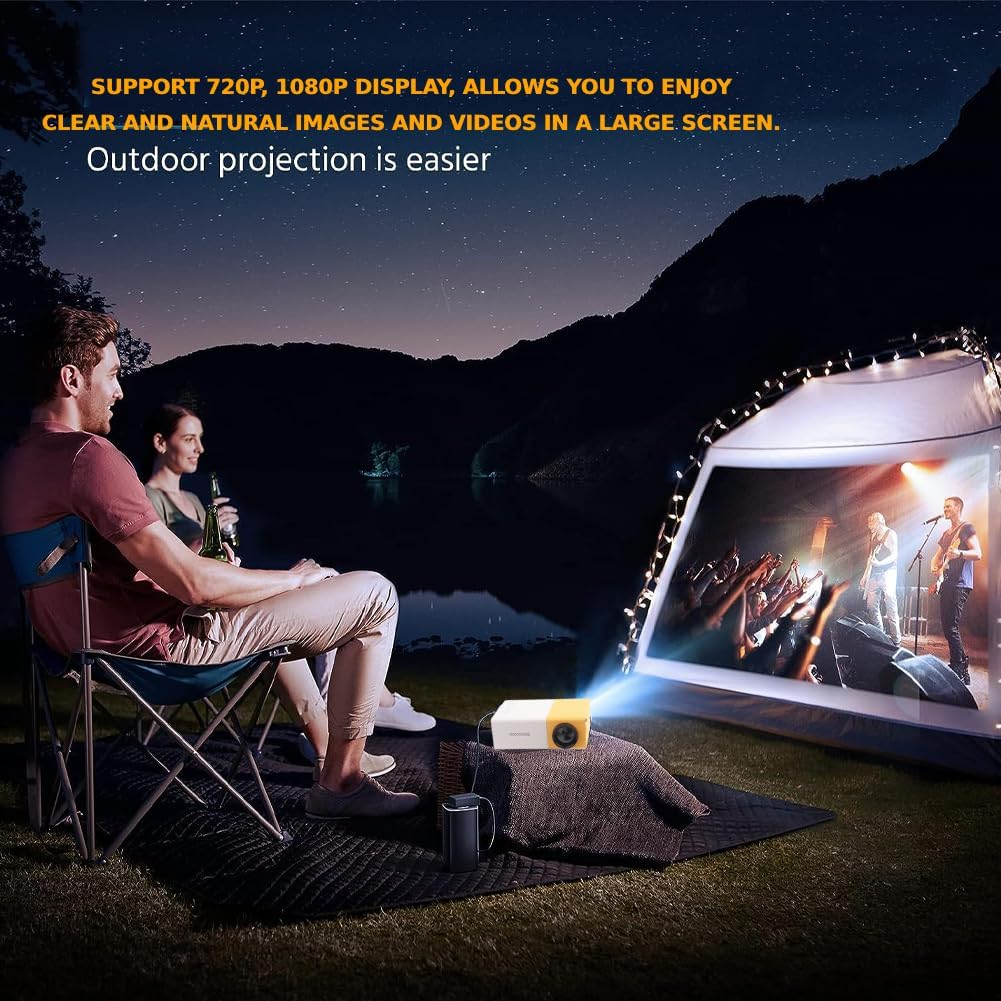
Figure 4.1: Example of outdoor projection setup.
5. Operating Instructions
5.1. Power On/Off
Press the power button on the projector or the remote control to turn the unit on or off.
5.2. Adjusting Focus
Rotate the focus ring located on the projector lens until the image on the screen appears clear and sharp.

Figure 5.1: Adjusting projection for optimal viewing.
5.3. Selecting Input Source
Use the 'Source' button on the remote control or the projector's control panel to cycle through available input sources (USB, TF, HDMI, AV, VGA).
5.4. Menu Navigation and Volume Control
Use the arrow keys and 'OK' button on the remote control or projector to navigate through menus and make selections. Adjust the volume using the dedicated volume buttons on the remote.
5.5. Aspect Ratio Adjustment
The projector supports aspect ratio adjustments from 16:9 to 4:3. Refer to the on-screen menu for specific settings.
6. Maintenance
6.1. Cleaning the Lens
Gently wipe the projector lens with the provided cleaning cloth or a soft, lint-free cloth. Avoid using abrasive materials or harsh chemicals that could damage the lens.
6.2. General Cleaning
Wipe the exterior of the projector with a soft, dry cloth. Ensure ventilation vents are clear of dust and debris to prevent overheating.
7. Troubleshooting
If you encounter issues with your projector, please refer to the following common solutions:
- No Power: Ensure the power adapter is securely connected to both the projector and the electrical outlet.
- No Image: Verify that the correct input source is selected. Check all cable connections (HDMI, AV, VGA, USB).
- Blurry Image: Adjust the focus ring on the projector lens. Ensure the projection surface is flat and the projector is at an appropriate distance.
- No Sound: Check the volume settings on both the projector and the connected media device. If using external speakers, ensure they are properly connected.
- Remote Control Not Working: Ensure batteries are correctly inserted and functional. Point the remote directly at the projector's IR receiver.
For further assistance, please consult the full user guide or contact customer support.
8. Specifications
| Feature | Specification |
|---|---|
| Product Dimensions | 5 x 3.21 x 1.91 inches |
| Item Weight | 1.01 pounds |
| Model Number | Wendry0fw4c39u5i-01 |
| Display Resolution | 320 x 240 (Native), Supports 720P/1080P |
| Connectivity Technology | HDMI, USB, VGA, AV, Micro SD |
| Special Feature | Lightweight, Portable |
| Recommended Uses | Gaming, Home Cinema, Outdoor Recreation |
| Lamp Life | 30,000 hours (RGB LED) |
| Brightness | 3000 lumens |