1. Introduction
This manual provides essential information for the safe and efficient operation of your Eurom DryBest 30 WiFi dehumidifier. Please read these instructions carefully before use and retain them for future reference. This appliance is designed to reduce humidity levels in indoor environments, improving air quality and preventing issues related to excessive moisture.
2. Safety Instructions
Always observe the following safety precautions to reduce the risk of fire, electric shock, or injury.
- Ensure the power supply voltage matches the rating label on the unit.
- Do not operate the dehumidifier with a damaged cord or plug.
- Keep the appliance away from heat sources, direct sunlight, and flammable materials.
- Do not block the air inlet or outlet. Maintain at least 20 cm clearance around the unit.
- Never insert objects into the air vents.
- Unplug the unit before cleaning, maintenance, or when not in use.
- Do not use the appliance in bathrooms or other excessively wet environments where it could come into contact with water.
- This appliance is not intended for use by persons (including children) with reduced physical, sensory or mental capabilities, or lack of experience and knowledge, unless they have been given supervision or instruction concerning use of the appliance by a person responsible for their safety.
- Children should be supervised to ensure that they do not play with the appliance.
- If the supply cord is damaged, it must be replaced by the manufacturer, its service agent, or similarly qualified persons to avoid a hazard.
3. Product Overview
The Eurom DryBest 30 WiFi is a powerful and efficient dehumidifier designed for domestic use. It features a quiet operation and can be controlled via WiFi for convenience.
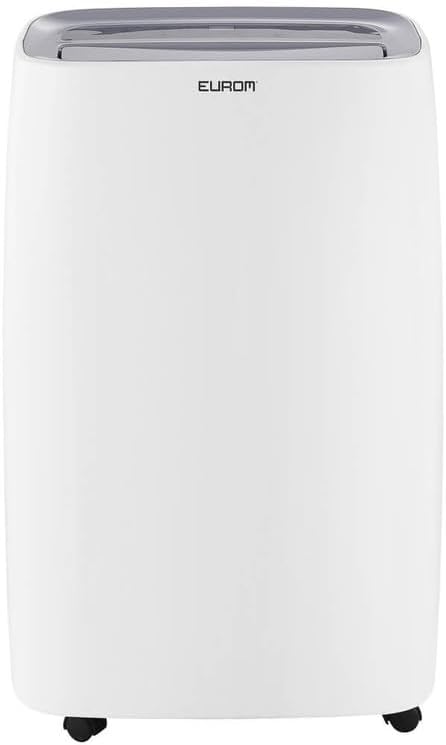
Figure 3.1: Front view of the Eurom DryBest 30 WiFi dehumidifier. This image displays the unit's overall appearance, highlighting its modern white casing and integrated handles for portability.
3.1 Main Components
- Control Panel: Located on the top of the unit for easy access to settings and indicators.
- Air Outlet: Top-mounted grille for expelling dry air.
- Air Inlet/Filter: Rear-mounted for drawing in humid air, equipped with a removable air filter.
- Water Tank: Removable tank for collecting condensed water.
- Continuous Drain Outlet: Port for connecting a hose for continuous drainage.
- Casters: Wheels at the base for easy movement.
4. Setup
4.1 Unpacking
- Carefully remove the dehumidifier from its packaging.
- Remove all packing materials, including any tape or protective films.
- Inspect the unit for any signs of damage. If damaged, do not operate and contact your retailer.
4.2 Placement
- Place the dehumidifier on a firm, level surface to prevent vibration and water leakage.
- Ensure there is at least 20 cm (8 inches) of space around the unit for proper airflow. Do not place it against a wall or furniture that could obstruct the air inlets or outlets.
- For optimal performance, place the unit in the center of the room or area requiring dehumidification.
- Avoid placing the unit near heat-generating appliances or in direct sunlight.
4.3 Power Connection
- Plug the power cord into a grounded electrical outlet.
- Ensure the outlet meets the electrical requirements of the unit (230V, 50Hz).
4.4 Drainage Options
The dehumidifier offers two drainage methods: manual tank emptying or continuous drainage.
4.4.1 Manual Drainage (Water Tank)
- When the water tank is full, the "FULL" indicator light will illuminate, and the unit will automatically stop operating.
- Carefully pull out the water tank from the front of the unit.
- Empty the collected water.
- Slide the empty water tank back into its position until it clicks securely. The unit will resume operation.
4.4.2 Continuous Drainage
- For continuous operation without emptying the tank, connect a suitable drain hose (not included) to the continuous drain outlet at the back of the unit.
- Ensure the hose is sloped downwards to allow gravity to drain the water into a floor drain or larger container.
- Verify that the hose connection is secure to prevent leaks.
4.5 WiFi Setup
The DryBest 30 WiFi can be controlled remotely via a smartphone app.
- Download the "Eurom Smart" app (or similar specified app) from your device's app store.
- Follow the in-app instructions to register an account and add your dehumidifier.
- Ensure your dehumidifier is powered on and the WiFi indicator light is blinking, indicating pairing mode.
- Once connected, the WiFi indicator light will become solid.
5. Operating Instructions

Figure 5.1: Control Panel of the Eurom DryBest 30 WiFi. This image details the various buttons and indicators for operating the dehumidifier.
5.1 Control Panel Overview
- POWER Button: Turns the unit on or off.
- MODE Button: Cycles through operating modes (e.g., Auto, Continuous, Laundry).
- UP/DOWN Buttons: Adjust desired humidity level or timer settings.
- SPEED Button: Selects fan speed (High, Low).
- TIMER Button: Sets the auto-on or auto-off timer.
- SWING Button: Activates or deactivates the oscillating air outlet.
- PUMP Button: Activates the internal pump for continuous drainage (if applicable and hose connected).
- LOCK Button: Child lock function to prevent accidental changes.
- WIFI Indicator: Shows WiFi connection status.
- FULL Indicator: Illuminates when the water tank is full.
- LAUNDRY Indicator: Illuminates when Laundry mode is active.
- FAN Indicator: Illuminates when fan is operating.
5.2 Basic Operation
- Power On: Press the POWER button. The unit will start in its default or last-used mode.
- Set Desired Humidity: Use the UP and DOWN buttons to set the target humidity level (e.g., 40% - 60% relative humidity is generally recommended). The unit will operate until this level is reached, then cycle on and off to maintain it.
- Select Mode: Press the MODE button to choose between different operating modes.
- Auto Mode: The unit automatically adjusts operation based on the ambient humidity.
- Continuous Mode: The unit runs continuously regardless of humidity level. Ideal for very damp conditions or for use with continuous drainage.
- Laundry Mode: Designed to quickly dry clothes indoors. The unit operates at high fan speed and continuous dehumidification.
- Adjust Fan Speed: Press the SPEED button to toggle between High and Low fan speeds.
- Set Timer: Press the TIMER button, then use UP and DOWN to set the desired operating duration (e.g., 2 hours, 4 hours).
- Swing Function: Press the SWING button to activate the oscillating louvers, distributing dry air more evenly.
- Child Lock: Press and hold the LOCK button for a few seconds to activate/deactivate the child lock.
- Power Off: Press the POWER button again to turn off the unit.

Figure 5.2: Dehumidifier in use, illustrating its application for drying laundry. The image shows the unit positioned near a clothes rack, indicating its effectiveness in reducing drying times indoors.
6. Maintenance
Regular maintenance ensures optimal performance and extends the lifespan of your dehumidifier.
6.1 Cleaning the Air Filter
The air filter should be cleaned every two weeks or more frequently depending on usage and air quality.
- Unplug the dehumidifier from the power outlet.
- Remove the air filter from the back of the unit.
- Gently vacuum any dust or debris from the filter. For heavy dirt, wash the filter with lukewarm water and a mild detergent.
- Rinse thoroughly and allow the filter to air dry completely before reinstalling. Do not expose to direct sunlight or high heat.
- Reinsert the dry filter into the unit.
6.2 Cleaning the Water Tank
Clean the water tank regularly to prevent mold and mildew growth.
- Unplug the unit.
- Remove and empty the water tank.
- Wash the tank with warm water and a mild detergent. Rinse thoroughly.
- Dry the tank completely before placing it back into the unit.
6.3 Storage
If the dehumidifier will not be used for an extended period:
- Unplug the unit and empty the water tank.
- Clean the air filter and the exterior of the unit.
- Allow the unit to dry for at least 24 hours in a well-ventilated area to prevent mold growth inside.
- Store the dehumidifier upright in a cool, dry place, away from direct sunlight and extreme temperatures.
7. Troubleshooting
Before contacting customer support, please refer to the following troubleshooting guide for common issues.
| Problem | Possible Cause | Solution |
|---|---|---|
| Unit does not turn on. | No power, power cord loose, water tank full. | Check power connection, ensure tank is empty and correctly inserted. |
| No water collected / Low dehumidification. | Humidity level too low, air filter clogged, room temperature too low, unit size too small for area. | Increase desired humidity setting, clean air filter, ensure room temperature is above 5°C (41°F), close doors/windows. |
| Unit is noisy. | Unit not on a level surface, air filter clogged. | Place on a flat, stable surface. Clean air filter. |
| Water leaks from unit. | Water tank not inserted correctly, continuous drain hose loose or blocked. | Reinsert water tank properly. Check continuous drain hose for secure connection and obstructions. |
| WiFi connection issues. | Incorrect app, poor WiFi signal, incorrect pairing procedure. | Ensure correct app is used, check router and signal strength, repeat WiFi setup steps. |
8. Specifications
| Feature | Specification |
|---|---|
| Model Name | DryBest 30 WiFi |
| Reference Number | 1052 |
| Brand | Eurom |
| Dehumidification Capacity | 30 Liters/24 hours |
| Power Consumption | 580 W |
| Airflow Capacity | 350 m³/hour |
| Noise Level | <47 dBA |
| Dimensions (L x W x H) | 64.2 x 43.1 x 30.1 cm |
| Weight | 15.5 kg |
| Water Tank Volume | 6 Liters / 10 Liters (depending on mode/configuration) |
| Special Features | Silent operation, Adjustable humidity control, WiFi connectivity |
| Recommended Use | Domestic |
| Color | White |
9. Warranty and Support
For warranty information, please refer to the terms and conditions provided at the time of purchase or contact your retailer. If you encounter any issues not covered in the troubleshooting section, or require further assistance, please contact Eurom customer support or your authorized dealer.
Keep your purchase receipt as proof of purchase for any warranty claims.


