
1. Introduction
This manual provides essential instructions for the safe operation, maintenance, and troubleshooting of your COSTWAY Industrial Evaporative Cooler. This 3-in-1 unit functions as an evaporative cooler, fan, and air humidifier, designed for use in various large areas such as workshops, factories, and supermarkets. Please read this manual thoroughly before initial use and retain it for future reference.

Image 1.1: The COSTWAY Industrial Evaporative Cooler, showcasing its main unit, remote control, and included ice packs.
2. Important Safety Instructions
To reduce the risk of fire, electric shock, or injury, always follow these basic safety precautions:
- Read all instructions before using this appliance.
- Ensure the power supply matches the voltage specified on the rating label.
- Do not operate the unit with a damaged cord or plug.
- Do not place the unit near heat sources or in direct sunlight for extended periods.
- Always unplug the unit before cleaning, servicing, or moving.
- Do not immerse the unit, cord, or plug in water or other liquids.
- Keep children and pets away from the unit during operation.
- Use only on a flat, stable surface to prevent tipping.
- Do not block air inlets or outlets.
- Do not insert objects into any openings.
- This appliance is for indoor use only.
3. Product Overview and Components
Familiarize yourself with the main components of your evaporative cooler.

Image 3.1: Key features of the COSTWAY Industrial Evaporative Cooler, highlighting its multi-functional design and construction materials.
3.1 Control Panel and Remote Control
The unit features an intuitive control panel and comes with a remote control for convenient operation.

Image 3.2: Detailed view of the control panel and remote, indicating functions such as Cold Air, Wind Class (Standard/Sleep/Natural), Timer (1-12 Hours), Swing, Speed (Low/Medium/High), and On/Off.
3.2 Water Tank and Drainage
The unit is equipped with a 7-gallon (26L) water tank and multiple access points for water management.

Image 3.3: Features related to the water tank, including the large capacity, easy-fill cover, transparent water level indicator, and dual drain ports for complete water removal.
4. Setup Instructions
Follow these steps to prepare your evaporative cooler for first use.
- Unpack the Unit: Carefully remove all packaging materials and inspect the unit for any damage.
- Install Casters: Attach the four universal wheels to the bottom of the unit. Ensure they are securely fastened.
- Fill the Water Tank:
- Open the left water cover or the top lid to access the 26L water tank.
- Pour clean water into the tank. Do not exceed the "MAX" water level indicator.
- For enhanced cooling, place the included ice crystal boxes in a freezer until frozen.
- Insert Ice Boxes (Optional):

Image 4.1: Visual guide for preparing the evaporative cooler, including water filling and ice box placement.
- Once frozen, place the ice crystal boxes into the designated compartment within the water tank.
- Close the water cover/lid securely.
- Position the Unit: Place the cooler on a flat, stable surface in a well-ventilated area. Ensure there is adequate space around the unit for proper airflow.
- Connect Power: Plug the power cord into a standard 120V, 60Hz electrical outlet.
5. Operating Instructions
Operate your evaporative cooler using either the control panel on the unit or the remote control.
- Power On/Off: Press the ON/OFF button to turn the unit on or off.
- Select Wind Speed: Press the SPEED button to cycle through Low, Medium, and High wind speeds.
- Choose Wind Mode: Press the WIND CLASS button to select between Standard, Sleep, and Natural wind modes.
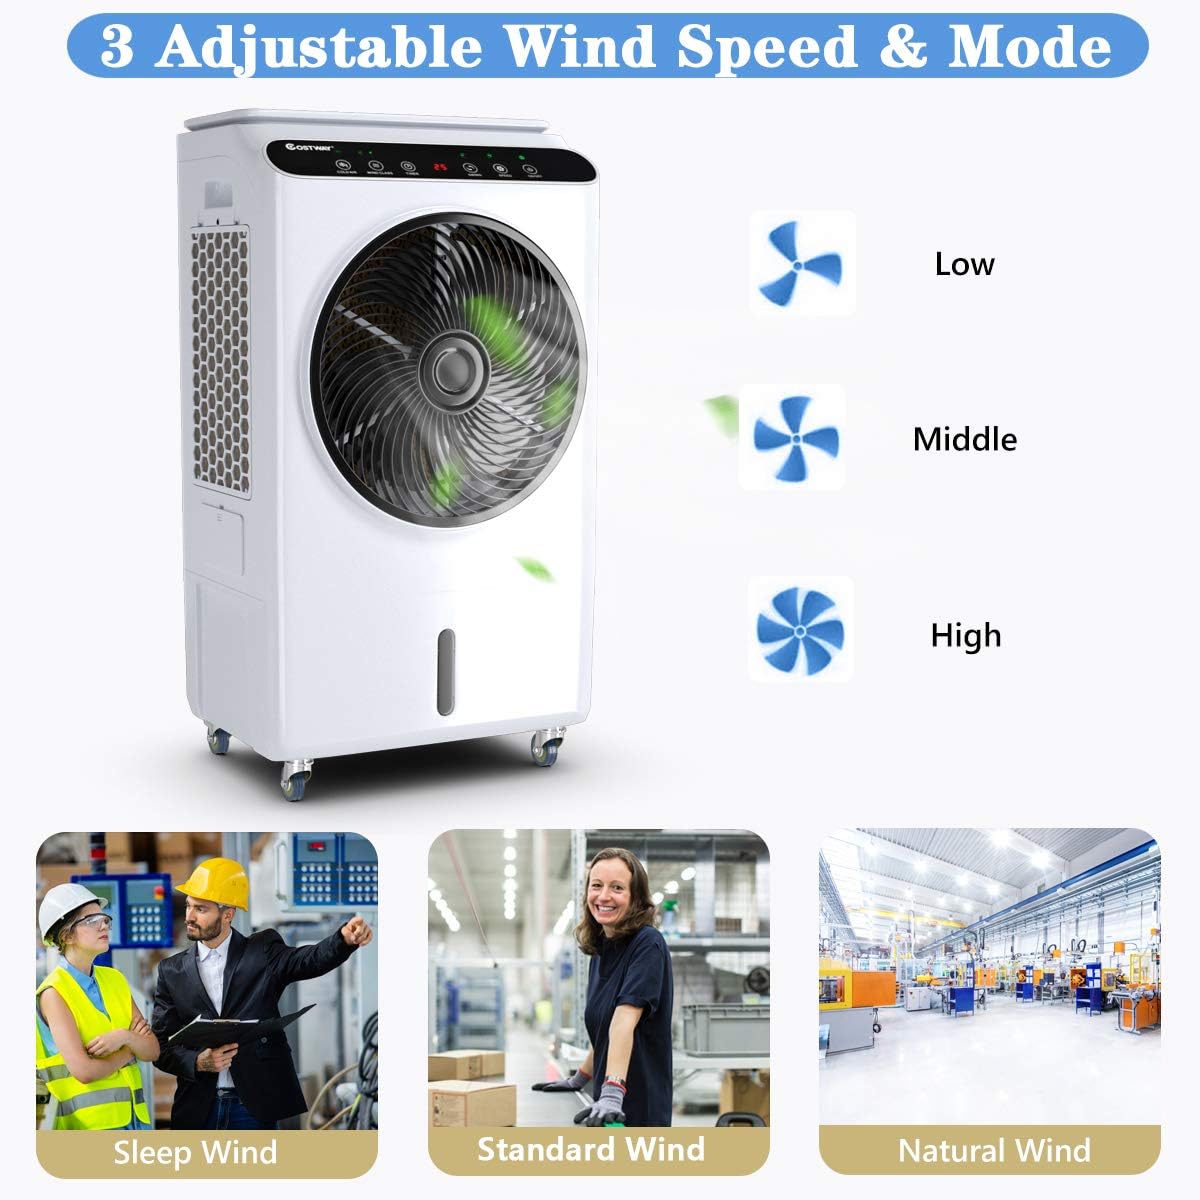
Image 5.1: Explanation of the three wind speeds and three wind modes available on the cooler.
- Activate Cooling/Humidification: Press the COLD AIR button to activate the evaporative cooling and humidification function. Ensure the water tank is filled.
- Set Timer: Press the TIMER button to set the automatic shutdown time from 1 to 12 hours. Each press increases the timer by one hour.
- Oscillation (Swing): Press the SWING button to activate or deactivate the automatic oscillation of the air outlet for wider air distribution.
For optimal cooling performance, ensure the water tank is adequately filled and ice crystal boxes are used.
6. Maintenance
Regular maintenance ensures optimal performance and extends the lifespan of your evaporative cooler.
6.1 Draining the Water Tank
- Always unplug the unit before draining.
- The unit has two drain ports: an upper drain port and a lower drain port.
- To drain, place a suitable container under the lower drain port and remove the plug.
- Allow all water to drain completely.
- Replace the drain plug securely.
6.2 Cleaning the Unit
- Exterior Cleaning: Wipe the exterior surfaces with a soft, damp cloth. Do not use abrasive cleaners or solvents.
- Water Tank Cleaning: Periodically clean the water tank to prevent mold and mildew growth. Drain the tank, wipe the interior with a damp cloth, and rinse thoroughly.
- Cooling Pad Cleaning: Refer to the specific instructions for cleaning or replacing the cooling pads (if removable). Regular cleaning of cooling pads is essential for efficient operation.
Storage: If storing the unit for an extended period, ensure the water tank is completely drained and dry. Clean all components, then store the unit in a cool, dry place, preferably in its original packaging.
7. Troubleshooting
Review the following common issues and their solutions before contacting customer support.
| Problem | Possible Cause | Solution |
|---|---|---|
| Unit does not power on. | No power supply; power cord not properly connected; remote control battery depleted. | Check power outlet and cord connection. Ensure the remote control has working batteries. |
| No cool air / Weak cooling effect. | Water tank empty; cooling pads dry; ice boxes not used or not frozen; high ambient humidity. | Fill water tank. Ensure cooling pads are saturated. Use frozen ice crystal boxes. Evaporative coolers are less effective in high humidity. |
| Water leakage. | Water tank overfilled; drain plug loose or missing; unit not on a level surface. | Do not overfill the water tank. Ensure drain plugs are securely closed. Place the unit on a flat, stable surface. |
| Unusual noise during operation. | Unit not on a level surface; foreign object in fan; water pump issue. | Ensure unit is on a level surface. Turn off and unplug, then check for obstructions. If noise persists, contact customer support. |
8. Specifications
Technical details for the COSTWAY Industrial Evaporative Cooler.
| Feature | Detail |
|---|---|
| Brand | COSTWAY |
| Model Number | B07WS6X3XN |
| Product Dimensions (L x W x H) | 19.5" x 16" x 36" |
| Net Weight | 28 lbs |
| Water Tank Capacity | 7 Gallons (26 Liters) |
| Voltage | 120V, 60Hz |
| Power | 105W |
| Fan Speeds | Low, Medium, High |
| Wind Modes | Standard, Sleep, Natural |
| Timing Function | 1-12 Hours |
| Control Type | Remote, On-unit buttons |
| Included Components | 1 x Air Cooler, 4 x Ice Crystal Box, 1 x Instruction Manual |

Image 8.1: Dimensional overview of the COSTWAY Industrial Evaporative Cooler.
9. Warranty and Customer Support
For warranty information or technical assistance, please contact COSTWAY customer support. Refer to your purchase documentation for specific warranty terms and contact details.
You can also visit the official COSTWAY store for more product information and support: COSTWAY Store on Amazon.