1. Introduction
Thank you for purchasing the SENCOR SDC 2800 B Digital Alarm Clock with Thermometer. This device features a clear LCD display with white backlight, digital time display, 12/24 hour format selection, calendar with day of the week in 7 languages, snooze function, and temperature display in °C/°F. Please read this manual carefully before use to ensure proper operation and to maximize the lifespan of your product.
2. Safety Information
- Keep the device away from water and high humidity.
- Do not expose the device to direct sunlight or extreme temperatures.
- Use only the specified battery type (2 x 1.5V AAA batteries).
- Do not mix old and new batteries, or different types of batteries.
- Remove batteries if the device will not be used for an extended period.
- Do not attempt to disassemble or repair the device yourself. Contact qualified service personnel.
- This device is designed for indoor use only, within a temperature range of 0°C to +50°C.
3. Product Overview
Familiarize yourself with the main components and controls of your SENCOR SDC 2800 B alarm clock.
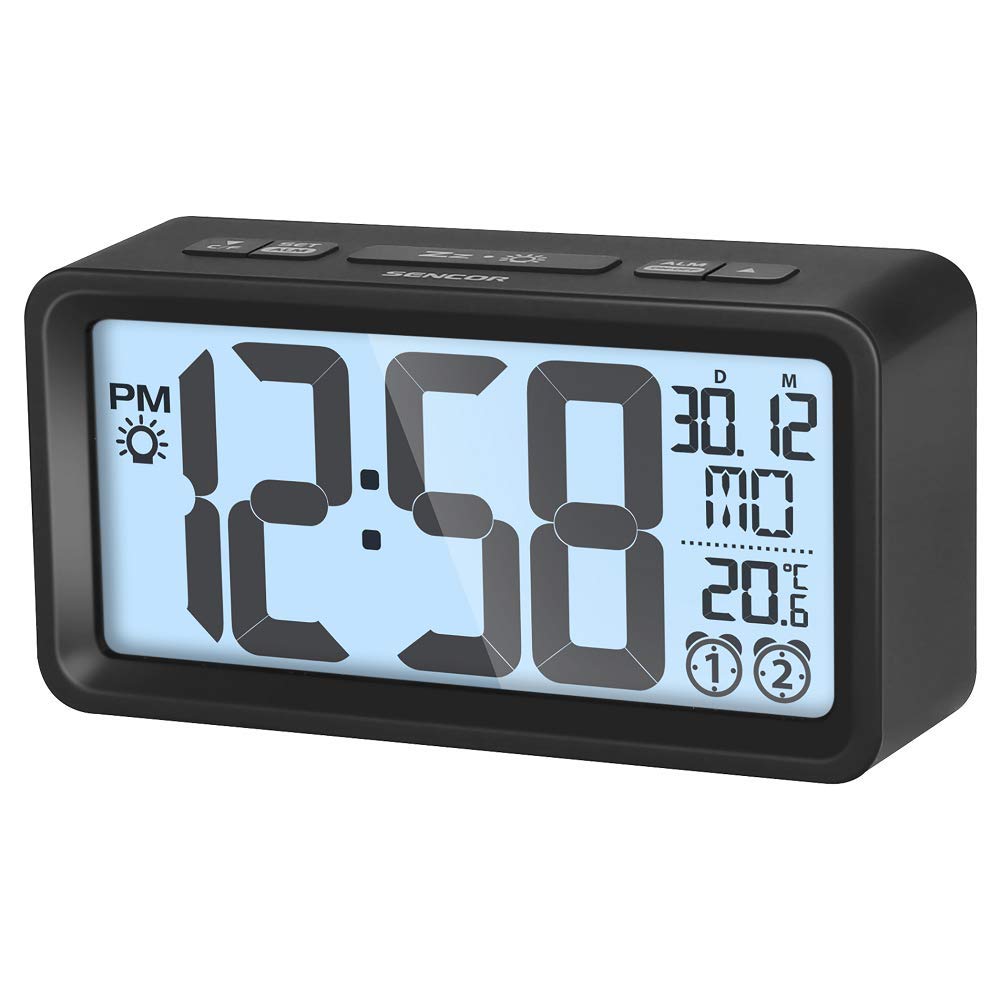
Figure 1: Front view of the SENCOR SDC 2800 B Digital Alarm Clock. Shows the LCD display, which presents time, date, and temperature. The display has a white backlight for visibility.
3.1. Display Elements
- Time Display: Shows current time in 12-hour or 24-hour format.
- Date Display: Shows month and day.
- Day of Week: Displays the current day of the week.
- Temperature Display: Shows indoor temperature in Celsius (°C) or Fahrenheit (°F).
- Alarm Indicator: Icon indicating if the alarm is active.
3.2. Control Buttons (Typical Layout)
While specific button labels may vary, common functions include:
- MODE/SET: Used to switch between display modes (time, alarm) and enter setting mode.
- UP/+: Used to increase values during setting or change display options.
- DOWN/-: Used to decrease values during setting or change display options.
- ALARM/SNOOZE: Activates/deactivates alarm, or triggers snooze during an active alarm.
- °C/°F: Toggles temperature unit.
- 12/24H: Toggles time format.
4. Setup
4.1. Battery Installation
- Locate the battery compartment cover on the back of the device.
- Slide or lift the cover to open the compartment.
- Insert two (2) 1.5V AAA batteries, ensuring the correct polarity (+ and -) as indicated inside the compartment.
- Replace the battery compartment cover securely.
The device will power on automatically once batteries are inserted. The display may flash or show a default time.
5. Operating Instructions
5.1. Setting the Time
- Press and hold the MODE/SET button for a few seconds until the hour digits start flashing.
- Use the UP/+ or DOWN/- buttons to adjust the hour.
- Press MODE/SET again to confirm the hour and move to setting the minutes.
- Use the UP/+ or DOWN/- buttons to adjust the minutes.
- Press MODE/SET to confirm the minutes and exit time setting mode.
5.2. Setting Date and Day of Week
- From normal time display, press the MODE/SET button repeatedly until the date (year, month, or day) starts flashing.
- Use the UP/+ or DOWN/- buttons to adjust the flashing value (e.g., year).
- Press MODE/SET to confirm and move to the next value (month, then day).
- Once the day is set, the day of the week will automatically adjust.
- Press MODE/SET to exit date setting mode.
5.3. Setting the Alarm
- Press the ALARM button once to display the current alarm time.
- Press and hold the ALARM button until the alarm hour digits start flashing.
- Use the UP/+ or DOWN/- buttons to adjust the alarm hour.
- Press ALARM again to confirm the hour and move to setting the alarm minutes.
- Use the UP/+ or DOWN/- buttons to adjust the alarm minutes.
- Press ALARM to confirm the alarm time and exit alarm setting mode.
- To activate or deactivate the alarm, press the ALARM button briefly when the current time is displayed. An alarm icon will appear or disappear on the display.
5.4. Snooze Function
When the alarm sounds, press the SNOOZE button (often combined with the ALARM button or a dedicated top button) to temporarily silence the alarm. The alarm will sound again after a few minutes (typically 5-10 minutes, depending on the model). To turn off the alarm completely, press any other button or let it ring for its full duration.
5.5. Temperature Display
The device displays the indoor temperature. To switch between Celsius (°C) and Fahrenheit (°F), press the dedicated °C/°F button (if available) or cycle through display modes using the MODE/SET button until the temperature unit flashes, then use UP/+ or DOWN/-.
5.6. 12/24 Hour Format
To switch between 12-hour (with AM/PM indicator) and 24-hour format, press the dedicated 12/24H button (if available) or cycle through time setting options until the format flashes, then use UP/+ or DOWN/-.
5.7. Backlight
The LCD display features a white backlight. This backlight typically activates briefly when a button is pressed or when the snooze function is engaged. Some models may have an option for continuous backlight when powered by an AC adapter (not included with this battery-powered model).
6. Maintenance
6.1. Cleaning
- Wipe the device with a soft, dry cloth.
- Do not use abrasive cleaners, solvents, or chemical agents, as these may damage the surface.
- Avoid getting moisture into any openings.
6.2. Battery Replacement
When the display becomes dim or the device stops functioning correctly, it is time to replace the batteries. Follow the steps in section 4.1 "Battery Installation" to replace the two (2) 1.5V AAA batteries. Dispose of old batteries responsibly according to local regulations.
7. Troubleshooting
| Problem | Possible Cause | Solution |
|---|---|---|
| Display is blank or dim. | Low or dead batteries. Incorrect battery polarity. | Replace batteries with new 1.5V AAA batteries, ensuring correct polarity. |
| Alarm does not sound. | Alarm is not activated. Alarm volume is too low (if adjustable). | Ensure the alarm icon is visible on the display. Check alarm settings. |
| Incorrect time/date. | Time/date not set correctly after battery installation or power interruption. | Refer to sections 5.1 and 5.2 to reset the time and date. |
| Temperature reading seems inaccurate. | Device placed near a heat source or vent. | Move the device to a location with stable ambient temperature. Allow time for the sensor to adjust. |
8. Specifications
| Model Number | SDC 2800 B |
| Display Type | LCD with white backlight |
| Time Format | 12/24 hour selectable |
| Calendar | Yes, with day of week in 7 languages |
| Alarm Function | Yes, with snooze |
| Temperature Range | 0°C to +50°C (32°F to 122°F) |
| Temperature Units | °C / °F selectable |
| Power Source | 2 x 1.5V AAA batteries (not included) |
| Dimensions (W x H x D) | 129 x 67 x 40 mm (approx. 5.08 x 2.64 x 1.57 inches) |
| Weight | 137 g (approx. 0.3 lbs) |
| Material | Plastic (Acrylonitrile Butadiene Styrene) |
| Usage Environment | Indoor use only |
9. Warranty and Support
SENCOR products are manufactured to high-quality standards. For information regarding warranty terms and conditions, please refer to the warranty card included with your purchase or visit the official SENCOR website. If you encounter any issues or require technical assistance, please contact SENCOR customer support or your local retailer.
Please retain your proof of purchase for warranty claims.