Vikye Vikyey3d529cgib
Vikye Universal Thermocouple Replacement Kit User Manual
Model: Vikyey3d529cgib
1. Product Overview
The Vikye Universal Thermocouple Replacement Kit is designed for temperature sensing and measurement in various gas appliances. It works in conjunction with a solenoid valve to enhance safety by automatically shutting off gas supply in case of leakage or flameout. This kit is suitable for induction cookers, gas stoves, heating devices, and other burning appliances.
Key Features:
- 900mm thermocouple with five nuts for gas parts and gas valve compatibility.
- Designed for accurate temperature sensing and measurement.
- Integrates with solenoid valves for automatic gas shut-off in emergency situations.
- Simple and convenient to use for replacement and installation.
- Versatile application across induction cookers, gas stoves, and heating devices.

Figure 1: Complete Vikye Universal Thermocouple Kit, showing the coiled thermocouple wire and the five included nuts/adaptors.
2. Package Contents
Upon opening the package, verify that all components are present and undamaged:
- 1 x Universal Thermocouple (900mm length)
- 5 x Assorted Nuts/Adaptors

Figure 2: The five different nuts/adaptors provided with the thermocouple, designed for various connection types.
3. Specifications
| Feature | Value |
|---|---|
| Length | 900mm (35.4 inches) |
| Probe Size (L*W) | Approx. 6.2 x 0.6 cm (2.4 x 0.2 inches) |
| Head Size | M6X0.75 |
| End Connection | M8X1 |
| Fit Nuts | 5 pieces |
| Weight | Approx. 61g (2.2 oz) |
| Product Dimensions | 0.39 x 0.39 x 0.39 inches (packaged) |
| Model Number | Vikyey3d529cgib |

Figure 3: Detailed dimensions of the thermocouple, including overall length and probe measurements.
4. Safety Information
WARNING: Installation and maintenance of gas appliances should only be performed by qualified personnel. Improper installation, adjustment, alteration, service, or maintenance can cause property damage, injury, or death. Read the installation, operating, and maintenance instructions thoroughly before installing or servicing this equipment.
- Always turn off the gas supply to the appliance before beginning any installation or maintenance.
- Ensure adequate ventilation when working with gas appliances.
- Check for gas leaks after installation using a soap solution, never an open flame.
- Wear appropriate personal protective equipment (PPE) such as gloves and eye protection.
- Do not modify the thermocouple or any gas appliance components.
5. Installation Guide
This section provides general guidance for replacing a thermocouple. Specific steps may vary depending on your appliance model. Refer to your appliance's service manual for detailed instructions.
Tools Required:
- Wrench set (adjustable or open-end)
- Screwdriver set (Phillips and flathead)
- Gas leak detection solution (soap and water mixture)
- Flashlight (optional)
Installation Steps:
- Disconnect Power and Gas: Ensure the gas supply to the appliance is completely shut off at the main valve. Disconnect any electrical power to the appliance.
- Access Thermocouple: Locate the existing thermocouple. This usually involves removing access panels or burner grates on your appliance.
- Remove Old Thermocouple:
- Carefully disconnect the thermocouple from the gas valve. This typically involves unscrewing a nut.
- Unclip or unfasten the thermocouple from its mounting bracket near the pilot light or burner.
- Gently pull the old thermocouple out of the appliance.
- Select Correct Adaptor: The kit includes five different nuts/adaptors. Select the one that matches the connection type of your appliance's gas valve. Some appliances may require an adaptor on both ends of the thermocouple.
- Install New Thermocouple:
- Insert the new thermocouple into the appliance, routing it along the same path as the old one.
- Secure the thermocouple probe near the pilot light or main burner, ensuring it is positioned correctly to be enveloped by the flame.
- Connect the other end of the thermocouple to the gas valve, using the appropriate adaptor if necessary. Tighten the connection firmly but do not overtighten.
- Check for Leaks:
- Slowly turn the gas supply back on.
- Apply a soap and water solution to all gas connections you disturbed. Look for bubbles, which indicate a leak.
- If bubbles appear, tighten the connection slightly and re-check. If leaks persist, turn off the gas and consult a qualified technician.
- Test Appliance: Restore electrical power (if applicable) and test the appliance to ensure the thermocouple is functioning correctly and the pilot light (if present) stays lit.

Figure 4: Example of a thermocouple installed in a gas appliance, demonstrating its typical placement.
6. Operation
The thermocouple operates automatically as part of your appliance's safety system. When the pilot flame or main burner flame heats the thermocouple, it generates a small electrical current. This current signals the gas valve to remain open, allowing gas to flow to the burner.
If the flame goes out, the thermocouple cools down, and the electrical current stops. This causes the gas valve to close, preventing unburnt gas from accumulating, thus enhancing safety.
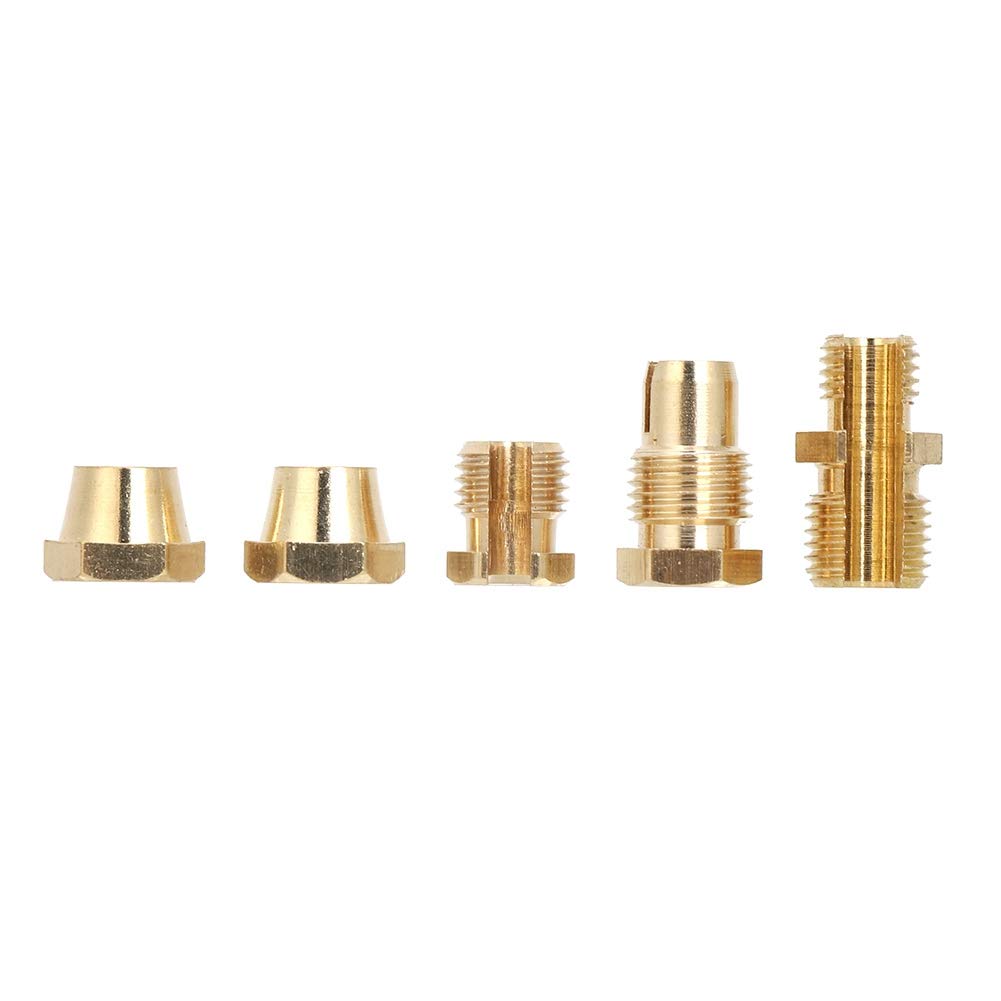
Figure 5: Visual representation of the thermocouple's function in sensing heat and generating a signal.
7. Maintenance
Thermocouples are generally low-maintenance components. However, periodic inspection can help ensure continued safe operation:
- Visual Inspection: Annually inspect the thermocouple for any signs of damage, corrosion, or carbon buildup on the probe tip.
- Cleaning: If carbon buildup is present, gently clean the probe tip with a fine-grit sandpaper or emery cloth. Be careful not to bend or damage the probe.
- Connection Check: Ensure all connections to the gas valve are secure and free from leaks.
- Flame Position: Verify that the pilot flame (if applicable) consistently envelops the thermocouple tip when lit. Adjust the pilot flame if necessary, following your appliance's instructions.
If the thermocouple appears damaged or fails to function correctly after cleaning, it should be replaced.
8. Troubleshooting
If your gas appliance is experiencing issues related to the thermocouple, consider the following common problems and solutions:
| Problem | Possible Cause | Solution |
|---|---|---|
| Pilot light won't stay lit (or main burner won't ignite/stay lit) |
|
|
| Gas smell after ignition attempt |
|
|
If troubleshooting steps do not resolve the issue, or if you are uncomfortable performing these checks, it is recommended to contact a qualified appliance technician.
9. Warranty and Support
For information regarding warranty coverage, technical support, or replacement parts for your Vikye Universal Thermocouple Replacement Kit, please refer to the retailer's return policy or contact Vikye customer service directly. Contact information can typically be found on the product packaging or the manufacturer's official website.
When contacting support, please have your product model number (Vikyey3d529cgib) and purchase date available.
Ask a question about this manual
Ask about setup, troubleshooting, compatibility, parts, safety, or missing instructions. Manuals+ will review the question and use this page’s manual context to help answer it.