1. Introduction
Thank you for choosing the STAYER S L20 Cordless Oscillating Multi-Tool. This versatile 18V battery-powered tool is designed for a wide range of applications, including cutting, sanding, scraping, and grinding. Its powerful 775 motor and high-quality gearbox ensure efficient performance, while the variable speed control allows for adaptation to various materials and tasks. This manual provides essential information for safe operation, setup, maintenance, and troubleshooting to ensure optimal performance and longevity of your tool.
2. General Safety Instructions
Always follow basic safety precautions when using electric tools to reduce the risk of fire, electric shock, and personal injury. Read all instructions carefully before operating the tool.
- Work Area Safety: Keep your work area clean and well-lit. Cluttered or dark areas invite accidents. Do not operate power tools in explosive atmospheres, such as in the presence of flammable liquids, gases, or dust.
- Electrical Safety: Avoid body contact with earthed or grounded surfaces (e.g., pipes, radiators, ranges, refrigerators). Do not expose power tools to rain or wet conditions.
- Personal Safety: Always wear eye protection. Use dust mask, non-skid safety shoes, hard hat, or hearing protection for appropriate conditions. Dress properly. Do not wear loose clothing or jewelry. Keep hair, clothing, and gloves away from moving parts.
- Tool Use and Care: Do not force the power tool. Use the correct power tool for your application. Do not use the power tool if the switch does not turn it on and off. Disconnect the plug from the power source and/or the battery pack from the power tool before making any adjustments, changing accessories, or storing power tools.
- Battery Pack Use and Care: Recharge only with the charger specified by the manufacturer. Use power tools only with specifically designated battery packs.
- Service: Have your power tool serviced by a qualified repair person using only identical replacement parts. This will ensure that the safety of the power tool is maintained.
3. Product Overview
Familiarize yourself with the components of your STAYER S L20 Multi-Tool before operation.
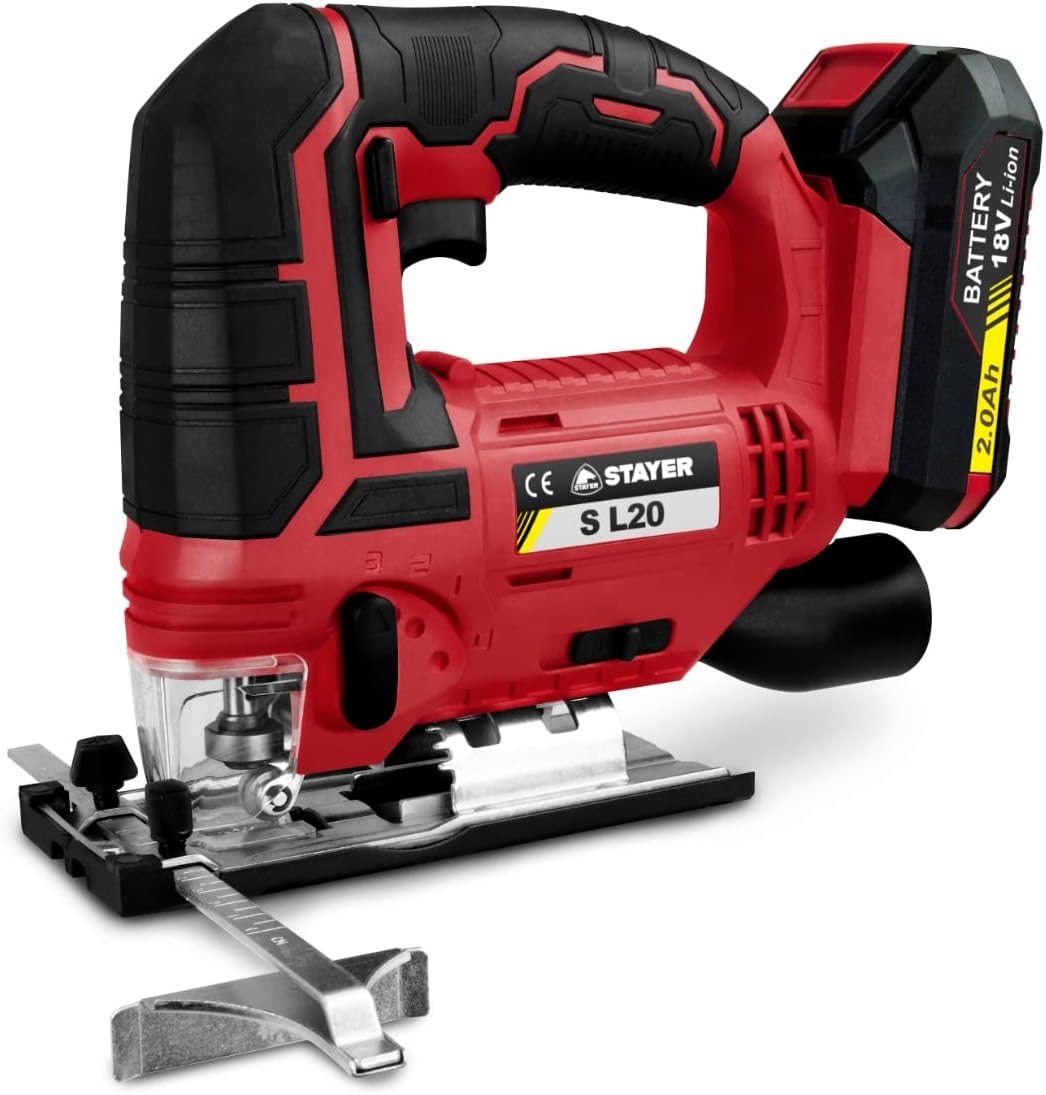
Figure 3.1: Front view of the STAYER S L20 Cordless Oscillating Multi-Tool, showing the main body, handle, battery slot, and accessory attachment point.
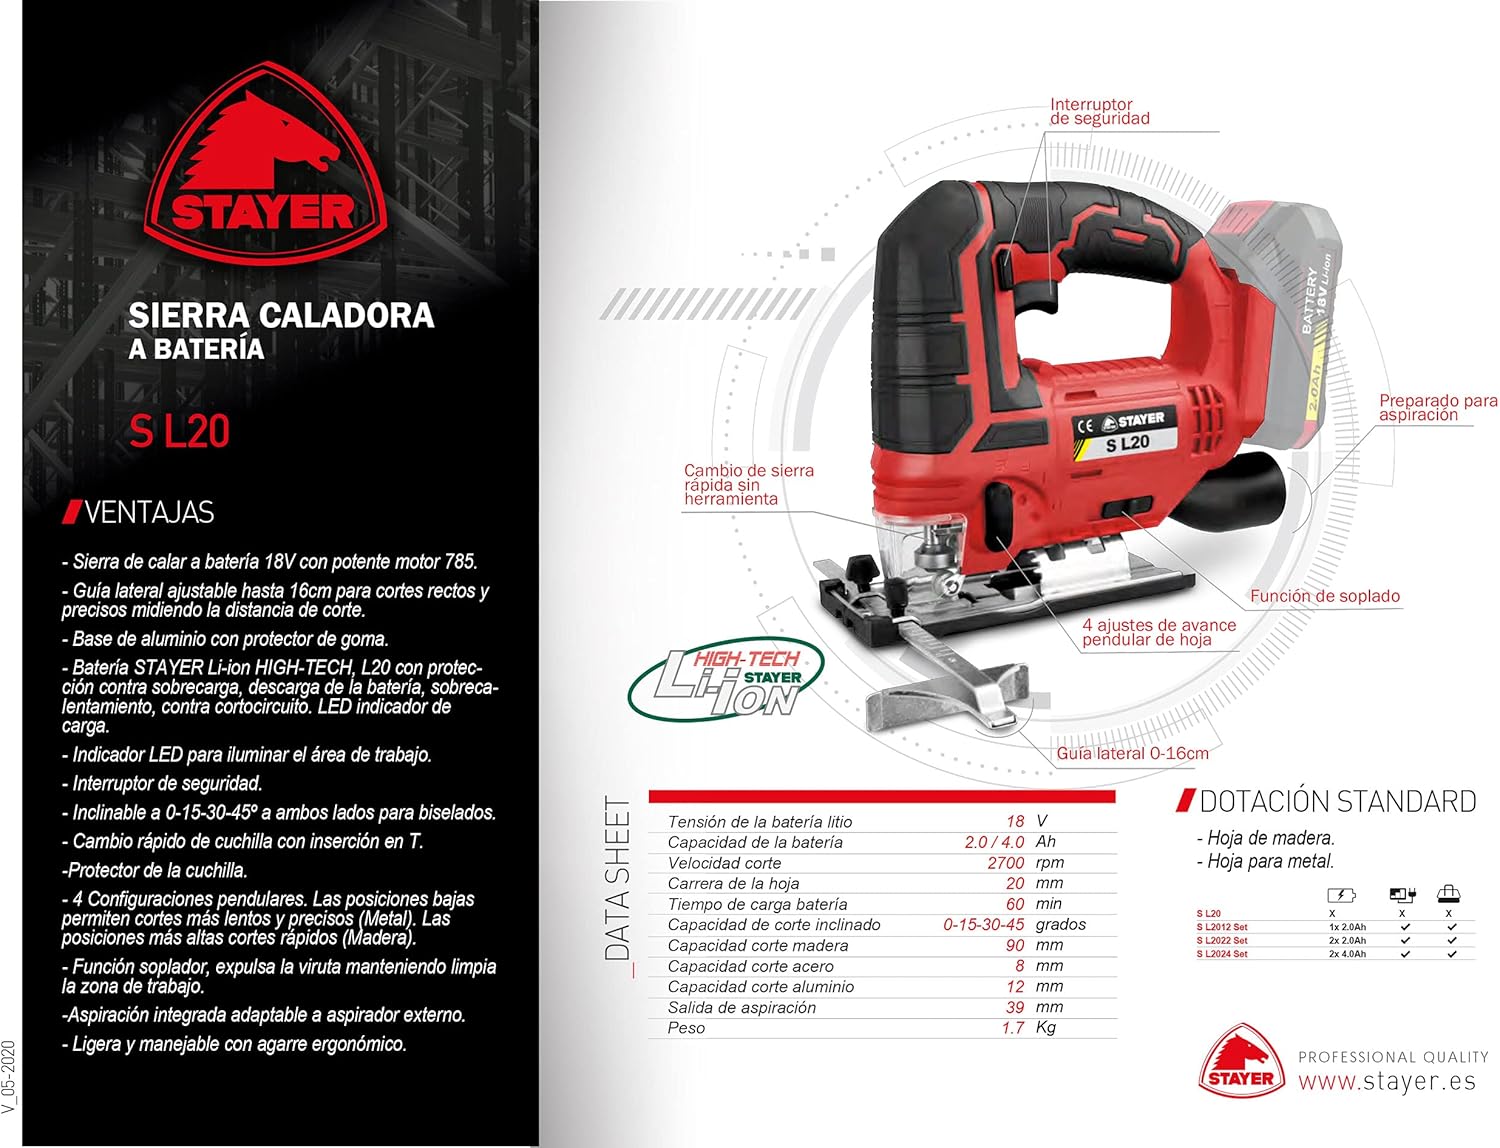
Figure 3.2: Diagram illustrating key features of the STAYER S L20, including the safety switch, quick blade change mechanism, oscillation angle, and LED work light.
Key Features:
- 18V Cordless Operation
- Powerful 775 Motor
- Variable Speed Control (5,000 - 20,000 OPM)
- STAYER Li-ion HIGH-TECH L20 Battery with comprehensive protection (overload, discharge, overheating, short-circuit) and LED charge indicator.
- Quick, Tool-Free Accessory Change System
- Integrated Work LED Light
- 3° Oscillation Angle
- High-Quality Gearbox
- Depth Adjustment Feature
4. Setup
4.1. Battery Installation and Charging
- Ensure the tool is switched off before installing or removing the battery.
- Align the battery pack with the battery slot on the tool.
- Slide the battery pack into the slot until it clicks securely into place.
- To remove, press the battery release button and slide the battery out.
- Charge the battery using a compatible STAYER charger. The LED indicator on the battery will show the charge status.
4.2. Attaching Accessories
The S L20 features a quick, tool-free accessory change system.
- Ensure the tool is switched off and the battery is removed.
- Locate the quick-release lever or mechanism on the tool head.
- Open the lever to release the accessory clamping mechanism.
- Align the accessory (e.g., saw blade, sanding pad) with the accessory mount on the tool. Ensure it fits snugly.
- Close the quick-release lever firmly until it locks the accessory in place.
- Gently pull on the accessory to ensure it is securely fastened before operation.
4.3. Adjusting Depth (if applicable)
For applications requiring precise depth control, utilize the depth adjustment feature.
- Identify the depth adjustment mechanism, typically a guide or stop.
- Loosen the locking screw or lever for the depth guide.
- Adjust the guide to the desired cutting or sanding depth.
- Tighten the locking screw or lever to secure the depth guide in position.
5. Operating Instructions
5.1. Powering On/Off
- To turn on the tool, press the power switch. Some models may have a safety lock button that needs to be pressed first.
- To turn off the tool, release the power switch.
5.2. Variable Speed Control
The S L20 features a 6-position speed regulator, allowing you to adjust the oscillation rate from 5,000 to 20,000 oscillations per minute (OPM) to match the material and accessory.
- Use lower speeds for softer materials, delicate work, or when greater control is needed.
- Use higher speeds for harder materials or when faster material removal is desired.
- Adjust the speed dial or switch to the desired setting before starting work.
5.3. General Operation Tips
- Always secure your workpiece firmly to prevent movement during operation.
- Apply light, consistent pressure. Do not force the tool, let the tool do the work.
- For cutting, allow the blade to reach full speed before engaging the workpiece.
- When sanding, move the tool in a consistent pattern to ensure even material removal.
- Utilize the integrated LED work light for improved visibility in dimly lit areas.
- For applications generating significant dust, consider using an external dust extraction system if the tool supports it, or wear appropriate respiratory protection.
6. Maintenance
Regular maintenance ensures the longevity and safe operation of your STAYER S L20 Multi-Tool.
6.1. Cleaning
- Always disconnect the battery pack before cleaning.
- Clean the tool's ventilation openings regularly to prevent overheating. Use a soft brush or compressed air.
- Wipe the tool housing with a soft, damp cloth. Do not use harsh chemicals or abrasive cleaners.
- Remove any accumulated dust or debris from the accessory mount area.
6.2. Storage
- Store the tool in a dry, secure place out of reach of children.
- Ensure the battery is partially charged (not fully depleted or fully charged) before long-term storage to preserve battery life.
- Store the tool and accessories in their original case or a suitable storage container to protect them from damage.
6.3. Battery Care
- Do not expose batteries to extreme temperatures or direct sunlight.
- Do not short-circuit battery terminals.
- Dispose of old batteries responsibly according to local regulations.
7. Troubleshooting
This section addresses common issues you might encounter with your STAYER S L20 Multi-Tool.
| Problem | Possible Cause | Solution |
|---|---|---|
| Tool does not start. | Battery not charged or improperly installed. Power switch faulty. | Ensure battery is fully charged and correctly inserted. If issue persists, contact customer support. |
| Reduced power or performance. | Battery low. Accessory dull or damaged. Overheating. | Recharge battery. Replace accessory. Allow tool to cool down. Clean ventilation openings. |
| Excessive vibration or noise. | Accessory not securely fastened. Damaged accessory. Internal mechanical issue. | Check and re-secure accessory. Replace accessory. Discontinue use and contact customer support. |
| Battery LED indicator not working. | Battery fault. | Try another charged battery if available. Contact customer support if the battery is faulty. |
8. Specifications
| Specification | Value |
|---|---|
| Model Number | 1.2136 |
| Manufacturer | STAYER |
| Power Source | Battery Powered (Li-ion) |
| Voltage | 18 Volts |
| Wattage | 18 Watts |
| Oscillation Speed | 5,000 - 20,000 OPM (Oscillations Per Minute) |
| Oscillation Angle | 3° |
| Weight | 1.65 Kilograms |
| Blade Material | High-speed steel (for included tools) |
| Special Feature | Depth Adjustment |
| Included Components | Tools (accessories) |
9. Warranty and Support
The STAYER S L20 Multi-Tool comes with a limited warranty. Please refer to the warranty card included with your product for specific terms and conditions. Spare parts availability is indicated for 2 years from the date of purchase.
For technical support, warranty claims, or to inquire about spare parts, please contact STAYER customer service through their official website or the retailer from whom you purchased the product.
Note: Proof of purchase may be required for warranty service.