1. Introduction
This manual provides detailed instructions for the safe installation, operation, and maintenance of your Warehouse of Tiffany CFL-8423REMO/CH Hegasal Chrome Dual Lamp Crystal Lighted Chandelier Ceiling Fan. Please read all instructions carefully before beginning installation and retain this manual for future reference.
2. Safety Information
WARNING: To reduce the risk of fire, electric shock, or personal injury, always turn off power at the main circuit breaker or fuse box before installation or servicing.
- All electrical connections must be in accordance with local codes, ordinances, or national electrical codes. If you are unfamiliar with electrical wiring, consult a qualified electrician.
- Ensure the installation site can support the weight of the fan (approximately 21 pounds).
- Do not operate the fan with damaged wiring.
- Avoid placing objects in the path of the fan blades.
- This product is designed for indoor use only.
- The fan must be mounted with a minimum of 7 feet (2.1 meters) clearance from the floor to the trailing edge of the blades.
3. Package Contents
Verify that all components listed below are present and undamaged before proceeding with installation.
- Ceiling Fan Motor Housing (Metal, Chrome finish)
- Five (5) Wooden Fan Blades
- Dual Scroll Crystal Chandelier Light Kit (includes upper and lower crystal shades)
- Remote Control with Wall Mount
- Mounting Bracket and Hardware
- Downrod Assembly
- Wiring Connectors
- Instruction Manual

Image 3.1: Components of the Hegasal Ceiling Fan. This image displays the central unit of the ceiling fan, highlighting the chrome finish, intricate crystal chandelier details, and the attachment points for the wooden blades.
4. Setup and Installation
Installation of this semi-flush mount ceiling fan requires basic electrical knowledge. If you are unsure, consult a qualified electrician.
- Turn Off Power: Locate the circuit breaker for the fan location and turn off the power. Verify power is off using a voltage tester.
- Mounting Bracket Installation: Secure the mounting bracket to the ceiling junction box. Ensure the junction box is securely fastened to the building structure and can support the fan's weight.
- Downrod Assembly: Insert the downrod through the canopy and motor housing. Secure with the provided pin and screw.
- Wiring: Carefully lift the fan assembly and hang it on the mounting bracket. Connect the electrical wires (live, neutral, ground) from the fan to the house wiring according to local electrical codes.
- Secure Fan to Mounting Bracket: Once wiring is complete, secure the fan motor housing to the mounting bracket.
- Attach Fan Blades: Attach the five wooden fan blades to the motor housing using the provided screws. Ensure all screws are tightened securely.
- Install Light Kit: Connect the light kit wiring to the fan motor wiring. Secure the dual scroll crystal chandelier light kit to the bottom of the fan motor housing.
- Install Light Bulbs: Install six (6) E26 medium base incandescent bulbs (max 40 watts each) into the light kit sockets.
- Crystal Attachment: Carefully attach the crystal elements to the chandelier light kit as per the design.
- Restore Power: Once installation is complete, restore power at the circuit breaker.
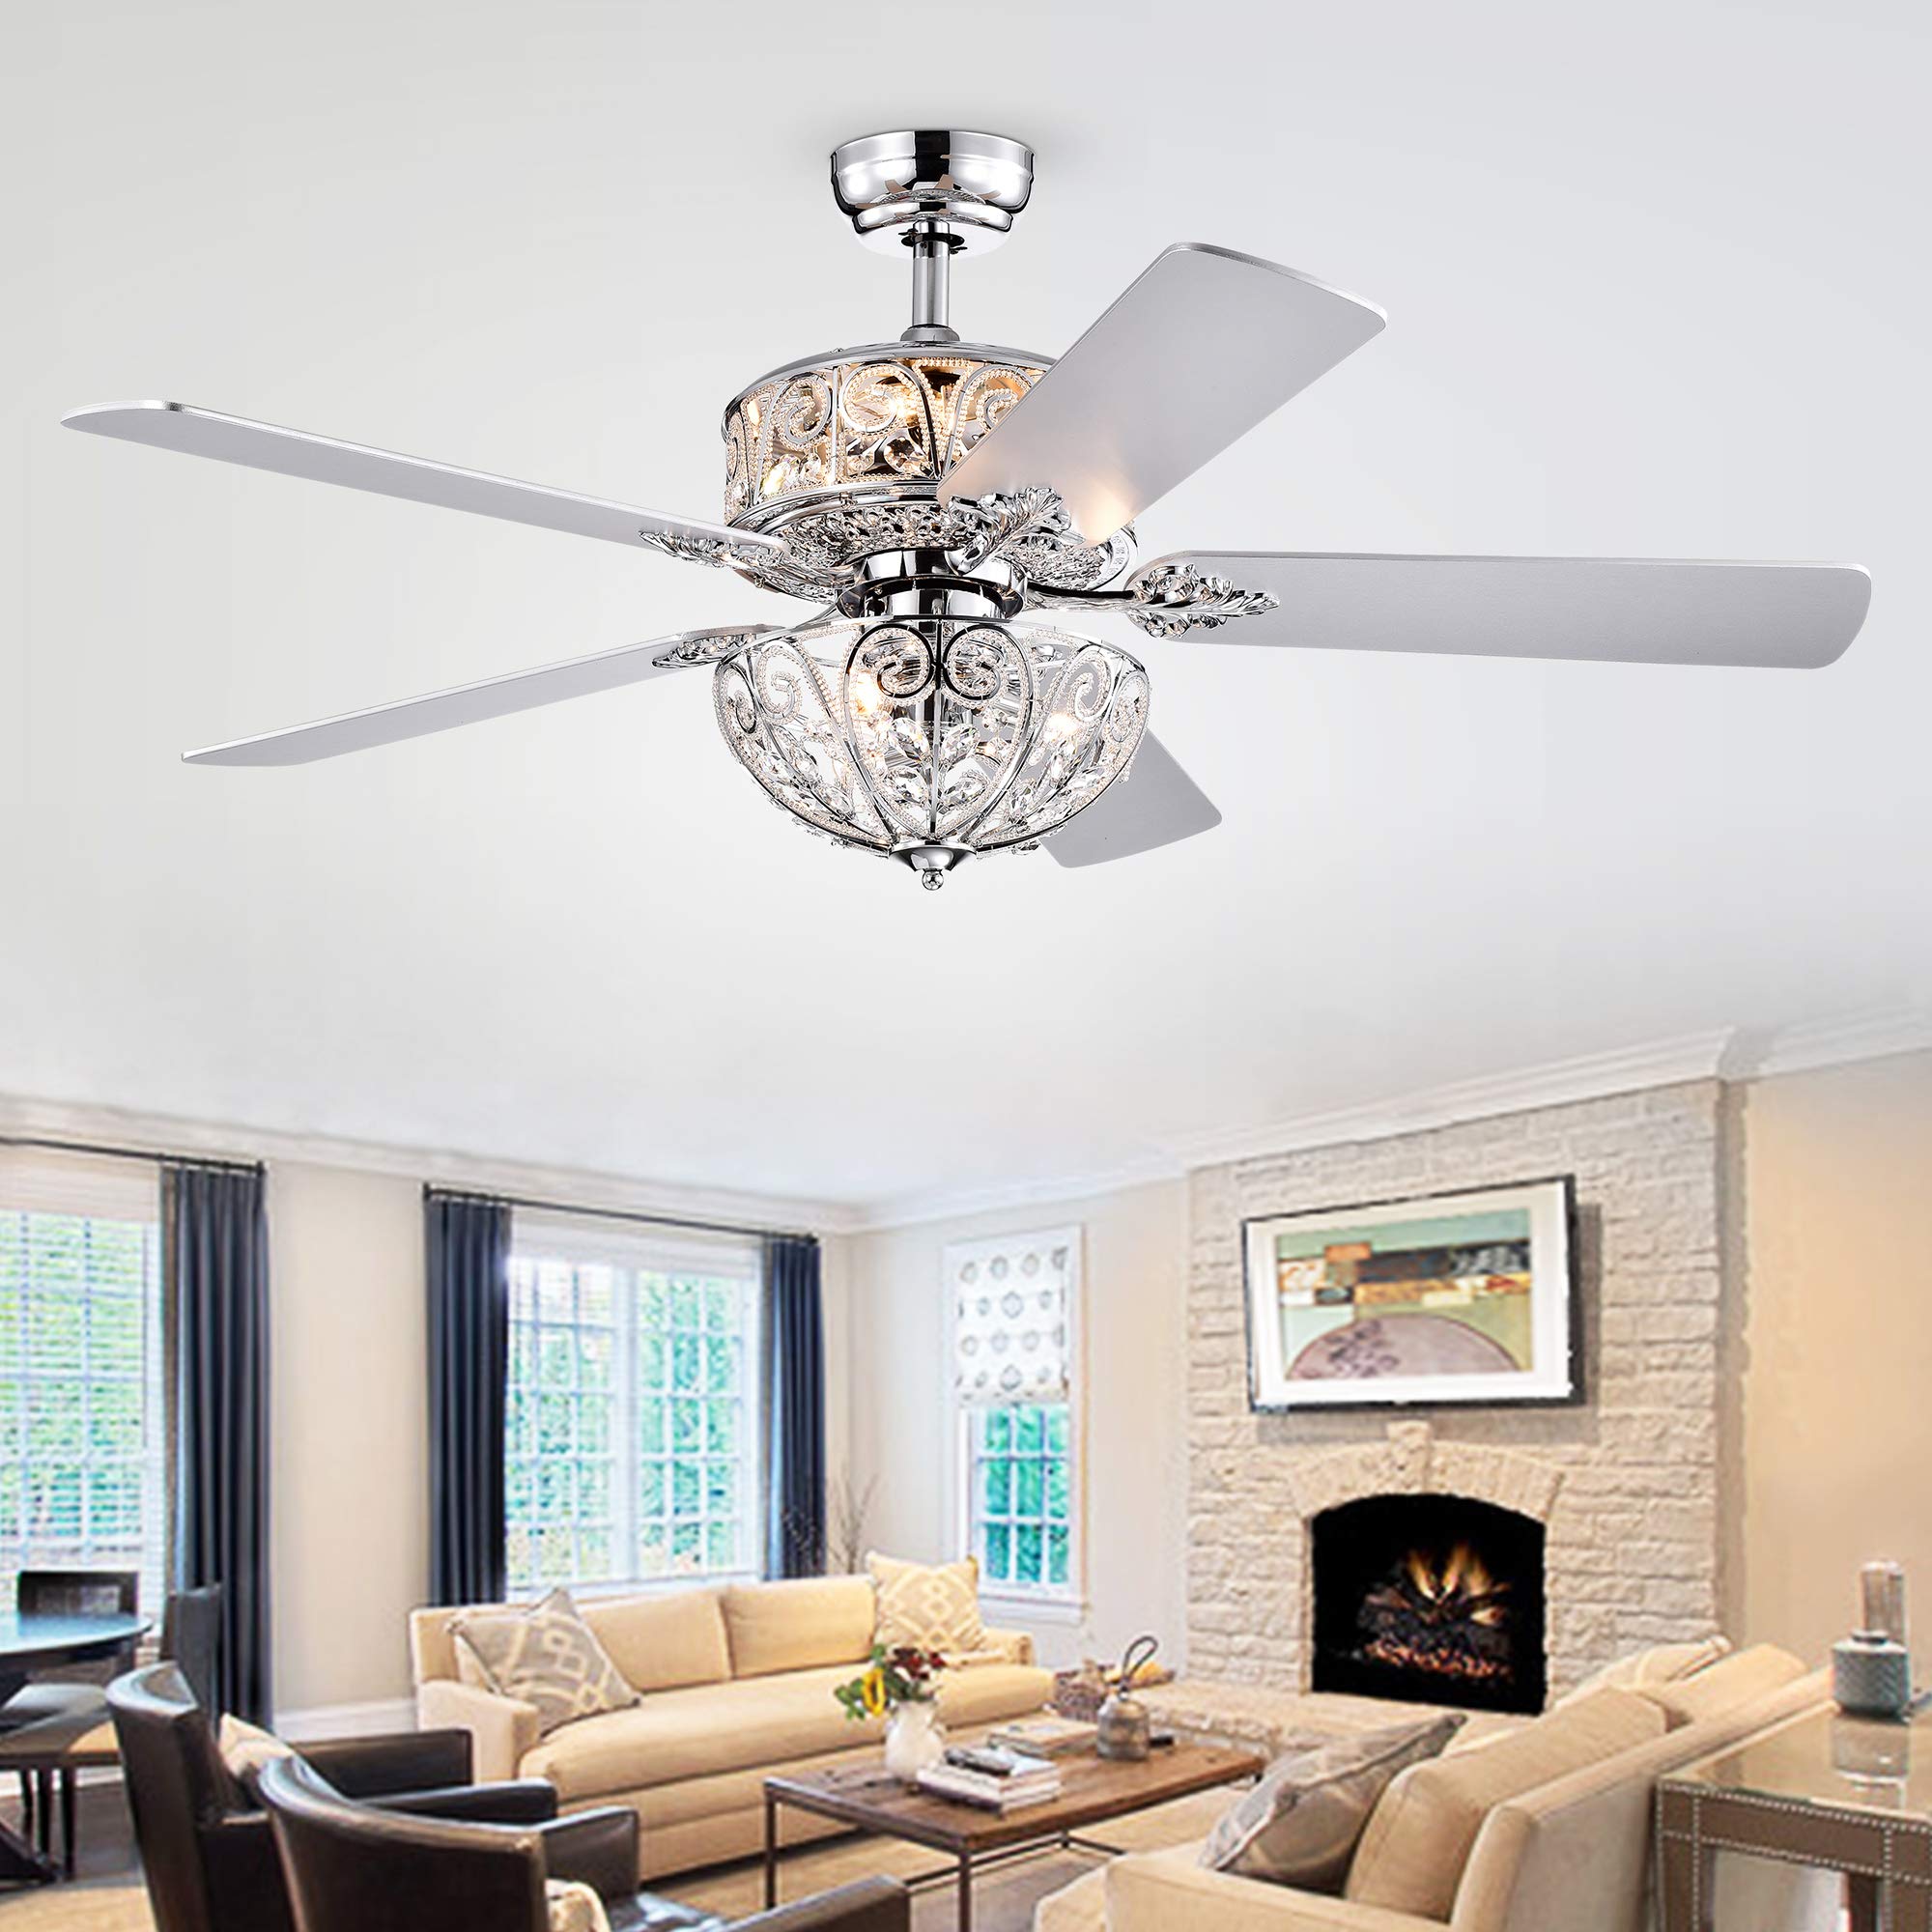
Image 4.1: Installed Hegasal Ceiling Fan. This image shows the ceiling fan fully installed in a room, demonstrating its aesthetic integration and overall appearance.
5. Operating Instructions
Your Hegasal ceiling fan is operated using the included remote control.
5.1 Remote Control Functions
- Fan ON/OFF: Press the fan button to turn the fan on or off.
- Fan Speed Control: Use the speed buttons (e.g., Low, Medium, High) to adjust the fan's rotation speed.
- Light ON/OFF: Press the light button to turn the chandelier lights on or off.
- Light Color Options: The light kit offers three different light combinations. Repeatedly press the light color button (if available on your remote) to cycle through the available light settings. This may include different bulb combinations or color temperatures.
- Fan Direction (Seasonal): A switch on the fan motor housing (or a button on the remote, if applicable) controls the fan's direction.
- Downward Airflow (Summer): Creates a cooling effect.
- Upward Airflow (Winter): Circulates warm air trapped near the ceiling.
Ensure the remote control has fresh batteries installed for optimal performance.
6. Maintenance
Regular maintenance ensures the longevity and optimal performance of your ceiling fan.
6.1 Cleaning
- General Cleaning: Use a soft, damp cloth to wipe down the motor housing and blades. Do not use abrasive cleaners or solvents.
- Crystal Cleaning: Gently wipe crystal elements with a soft, lint-free cloth dampened with water or a mild glass cleaner. Avoid spraying cleaner directly onto the crystals or electrical components.
- Blade Cleaning: Dust fan blades regularly to prevent dust buildup, which can cause imbalance and noise.
6.2 Bulb Replacement
To replace light bulbs:
- Turn off power to the fan at the circuit breaker.
- Allow bulbs to cool completely.
- Carefully remove the old E26 medium base incandescent bulbs.
- Install new E26 medium base incandescent bulbs, ensuring they do not exceed 40 watts each.
- Restore power.
7. Troubleshooting
Refer to the following table for common issues and their solutions.
| Problem | Possible Cause | Solution |
|---|---|---|
| Fan does not start. | No power to the fan; loose wiring; remote control issue. | Check circuit breaker. Verify all wiring connections are secure. Replace remote batteries. Ensure remote is paired (if applicable). |
| Lights do not work. | Loose wiring; faulty bulbs; light switch off; remote control issue. | Check light kit wiring. Replace bulbs. Ensure light function on remote is activated. |
| Fan wobbles. | Loose blades; unbalanced blades; loose mounting. | Ensure all blade screws are tight. Use a balancing kit (not included) if necessary. Verify mounting bracket is secure. |
| Excessive noise. | Loose screws; motor hum; blades hitting an obstruction. | Check all screws for tightness. Ensure no wires are rubbing against the motor. Verify blades are clear of obstructions. |
8. Specifications
| Feature | Detail |
|---|---|
| Model Number | CFL-8423REMO/CH |
| Brand | Warehouse of Tiffany |
| Material | Crystal, Metal, Wood |
| Color | Chrome (finish), Clear (shade) |
| Number of Blades | 5 |
| Light Source | Incandescent |
| Number of Light Sources | 6 |
| Bulb Base | E26 Medium |
| Max Wattage per Bulb | 40 watts |
| Voltage | 120 Volts |
| Control Method | Remote Control |
| Installation Type | Semi Flush Mount |
| Indoor/Outdoor Usage | Indoor |
| Item Weight | 21 Pounds |
| Certifications | ETL Listed |
9. Warranty Information
According to the manufacturer's information, this product comes with No warranty.
10. Customer Support
For technical assistance, missing parts, or any questions regarding the installation or operation of your Warehouse of Tiffany ceiling fan, please contact the manufacturer or your retailer. Refer to your purchase documentation for specific contact details.
You can also visit the Warehouse of Tiffany Store on Amazon for more information.


