
1. Product Overview
The Walfront Digital Power Analyzer Watt Meter is a versatile instrument designed for measuring various electrical parameters in DC circuits. It provides clear and accurate readings for voltage, current, power, energy (Wh), and charge (Ah). This device is suitable for use with 12V, 24V, 36V, and 48V battery bank systems, handling up to 100 amps intermittently and 50 amps continuously.
Key features include:
- Clear LCD Display: Provides precise and easy-to-read measurements.
- Wide Voltage Range: Operates from 0 to 60 volts.
- High Current Capacity: Supports up to 100 amps peak and 50 amps continuous.
- Multi-function Measurement: Measures energy (Wh), charge (Ah), power (W), current (A), and voltage (V).
- Low Power Consumption: Efficient design with only 0.001 Ohms resistance and 36 mA consumption.
- High Precision: Offers 0.01 A current and 0.01 V voltage resolutions.
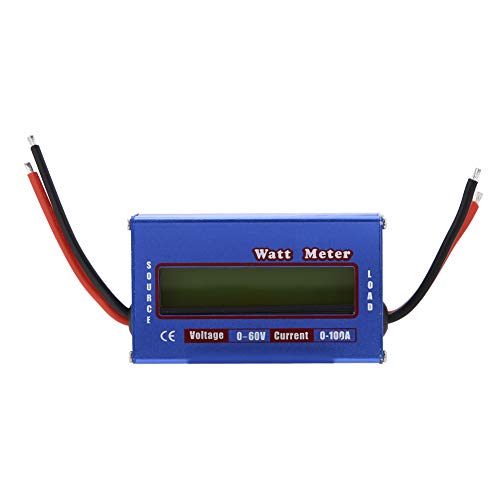
Figure 1: Front view of the Walfront Digital Power Analyzer Watt Meter, showing the LCD screen and approximate dimensions.
2. Safety Information
Please read and understand all safety instructions before operating the device. Failure to follow these instructions may result in electric shock, fire, or serious injury.
- Always ensure the device is connected correctly according to the wiring diagram.
- Do not exceed the maximum voltage (60V) or current (100A peak, 50A continuous) ratings.
- Avoid contact with live circuits.
- Do not operate the device in wet conditions or in the presence of flammable gases or vapors.
- Keep the device away from children.
- If the device appears damaged, do not use it.
3. Setup and Connection
The watt meter features two sets of wires: "SOURCE" and "LOAD".
- Identify Terminals: The device has clearly labeled "SOURCE" and "LOAD" connections. The "SOURCE" side connects to your power supply (e.g., battery), and the "LOAD" side connects to the device you wish to measure (e.g., motor, ESC).
- Connect to Power Source: Connect the red wire from the "SOURCE" side to the positive (+) terminal of your DC power source (e.g., battery). Connect the black wire from the "SOURCE" side to the negative (-) terminal of your DC power source.
- Connect to Load: Connect the red wire from the "LOAD" side to the positive (+) input of your electrical load. Connect the black wire from the "LOAD" side to the negative (-) input of your electrical load.
- Ensure Polarity: Always ensure correct polarity (positive to positive, negative to negative) to prevent damage to the meter and connected devices.
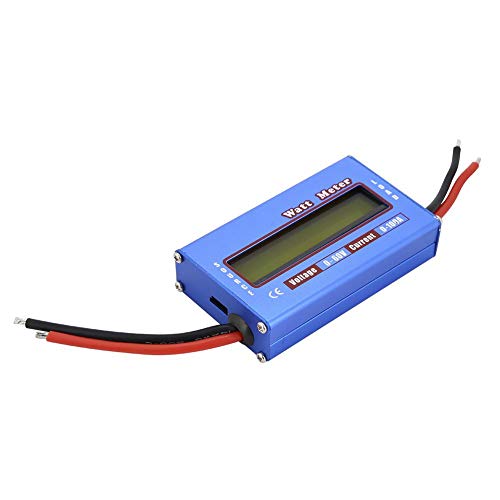
Figure 2: Top view of the watt meter, indicating "SOURCE" and "LOAD" connections for proper wiring.

Figure 3: Side view of the watt meter, illustrating the robust wire connections.
4. Operation
Once properly connected, the watt meter will automatically power on and display real-time measurements on its LCD screen.
4.1 Reading the Display
The LCD display shows various parameters simultaneously. Common readings include:
- Voltage (V): The current voltage of the circuit.
- Current (A): The current flowing through the circuit.
- Power (W): The instantaneous power consumption.
- Energy (Wh): The total energy consumed over time.
- Charge (Ah): The total charge (amp-hours) passed through the circuit.
- Peak Amps (Ap): The highest current recorded during the measurement period.
- Voltage Minimum (Vm): The lowest voltage recorded (sag).
4.2 Resetting Measurements
To reset accumulated energy (Wh) and charge (Ah) readings, disconnect the power from the meter for a few seconds and then reconnect it. This will clear the accumulated values and start new measurements.
5. Maintenance
The Walfront Digital Power Analyzer Watt Meter requires minimal maintenance.
- Cleaning: Wipe the device with a soft, dry cloth. Do not use abrasive cleaners or solvents.
- Storage: Store the device in a cool, dry place away from direct sunlight and extreme temperatures.
- Inspection: Periodically inspect the wires and connections for any signs of wear or damage.
6. Troubleshooting
| Problem | Possible Cause | Solution |
|---|---|---|
| No display/Device not powering on | Incorrect wiring; No power from source; Damaged device. | Check all connections for correct polarity and secure contact. Ensure the power source is active. If damaged, discontinue use. |
| Inaccurate readings | Loose connections; Device operating outside specified range; Interference. | Verify all connections are tight. Ensure voltage and current are within 0-60V and 0-100A. Relocate away from strong electromagnetic fields. |
| Readings not resetting | Continuous power supply. | Disconnect power completely for a few seconds to clear accumulated data. |
7. Specifications
| Parameter | Value |
|---|---|
| Brand | Walfront |
| Model | Walfront36hxv74n9g |
| Voltage Range | 0 - 60V DC |
| Current Range | 0 - 100A (100A peak, 50A continuous) |
| Current Resolution | 0.01 A |
| Voltage Resolution | 0.01 V |
| Resistance | 0.001 Ohms |
| Power Consumption | 36 mA |
| Dimensions | 4.13 x 3.03 x 1.38 inches (approx.) |
| Weight | 0.1 Kilograms (approx.) |
| Color | Black, Blue |
8. Warranty and Support
For warranty information and technical support, please refer to the documentation provided with your purchase or contact Walfront customer service. Keep your purchase receipt as proof of purchase.
Manufacturer: Eujgoov