1. Product Overview
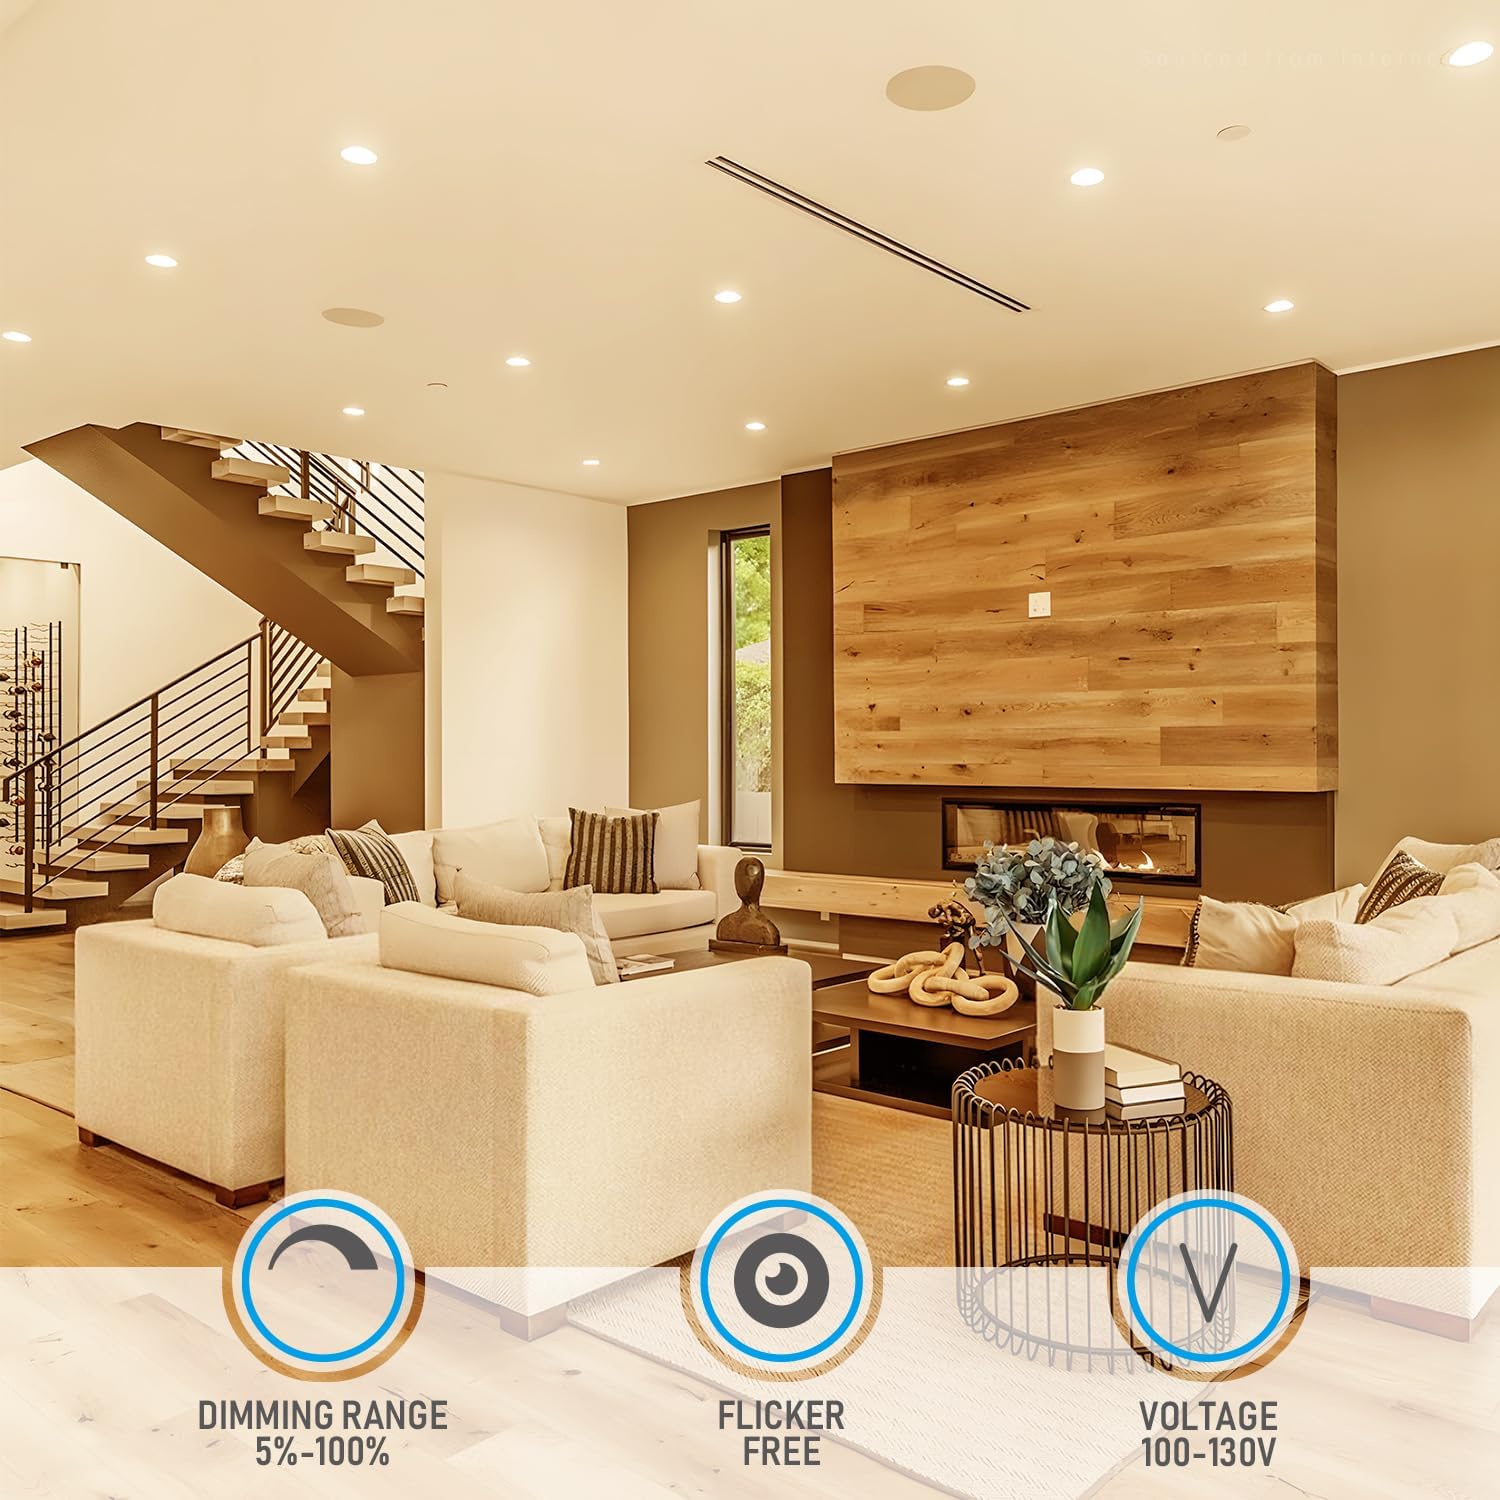
The TORCHSTAR 4 Inch Ultra-Thin LED Recessed Light is designed for efficient and versatile indoor lighting. This low-profile fixture, featuring a junction box, is suitable for narrow ceiling spaces that may not accommodate traditional housing cans. It provides 650 lumens of soft white (2700K) light while consuming only 10 watts of power. The light is dimmable from 5% to 100% and is ETL and Energy Star certified, ensuring safety and energy efficiency.


2. Safety Information
Please read all instructions carefully before installation and retain them for future reference. Installation should be performed by a qualified electrician in accordance with national and local electrical codes.
- Disconnect power at the circuit breaker before installation or servicing.
- Ensure the supply voltage is compatible with the fixture (100-130V AC).
- Do not attempt to modify the fixture.
- Wear appropriate safety gear, including safety glasses and gloves, during installation.
- This fixture is IC-rated, meaning it is permitted to be in contact with insulation in ceilings.
- Suitable for damp locations.
3. Package Contents
Each package typically includes:
- 4 x 4-Inch Ultra-Thin LED Recessed Lights
- 4 x Remote Junction Boxes
- Wire Nuts (quantity may vary)
- Instruction Manual
4. Specifications
| Feature | Specification |
|---|---|
| Brand | TORCHSTAR |
| Model Number | JXLDL4D-10W27D-4P |
| Size | 4 Inches |
| Color Temperature | 2700K (Soft White) |
| Wattage | 10 Watts |
| Brightness | 650 Lumens |
| Voltage | 100-130 Volts AC |
| Dimmable | Yes (5%-100%) |
| Average Life | 54,000 Hours |
| Material | Aluminum |
| Certifications | ETL, Energy Star |
| Indoor/Outdoor Usage | Indoor (Damp Location Available) |
| Minimum Clearance | 2 inches above ceiling |
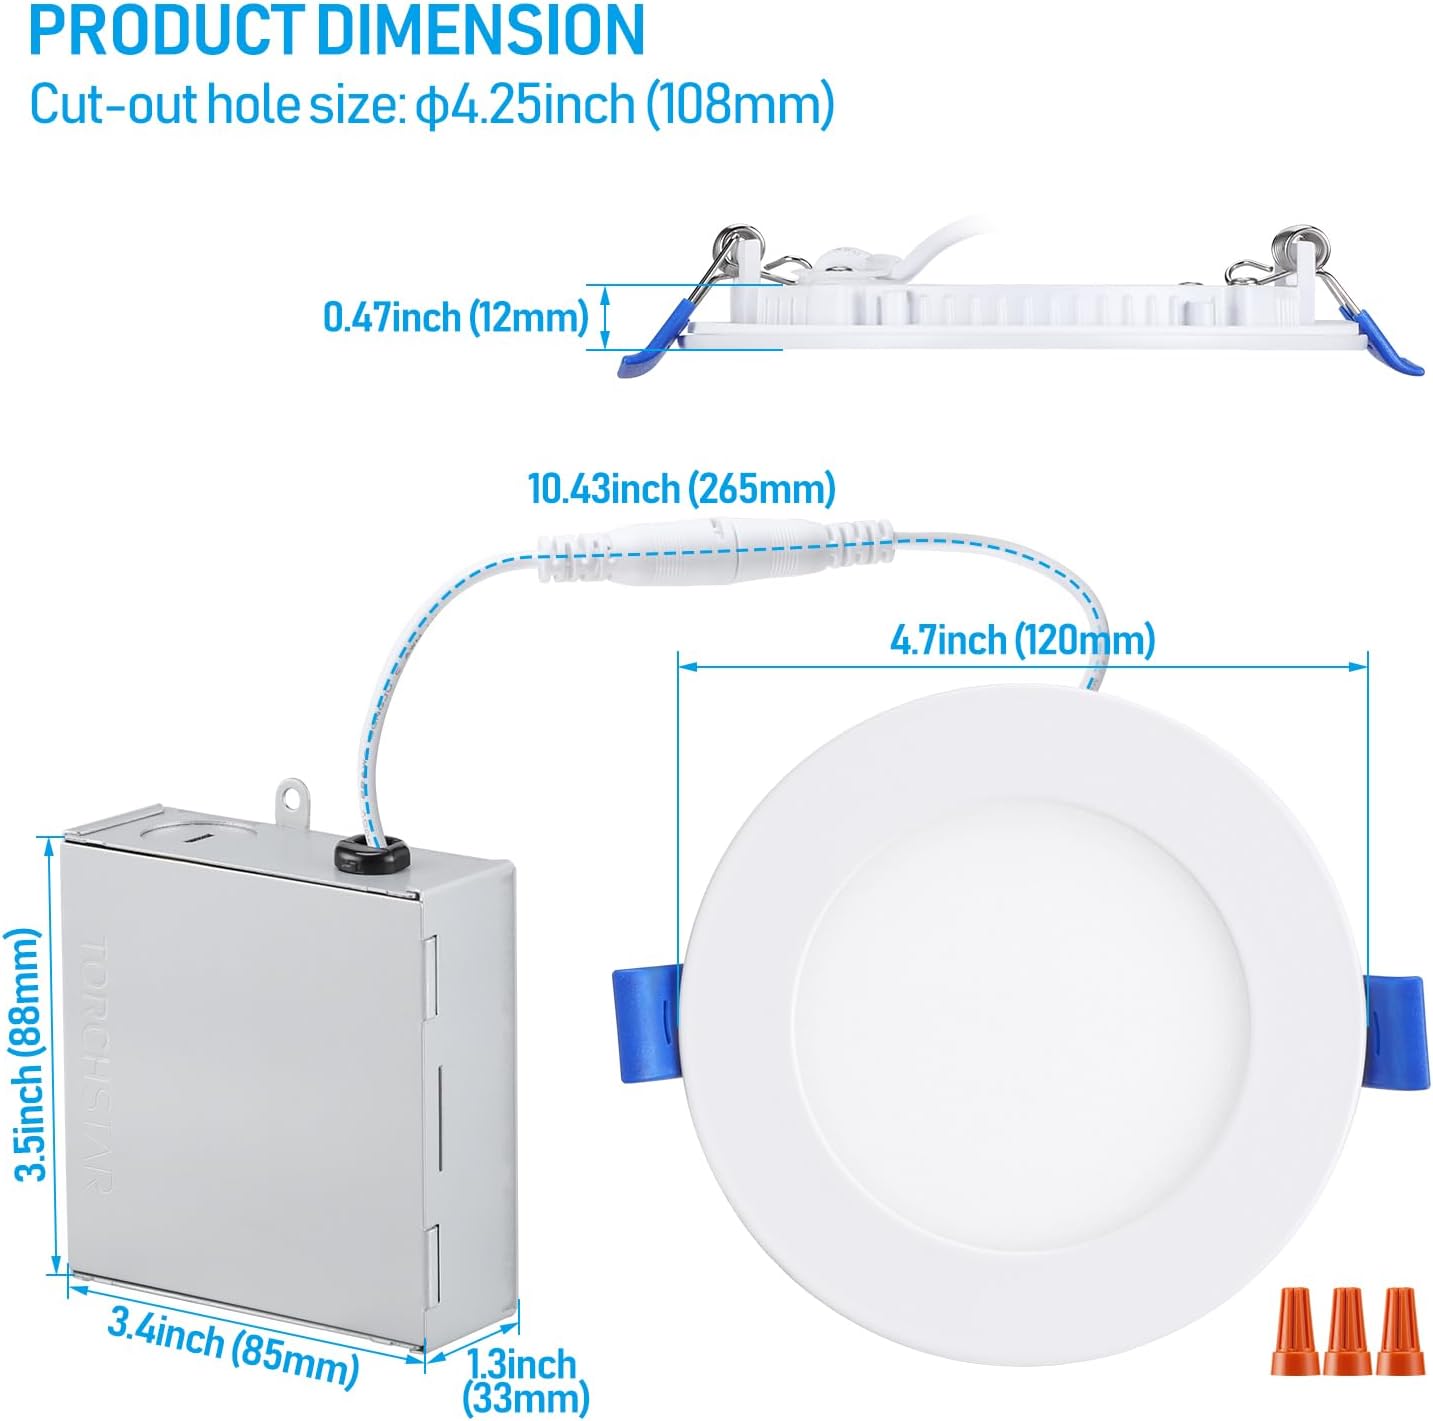
| Cut-out Hole Size | 4.25 inches (108mm) |

5. Installation Instructions
Follow these steps for proper installation:
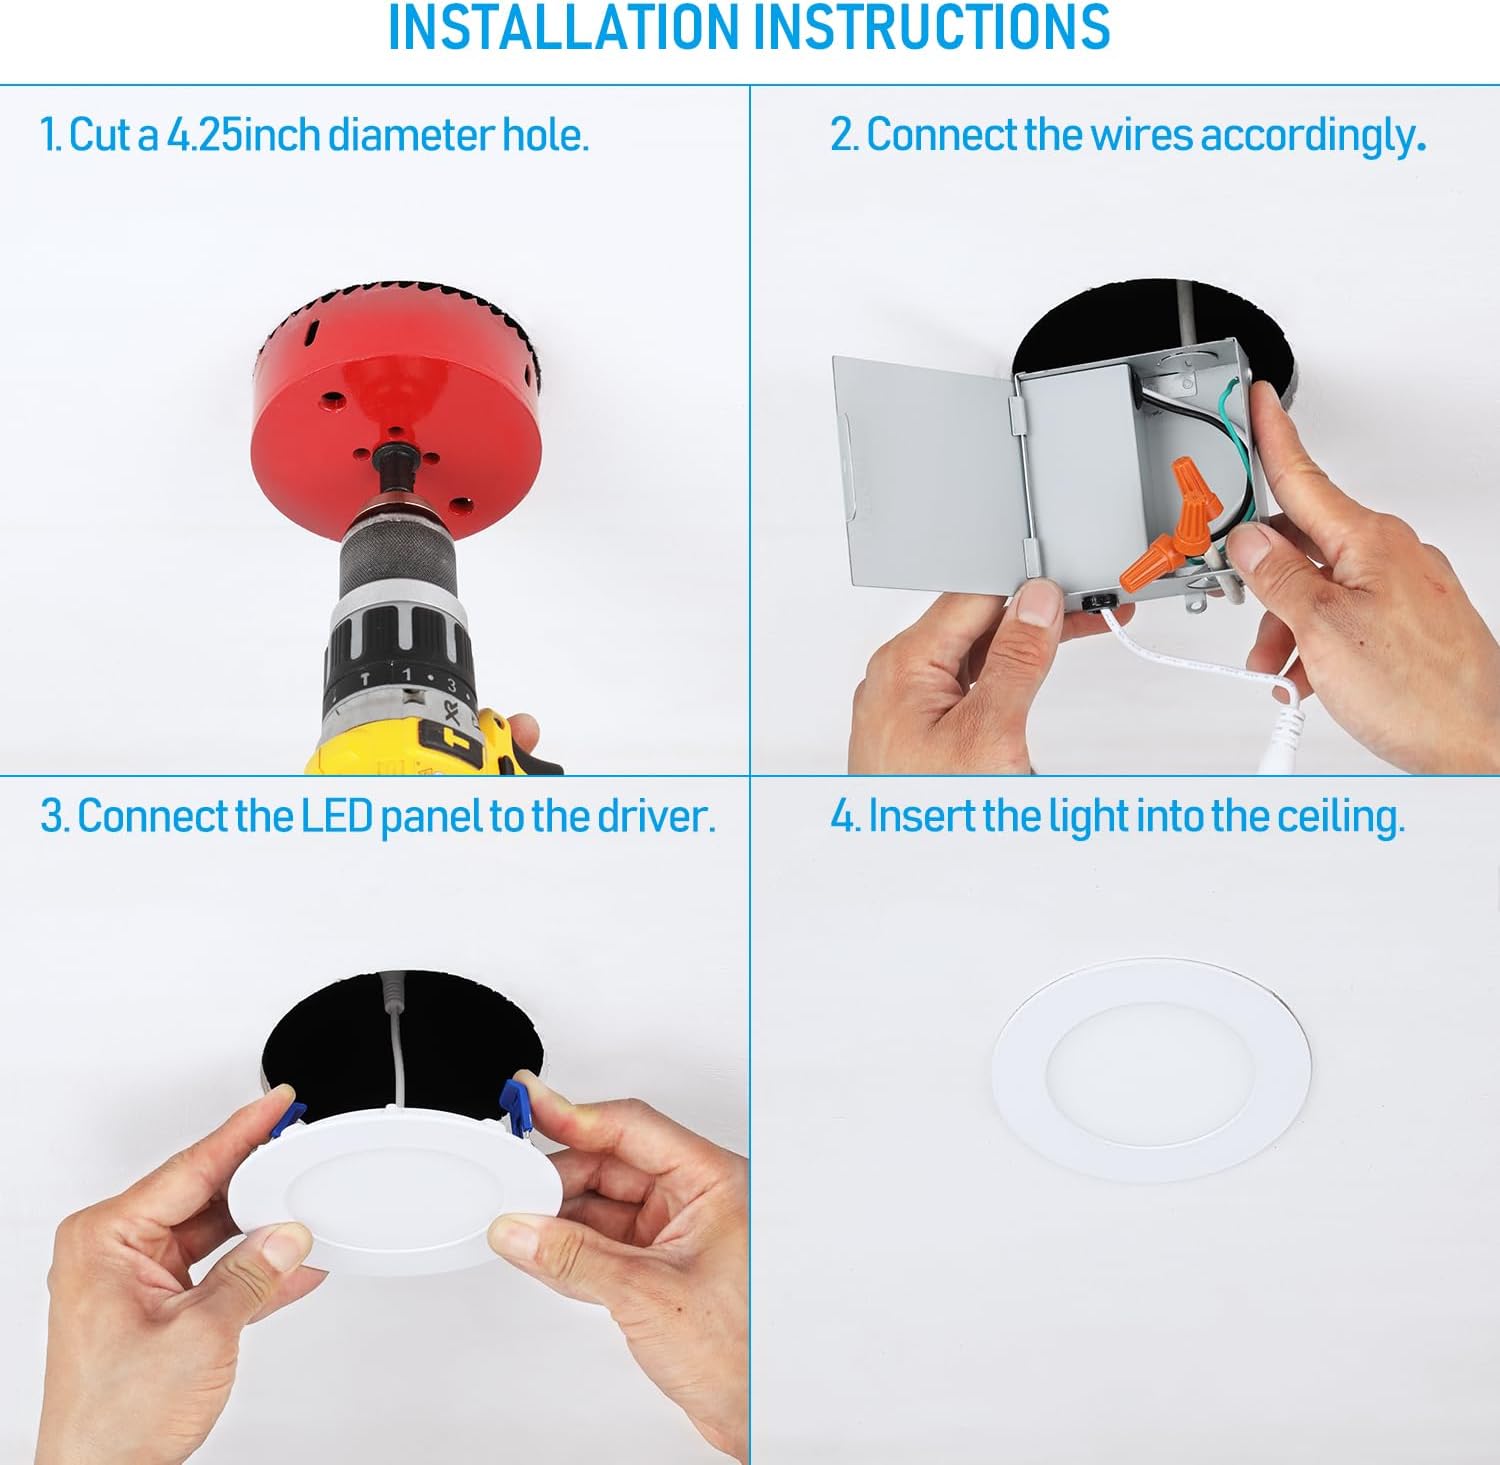
- Prepare the Ceiling: Ensure power is off at the circuit breaker. Mark the desired location for the light. Using a 4.25-inch (108mm) diameter hole saw, cut a circular opening in the ceiling.
- Wire the Junction Box: Open the junction box cover. Connect the household wiring to the wires inside the junction box using appropriate wire nuts (typically black to black, white to white, and ground to ground). Secure the wires and close the junction box cover.
- Connect Light to Junction Box: Connect the male/female cables from the LED panel to the junction box. Ensure a secure connection.
- Insert Light into Ceiling: Gently push the junction box through the cut-out hole into the ceiling cavity. Then, push the LED light fixture into the hole. The spring clips on the sides of the light will secure it firmly against the ceiling.
6. Operating Instructions
Once installed and power is restored, the light can be operated via a standard wall switch. For dimming functionality, ensure a compatible dimmer switch is installed. The light is designed for smooth dimming from 100% down to 5% brightness.
7. Maintenance
The TORCHSTAR LED Recessed Light requires minimal maintenance. The LED components are integrated and not user-serviceable.
- Cleaning: Ensure power is off before cleaning. Wipe the surface of the light with a soft, dry or slightly damp cloth. Do not use abrasive cleaners or solvents.
- Inspection: Periodically check for any loose connections or damage to the fixture. If any damage is observed, disconnect power and consult a qualified electrician.
8. Troubleshooting
If you encounter issues with your light, refer to the following common problems and solutions:
| Problem | Possible Cause | Solution |
|---|---|---|
| Light does not turn on | No power supply; Loose wiring; Faulty switch | Check circuit breaker; Verify all wire connections; Test or replace switch |
| Light flickers | Incompatible dimmer switch; Loose wiring; Voltage fluctuations | Ensure dimmer is LED compatible; Check wiring connections; Consult electrician for voltage issues |
| Light is too dim or too bright | Dimmer setting; Incorrect light chosen for space | Adjust dimmer to desired level; Consider light output requirements for the room |
If the problem persists after attempting these solutions, contact customer support.
9. Warranty and Support
Specific warranty details are not provided within this manual. For warranty information, technical support, or replacement parts, please contact TORCHSTAR customer service directly. Refer to the product packaging or the TORCHSTAR official website for contact details.