DreamSky 193
DreamSky Alarm Clock User Manual
Model: 193
Brand: DreamSky
Introduction
Thank you for choosing the DreamSky Alarm Clock. This digital alarm clock is designed for convenience and reliability, featuring an auto-set time function, large display with adjustable brightness, USB charging ports, and battery backup. This manual provides detailed instructions for setup, operation, and maintenance to ensure you get the most out of your device.
Package Contents
- DreamSky Digital Alarm Clock (Model 193)
- Power Adapter
- USB Cable
- CR2032 Button Cell Battery (pre-installed for backup)
- User Manual
Product Overview
Familiarize yourself with the main components and controls of your DreamSky Alarm Clock.

Figure 1: Front view of the DreamSky Alarm Clock, showing the large digital display with time, date, day of week, temperature, and alarm settings. A smartphone is shown charging via the USB port.

Figure 2: Rear view of the DreamSky Alarm Clock, highlighting the control buttons (+, SET, -), alarm ON/OFF switch, and the backup battery compartment. Two USB charging ports are also visible.
Controls and Features:
- Large LCD Display: Shows time, date, day of week, and temperature.
- SNOOZE/LIGHT Button: Located on top, used for snooze function and display brightness adjustment.
- SET Button: Used to enter and confirm settings.
- '+' Button: Adjusts values up or increases brightness.
- '-' Button: Adjusts values down or decreases brightness.
- ALARM ON/OFF Switch: Activates or deactivates the alarm.
- USB Charging Ports: Two ports for charging external devices.
- Battery Compartment: For 3 x AAA backup batteries (not included for main power).
Setup
1. Powering the Clock
The DreamSky Alarm Clock is primarily powered by an AC adapter. It also features a battery backup system to maintain settings during power outages.
- Connect the Power Adapter: Plug the provided USB cable into the clock's power input port and the other end into the power adapter. Plug the adapter into a standard wall outlet. The clock display will light up immediately.
- Install Backup Batteries (Optional but Recommended): For battery backup functionality, open the battery compartment on the back of the clock and insert 3 new AAA batteries (not included), observing the correct polarity. The pre-installed CR2032 button cell battery maintains time and settings during brief power interruptions, but AAA batteries are needed for the display to light up for 5 seconds and for the alarm to trigger during a power outage.

Figure 3: The alarm clock connected to a wall outlet using the provided power adapter and USB cable.

Figure 4: Rear view of the clock showing the open battery compartment for AAA batteries, which provide backup power for the display and alarm during outages.
2. Initial Time Setup (Auto-Set)
Upon first power-up, the clock will automatically set the correct time, date, and temperature. You only need to select your time zone.
- Select Time Zone:
- Press and hold the SET button for 2 seconds. The time zone will begin to flash.
- Use the + or - buttons to cycle through the available time zones (EST, CST, MST, PST, AST, HAT, AKT, NST).
- Press SET again to confirm your selection and exit time zone setting.
- Daylight Saving Time (DST):
- After setting the time zone, the DST setting will flash.
- Use the + or - buttons to toggle DST ON or OFF. When ON, the clock will automatically adjust for Daylight Saving Time.
- Press SET to confirm and exit.
Note: If the auto-set time is incorrect due to specific circumstances, you can manually adjust the time by holding the SET button for 2 seconds and then pressing SET repeatedly to cycle through time, date, and temperature settings, using + and - to adjust each value.
Operating Instructions
1. Setting the Alarm
- Enter Alarm Setting Mode: Press the SET button once (do not hold). The alarm time will flash.
- Adjust Alarm Time: Use the + or - buttons to set the desired alarm hour. Press SET to confirm the hour and move to minutes. Use - or + to set the desired alarm minutes.
- Confirm Alarm Setting: Press SET again to save the alarm time and exit alarm setting mode.
- Activate/Deactivate Alarm: Use the ALARM ON/OFF switch on the back of the clock to turn the alarm function on or off. When the alarm is active, an alarm icon will appear on the display.
2. Snooze Function
When the alarm sounds, press the large SNOOZE/LIGHT button on top of the clock. The alarm will pause for 8 minutes and then sound again. This can be repeated multiple times.

Figure 5: Visual representation of the 8-minute snooze function.
3. Adjusting Display Brightness
The clock features 6 levels of brightness and an auto-dimming mode.
- Manual Brightness Adjustment: In normal time display mode (not in setting mode), press the + or - buttons to cycle through the 6 brightness levels (100%, 70%, 50%, 30%, 10%, 5%).
- Auto-Dimming Mode: Continue pressing the - button past the lowest manual setting to activate the auto-dimming mode. An "AUTO" icon will appear on the display. In this mode, the brightness will automatically adjust:
- 7:00 AM - 9:00 PM: 100% Brightness
- 9:01 PM - 6:59 AM: 5% Brightness

Figure 6: Illustration of the various brightness levels and the automatic dimming feature based on time of day.
4. Using the USB Charging Ports
The clock is equipped with two USB ports on the back, allowing you to charge your smartphone or other small electronic devices.
- Simply connect your device's USB charging cable to one of the ports on the back of the alarm clock.
- Ensure the alarm clock is plugged into a wall outlet for the USB charging ports to function.
Figure 7: The alarm clock with a smartphone connected to its USB charging port, demonstrating its charging capability.
Maintenance
- Cleaning: Wipe the clock with a soft, dry cloth. Do not use abrasive cleaners or solvents.
- Battery Replacement: If using AAA backup batteries, replace them annually or when the backup function appears weak. The pre-installed CR2032 battery has a long lifespan but can be replaced if necessary by a qualified technician.
- Storage: If storing the clock for an extended period, remove the AAA backup batteries to prevent leakage.
Troubleshooting
| Problem | Possible Cause | Solution |
|---|---|---|
| Clock display is blank. | Not plugged in; power outage; faulty adapter. | Ensure the power adapter is securely plugged into the clock and a working outlet. Check if there's a power outage. |
| Alarm does not sound. | Alarm is off; alarm time not set correctly. | Check the ALARM ON/OFF switch on the back. Verify the alarm time is set correctly. |
| Time is incorrect after power outage. | AAA backup batteries not installed or dead. | Install or replace 3 AAA backup batteries. The CR2032 battery only holds settings, not full operation during outage. |
| USB charging not working. | Clock not powered by AC; faulty USB cable. | Ensure the clock is plugged into a wall outlet. Try a different USB cable. |
| Display too bright/dim. | Brightness setting needs adjustment. | Press '+' or '-' buttons to adjust brightness levels or activate auto-dimming mode. |
Specifications
- Brand: DreamSky
- Model: 193
- Display Type: Digital LCD
- Product Dimensions: 6.1"W x 4"H (approximate, from product data)
- Power Source: Corded Electric (USB adapter), Battery Powered (3 x AAA for backup, 1 x CR2032 included for settings backup)
- Special Features: Auto-dimmable display, Self-setting time, Date and Day of Week display, Thermometer, Auto DST, USB charging ports.
- Material: Plastic
- Item Weight: 11.2 ounces
- UPC: 860001921168
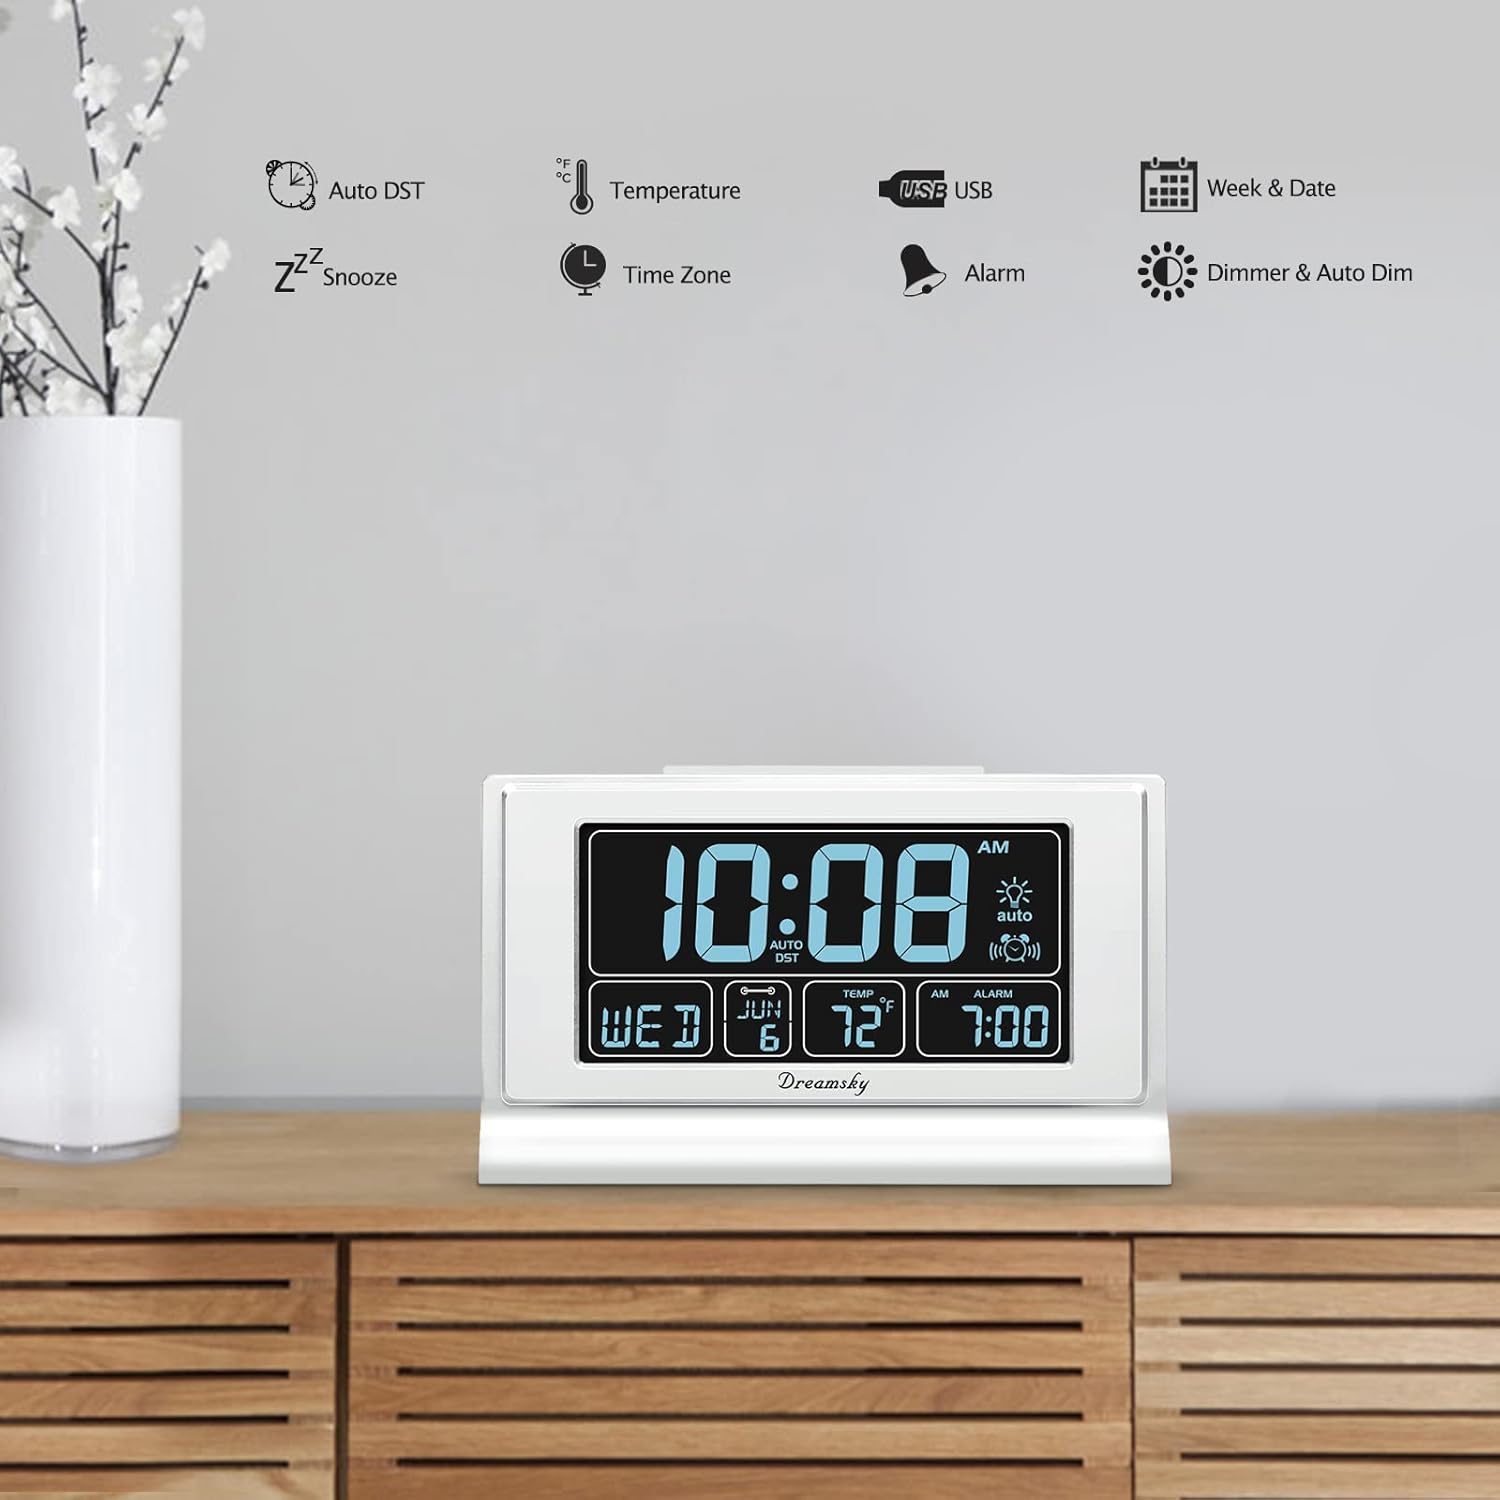
Figure 8: Diagram illustrating the dimensions of the DreamSky Alarm Clock (6.2 inches wide, 4.1 inches high, 1.5 inches deep).
Warranty and Support
For warranty information or technical support, please refer to the contact details provided with your product packaging or visit the official DreamSky website. Keep your purchase receipt for warranty claims.
DreamSky Official Store: Visit the DreamSky Store on Amazon
Ask a question about this manual
Ask about setup, troubleshooting, compatibility, parts, safety, or missing instructions. Manuals+ will review the question and use this page’s manual context to help answer it.