
1. Introduction
Thank you for choosing the BLACK+DECKER Variable Control Compact Iron. This manual provides essential information for the safe operation, maintenance, and care of your appliance. Please read all instructions carefully before use and retain this manual for future reference.

Image 1.1: The BLACK+DECKER Variable Control Compact Iron, showcasing its red and white design.
2. Important Safety Instructions
WARNING: To reduce the risk of fire, electric shock, or injury:
- Read all instructions before using the iron.
- Use the iron only for its intended household use.
- To avoid the risk of electric shock, do not immerse the iron in water or other liquids.
- Always turn the iron OFF before plugging or unplugging from the electrical outlet. Never pull on the cord to disconnect from the outlet; instead, grasp the plug and pull to disconnect.
- Do not allow the cord to touch hot surfaces. Let the iron cool completely before putting away. Loop cord loosely around the iron when storing.
- Always disconnect the iron from the electrical outlet when filling with water or emptying, and when not in use.
- Do not operate the iron with a damaged cord or if the iron has been dropped or damaged. To avoid the risk of electric shock, do not disassemble the iron; take it to a qualified service person for examination and repair. Incorrect reassembly can cause a risk of electric shock when the iron is used.
- Close supervision is necessary for any appliance used by or near children. Do not leave the iron unattended while connected or on an ironing board.
- Burns can occur from touching hot metal parts, hot water, or steam. Use caution when you turn a steam iron upside down – there may be hot water in the reservoir.
- This appliance has a polarized plug (one blade is wider than the other). To reduce the risk of electric shock, this plug is intended to fit into a polarized outlet only one way. If the plug does not fit fully into the outlet, reverse the plug. If it still does not fit, contact a qualified electrician. Do not attempt to modify the plug in any way.
3. Product Features
- Easy Dial with 6-Fabric Settings: Use the improved dial to select the perfect setting for different fabric types.
- New Cord Design: The cord is designed to toggle down so it stays out of the way while you iron.
- TrueGlide Premium Nonstick Soleplate: The enhanced nonstick soleplate is engineered to glide smoothly across all ironable fabrics.
- Easy-Fill 240mL Water Tank Design: The water tank is designed for easy filling and features a large capacity relative to the compact size of the iron.
- Ergonomic Mist and Steam Burst Buttons: The side-by-side buttons offer total moisture control. One delivers a burst of steam and the other a gentle spray mist.

Image 3.1: Side view of the iron, highlighting the ergonomic mist and steam burst buttons and the temperature control dial.

Image 3.2: The iron's new cord design, engineered to stay clear of the ironing path.

Image 3.3: Detailed view of the TrueGlide Premium Nonstick Soleplate, designed for smooth gliding.
4. Setup
4.1 Filling the Water Tank
- Ensure the iron is unplugged from the electrical outlet.
- Open the water fill cover located on the top of the iron.
- Using a measuring cup, carefully pour tap water into the water tank until it reaches the 'MAX' fill line. Do not overfill.
- Close the water fill cover securely.
4.2 Initial Use
- Before ironing garments, operate the iron for a few minutes on an old cloth to ensure any manufacturing residues are removed.
- Plug the iron into a standard 120-volt AC electrical outlet.
5. Operating Instructions
5.1 Selecting Temperature
- Refer to the fabric care label on your garment.
- Rotate the temperature control dial to the desired fabric setting (e.g., synthetic, silk, wool, cotton, linen).
- Allow the iron to heat up. The indicator light will turn off when the selected temperature is reached.
5.2 Steam Ironing
Steam ironing is recommended for most fabrics except delicate ones like silk or synthetics, which may require dry ironing or lower steam settings.
- Ensure the water tank is filled.
- Set the temperature dial to a steam-appropriate setting (usually cotton, linen, or wool). Steam will not generate at lower temperatures.
- Once the iron reaches the set temperature, steam will begin to emit from the soleplate.
5.3 Burst of Steam
For stubborn wrinkles, press the 'Burst of Steam' button. This delivers an extra surge of steam. Allow a few seconds between bursts for optimal steam generation.
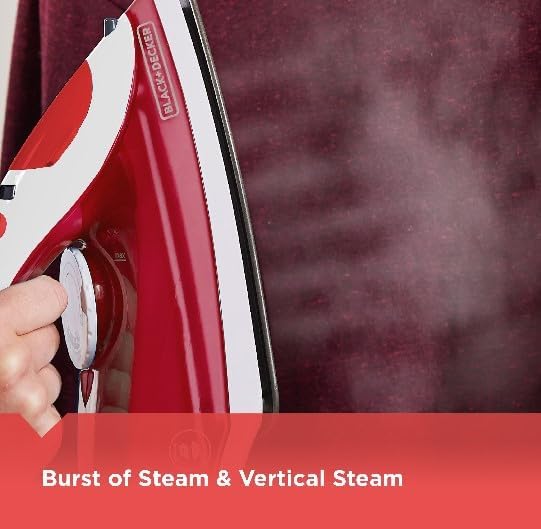
Image 5.1: Demonstrating the use of the burst of steam feature for effective wrinkle removal.
5.4 Vertical Steam
The burst of steam feature can also be used for vertical steaming of hanging garments, drapes, or upholstery. Hold the iron upright, about 1 inch away from the fabric, and press the 'Burst of Steam' button.
5.5 Spray Mist
Press the 'Spray Mist' button to lightly dampen fabrics, which can help in smoothing out wrinkles, especially on dry fabrics.
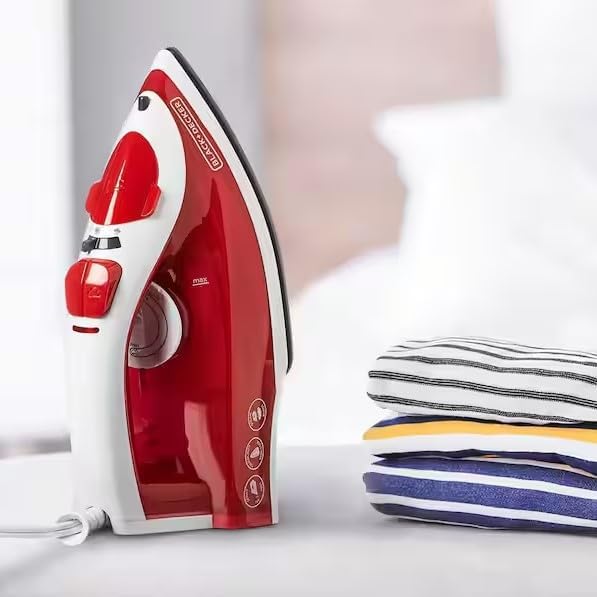
Image 5.2: The iron positioned on an ironing board, ready for use, with folded laundry nearby.
6. Maintenance
6.1 Cleaning the Soleplate
To clean the soleplate, ensure the iron is unplugged and completely cool. Wipe the soleplate with a damp cloth and a non-abrasive liquid cleaner. Do not use harsh scouring pads or metallic cleaners as they can scratch the soleplate.

Image 6.1: The underside of the iron, displaying the TrueGlide Premium Nonstick Soleplate with steam vents.
6.2 Draining the Water Tank
After each use, or before storing, ensure the iron is unplugged and cool. Open the water fill cover and carefully empty any remaining water from the tank. This helps prevent mineral buildup.
6.3 Storage
Once the iron is completely cool and empty of water, store it upright on its heel rest to protect the soleplate. Loop the cord loosely around the iron.
7. Troubleshooting
| Problem | Possible Cause | Solution |
|---|---|---|
| Iron does not heat up. | Not plugged in; power outlet malfunction; temperature dial set to OFF or too low. | Ensure iron is securely plugged in. Check power outlet with another appliance. Adjust temperature dial to a higher setting. |
| No steam or insufficient steam. | Water tank empty; temperature too low for steam; steam vents clogged. | Fill water tank. Set temperature to a steam-appropriate setting (e.g., cotton, linen). Clean soleplate vents if clogged. |
| Water leaks from soleplate. | Temperature too low for steam; water tank overfilled. | Increase temperature setting. Do not overfill the water tank. |
| Iron sticks to fabric. | Soleplate dirty; temperature too high for fabric type. | Clean the soleplate. Reduce temperature setting according to fabric care label. |
8. Specifications
- Brand: BLACK+DECKER
- Model Name: BLACK+DECKER Variable Control Compact Iron
- Model Number: IR20VR-2
- Voltage: 120 Volts
- Item Weight: 2.31 pounds
- Product Dimensions: 5.12"L x 12.05"W
- Base Material: Stainless Steel (TrueGlide Premium Nonstick Soleplate)
- Special Features: Non-Stick Soleplate, Steam Boost Function, Temperature Control, Variable Steam Function, Vertical Steaming

Image 8.1: Diagram illustrating the approximate dimensions of the iron (10.6 inches in length, 5.9 inches in width).

Image 8.2: Top-down view of the iron with indicated measurements for length (11 inches / 29 cm).
9. Warranty and Support
For warranty information and customer support, please refer to the warranty card included with your product or visit the official BLACK+DECKER website. Keep your purchase receipt as proof of purchase for any warranty claims.
Manufacturer: BLACK+DECKER
Website: www.blackanddecker.com