1. Introduction
This manual provides detailed instructions for the installation, operation, and maintenance of your XVIM H.264 2MP Wireless Security Camera System. Please read this manual thoroughly before using the product to ensure proper functionality and to maximize its lifespan. Keep this manual for future reference.
2. Product Overview
2.1 System Components
- 1 x 8-Channel 1080P HD DVR (Digital Video Recorder) with 2TB HDD (Hard Disk Drive)
- 8 x 1080P Wireless Outdoor/Indoor Waterproof Surveillance Cameras
- Power Adapters for DVR and Cameras
- USB Mouse
- Network Cable
2.2 Key Features
- 1080P HD Video: High-definition video recording and live viewing.
- Wireless Connectivity: Cameras connect wirelessly to the DVR, simplifying installation.
- 2TB Hard Drive: Pre-installed for extensive video storage.
- 85FT Night Vision: Infrared LEDs provide clear surveillance in low-light conditions.
- Motion Detection: Configurable motion-triggered recording and alerts.
- Weatherproof Cameras: Suitable for both outdoor and indoor use.
- Remote Access: View live footage and recordings via mobile app (Android/iOS) or PC.
2.3 System Diagram
The diagram below illustrates a typical setup for the wireless security camera system, showing camera placement for optimal coverage around a property.

Image: Overview of the XVIM Wireless Security Camera System showing camera placement in a home environment.
2.4 DVR Rear Panel
Familiarize yourself with the ports on the back of the DVR for proper connection of peripherals and network access.
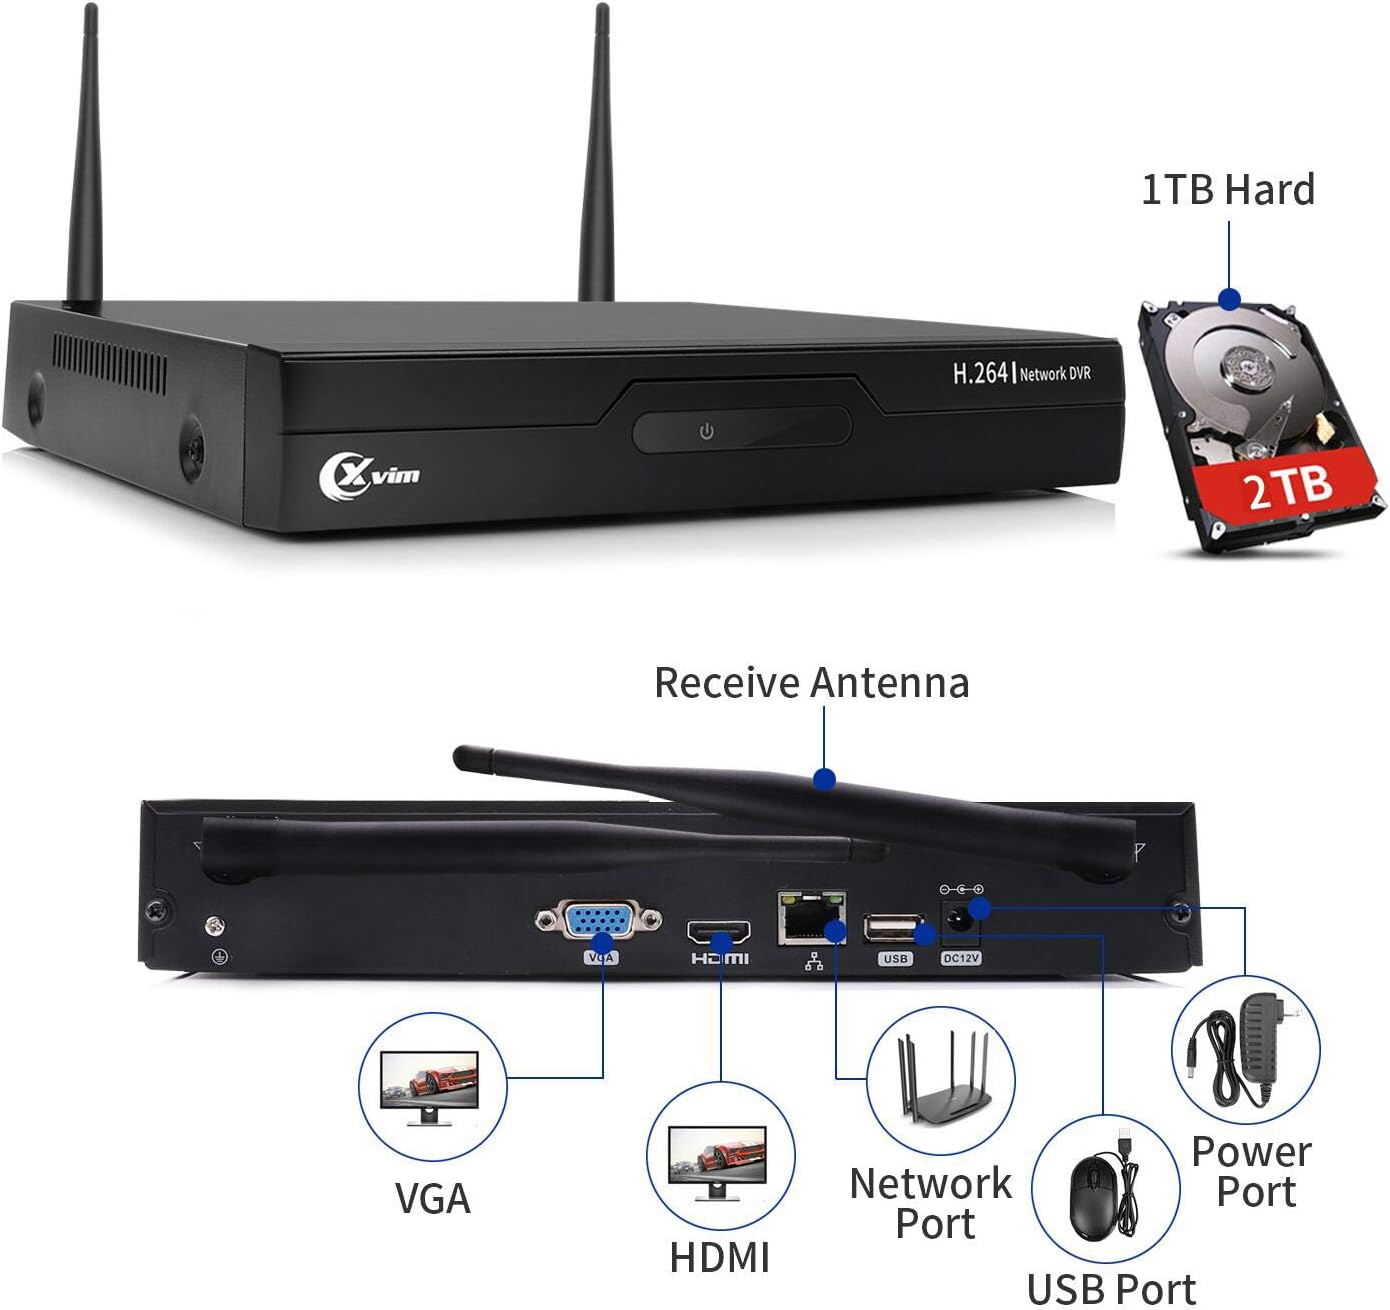
Image: The rear panel of the DVR, highlighting ports for VGA, HDMI, Network, USB, and Power. It also shows the pre-installed 2TB HDD.
3. Setup Instructions
3.1 Initial Connection
- Connect DVR to Monitor: Use an HDMI or VGA cable to connect the DVR to a monitor or TV.
- Connect USB Mouse: Plug the included USB mouse into a USB port on the DVR.
- Connect DVR Power: Connect the DVR to its power adapter and plug it into an electrical outlet. The DVR will power on automatically.
- Connect Camera Power: Connect each camera to its respective power adapter and plug them into electrical outlets.
3.2 Camera Pairing
The cameras are pre-paired with the DVR at the factory. Once both the DVR and cameras are powered on, the cameras should automatically connect and display video on the monitor. If a camera does not display video, ensure it is powered correctly and within range of the DVR's wireless signal.

Image: A wireless camera mounted on a wall, connected to a power outlet. The image also indicates WiFi Wireless Camera, Auto-Pairing, and Wired Powered Adapter features.
3.3 Network Connection (Optional)
For remote viewing, connect the DVR to your router using an Ethernet cable. Follow the on-screen prompts on the DVR to configure network settings or refer to the mobile app section for QR code scanning.
4. Operating Instructions
4.1 Local Viewing
Once the DVR is connected to a monitor, you can view live footage from all connected cameras. Use the USB mouse to navigate the DVR's interface, access settings, playback recordings, and manage the system.
4.2 Remote Viewing via Mobile App
Download the official XVIM mobile application (available for Android and iOS) to view your cameras remotely. Scan the QR code displayed on the DVR's monitor or enter the device ID manually to add your system to the app.

Image: A mobile phone screen showing a live view from multiple security cameras, demonstrating remote monitoring capabilities.
4.3 Recording Modes
The system supports various recording modes, including continuous recording and motion-triggered recording. Configure these settings via the DVR's menu. Motion detection can be customized for specific areas and sensitivity levels.
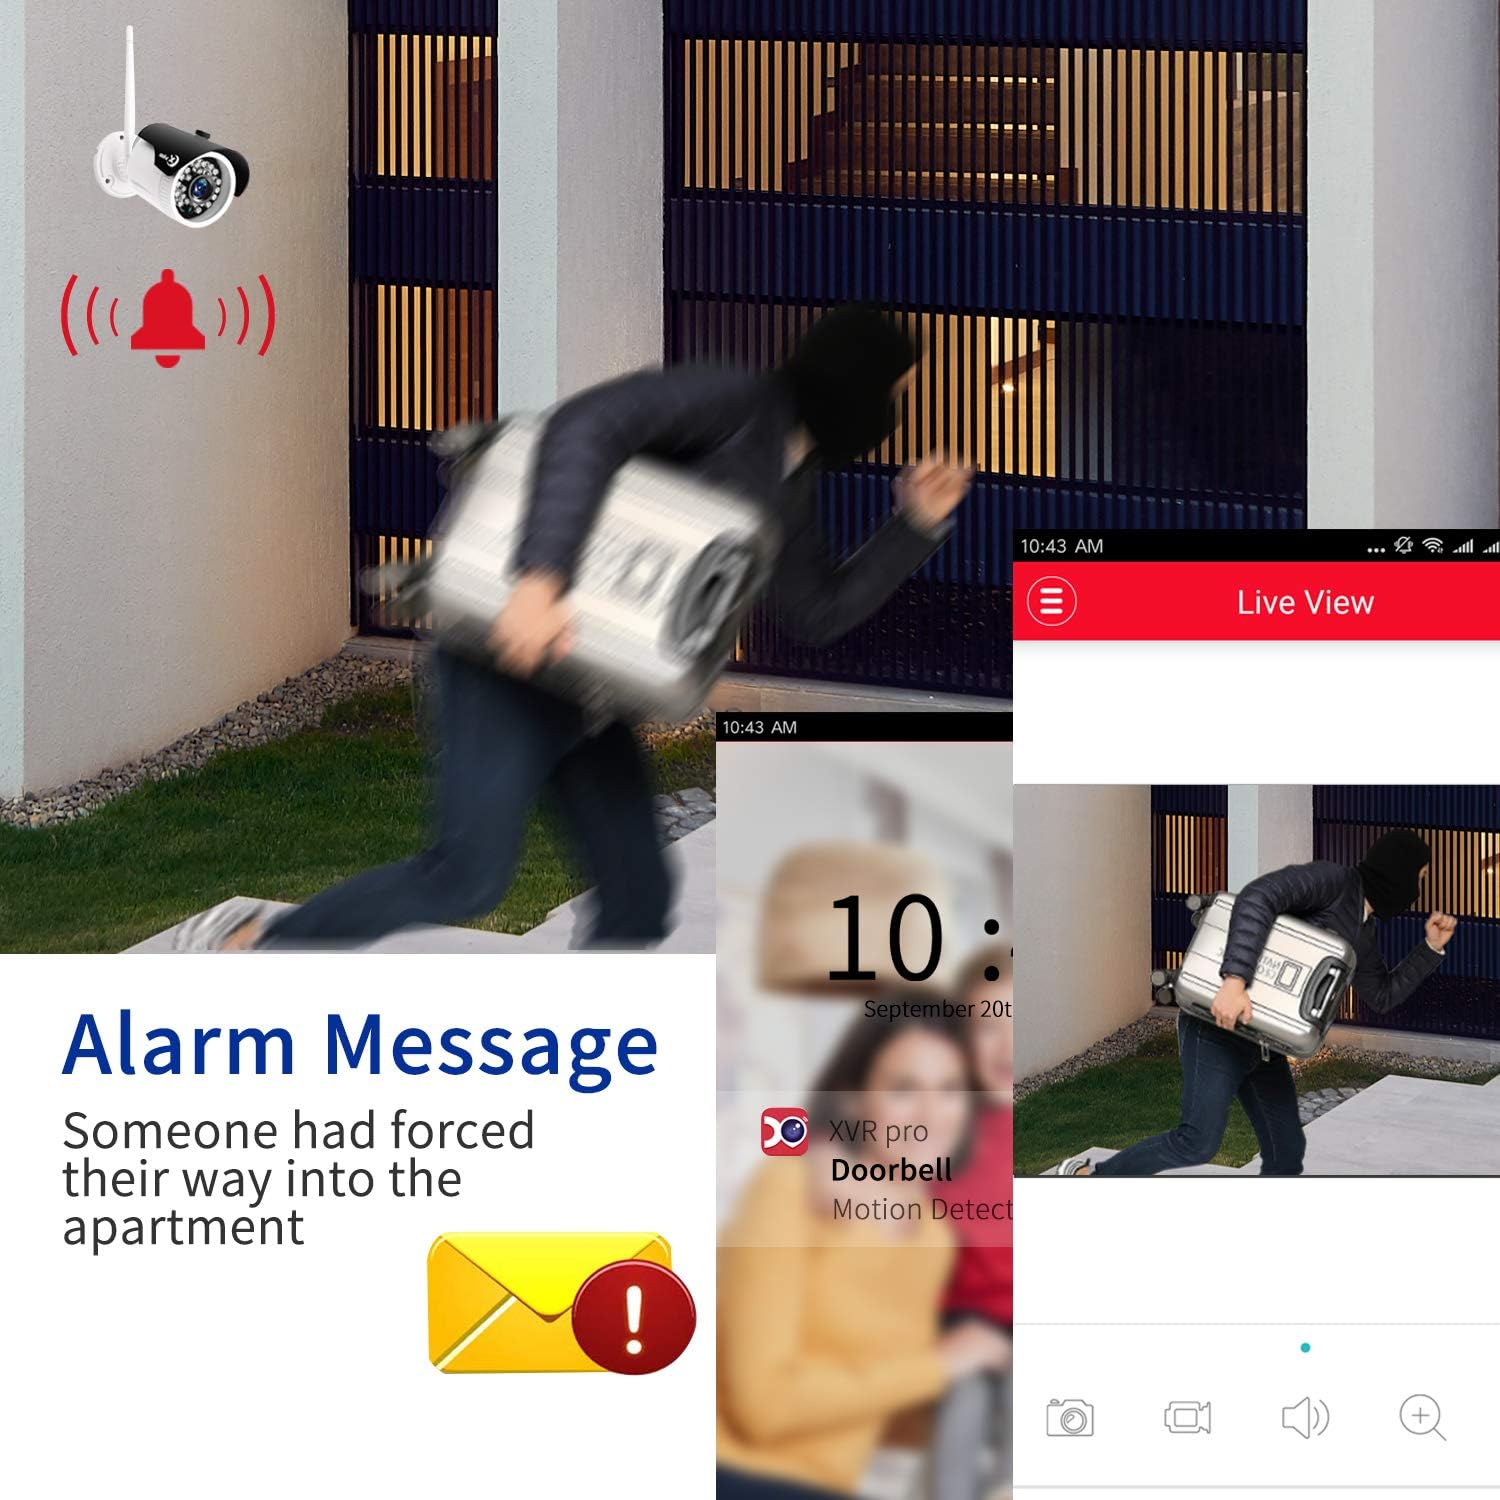
Image: An example of an alarm message notification on a mobile device, indicating motion detection by the security camera system.
4.4 Night Vision
The cameras are equipped with infrared night vision, providing clear black and white video footage up to 85 feet in complete darkness. This feature activates automatically in low-light conditions.

Image: A split image demonstrating the camera's clear day vision and its effective infrared night vision capabilities.
5. Maintenance
- Regular Cleaning: Periodically clean camera lenses with a soft, dry cloth to ensure clear image quality.
- Firmware Updates: Check the manufacturer's website for any available firmware updates for the DVR or cameras to ensure optimal performance and security.
- Hard Drive Management: The 2TB HDD will automatically overwrite older footage when full. Regularly back up important recordings if needed.
- Power Supply Check: Ensure all power adapters are securely connected and free from damage.
6. Troubleshooting
6.1 No Video Display
- Check if the DVR and monitor are powered on and connected correctly.
- Ensure all cameras are powered on and within range of the DVR.
- Verify the HDMI/VGA cable connection between the DVR and monitor.
6.2 Cameras Not Connecting
- Confirm cameras are receiving power.
- Reduce the distance between cameras and the DVR, or remove obstructions.
- If necessary, manually re-pair cameras with the DVR (refer to the DVR's on-screen menu for pairing instructions).
6.3 Remote Access Issues
- Ensure the DVR is connected to your router via an Ethernet cable.
- Verify your router has an active internet connection.
- Check firewall settings on your router; port forwarding may be required for advanced configurations.
- Confirm the mobile app is updated to the latest version.
6.4 Poor Image Quality
- Clean the camera lens.
- Ensure cameras are not pointing directly into strong light sources.
- Check for obstructions in the camera's field of view.
7. Specifications
| Feature | Detail |
|---|---|
| Brand | XVIM |
| Connectivity Technology | Wireless |
| Video Capture Resolution | 1080p |
| Special Features | Motion Sensor, Night Vision, Waterproof, Wireless |
| Number of Channels | 8 |
| Memory Storage Capacity | 2 TB HDD |
| Power Source | Battery Powered (for cameras, though they need to be plugged into an outlet) |
| Operating System Compatibility | Android, iOS |
| Compatible Devices | Cameras, Personal Computers, Smartphones, TV, Tablets |
| Low Light Technology | Night color (refers to night vision capabilities) |
| Recording Mode | Motion Detection |
| Item Weight | 10.71 pounds |
| ASIN | B07VH9FBNZ |
| UPC | 675234632411 |
8. Warranty and Support
For warranty information, technical support, or service inquiries, please contact XVIM customer support directly. Refer to the product packaging or the official XVIM website for the most current contact details and warranty terms.
XVIM is committed to providing high-quality security surveillance solutions. For additional resources, visit the XVIM Store on Amazon.