KCO L1020-G
KCO Lighting Modern Globe Pendant Light (Model L1020-G) User Manual
Introduction
This manual provides detailed instructions for the safe installation, operation, and maintenance of your KCO Lighting Modern Globe Pendant Light, Model L1020-G. Please read this manual thoroughly before installation and retain it for future reference.
Important Safety Information
- Always turn off the main power supply at the circuit breaker before beginning installation or performing any maintenance.
- Consult a qualified electrician if you are unsure about the installation process.
- Ensure all electrical connections are made in accordance with local codes and ordinances.
- Do not exceed the maximum wattage specified for the bulb.
- Handle glass components with care to prevent breakage.
- This fixture is designed for indoor use only.
Package Contents
Verify that all components are present before beginning installation:
- Pendant Light Fixture (Model L1020-G)
- Frosted Glass Lampshade
- Ceiling Canopy
- Mounting Hardware Kit
- E26 Base Bulb (1 included)
- Instruction Manual
Product Specifications
| Feature | Detail |
|---|---|
| Brand | KCO |
| Model Number | L1020-G |
| Color | Gold-1 Light |
| Material | Glass, Metal (Brass Finish) |
| Style | Modern |
| Light Fixture Form | Pendant |
| Product Dimensions | 7.9"L x 7.9"W x 15.8"H |
| Hanging Cord Length | 59" (Adjustable) |
| Bulb Base | E26 (Bulb Included) |
| Maximum Compatible Wattage | 60 Watts |
| Voltage | 110-240V (Worldwide) |
| Special Feature | Dimmable (with compatible bulb and dimmer switch) |
| Indoor/Outdoor Usage | Indoor |
The glass globe lampshade has a diameter of 7.9 inches (20cm), and the ceiling plate measures 4.7 inches (12cm).
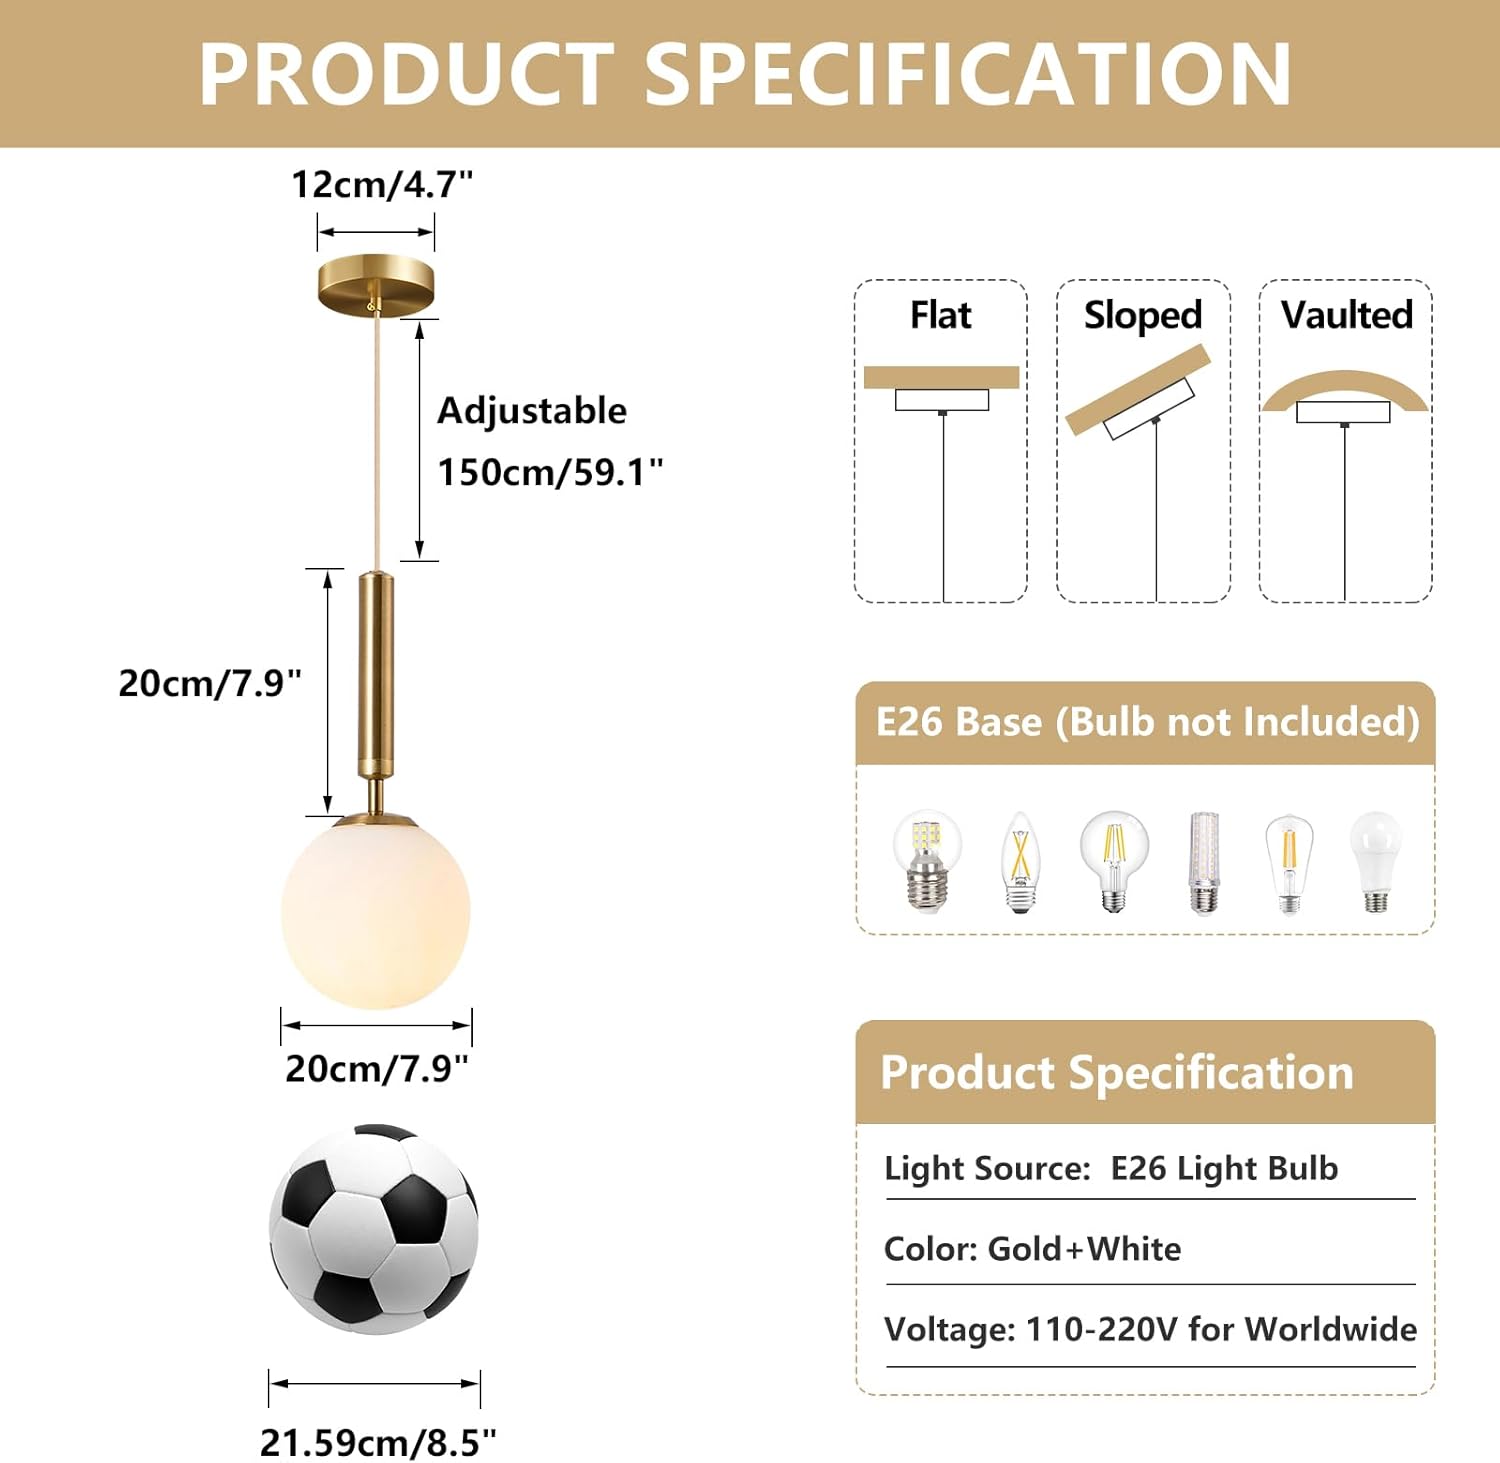
Image: Product dimensions and specifications, highlighting the adjustable cord and E26 bulb base.
Installation Guide
Follow these steps to install your pendant light. It is recommended to have two people for installation.
Tools Required:
- Screwdriver
- Wire Strippers
- Electrical Tape
- Ladder
Installation Steps:
- Turn Off Power: Before starting, ensure the power supply to the installation area is turned off at the circuit breaker.
- Prepare Mounting Plate: Attach the mounting plate to the junction box in the ceiling using the provided screws. Ensure it is securely fastened.
- Adjust Cord Length: Determine the desired hanging height for your pendant light. The gold braided cord is 59 inches long and can be adjusted. Loosen the small screw at the base of the canopy to adjust the cord length, then tighten it to secure the cord. Ensure the cord is set to the desired length before proceeding, as adjustments after mounting can be difficult.
- Make Electrical Connections: Connect the fixture's wires to the corresponding wires from the junction box. Typically, connect the black wire from the fixture to the black (live) wire from the ceiling, the white wire from the fixture to the white (neutral) wire from the ceiling, and the ground wire to the ground wire from the ceiling. Secure connections with wire nuts and electrical tape.
- Mount Canopy: Carefully push the wires into the junction box and align the ceiling canopy with the mounting plate. Secure the canopy to the mounting plate using the provided screws.
- Install Glass Lampshade: Gently screw the frosted glass lampshade onto the fixture. Do not overtighten.
- Install Bulb: Screw the E26 base bulb into the socket.
- Restore Power: Once installation is complete, turn the power back on at the circuit breaker.
This pendant light is suitable for installation on flat, sloped, or vaulted ceilings.
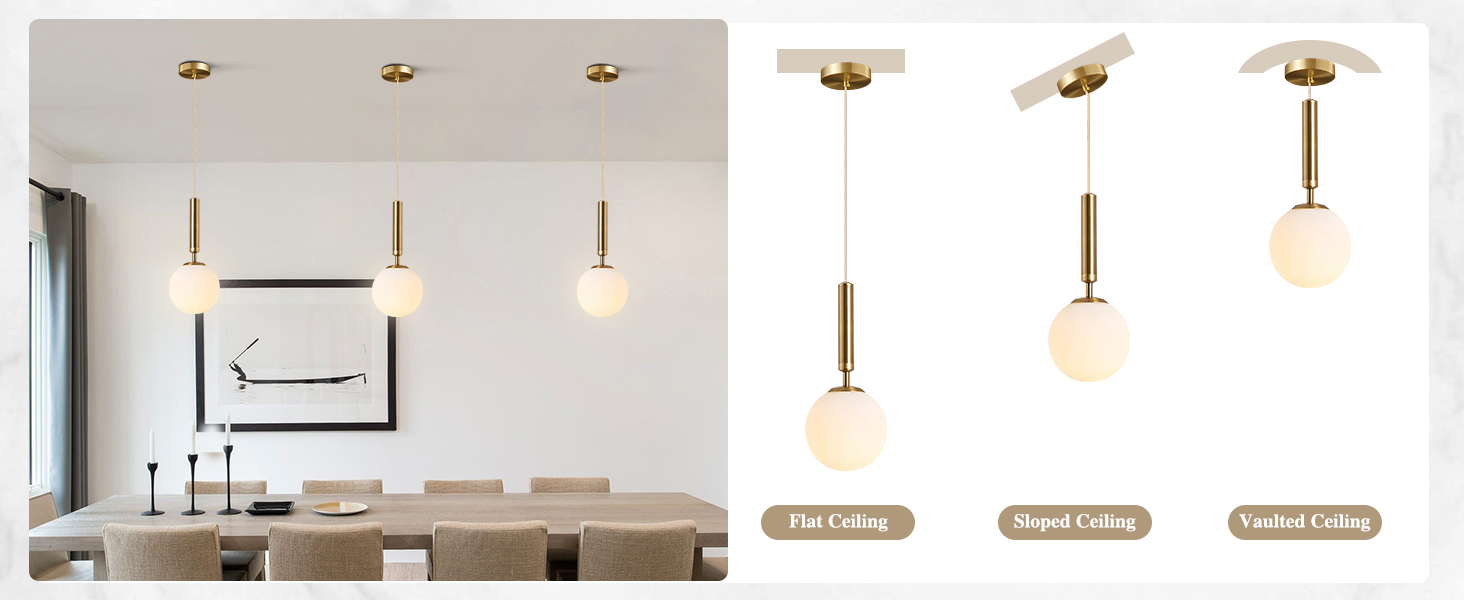
Image: Ceiling compatibility for flat, sloped, and vaulted installations.
Installation Video:
Video: This video demonstrates the KCO Lighting Milk Glass Pendant Light, showcasing its design and potential applications in a kitchen island setting. It provides a visual overview of the product's aesthetic and how it integrates into various spaces.
Operating Instructions
Once installed and power is restored, the pendant light operates via your standard wall switch. For dimming functionality:
- Ensure you are using a dimmable E26 base bulb.
- Install a compatible dimmer switch on your wall.
- Follow the dimmer switch manufacturer's instructions for operation.
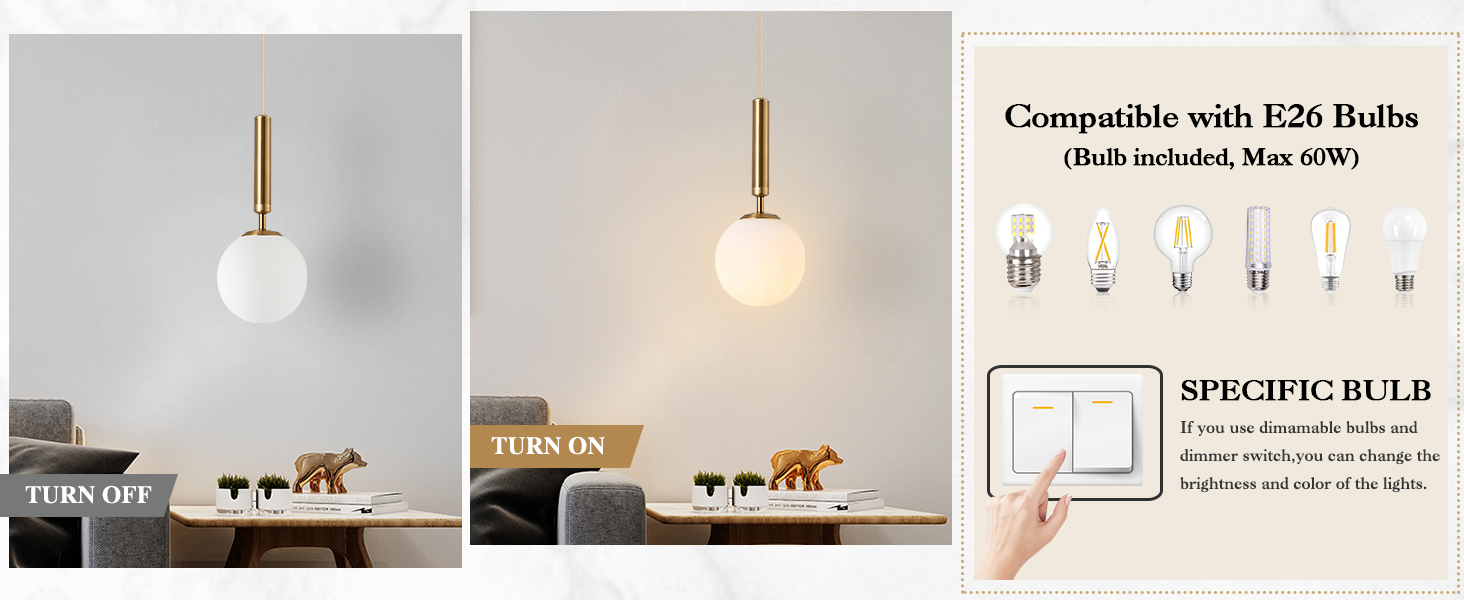
Image: Bulb compatibility and dimmable feature with a dimmer switch.
Care and Maintenance
To maintain the appearance and longevity of your KCO Lighting pendant light:
- Cleaning: Always turn off the power before cleaning. Use a soft, dry cloth to wipe the metal and glass surfaces. Avoid abrasive cleaners, solvents, or polishes as they may damage the finish.
- Bulb Replacement: Ensure the power is off and the bulb has cooled before attempting to replace it. Unscrew the old bulb and screw in a new E26 base bulb, not exceeding 60 watts.
- Inspection: Periodically check all connections and mounting hardware to ensure they remain secure.
Troubleshooting
| Problem | Possible Cause | Solution |
|---|---|---|
| Light does not turn on | No power supply Loose wiring Faulty bulb | Check circuit breaker and wall switch Verify all wire connections are secure (power off) Replace bulb |
| Light flickers | Loose bulb Incompatible dimmer/bulb Loose wiring | Tighten bulb Ensure dimmable bulb and compatible dimmer are used Check wiring connections (power off) |
| Glass shade is loose | Shade not tightened properly | Gently tighten the glass lampshade |
Warranty and Support
KCO Lighting offers a 3-year warranty for this product. If you encounter any issues such as broken, damaged, or cracked glass lampshades, or any other quality concerns, please contact KCO Lighting directly through your order number for assistance.
For professional after-sales service or if you require a different length cable, please contact us. We are committed to providing solutions within 24 hours.
Contact Information: Please refer to your purchase platform or original packaging for the most current contact details for KCO Lighting customer support.
Ask a question about this manual
Ask about setup, troubleshooting, compatibility, parts, safety, or missing instructions. Manuals+ will review the question and use this page’s manual context to help answer it.