1. Introduction
This manual provides detailed instructions for the proper use and maintenance of your Walfront TL88 Portable Fish Finder. Please read this manual thoroughly before operating the device to ensure optimal performance and longevity. This device is designed to detect water depth, approximate fish location, and underwater contour in various fishing environments.
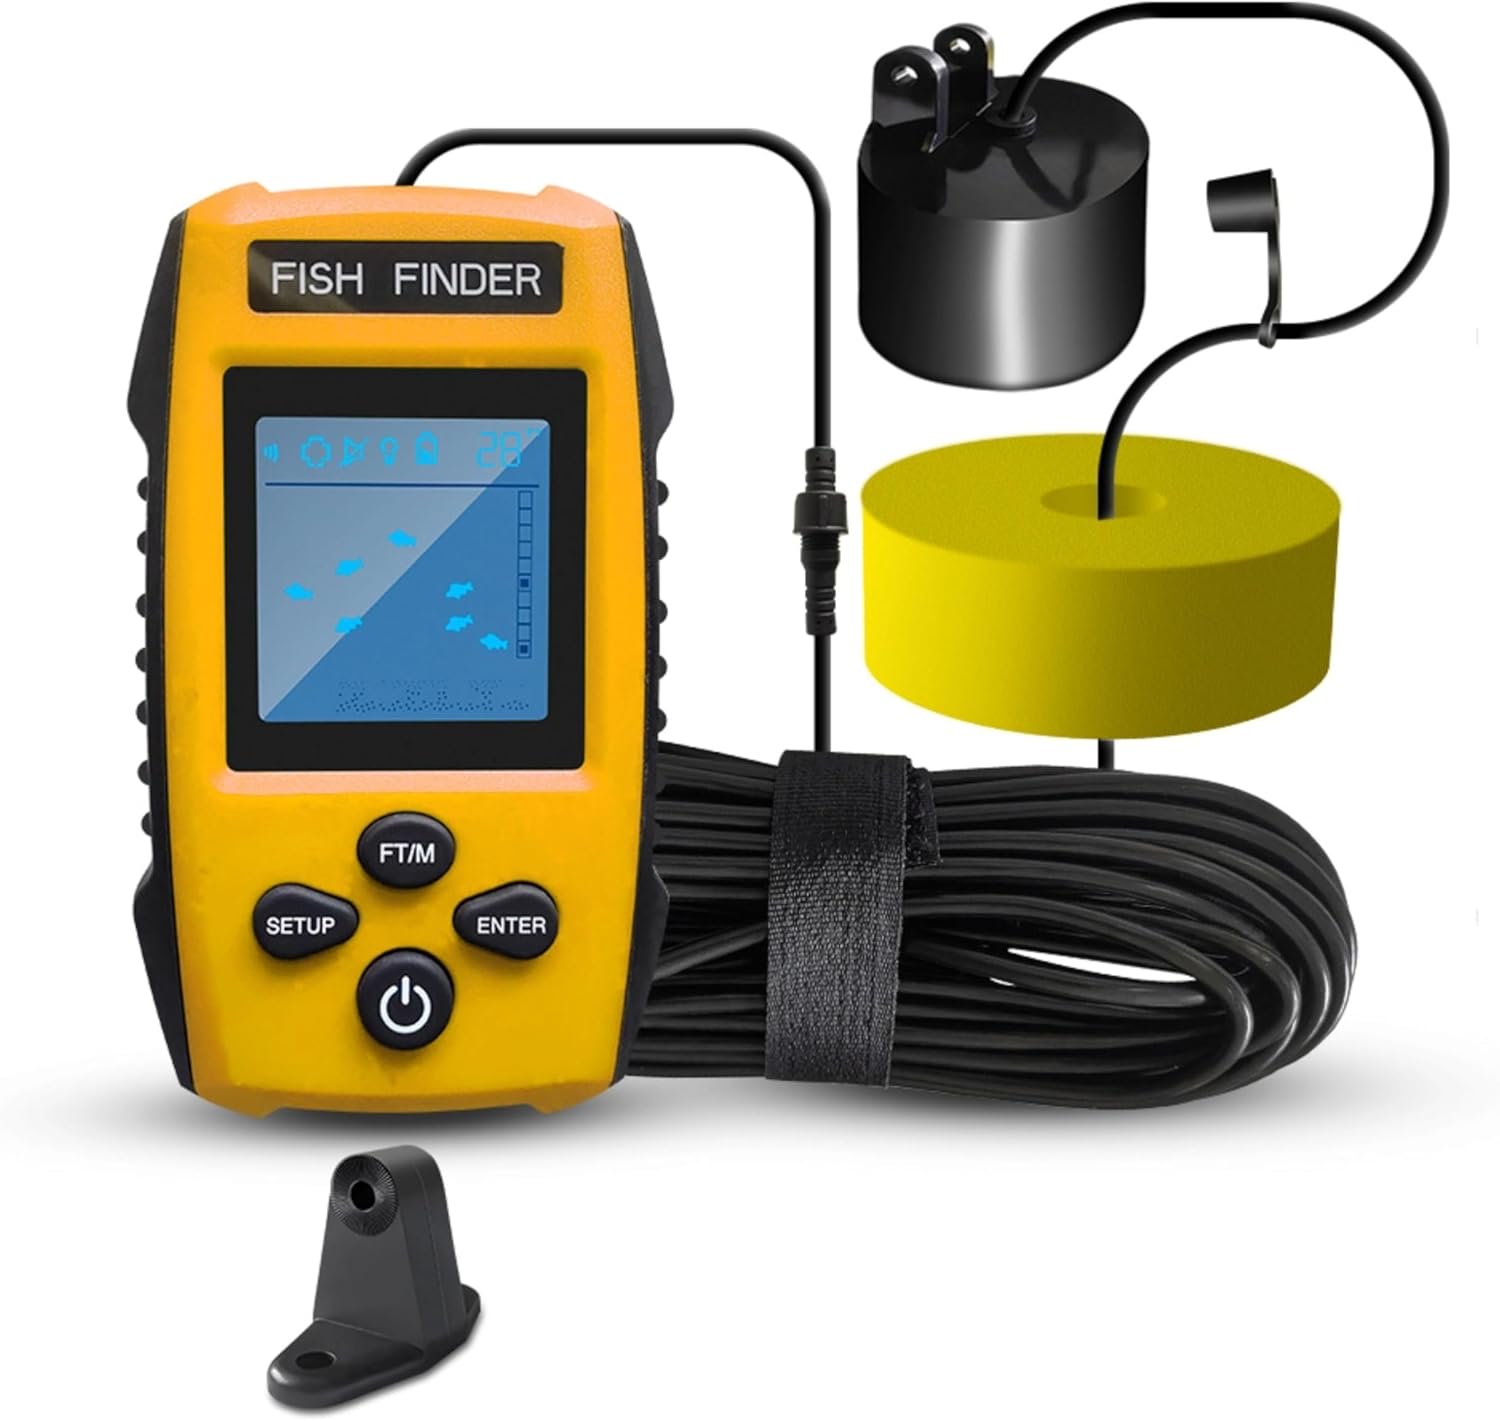
Image: The Walfront TL88 Portable Fish Finder, showing the main display unit, the wired sonar transducer, its float, and the connecting cable.
2. Package Contents
Verify that all items listed below are included in your package:
- 1 x Fish Finder Display Unit
- 1 x Sonar Transducer with Cable
- 1 x Removable Transducer Float
- 1 x Lanyard
- 1 x Fixing Screw
- 1 x Fixing Frame
- 1 x Instruction Manual (this document)
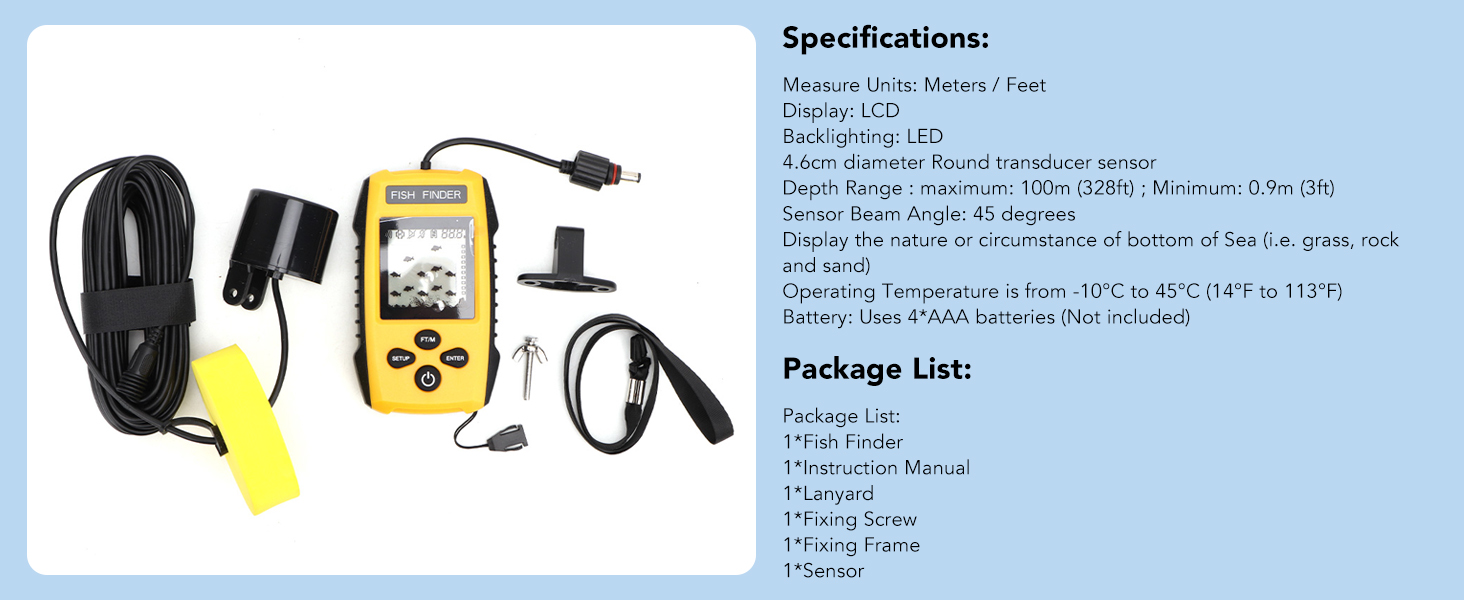
Image: An illustration detailing the complete set of product components, including the handheld unit, cable, rope (lanyard), float, and fix bolt (fixing screw/frame).
3. Product Components & Display Overview
Familiarize yourself with the main components and display indicators of your fish finder:

Image: A detailed diagram labeling the various parts of the fish finder's display and control buttons, including battery indicator, sensitivity indicator, water depth display, backlight ON/OFF, fish depth indicator, fish size display, depth unit change, function set up key, function affirmation key, and turn on/off button.
Display Indicators:
- Battery Indicator: Shows remaining battery life.
- Sensitivity Indicator: Displays the current sensitivity level.
- Water Depth Display: Shows the current water depth.
- Backlight ON/OFF: Indicates backlight status.
- Fish Depth Indicator: Shows the approximate depth of detected fish.
- Fish Size Display: Represents detected fish with small, medium, or large icons.
Control Buttons:
- SETUP: Accesses settings menu.
- FT/M: Toggles depth unit between feet and meters.
- ENTER: Confirms selections in the menu.
- Power Button: Turns the device ON/OFF.
4. Installation & Setup
4.1 Battery Installation
- Open the battery compartment cover on the back of the display unit.
- Insert four (4) AAA batteries, ensuring correct polarity (+/-).
- Close the battery compartment cover securely.
4.2 Transducer Deployment Methods
The sonar transducer must be submerged in water to function correctly. Ensure there are no air bubbles between the transducer and the water. The transducer can be deployed in several ways:
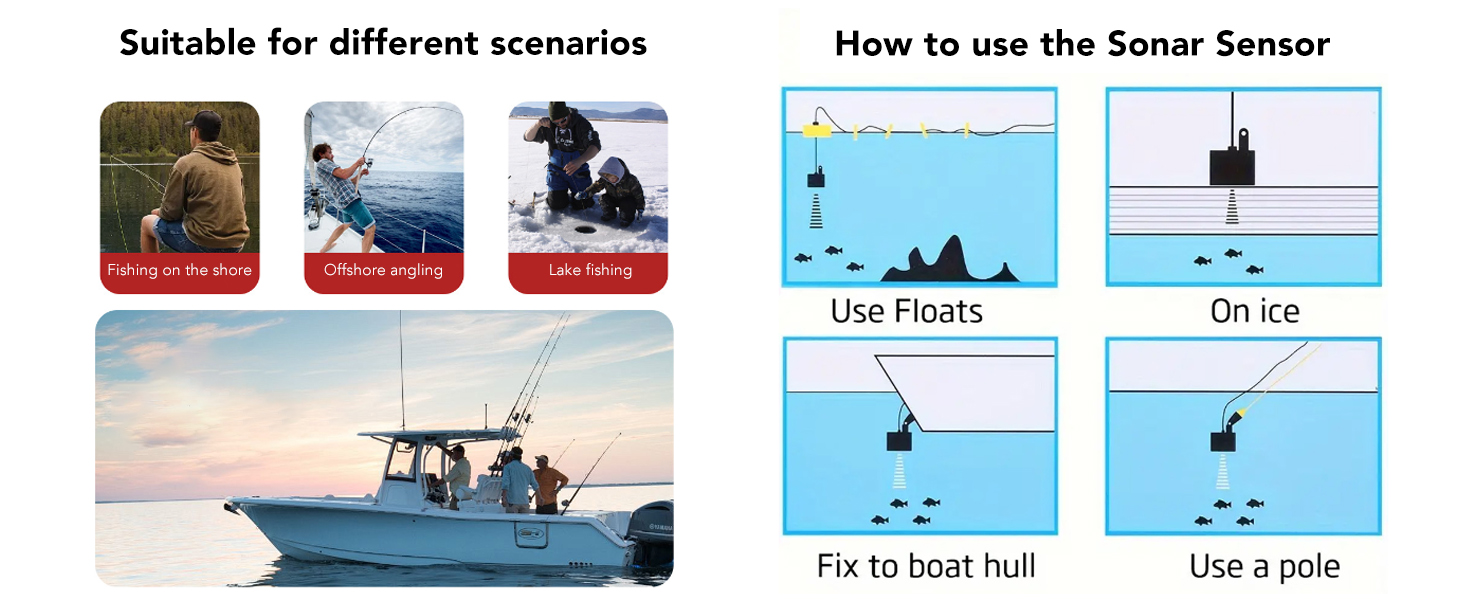
Image: Visual guide demonstrating various methods for deploying the sonar sensor, including using the float, ice fishing setup, mounting to a boat hull, and attaching to a pole.
- Using the Float: Attach the transducer to the provided float and cast it into the water. Ensure the transducer is fully submerged and hangs vertically.
- Ice Fishing: Place the transducer directly on the ice surface if the ice is clear and smooth, or submerge it into a hole drilled in the ice. Ensure good contact with the water.
- Fixing to a Boat Hull: Use the fixing frame to mount the transducer to the boat hull. Ensure the transducer is below the waterline and free from obstructions.
- Using a Pole: Attach the transducer to a pole and submerge it into the water from the side of a boat or dock.
The transducer cable is 25 feet (approximately 7.6 meters) long, allowing for flexible deployment.
5. Basic Operation
5.1 Powering On/Off
- To turn on, press the Power Button.
- To turn off, press and hold the Power Button for a few seconds until the display shuts down.
5.2 Adjusting Sensitivity
Sensitivity controls how detailed the sonar readings are. Higher sensitivity detects smaller objects and more clutter, while lower sensitivity filters out noise. There are 5 user-selectable sensitivity levels.
- Press the SETUP button to enter the settings menu.
- Navigate to the Sensitivity option.
- Use the arrow buttons (often integrated with FT/M or SETUP for navigation) to adjust the level.
- Press ENTER to confirm.
5.3 Changing Units (FT/M)
To switch between feet (FT) and meters (M) for depth readings:
- Press the FT/M button. The display will update immediately.
5.4 Fish Alarm Settings
The fish alarm alerts you when fish are detected.

Image: The fish finder display showing various fish sizes (small, middle, large) and an alarm icon, indicating that an alarm will sound when fish are detected according to user settings.
- Press the SETUP button to enter the settings menu.
- Navigate to the Fish Alarm option.
- Select ON or OFF.
- Press ENTER to confirm.
5.5 Backlight Control
Adjust the backlight for better visibility in different lighting conditions.
- Press the SETUP button to enter the settings menu.
- Navigate to the Backlight option.
- Select ON or OFF.
- Press ENTER to confirm.
5.6 Battery Save Mode
Enable battery save mode to extend battery life.
- Press the SETUP button to enter the settings menu.
- Navigate to the Battery Save option.
- Select ON or OFF.
- Press ENTER to confirm.
6. Understanding the Display
The LCD display provides visual information about the underwater environment:

Image: The fish finder display showing water depth, a status bar, fish size/depth indicators, and the underwater contour, with the sonar transducer submerged in water.
- Water Depth: The numerical value at the top of the screen indicates the current water depth from the sonar sensor.
- Fish Icons: Fish are represented by icons of varying sizes (small, medium, large) to indicate their approximate size. Their position on the screen relative to the depth scale indicates their depth.
- Underwater Contour: The bottom portion of the display shows the contour of the seabed, including indications of short & tall weeds, sand, and rocks.
- Status Bar: Provides additional information such as sensitivity level, battery status, and alarm status.
7. Maintenance
Proper maintenance ensures the longevity and reliability of your fish finder.
- Cleaning: After each use, especially in saltwater, rinse the transducer and cable with fresh water. Wipe the display unit with a soft, dry cloth. Do not use abrasive cleaners or solvents.
- Storage: Store the fish finder in a dry, cool place away from direct sunlight. Remove batteries if the device will not be used for an extended period.
- Cable Care: Avoid kinking or sharply bending the transducer cable. Coil it loosely for storage.
8. Troubleshooting
If you encounter issues with your Walfront TL88 Fish Finder, refer to the following common problems and solutions:
| Problem | Possible Cause | Solution |
|---|---|---|
| No display/Device won't turn on | Low or dead batteries; incorrect battery installation | Replace batteries; check battery polarity. |
| No depth reading or erratic readings | Transducer not fully submerged; air bubbles on transducer; transducer cable damaged; water too shallow/deep | Ensure transducer is fully in water and free of bubbles; check cable for damage; verify depth is within 0.9m-100m range. |
| No fish detected | Low sensitivity setting; no fish present; fish alarm off | Increase sensitivity; ensure fish alarm is enabled. |
| Display is dim or hard to read | Backlight off; low battery | Turn on backlight; replace batteries. |
9. Specifications
Technical specifications for the Walfront TL88 Portable Fish Finder:
Image: A graphic displaying the product specifications and package list for the Walfront TL88 Fish Finder.
- Display: LCD
- Backlight: LED
- Measurement Units: Meters / Feet
- Sonar Sensor Beam Angle: 45 degrees
- Depth Range: Maximum 100m (328ft); Minimum 0.9m (3ft)
- Power Source: 4 x AAA Batteries (not included)
- Operating Temperature: -10°C to 45°C (14°F to 113°F)
- Screen Size: 4.6 Centimeters
- Item Weight: Approximately 0.55 Kilograms
10. Warranty and Support
For warranty information or technical support, please refer to the contact details provided with your purchase or visit the official Walfront website. Keep your purchase receipt as proof of purchase for any warranty claims.


