Occus UKN-ECF8ACBA9B81B5D7EAEB27E8A7525497
LUKEY 702 2-in-1 Digital Hot Air Soldering Station User Manual
Model: LUKEY 702 | Brand: Occus
1. Product Overview
The LUKEY 702 is a versatile 2-in-1 digital hot air soldering station, combining a hot air gun and an electric soldering iron. Designed for precision work, it features compact size, digital temperature indication, and a wide working temperature range, making it suitable for various soldering and rework tasks.
This station is ideal for assembling and disassembling components such as SOIC, PLCC, QFP, and BGA, as well as for heat shrink tubing, drying, pre-heating, and plastic soldering. Its antistatic function provides essential protection for sensitive electronic boards against static or electric discharge.
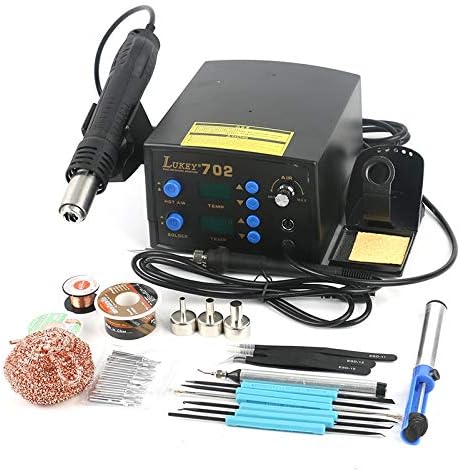
Figure 1: The LUKEY 702 2-in-1 Digital Hot Air Soldering Station with its complete set of accessories, including the main unit, hot air gun, soldering iron, various nozzles, tips, and tools.
2. Package Contents
Please verify that all items listed below are included in your package:
- 1 x LUKEY 702 2-in-1 Soldering Station (Main Unit)
- 1 x Hot Air Gun Handle
- 1 x Electric Soldering Iron Handle
- 3 x Hot Air Nozzles (A1130, A1170, A1110)
- 1 x Soldering Iron Stand with Sponge
- 10 x Assorted Soldering Iron Tips
- 1 x Solder Wick
- 1 x Tin Wire (Solder Roll)
- 3 x ESD Tweezers
- 1 x Cleaning Sponge
- 1 x Vacuum Pump (Desoldering Pump)
- 1 x Vacuum Pen
- 1 x Rosin Flux
- 1 x Clean Copper Wire (Tip Cleaner)
- 1 x Set of Welding Tools
3. Safety Information
Always observe the following safety precautions when operating the LUKEY 702 soldering station to prevent injury or damage to the equipment:
- Electrical Safety: Ensure the power supply matches the specified voltage (220V-240V). Always connect the unit to a grounded outlet. Do not operate with wet hands or in damp environments.
- Heat Hazard: The soldering iron tip and hot air nozzle reach very high temperatures. Avoid direct contact with skin or flammable materials. Allow components to cool completely before handling.
- Fume Ventilation: Soldering produces fumes that can be harmful. Always work in a well-ventilated area or use a fume extractor.
- ESD Protection: The unit features antistatic protection. However, always take additional ESD precautions when working with sensitive electronic components.
- Proper Use: Use the station only for its intended purpose. Do not modify the unit or use non-original parts.
- Storage: Store the unit in a dry, safe place away from children and unauthorized users.
4. Setup Guide
Follow these steps to set up your LUKEY 702 soldering station:
- Unpack: Carefully remove all components from the packaging and inspect for any damage.
- Placement: Place the main unit on a stable, heat-resistant, and non-flammable surface, ensuring adequate ventilation around the unit.
- Connect Hot Air Gun: Connect the hot air gun handle cable to the designated port on the front panel of the main unit. Ensure it is securely fastened.
- Connect Soldering Iron: Connect the soldering iron handle cable to its respective port on the front panel. Place the soldering iron in its stand.
- Attach Nozzle: Select the appropriate hot air nozzle for your task and securely attach it to the hot air gun.
- Power Connection: Connect the power cord to the main unit's power input on the rear, then plug the US plug into a grounded 220V-240V AC outlet.

Figure 2: The main unit with the hot air gun and soldering iron connected, ready for operation.
5. Operating Instructions
The LUKEY 702 features independent controls for the hot air gun and soldering iron, allowing for simultaneous or separate operation.
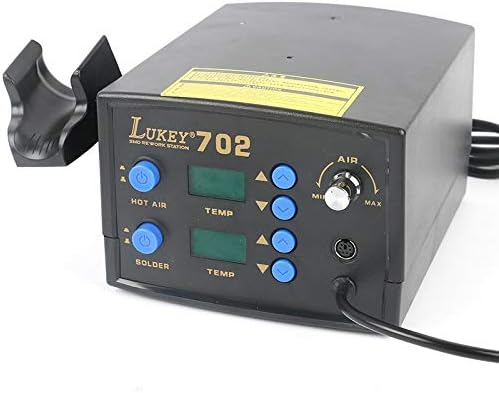
Figure 3: Front panel of the LUKEY 702, showing digital displays and control buttons for both hot air and soldering iron functions.
5.1. Hot Air Rework Station Operation
- Power On: Press the 'HOT AIR' power button on the front panel. The digital display will illuminate.
- Set Temperature: Use the 'TEMP' up/down arrow buttons for the hot air section to set the desired temperature (range: 100 - 480 ℃).
- Adjust Airflow: Rotate the 'AIR' knob to adjust the airflow speed. Start with a lower setting and increase as needed. The maximum airflow is 120 l/min.
- Operation: Once the set temperature is reached, the hot air gun is ready for use. Always hold the hot air gun by its handle and direct the hot air away from yourself and flammable materials.
- Cooling Function: After use, place the hot air gun back into its holder. The unit features a unique cooling function: the fan will continue to operate until the airwave temperature falls below 50 ℃, automatically turning off to extend the lifespan of the handle and heating element.

Figure 4: Detailed view of the hot air gun handle, showing its ergonomic design and nozzle attachment point.
5.2. Electric Soldering Iron Operation
- Power On: Press the 'SOLDER' power button on the front panel. The digital display will show the current temperature.
- Set Temperature: Use the 'TEMP' up/down arrow buttons for the soldering iron section to set the desired temperature (range: 200 - 480 ℃).
- Tinning the Tip: Before first use or after cleaning, tin the soldering iron tip by applying a small amount of solder. This helps with heat transfer and prevents oxidation.
- Soldering: Apply the heated tip to the joint, then feed solder onto the joint, not directly onto the tip. Allow the solder to flow evenly.
- Cleaning the Tip: Regularly clean the soldering iron tip using the included sponge (dampened with water) or copper wire cleaner to remove excess solder and oxidation.
6. Maintenance
Proper maintenance ensures the longevity and optimal performance of your LUKEY 702 soldering station.
- Soldering Iron Tip Care: Keep tips clean and tinned. Replace tips when they become pitted or excessively oxidized. Use only lead-free solder if working with lead-free components.
- Hot Air Nozzle Cleaning: Periodically inspect and clean hot air nozzles to ensure unobstructed airflow.
- Sponge Maintenance: Keep the cleaning sponge damp (not soaking wet) during use. Replace the sponge when it becomes worn or heavily soiled.
- General Cleaning: Keep the main unit and handles clean and free of dust and debris. Use a soft, dry cloth. Do not use abrasive cleaners or solvents.
- Power Off: Always turn off the unit and unplug it from the power source when not in use or before performing any maintenance.
7. Troubleshooting
Refer to the table below for common issues and their potential solutions:
| Problem | Possible Cause | Solution |
|---|---|---|
| Unit does not power on | No power supply; loose power cord; faulty power switch | Check power outlet; ensure power cord is securely plugged in; contact support if switch is faulty. |
| Hot air gun not heating or weak airflow | Incorrect temperature/airflow setting; clogged nozzle; heating element issue | Verify settings; clean nozzle; contact support if heating element is faulty. |
| Soldering iron not heating or poor heat transfer | Incorrect temperature setting; oxidized/dirty tip; faulty heating element | Verify temperature; clean and tin tip; replace tip if necessary; contact support. |
| Digital display not working | Internal connection issue; display malfunction | Power cycle the unit; if issue persists, contact customer support. |
8. Technical Specifications
Detailed specifications for the LUKEY 702 2-in-1 Digital Hot Air Soldering Station:
| Feature | Specification |
|---|---|
| Model Number | 702 (UKN-ECF8ACBA9B81B5D7EAEB27E8A7525497) |
| Operating Voltage | 220V-240V AC |
| Total Power Supply | 750 W |
| Soldering Iron Temperature Range | 200 - 480 ℃ |
| Hot Air Fan Temperature Range | 100 - 480 ℃ |
| Temperature Stability | +/- 2 ℃ |
| Soldering Iron Heating Element Type | Ceramic |
| Hot Air Pump Type | Turbine (Circular Propeller) |
| Max Airflow Speed | 120 l/min |
| Dimensions (L x W x H) | 160 x 190 x 116 mm |
| Power Plug Type | US Plug |
| Display Type | LCD |
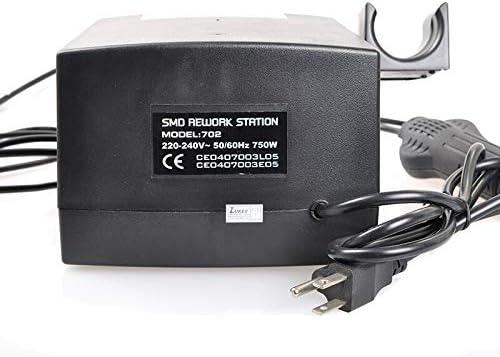
Figure 5: Rear view of the LUKEY 702 main unit, displaying the power input and product identification label.
9. Warranty and Support
For warranty information and technical support, please refer to the documentation provided at the time of purchase or contact your retailer. Keep your purchase receipt as proof of purchase.
For general inquiries or assistance, please visit the official Occus brand website or contact their customer service department.