1. Introduction
This manual provides essential instructions for the safe assembly, operation, and maintenance of your Guide Gear Vehicle Hitch Cargo Carrier with 3-Position Ramp. Please read this manual thoroughly before installation and use. Keep it for future reference.
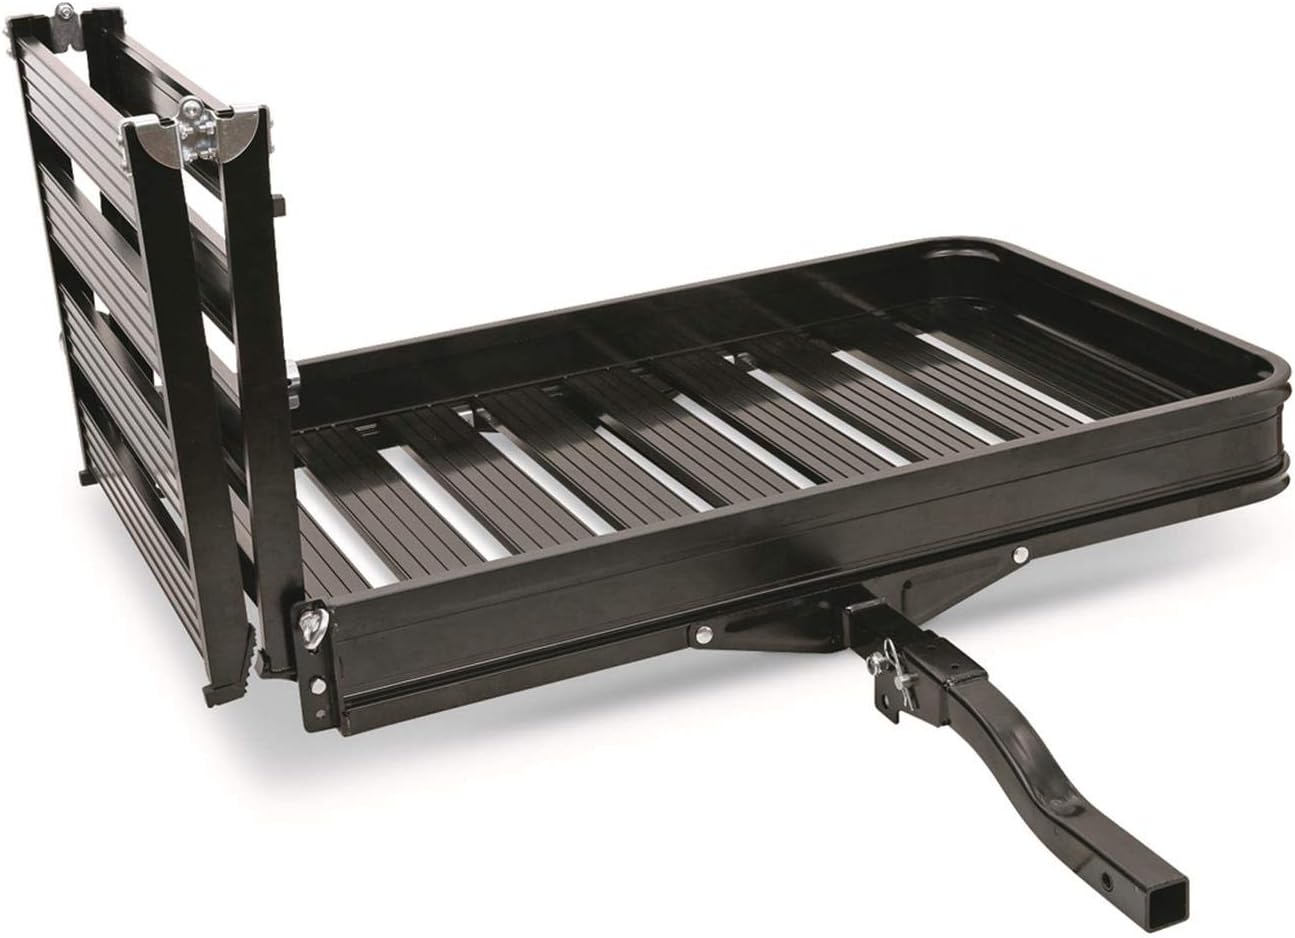
The Guide Gear Cargo Carrier is designed to transport up to 500 lbs. of gear and equipment. It features a 3-position folding ramp for easy loading and unloading, and is compatible with standard Class III and IV 2-inch receivers. The carrier is constructed from black-coated lightweight aluminum for corrosion resistance, with a carbon steel hitch, hitch plate, and hardware for durability.
2. Safety Information
- Maximum Load Capacity: Do not exceed the maximum load capacity of 500 lbs. or your vehicle's hitch capacity, whichever is lower. Overloading can cause serious injury or damage.
- Proper Hitch Connection: Ensure the carrier is securely attached to a properly rated 2-inch hitch receiver using the provided hitch pin and clip. Verify the anti-wobble device is correctly installed and tightened to reduce rattling.
- Secure Cargo: Always secure all cargo with appropriate tie-downs, straps, or nets to prevent shifting or falling during transit. Loose cargo can create hazards.
- Weight Distribution: Distribute the load evenly across the carrier platform. Place heavier items closer to the vehicle.
- Ramp Safety: When using the ramp, ensure it is fully extended and stable on a level surface. Exercise caution when loading or unloading items, especially heavy or wheeled equipment. Never stand on the ramp while loading.
- Vehicle Clearance: Be aware of the increased length and width of your vehicle when the carrier is installed. Allow for extra clearance when turning, backing up, and parking.
- Regular Inspection: Before each use, inspect the carrier, ramp, hitch connection, and all hardware for signs of wear, damage, or loose fasteners. Do not use if any components are compromised.
- Lighting: Ensure your vehicle's taillights and license plate are not obstructed. If they are, auxiliary lighting may be required by law.
3. Package Contents
Verify that all components are present before beginning assembly:
- Cargo Carrier Platform
- 3-Position Folding Ramp
- Hitch Shank
- Anti-Wobble Device
- Assembly Hardware (bolts, washers, nuts, hitch pin, clip)
- Reflectors
4. Setup and Assembly
Follow these steps to assemble and attach your cargo carrier:
- Unpack Components: Carefully remove all parts from the packaging and lay them out on a clean, flat surface.
- Attach Hitch Shank: Connect the hitch shank to the main cargo carrier platform using the provided bolts, washers, and nuts. Ensure all fasteners are tightened securely.
- Install Ramp: Attach the 3-position folding ramp to the carrier platform according to the instructions in your hardware kit. Ensure the pivot points are free of obstruction and the locking mechanisms function correctly.
- Mount to Vehicle: Slide the hitch shank into your vehicle's 2-inch hitch receiver. Align the hitch pin holes.
- Secure with Hitch Pin: Insert the hitch pin through the aligned holes and secure it with the cotter pin or clip.
- Install Anti-Wobble Device: Attach and tighten the anti-wobble device as per its specific instructions. This device helps to minimize movement and rattling of the carrier in the hitch receiver.
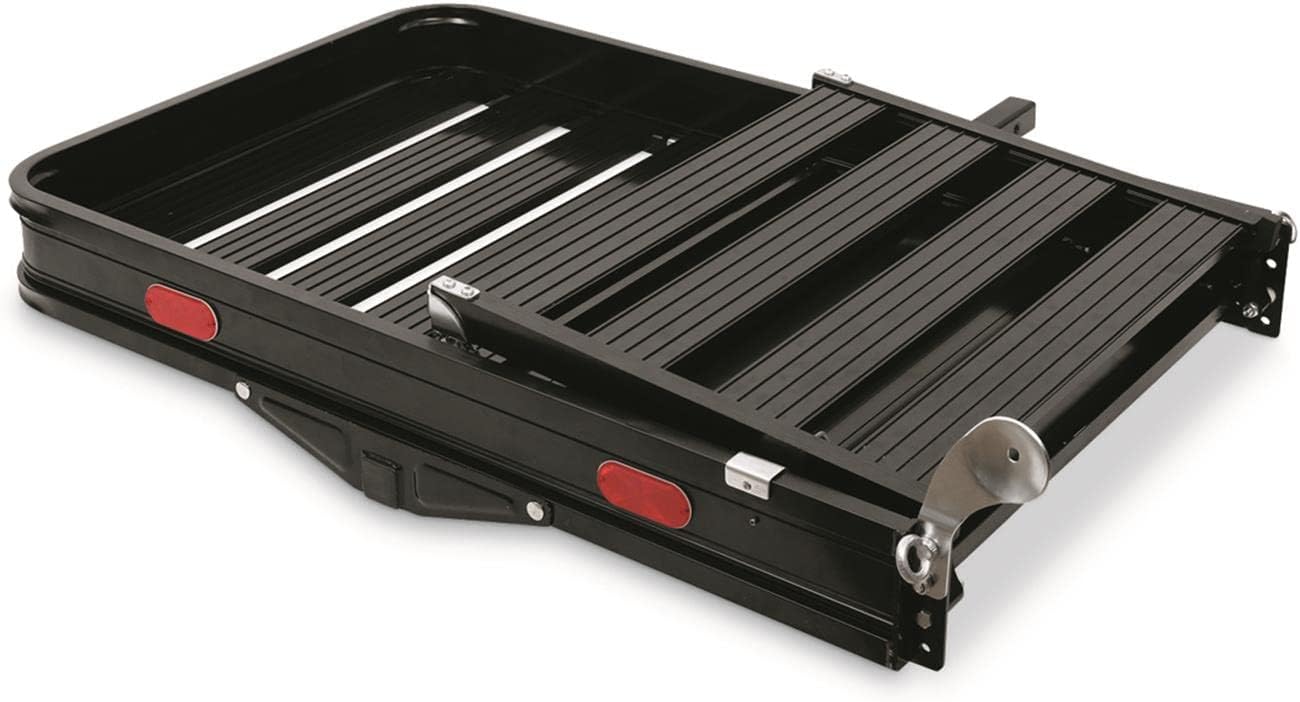
- Attach Reflectors: Securely attach the red reflectors to the designated areas on the carrier for increased visibility.

5. Operating Instructions
5.1 Deploying the 3-Position Ramp
The ramp can be positioned in three ways: folded up (vertical), folded flat (horizontal), or extended (angled for loading).
- Vertical Position (Storage/Transport): To keep the ramp folded vertically against the carrier, ensure the locking pins are engaged in the upper position. This is ideal for transport when not actively loading or unloading.
- Horizontal Position (Extended Platform): To create an extended flat platform, release the locking pins and lower the ramp until it is horizontal with the main carrier bed. Secure it in this position if applicable. This provides additional flat cargo space.
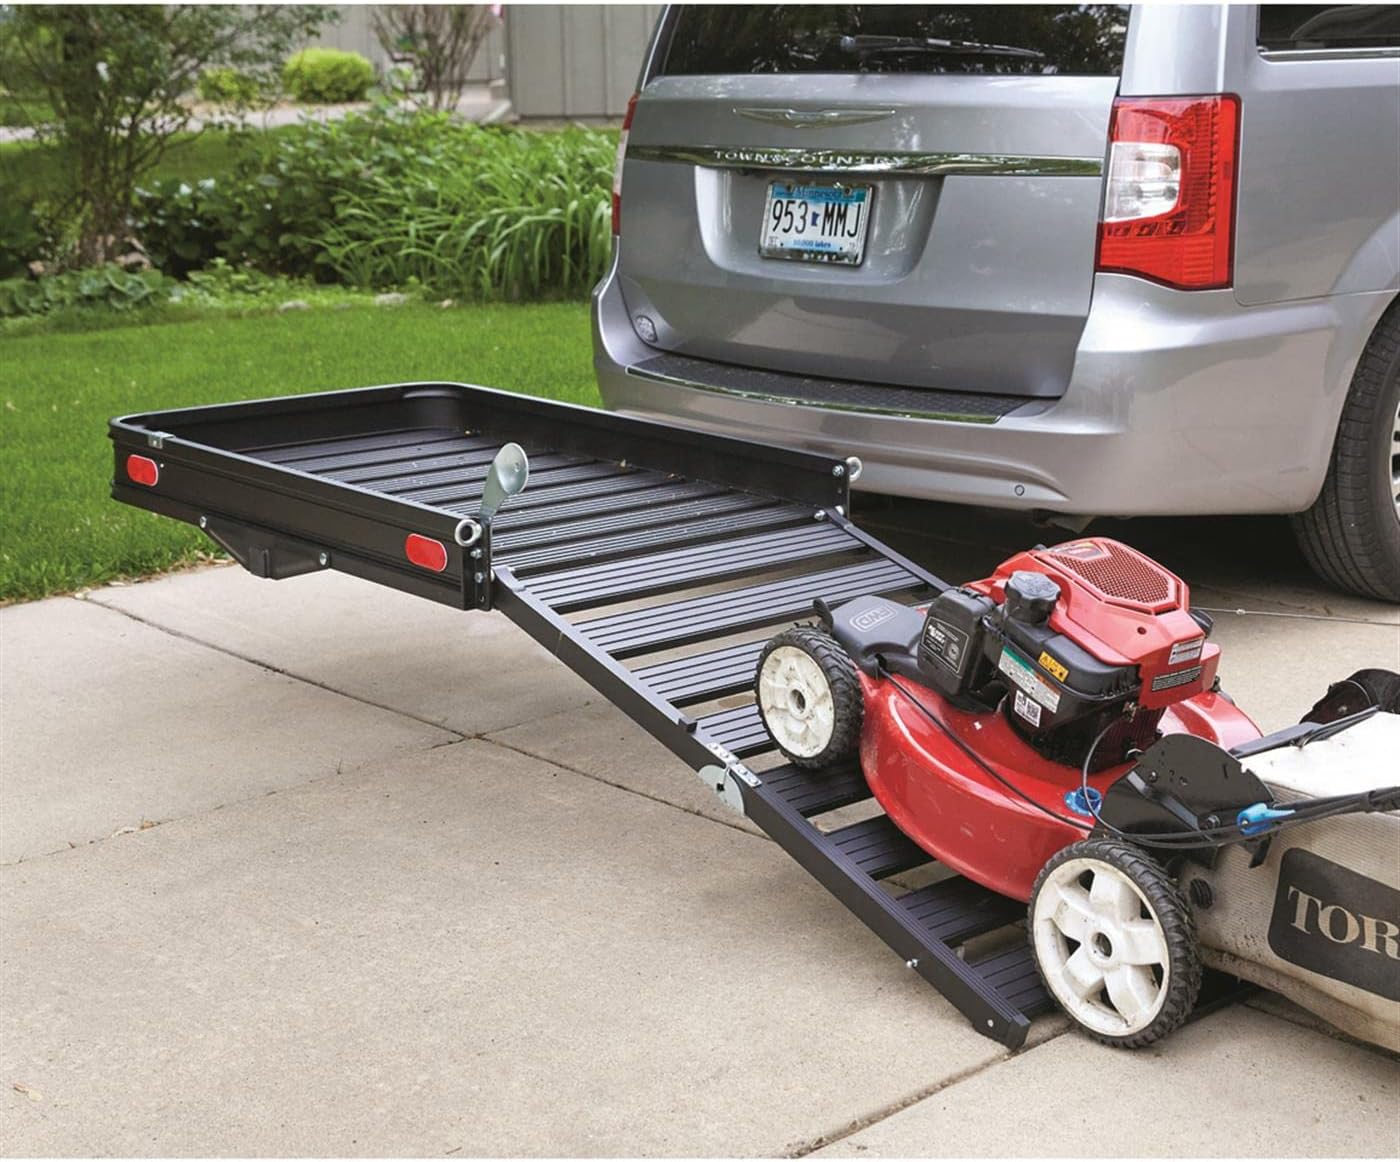
- Extended Position (Loading/Unloading): To use the ramp for loading, release the locking pins and carefully lower the ramp to the ground. Ensure the ramp is fully extended and stable before attempting to load any items.
5.2 Loading and Securing Cargo
- Prepare for Loading: Deploy the ramp to the extended position. Ensure the vehicle is parked on a level surface with the parking brake engaged.
- Load Items: Carefully roll or slide items up the ramp onto the carrier platform. For wheeled items like lawnmowers or generators, push them slowly and maintain control.
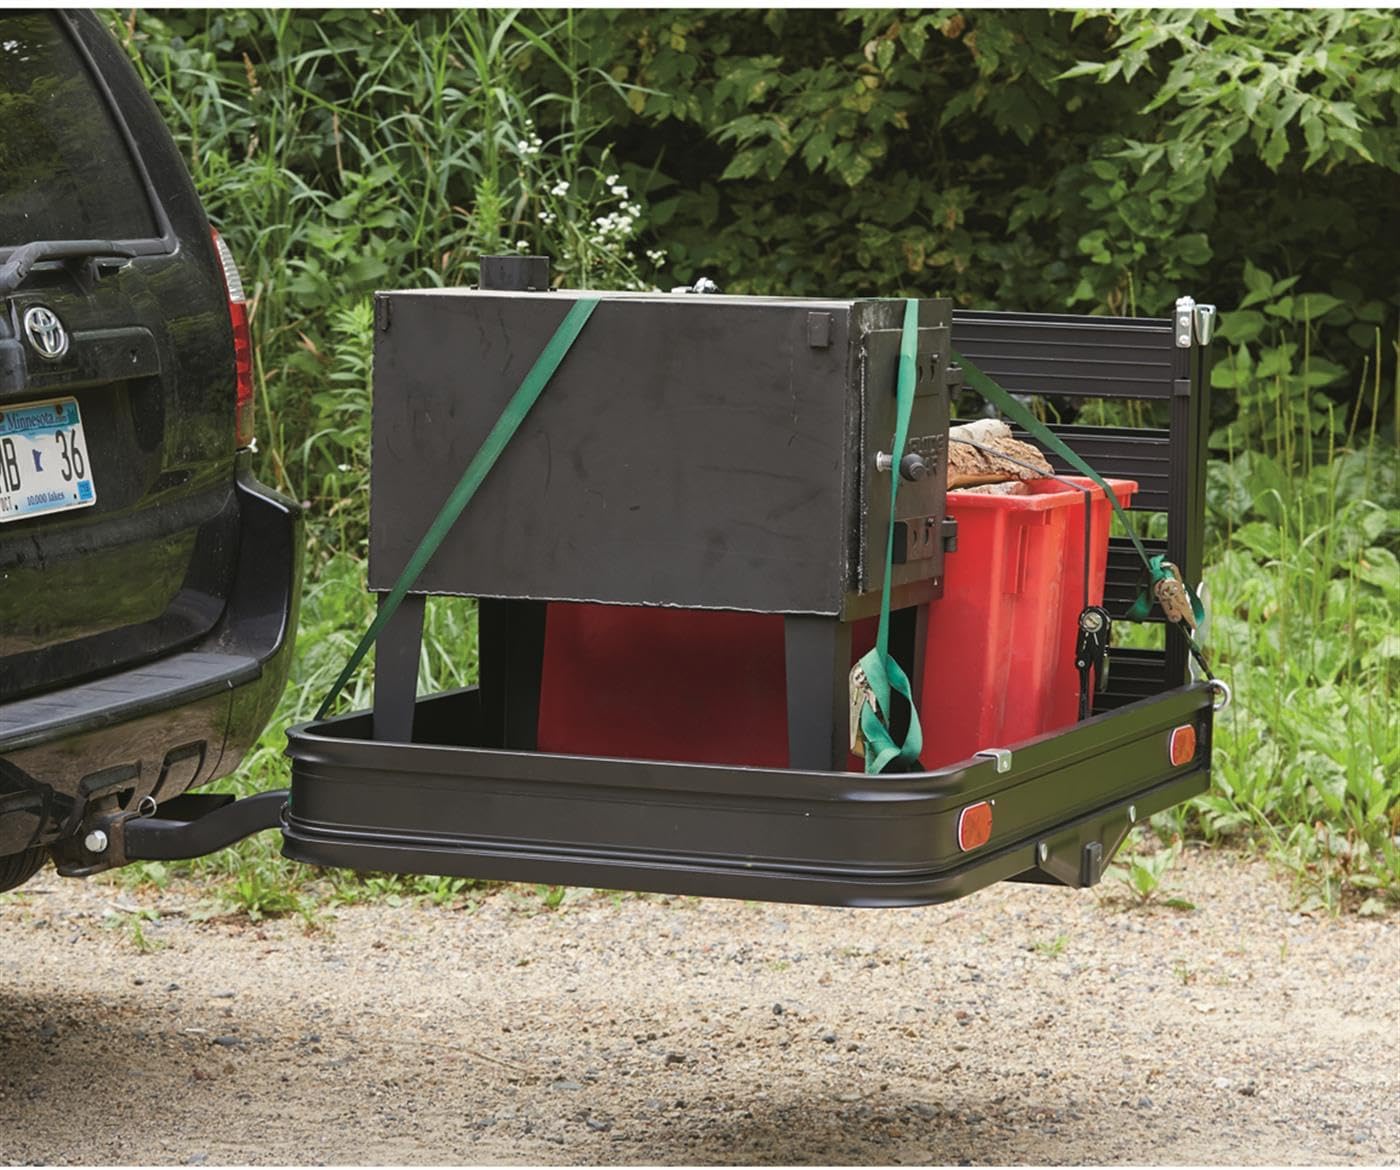
- Position Cargo: Distribute the weight evenly on the carrier. Place heavier items towards the center and front of the carrier (closer to the vehicle).
- Secure Cargo: Use heavy-duty tie-down straps or bungee cords to firmly secure all items to the carrier. Utilize the side rails and any integrated tie-down points. Ensure cargo cannot shift, slide, or fall off during travel.

5.3 Folding for Transport
Once cargo is loaded and secured, or if the carrier is empty, the ramp can be folded up for transport.
- Fold Ramp: Carefully lift the ramp from its extended or horizontal position and fold it upwards until it is vertical against the carrier. Engage the locking pins to secure it.
- Verify Security: Double-check that the ramp is fully locked in the vertical position before driving.

5.4 Product Video
6. Maintenance
Regular maintenance ensures the longevity and safe operation of your cargo carrier.
- Cleaning: Clean the carrier regularly with mild soap and water to remove dirt, road grime, and salt. Rinse thoroughly and dry to prevent corrosion.
- Inspection: Periodically inspect all bolts, nuts, and pins for tightness. Re-tighten any loose fasteners. Check for cracks, bends, or other damage to the aluminum and steel components.
- Lubrication: Apply a light lubricant to the ramp's pivot points and locking mechanisms to ensure smooth operation.
- Storage: When not in use, store the carrier in a dry, protected area to prevent exposure to harsh weather conditions.
7. Troubleshooting
- Carrier Wobbles in Hitch: Ensure the anti-wobble device is correctly installed and fully tightened. Check that the hitch pin is securely in place.
- Ramp Difficult to Fold/Unfold: Inspect the pivot points for dirt or debris. Clean and apply lubricant if necessary. Ensure locking pins are fully disengaged before attempting to move the ramp.
- Excessive Noise During Travel: Verify all cargo is securely tied down. Check all assembly hardware for tightness. Ensure the anti-wobble device is properly engaged.
8. Specifications
| Feature | Specification |
|---|---|
| Brand | Guide Gear |
| Model Number | 10101198 |
| Material | Alloy Steel, Aluminum |
| Color | Black |
| Item Weight | 70 Pounds |
| Product Dimensions (L x W x H) | 54"L x 6"W x 35"H |
| Load Capacity | 500 pounds |
| Foldable | Yes |
| Hitch Compatibility | Standard Class III and IV 2" Receivers |

9. Warranty and Support
For warranty information or technical support regarding your Guide Gear Vehicle Hitch Cargo Carrier, please refer to the warranty documentation included with your purchase or contact Guide Gear customer service directly. Contact details can typically be found on the manufacturer's official website or on your purchase receipt.