Introduction

Image: Front view of the Crompton Classic 15 L Electric Water Heater, white in color, with branding and energy rating sticker visible.
This manual provides essential information for the safe and efficient operation, installation, and maintenance of your Crompton Classic 15 L Electric Water Heater. Please read this manual thoroughly before installation and use, and retain it for future reference. Proper adherence to these instructions will ensure optimal performance and longevity of your appliance.
Important Safety Instructions
Failure to follow these safety instructions may result in electric shock, fire, property damage, or personal injury. Always consult a qualified professional for installation and any complex repairs.
- Electrical Safety: Ensure the water heater is properly grounded. Do not operate with a damaged power cord or plug. Disconnect power before performing any maintenance or repairs.
- Water Pressure: Install a pressure relief valve as required by local codes to prevent excessive pressure buildup.
- Temperature Settings: Avoid setting the temperature too high to prevent scalding.
- Installation: Installation must be performed by a qualified technician in accordance with all local and national electrical and plumbing codes.
- Children and Pets: Keep children and pets away from the water heater, especially during operation.
Product Features
The Crompton Classic 15 L Electric Water Heater is designed for efficient and reliable hot water supply. Key features include:
- Powerful Heating Element: Ensures rapid water heating.
- Nano Polybond Technology: Provides excellent corrosion resistance, enhancing tank longevity.
- Advanced 3 Level Safety: Incorporates multiple safety mechanisms for user protection.
- Standby Cutoff: Reduces electricity consumption by automatically cutting off power when not in use.
- Smart Shield Protection: Offers additional protection against various operational hazards.

Image: Illustration of the key features of the Crompton Classic water heater, including Powerful Heating Element, Nano Polybond Technology, Advanced 3 Level Safety, Standby Cutoff, and Smart Shield Protection.
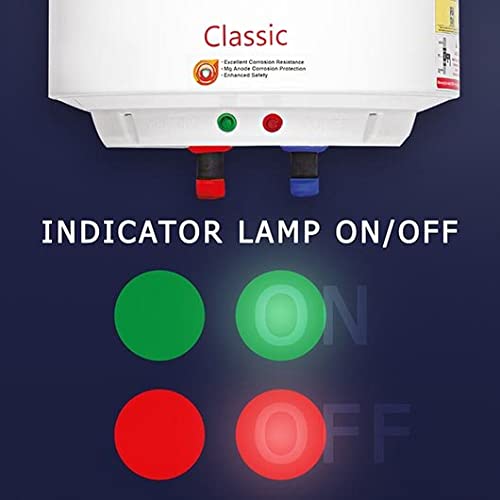
Image: Close-up view of the indicator lamps on the Crompton Classic water heater, showing green for ON and red for OFF status.
Setup and Installation
Proper installation is crucial for the safe and efficient operation of your water heater. It is strongly recommended that installation be carried out by a certified plumber or electrician.
Mounting the Water Heater
- Location: Choose a suitable location that is close to the point of use, has adequate wall support, and is protected from freezing temperatures. Ensure sufficient space for maintenance.
- Wall Mounting: Use appropriate fasteners and brackets (not included) to securely mount the water heater to a solid wall structure. Refer to the product dimensions for proper spacing.

Image: Diagram showing the dimensions of the Crompton Classic water heater: 355 mm width, 542 mm height, and 340 mm depth.
Plumbing Connections
- Water Inlet/Outlet: Connect the cold water supply to the blue marked inlet pipe and the hot water outlet to the red marked pipe. Use appropriate plumbing fittings and sealants to prevent leaks.
- Pressure Relief Valve: Install a T&P (Temperature and Pressure) relief valve in the designated opening. Ensure the discharge pipe from the T&P valve is directed downwards to an open drain.
- Filling the Tank: Before connecting power, open a hot water faucet in your home to allow air to escape while the tank fills with water. Close the faucet once water flows steadily.
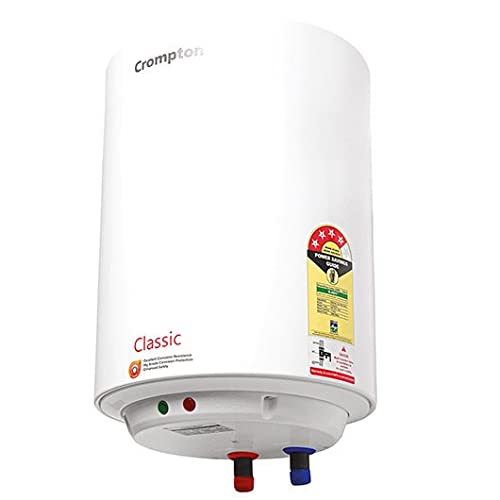
Image: Underside view of the Crompton Classic water heater, showing the red and blue marked pipes for hot water outlet and cold water inlet, respectively, along with indicator lights.
Electrical Connections
- Power Supply: Connect the water heater to a dedicated, properly grounded electrical circuit with the correct voltage and amperage as specified on the product label.
- Circuit Breaker: Ensure the circuit is protected by an appropriate circuit breaker or fuse.
- Testing: After all connections are made and the tank is full of water, turn on the electrical supply to the water heater.
Operating Your Water Heater
Once installed and filled with water, your Crompton Classic water heater is ready for operation.
- Power On: Ensure the main power supply to the water heater is switched on. The indicator lamp will illuminate (typically green) to show that the unit is receiving power and heating.
- Heating Cycle: The water heater will automatically begin heating the water to its preset temperature. The heating indicator (if separate, often red) will illuminate during the heating cycle and turn off once the desired temperature is reached.
- Hot Water Delivery: Once the water is heated, it will be available at your hot water faucets.
- Power Off: To turn off the water heater, switch off the main power supply.
Maintenance
Regular maintenance helps ensure the efficiency and extends the lifespan of your water heater. Always disconnect power before performing any maintenance.
- Anode Rod Inspection: The anode rod protects the tank from corrosion. Inspect and replace the anode rod every 1-3 years, or more frequently in areas with hard water.
- Draining the Tank: If the water heater will be unused for an extended period or if there is a risk of freezing, drain the tank completely. Turn off power, close the cold water inlet valve, open a hot water faucet, and open the drain valve at the bottom of the heater.
- Pressure Relief Valve Test: Annually, test the T&P relief valve by lifting the lever. Water should discharge from the drain pipe. If no water discharges, or if it continues to drip, replace the valve.
- Exterior Cleaning: Clean the exterior of the water heater with a soft, damp cloth. Do not use abrasive cleaners or solvents.
Troubleshooting
Refer to the following table for common issues and their potential solutions. If the problem persists, contact customer support.
| Problem | Possible Cause | Solution |
|---|---|---|
| No hot water | No power supply; tripped circuit breaker; faulty heating element. | Check power connection and circuit breaker. If problem persists, contact service. |
| Insufficient hot water | High hot water demand; sediment buildup in tank; faulty thermostat. | Allow more recovery time. Consider draining and flushing the tank. Contact service if thermostat is suspected. |
| Water leaking | Loose plumbing connections; faulty T&P valve; tank leak. | Tighten connections. Test or replace T&P valve. A tank leak usually requires replacement. Contact service. |
| Unusual noises | Sediment buildup in tank. | Drain and flush the tank to remove sediment. |
Specifications
| Attribute | Detail |
|---|---|
| Brand | Crompton |
| Model Number | Classic |
| Capacity | 15 Litres |
| Power Source | Corded Electric |
| Colour | White |
| Item Weight | 8 kg 940 g |
| Package Dimensions | 52.4 x 39.79 x 35.79 cm |
Warranty and Support
Your Crompton Classic 15 L Electric Water Heater comes with a standard manufacturer's warranty. Please refer to the warranty card included with your product for specific terms and conditions, including the warranty period and coverage details.
For technical assistance, service requests, or to inquire about replacement parts, please contact Crompton customer support:
- Crompton Customer Service: Visit the official Crompton website or refer to your product documentation for contact numbers and email support.
- Online Resources: For additional information and FAQs, you may visit the Crompton Store on Amazon.


