Introduction
Thank you for choosing the lychee 7-inch Vehicle On-Dash Backup Monitor. This high-resolution TFT LCD display is designed to enhance your driving safety and convenience by providing clear visual feedback from your vehicle's cameras. With its versatile input options and user-friendly controls, it is an ideal solution for various automotive video applications. This manual provides detailed instructions for installation, operation, maintenance, and troubleshooting to ensure optimal performance and longevity of your device.

Figure 1: lychee 7-inch Vehicle On-Dash Backup Monitor
Package Contents
Please verify that all items listed below are included in your package. If any items are missing or damaged, please contact customer support.
- 1 x 7" Car Monitor
- 1 x Holder (Mounting Stand)
- 1 x Frame (for headrest installation, if applicable)
- 1 x Video & Power Cable
- 1 x Remote Controller
- 1 x User Manual

Figure 2: Included Package Contents
Setup
Proper setup is crucial for the optimal performance of your monitor. Follow these steps carefully.
Mounting the Monitor
The monitor comes with a versatile holder for dashboard or surface mounting. Ensure the mounting surface is clean and stable.
- Attach the monitor to the holder by aligning the interface and tightening clockwise.
- Secure the holder to your desired location using the adhesive pad or screws.
- Adjust the monitor angle for optimal viewing. The monitor supports a 120-degree multi-angle view.

Figure 3: Monitor mounted on a dashboard
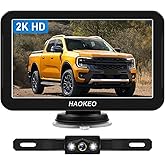
Figure 4: Monitor Installation Steps
Wiring Connections
The monitor features two AV inputs (AV1 and AV2) for connecting various video equipment.
- Power Connection: Connect the red wire of the power cable to a 12V DC positive power source and the black wire to a ground point.
- AV1 Input: Connect AV1 to devices such as a car DVD player or VCR.
- AV2 Input: Connect AV2 to your car backup camera. This input is typically used for automatic switching when the vehicle is in reverse.
- Reversing Cable (Green): Connect the green reversing cable to your vehicle's reverse light power source. This enables automatic switching to AV2 when reverse gear is engaged.

Figure 5: Video and Power Cables
Figure 6: Wiring Diagram
Video 1: Unboxing and Setup Overview of the Vehicle On-Dash Backup Monitor.
Operating Instructions
Learn how to effectively use your lychee monitor's features.
Basic Operation
The monitor can be controlled using the buttons on the front panel or the included IR remote controller.
- Power On/Off: Press the power button on the monitor or remote.
- Volume Control: Use the 'Volume+' and 'Volume-' buttons to adjust audio output.
- Menu: Press the 'Menu' button to access display settings.

Figure 7: Remote Controller
Figure 8: Monitor and Remote Control Functions
Video Input Switching
Manually switch between AV1 and AV2 inputs using the 'V1/V2' button on the monitor or the 'Video Select' button on the remote. The monitor will automatically switch to AV2 when the reversing cable detects power (e.g., when reverse gear is engaged).
Screen Adjustment
The monitor's screen can be rotated and adjusted for optimal viewing angles. Use the physical adjustment points on the holder to tilt and swivel the screen. The display also supports 16:9/4:3 aspect ratio switching via the 'Screen Switch' button.
Figure 9: 120° Multi-Angle View Adjustment
Maintenance
To ensure the longevity and proper functioning of your monitor, follow these maintenance guidelines:
- Cleaning: Use a soft, dry cloth to clean the screen and exterior. For stubborn smudges, lightly dampen the cloth with water or a screen-safe cleaner. Avoid abrasive materials or harsh chemicals.
- Temperature: While designed for automotive environments, avoid exposing the monitor to extreme temperatures for prolonged periods. The monitor features a design for fast heat dissipation to maintain performance.
- Storage: If storing the monitor for an extended period, disconnect it from power and store it in a cool, dry place away from direct sunlight.
Figure 10: Monitor Back View with Heat Dissipation
Troubleshooting
If you encounter issues with your monitor, refer to the table below for common problems and their solutions.
| Problem | Possible Cause | Solution |
|---|---|---|
| No power/Screen is blank | Loose power connection; Blown fuse; Power button off | Check power cable connections; Inspect vehicle fuse; Press power button on monitor/remote. |
| No video signal | Loose AV cable connection; Incorrect AV input selected; Camera/video source issue | Ensure AV cables are securely connected; Press 'V1/V2' button to switch inputs; Verify camera/video source is functioning. |
| Image is distorted or unclear | Poor cable connection; Interference; Camera resolution mismatch | Check all cable connections; Ensure cables are not near strong electrical interference sources; Verify camera output resolution. |
| Remote control not working | Dead battery; Obstruction; Remote not pointed at IR receiver | Replace remote battery; Remove any obstructions between remote and monitor; Point remote directly at the monitor's IR receiver. |
| Automatic switching to AV2 not working | Green reversing cable not connected or faulty; No power from reverse light | Check connection of green reversing cable to reverse light; Verify reverse light is receiving power. |
Specifications
Key technical specifications for the lychee 7-inch Vehicle On-Dash Backup Monitor:
| Feature | Detail |
|---|---|
| Screen Size | 7 Inches |
| Display Technology | Color TFT LCD |
| Resolution | 800 x 480 pixels |
| Video Inputs | 2 AV Inputs (AV1, AV2) |
| Aspect Ratio | 16:9 / 4:3 Switchable |
| Power Supply | DC 12V |
| Product Dimensions | 6.81 x 4.45 x 5.5 inches (6.81"L x 4.45"W x 5.5"H) |
| Item Weight | 1.57 pounds |
| Model Number | 06-001-056 |
| Manufacturer | Lychee |

Figure 11: Monitor Dimensions
Warranty and Support
For warranty information, technical support, or service inquiries, please refer to the documentation provided with your purchase or contact the seller directly. Keep your purchase receipt as proof of purchase for any warranty claims.