
BBRKIN QHXP029A
BBRKIN Large Rifle Safe User Manual
Model: QHXP029A
Introduction
Thank you for choosing the BBRKIN Large Rifle Safe. This manual provides essential information for the proper setup, operation, and maintenance of your new safe. Please read these instructions carefully before using the product to ensure optimal security and functionality. Keep this manual for future reference.
Safety Information
- Always store firearms unloaded and separate from ammunition.
- Keep the safe locked at all times when not in use, especially in households with children.
- Do not store the backup keys inside the safe. Store them in a secure, separate location.
- Ensure the safe is securely mounted to a wall or floor to prevent tipping and unauthorized removal.
- This safe is not water resistant. Avoid exposure to water or high humidity.
Product Overview
Features
- Large capacity for 5-6 rifles/shotguns up to 50 inches.
- Integrated separate lock box for handguns and valuables.
- Electronic keypad with programmable PIN code (3-8 digits).
- Backup key access for emergencies.
- Wrong access alarm system.
- Optional silent mode for discreet operation.
- Constructed from high-strength alloy steel for robust security.
- Removable interior shelf for flexible storage.
- Pre-drilled mounting holes for secure floor or wall installation.
Components

A comprehensive view of the safe, displaying its exterior with the keypad and handle, alongside internal views illustrating the capacity for rifles and the separate lockable compartment for handguns and other small items.

This image highlights key components of the safe, including the lockable box, removable shelf, adjustable gun rack, pre-drilled mounting holes, the electronic keypad, battery holder, door handle, and the solid locking bolts that secure the door.

An interior perspective of the safe, demonstrating its capacity to store multiple rifles and shotguns, along with a dedicated handgun holder on the door and the secure internal lock box.
Dimensions and Capacity
| Specification | Value |
|---|---|
| Exterior Dimensions (H x W x D) | 57" x 13.8" x 12" (Approximate, based on product description) |
| Interior Chamber Height | 56.5 inches |
| Interior Chamber Width | 14 inches |
| Interior Chamber Depth | 13.8 inches |
| Weight | 81 Pounds |
| Rifle/Shotgun Capacity | 5-6 (up to 50 inches in length) |

This image illustrates the external dimensions and door thickness of the BBRKIN safe, highlighting its robust construction and spacious design compared to typical alternatives.
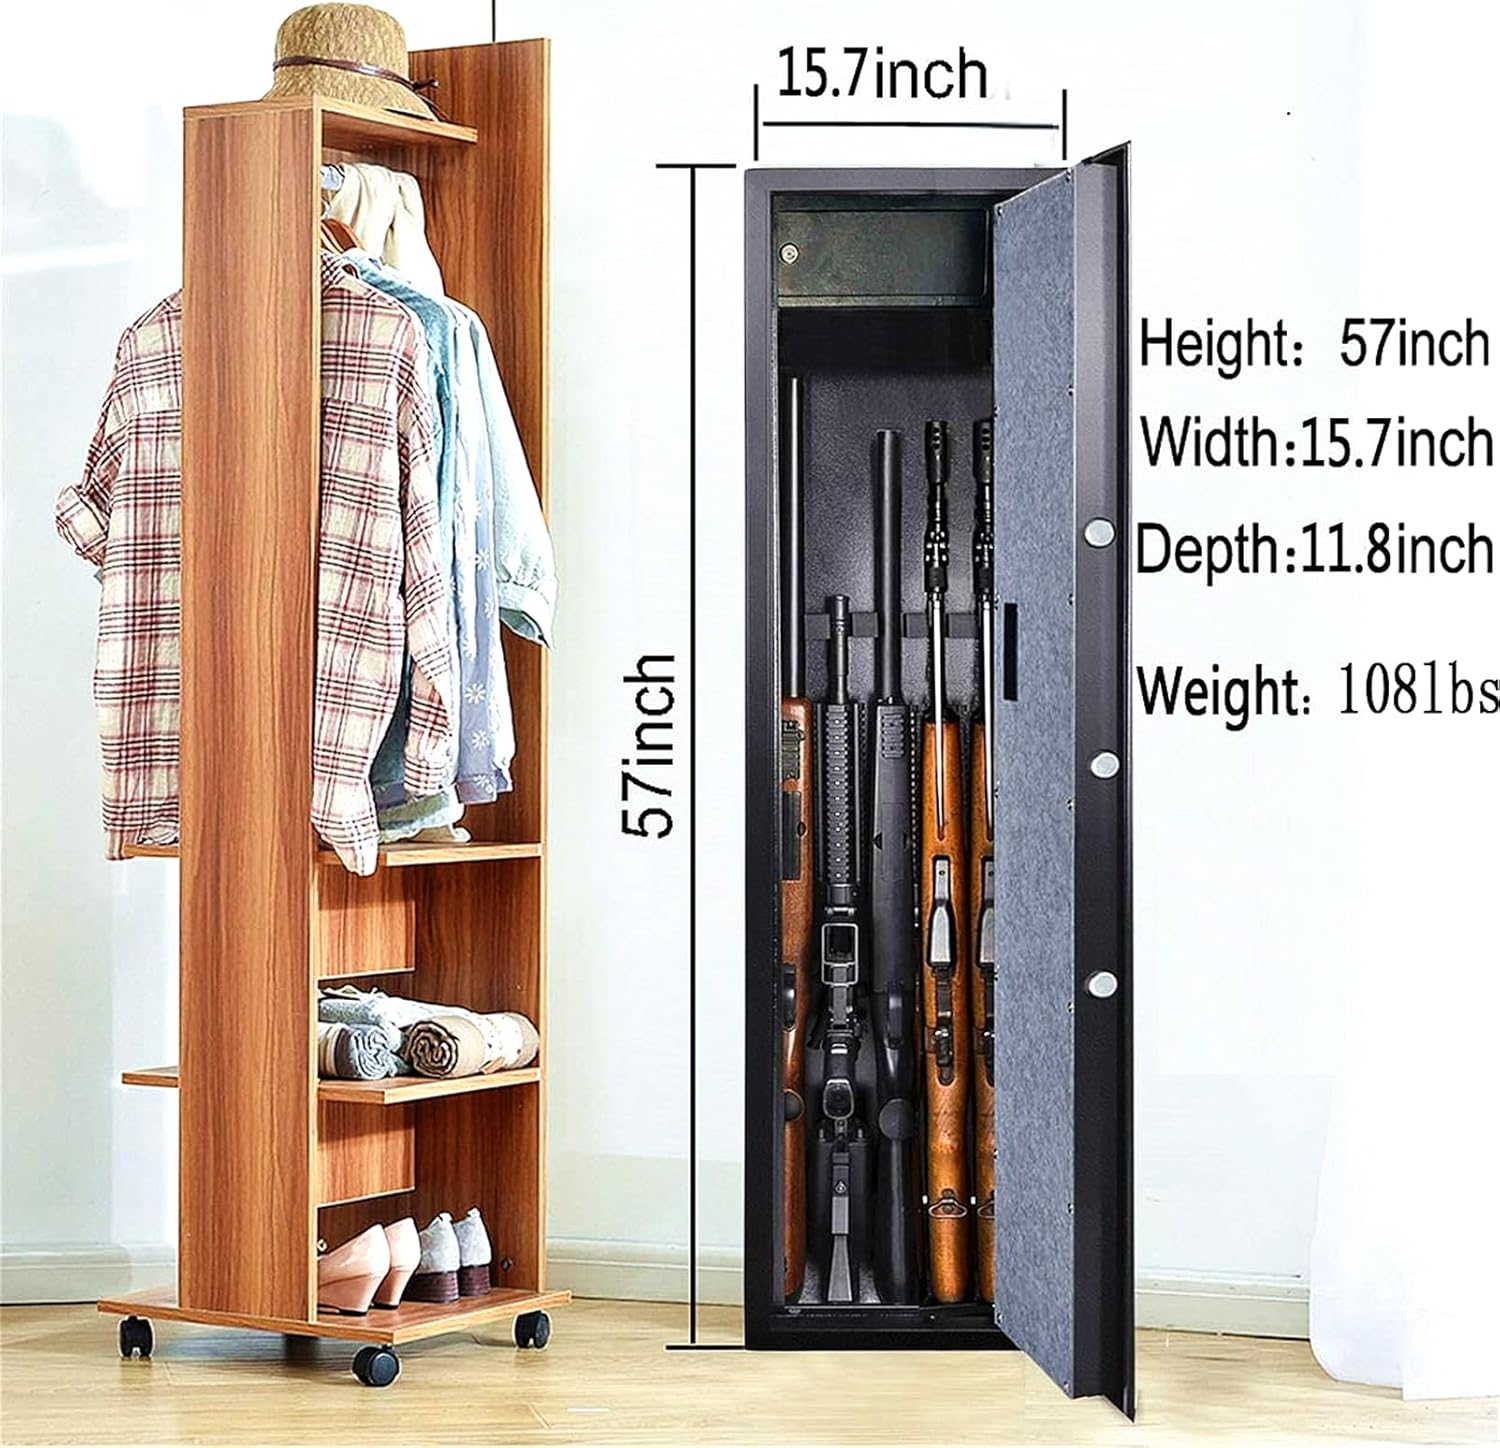
This image provides a visual representation of the safe's scale when placed in a room, offering a practical understanding of its height and footprint relative to common household items.
Setup and Installation
- Unpacking: Carefully remove the safe from its packaging. Inspect for any damage.
- Battery Installation: Locate the battery compartment on the back of the electronic keypad. Insert 4 AA batteries (not included), ensuring correct polarity.
- Initial Access: Use the backup key to open the safe for the first time. The backup key port is usually hidden behind a cover on the keypad.
- Mounting Location: Choose a secure and discreet location for your safe. Consider mounting it to a wall, floor, or both for maximum security.
- Secure Mounting: The safe features 3 pre-punched mounting holes in the back and 2 at the bottom. Use the included bolts to secure the safe to a solid surface (e.g., concrete wall/floor or wooden studs).
This image shows the pre-drilled mounting holes, which are essential for securely fastening the safe to a wall or floor, preventing unauthorized removal.
Operating Instructions
Setting Your PIN Code
- With the safe door open, locate the red reset button on the inside of the door, near the hinge or battery compartment.
- Press the red reset button. The keypad will beep, and the yellow light will illuminate.
- Enter your desired 3-8 digit PIN code on the keypad.
- Press the "#" button to confirm. The keypad will beep again, and the green light will flash, indicating successful programming.
- Test your new PIN code with the door open to ensure it works correctly before closing the safe.
Opening the Safe with PIN Code
- Enter your 3-8 digit PIN code on the electronic keypad.
- Press the "#" button. The green light will illuminate.
- Within 5 seconds, turn the door handle clockwise to open the safe.

This image displays the electronic keypad, which allows for quick access via a programmable PIN code. It also highlights the smart alarm system and the option for silent mode operation.
Opening the Safe with Backup Key
- Remove the cover plate from the keyhole on the keypad.
- Insert the backup key into the keyhole and turn it counter-clockwise.
- Simultaneously turn the door handle clockwise to open the safe.
- Note: The backup key can be used to open the safe even if the batteries are dead or the PIN code is forgotten.
Using the Internal Lock Box
- The internal lock box provides additional security for smaller items.
- It operates with its own separate key. Insert the key into the lock and turn to open or close.
Silent Mode Operation
- To activate silent mode (turn off keypad sounds), press the "*" button on the keypad.
- To deactivate silent mode (turn on keypad sounds), press the "*" button again.
Wrong Access Alarm
- If an incorrect PIN code is entered 3 times consecutively, the safe will activate an audible alarm.
- During the alarm, access via PIN code will be temporarily locked.
- To stop the alarm and reset the system, use the backup key to open the safe or wait for the alarm to cease.
Maintenance
- Battery Replacement: Replace the batteries in the electronic keypad annually, or when the low battery indicator light illuminates. Always use new AA alkaline batteries.
- Cleaning: Clean the exterior of the safe with a soft, damp cloth. Avoid abrasive cleaners or solvents that could damage the finish.
- Lock Mechanism: Periodically check the locking bolts and door hinges for smooth operation. Do not lubricate the electronic lock mechanism.
- Key Storage: Ensure backup keys are stored in a secure location away from the safe and accessible only to authorized individuals.
Troubleshooting
| Problem | Possible Cause | Solution |
|---|---|---|
| Safe does not open with PIN code. | Incorrect PIN entered; Dead batteries; Keypad malfunction. | Re-enter PIN carefully. Replace batteries. Use backup key. If issue persists, contact support. |
| Keypad is unresponsive. | Dead or improperly installed batteries. | Check battery polarity and replace batteries. |
| Alarm sounds frequently. | Repeated incorrect PIN entries. | Ensure correct PIN is used. Wait for alarm to clear or use backup key. |
| Door does not close or latch properly. | Obstruction in door frame; Misaligned bolts. | Check for obstructions. Ensure safe is level and securely mounted. |
Specifications
| Attribute | Value |
|---|---|
| Brand | BBRKIN |
| Model Number | QHXP029A |
| UPC | 712867461602 |
| Exterior Dimensions (H x W x D) | 57" x 13.8" x 12" (Approximate, based on product description) |
| Interior Chamber Height | 56.5 inches |
| Interior Chamber Width | 14 inches |
| Interior Chamber Depth | 13.8 inches |
| Item Weight | 81 Pounds |
| Lock Type | Electronic, Key |
| Color | Black |
| Material | Alloy Steel, Metal |
| Special Feature | Removable Shelf |
| Mounting Type | Floor Mount, Wall Mount |
| Alarm | Audible |
| Water Resistance Level | Not Water Resistant |
| Included Components | Bolts, Keys |
Warranty and Support
For any issues with the product upon receipt, such as scratches, damage, or malfunction, please contact the manufacturer or seller directly. They can provide replacement or solutions within 24 hours. Refer to your purchase documentation for specific warranty terms and contact information.
For further assistance or inquiries, please visit the official BBRKIN store on Amazon: BBRKIN Store.
Ask a question about this manual
Ask about setup, troubleshooting, compatibility, parts, safety, or missing instructions. Manuals+ will review the question and use this page’s manual context to help answer it.