
1. Introduction and Safety Information
This manual provides essential information for the safe installation, operation, and maintenance of your Hofstein Morino Ceiling Fan with Integrated Lighting. Please read all instructions carefully before beginning installation or use. Retain this manual for future reference.
Important Safety Instructions:
- Always disconnect power at the main circuit breaker before installation, maintenance, or cleaning.
- Installation must be performed by a qualified electrician in accordance with all local and national electrical codes.
- Ensure the mounting structure can support the weight of the fan (approximately 8.86 kg).
- Do not insert objects into the fan blades while the fan is operating.
- Ensure all connections are secure and properly insulated.
- This product is designed for indoor use only (IP20 rating).
2. Package Contents
Carefully unpack all components and ensure you have received the following items:
- Ceiling Fan Motor Housing
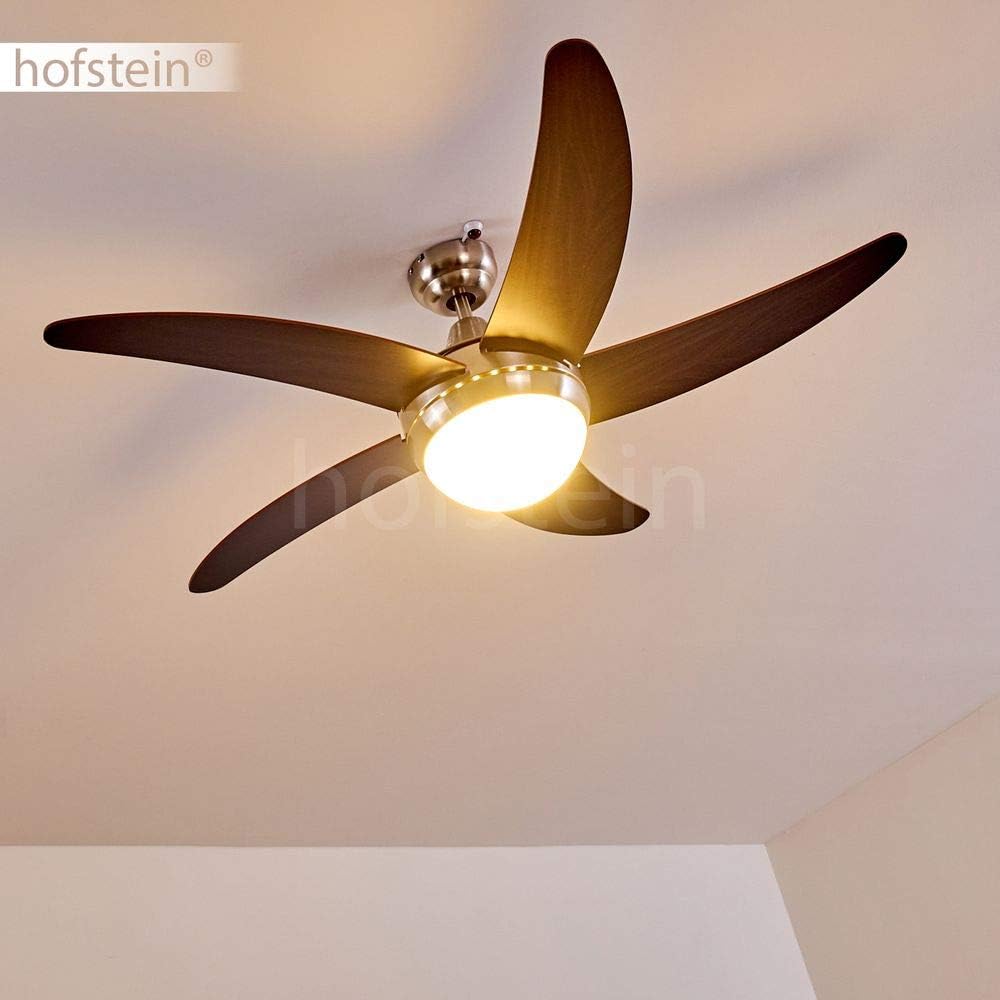
- Fan Blades (5 pieces, brown MDF)
- Light Kit with White Glass Shade
- Mounting Bracket (nickel-mat metal)
- Remote Control with Wall Mount
- Hardware Pack (screws, wire nuts, etc.)
- User Manual (this document)
If any parts are missing or damaged, please contact your retailer for assistance.
3. Specifications
| Feature | Specification |
|---|---|
| Model Number | H3013335 |
| Dimensions (L x W x H) | 120 cm x 120 cm x 39 cm |
| Weight | 8.86 kg |
| Materials | MDF (blades), Metal (housing), Glass (shade) |
| Color | Brown (blades), Nickel Mat (housing), White (shade) |
| Bulb Sockets | 2 x E14 |
| Max. Bulb Wattage | 40 Watt per bulb (LED compatible) |
| Motor Power | 55 Watt |
| Fan Speeds | 3 |
| Control Method | Remote Control (Infrared) |
| Recommended Room Size | 30 - 40 m² |
| IP Rating | IP20 (Indoor Use) |
| Power Source | Electric Cable (230 Volt) |
4. Installation Guide
Professional installation by a qualified electrician is highly recommended to ensure safety and proper function.
4.1 Pre-Installation Steps
- Turn off Power: Locate the circuit breaker for the fan's intended location and turn off the power. Verify power is off using a voltage tester.
- Prepare Mounting Location: Ensure the ceiling joist or support structure is capable of holding the fan's weight (8.86 kg) and is suitable for ceiling fan installation.
- Unpack Components: Carefully remove all parts from the packaging.
4.2 Mounting the Fan
- Attach Mounting Bracket: Secure the mounting bracket to the ceiling outlet box or support structure using appropriate screws and washers. Ensure it is firmly attached.
- Wiring Connections: Connect the fan's electrical wires to the household wiring according to local electrical codes. Typically, this involves connecting live, neutral, and ground wires. Refer to the wiring diagram provided with the fan.
- Secure Fan Body: Carefully lift the fan motor assembly and attach it to the mounting bracket. Ensure all safety cables and connections are properly secured.
- Install Fan Blades: Attach each fan blade to the motor housing using the provided screws. Ensure they are tightened securely.
- Install Light Kit: Connect the light kit wiring to the fan's light wiring. Secure the light kit to the fan motor housing.
- Insert Bulbs: Screw two E14 bulbs (max 40W each, not included) into the light sockets.
- Attach Glass Shade: Secure the glass shade to the light kit.

5. Operating Instructions
Your Hofstein Morino Ceiling Fan is controlled by the included remote control.
5.1 Remote Control Functions

- ON/OFF Button: Turns the fan on or off.
- Light ON/OFF Button: Controls the integrated light.
- Fan Speed Buttons (1, 2, 3): Adjusts the fan speed (1-low, 2-medium, 3-high).
- Timer Button: Sets a timer for the fan to turn off automatically (specific timer intervals may vary, refer to remote markings).
- Reverse Function Button (often a snowflake/sun icon): Changes the direction of blade rotation.
5.2 Summer and Winter Mode (Reverse Function)
The fan features a reversible motor for year-round comfort:
- Summer Mode (Counter-clockwise rotation): Creates a downward airflow, generating a cooling breeze.
- Winter Mode (Clockwise rotation): Creates an upward airflow, circulating warm air trapped near the ceiling throughout the room, which can help reduce heating costs.
To change the direction, ensure the fan is off, then press the reverse function button on the remote control. Turn the fan back on to observe the new rotation direction.

6. Maintenance
Regular maintenance ensures optimal performance and extends the lifespan of your ceiling fan.
6.1 Cleaning
- Before Cleaning: Always turn off the power to the fan at the circuit breaker.
- Fan Blades: Use a soft, damp cloth to wipe the fan blades. Do not use abrasive cleaners or solvents, as these can damage the finish.
- Motor Housing and Light Kit: Wipe with a soft, dry cloth. Avoid getting moisture into the electrical components.
- Glass Shade: Remove the glass shade carefully and wash with mild soap and water. Dry thoroughly before reattaching.
6.2 Bulb Replacement
- Before Replacing: Turn off the power to the fan at the circuit breaker and allow bulbs to cool completely.
- Remove Shade: Carefully remove the glass shade.
- Replace Bulbs: Unscrew the old E14 bulbs and screw in new E14 bulbs (max 40W each). LED bulbs are compatible and recommended for energy efficiency.
- Reattach Shade: Securely reattach the glass shade.

7. Troubleshooting
Before attempting any repairs, always ensure the power is disconnected at the circuit breaker.
| Problem | Possible Cause | Solution |
|---|---|---|
| Fan does not start | No power; loose wiring; remote control battery dead; remote not paired. | Check circuit breaker. Verify all wire connections. Replace remote battery. Refer to remote pairing instructions (if applicable). |
| Light does not work | Bulbs faulty or loose; loose wiring; remote control battery dead. | Ensure bulbs are screwed in tightly. Replace bulbs. Check wiring connections. Replace remote battery. |
| Fan wobbles | Loose blades; uneven blade weight; loose mounting bracket. | Ensure all blade screws are tight. Use a balancing kit (not included) if necessary. Tighten mounting bracket screws. |
| Remote control not responding | Dead battery; obstruction; remote not paired. | Replace remote battery. Ensure no obstructions between remote and fan receiver. Re-pair remote if necessary (refer to specific remote instructions). |
8. Warranty and Support
For warranty information or technical support, please contact Hofstein customer service or your retailer. Keep your proof of purchase for any warranty claims.
Manufacturer: HOFSTEIN
Model: H3013335
For further assistance, visit the Hofstein Brand Store.