1. Introduction
This manual provides essential instructions for the safe and efficient use of your Sunny-room USB Single Battery Charger. This charger is designed to power various Samsung camcorder lithium-ion battery packs. Please read this manual thoroughly before operating the device.
2. Package Contents
Verify that all items listed below are included in your package:
- 1x USB Single Battery Charger
- 1x Micro USB Cable
3. Specifications
Technical specifications for the USB Single Battery Charger:
| Feature | Detail |
|---|---|
| Micro Input | DC 5V |
| Output | DC 8.4V, 400-600mA |
| Compatibility | For 7.2V-8.0V Lithium-ion Camera Battery Packs |
| Dimensions (L x W x H) | 85 x 48 x 20 mm (3.35 x 1.89 x 0.79 inches) |
| Weight | 30g (1.06 ounces) |
| Safety Features | Constant Current Control, Over-Voltage Protection, Over-Charging Protection, Short-Circuit Protection |
| LED Indicator | Red (Charging), Green (Fully Charged) |

Image: Charger's Micro USB port and bottom label detailing input/output specifications.

Image: Charger dimensions in inches (1.78" x 0.71" x 3.54").

Image: Charger dimensions in centimeters (8.3cm x 4.5cm x 1.5cm).
4. Setup
The charger offers flexible power options. To set up the charger:
- Connect the provided Micro USB cable to the Micro USB port on the charger.
- Connect the other end of the USB cable to a compatible 5V USB power source. This can be a USB wall charger, a car charger, an external battery (power bank), or any other device with a USB port.

Image: Multiple charging options for the USB Single Charger, including USB wall charger, power bank, and car charger.
5. Operating Instructions
Follow these steps to charge your compatible battery:
- Ensure the charger is connected to a power source as described in the Setup section. The charger is ready when no battery is inserted.
- Carefully insert the battery into the charger slot, ensuring the correct polarity (positive and negative terminals) aligns with the charger's contacts.
- Once the battery is correctly inserted, the LED indicator on the charger will illuminate red, indicating that charging is in progress.
- When the battery is fully charged, the LED indicator will turn green. You can then remove the battery from the charger.
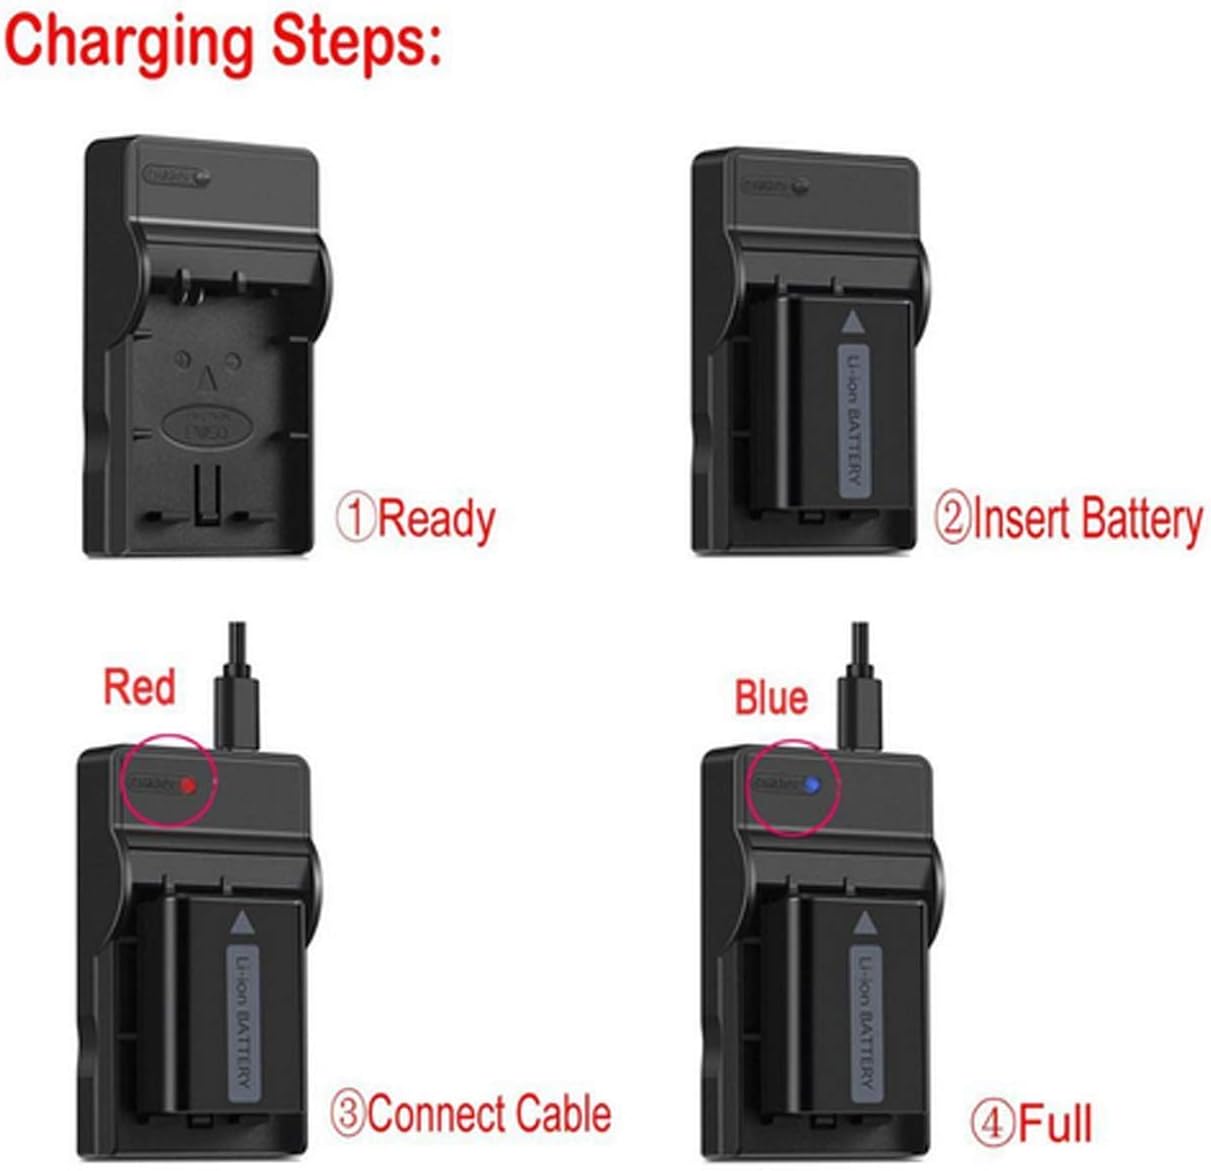
Image: Visual guide to the battery charging process, from insertion to full charge indication.
6. Maintenance
To ensure the longevity and proper functioning of your charger:
- Keep the charger clean and dry. Avoid exposure to moisture or extreme temperatures.
- Do not attempt to disassemble or modify the charger.
- Store the charger in a cool, dry place when not in use.
7. Troubleshooting
If you encounter issues with your charger, refer to the following common solutions:
- Charger LED does not light up: Ensure the Micro USB cable is securely connected to both the charger and the power source. Verify that the power source is active and providing 5V DC.
- Battery not charging (LED remains off or green immediately): Check that the battery is correctly inserted with the correct polarity. Ensure the battery is compatible with this charger. The battery might already be fully charged.
- Slow charging: Ensure your USB power source provides sufficient current (e.g., a standard 1A or 2A USB adapter is recommended).
If problems persist, please contact customer support for assistance.
8. Compatibility
This charger is compatible with the following Samsung Lithium-ion battery models, typically used with camcorders such as the Samsung VP-W70, VP-W70U, VP-W71, VP-W75, and VP-W75D series:
- Samsung SB-L110A
- Samsung SB-L160
- Samsung SB-L320
- Samsung SB-L70
- Samsung SB-L70A
- Samsung SB-L70R
- Samsung SB-L110
- Samsung SB-L220
- Samsung SB-LS70
- Samsung SB-LS110
- Samsung SB-LS220
- AD43-00070A
Important: Please confirm the specific model of your camera or battery before purchase to ensure compatibility. Incorrect purchases may result in unusable equipment.
9. Safety Information and Important Tips
- The charger is designed for charging batteries only. It cannot directly charge a camera or camcorder.
- Always ensure correct battery polarity when inserting the battery into the charger.
- Do not expose the charger to water, fire, or high temperatures.
- Keep out of reach of children.
- Disconnect the charger from the power source when not in use.
- If you are unsure about battery or charger compatibility, please contact the manufacturer for more information.