1. Product Overview
The LITFAD Simple Cartoon Rocket Dimmable LED Ceiling Light is designed for children's rooms, offering both illumination and a decorative element. This ceiling light features a rocket shape and integrated LED lighting with dimmable functionality, controlled via a remote. It is suitable for indoor use in bedrooms, dining rooms, and kitchens.

Image 1.1: The LITFAD Simple Cartoon Rocket Dimmable LED Ceiling Light, showcasing its design and illumination in a room setting.
2. What's in the Box
Verify that all components are present before beginning installation.
- LITFAD Simple Cartoon Rocket LED Ceiling Light Fixture
- Mounting Hardware (screws, anchors, etc.)
- Integrated LED Bulb(s)
- Remote Control (batteries not included)
3. Product Specifications
| Brand | LITFAD |
| Model Name | Simple Cartoon Rocket |
| Color | Rocket (White) |
| Material | Acrylic |
| Product Dimensions | 23.62 x 23.62 x 15.75 inches (Length x Width x Height) |
| Item Weight | 5.79 pounds |
| Power Source | AC |
| Voltage | 110 Volts |
| Wattage | 30 watts |
| Light Source Type | LED |
| Special Feature | Dimmable |
| Control Method | Remote Control |
| Installation Type | Flush Mount |
| Assembly Required | Yes |
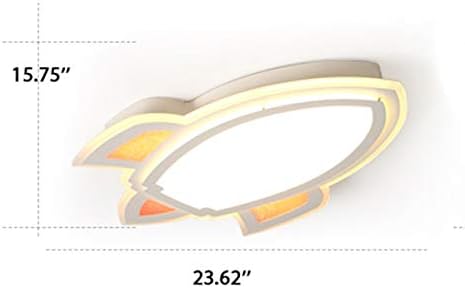
Image 3.1: Detailed dimensions of the ceiling light fixture, showing 23.62 inches width and 15.75 inches height.
4. Installation Instructions
Important Safety Information: Installation should be performed by a qualified electrician or a person with sufficient knowledge of electrical wiring. Always turn off power at the circuit breaker before beginning installation to prevent electric shock.
- Prepare for Installation:
- Turn off the main power supply at the circuit breaker.
- Unpack the light fixture and verify all parts are present as listed in "What's in the Box".
- Ensure you have the necessary tools: screwdriver, wire strippers, electrical tape, drill (if needed for mounting).
- Mount the Fixture Base:
- Attach the mounting bracket (if separate) to the junction box in the ceiling using the provided screws.
- Carefully align the light fixture with the mounting bracket or directly with the ceiling junction box.
- Secure the fixture to the ceiling using the provided mounting hardware. Ensure it is firmly attached.
- Wire Connections:
- Connect the live (black) wire from the ceiling to the live wire of the fixture.
- Connect the neutral (white) wire from the ceiling to the neutral wire of the fixture.
- Connect the ground (green or bare copper) wire from the ceiling to the ground wire of the fixture.
- Use wire nuts to secure all connections and wrap with electrical tape for added safety.
- Final Assembly:
- Carefully tuck all wires into the junction box.
- Attach the decorative cover or shade to the fixture, ensuring it is securely fastened.
- Restore Power:
- Turn the main power supply back on at the circuit breaker.
- Test the light fixture to ensure proper operation.

Image 4.1: The ceiling light installed in a child's bedroom, demonstrating its flush-mount appearance.
5. Operating Instructions
This LED ceiling light is controlled using the included remote control. Ensure batteries are installed in the remote (batteries not included).
5.1 Remote Control Functions
- Power On/Off: Press the ON/OFF button to turn the light on or off.
- Brightness Adjustment: Use the + and - buttons to increase or decrease the light brightness.
- Color Temperature Adjustment: The light offers different color temperature options (warm white, cool white, neutral white). Use the dedicated buttons (often labeled with sun icons or color temperatures) to cycle through or select your desired setting.
- Night Light Mode: Some remotes may include a night light function for a very dim light output.
- Memory Function: The light may retain the last used brightness and color temperature setting when turned off and on again.
Note: The remote control may have Chinese labeling. Refer to the remote's diagram for specific button functions if available.
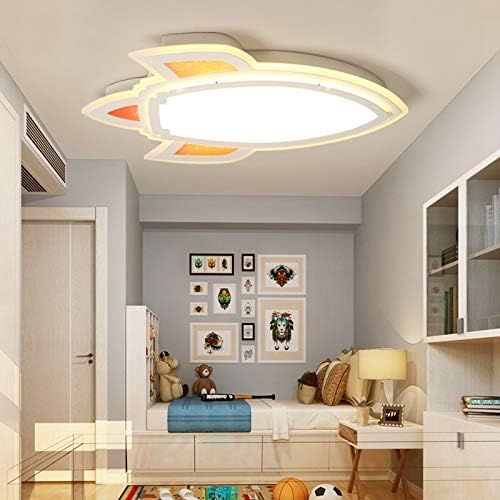
Image 5.1: The ceiling light emitting a warm white light, demonstrating its dimmable feature.
6. Maintenance
Regular maintenance ensures the longevity and optimal performance of your ceiling light.
- Cleaning:
- Before cleaning, ensure the light is turned off and cool to the touch.
- Wipe the fixture with a soft, dry or slightly damp cloth.
- Do not use abrasive cleaners, solvents, or polishes as they may damage the finish or acrylic material.
- Bulb Replacement:
- This fixture uses integrated LED bulbs, which are designed for long life and are generally not user-replaceable.
- If the LEDs fail prematurely, contact customer support for assistance.
- Remote Control:
- Replace remote control batteries when the range decreases or buttons become unresponsive.
- Use the specified battery type (usually AAA or CR2032, check remote for details).
7. Troubleshooting
If you encounter issues with your LITFAD ceiling light, refer to the following common problems and solutions:
| Problem | Possible Cause / Solution |
|---|---|
| Light does not turn on. |
|
| Remote control is unresponsive. |
|
| Light flickers or dims unexpectedly. |
|
| Light color changes every time it's turned on. |
|
8. Warranty and Support
Warranty: This LITFAD product comes with a 2-year limited warranty from the date of purchase. This warranty covers defects in materials and workmanship under normal use. It does not cover damage caused by improper installation, misuse, accidents, or unauthorized modifications.
Customer Support: For technical assistance, warranty claims, or any questions regarding your product, please contact LITFAD customer service. Refer to your purchase documentation or the official LITFAD website for contact information.
Please retain your proof of purchase for warranty purposes.