1. Introduction
Thank you for choosing the Aurlane LUNAR SQUARE 90 shower cabin. This manual provides essential information for the safe installation, operation, and maintenance of your new shower cabin. Please read these instructions carefully before beginning installation and keep them for future reference.
The LUNAR SQUARE 90 is a modern square shower cabin featuring a matte black aluminum frame, a 5mm transparent tempered glass pivot door, and 4mm tempered glass side and extra-white back panels. It includes a reinforced white acrylic shower tray, a height-adjustable rain shower, and an anti-limescale hand shower, all designed for a comfortable and stylish showering experience.
2. Safety Information
- Professional Installation Recommended: Installation should ideally be performed by a qualified professional to ensure safety and proper function.
- Required Installation Height: A minimum height of 230 cm is required for proper installation of the shower cabin.
- Glass Handling: Tempered glass, while strong, can shatter if struck forcefully or if edges are chipped. Handle all glass panels with extreme care. Wear appropriate safety gloves and eye protection.
- Water and Electricity: Ensure all water and electrical connections (if applicable) are performed by certified technicians according to local regulations.
- Secure Fastening: All components must be securely fastened to prevent movement or collapse.
- Weight: The shower cabin components can be heavy. Use proper lifting techniques or seek assistance to prevent injury.
- No Silicone Assembly: This model is designed for assembly without silicone. Follow instructions carefully to ensure a watertight seal.
3. Package Contents
Before beginning installation, please verify that all components are present and undamaged. Refer to the detailed diagram for component identification.
- 1 x Shower Cabin (including frame, glass panels, and shower tray)
- Matte Black Aluminum Frame profiles
- 5mm Transparent Tempered Glass Pivot Door
- 4mm Tempered Glass Side Panels
- 4mm Extra-White Tempered Glass Back Panels
- Reinforced White Acrylic Shower Tray
- Height-Adjustable Main Shower (Rain Shower, Matte Black)
- Anti-Limescale Hand Shower (Matte Black)
- Matte Black Shower Hose
- Matte Black Aluminum Faucet Frame
- Matte Black Towel Handles
- Chrome-plated Mixer Handles
- Mechanical Mixer Tap
- 60mm Drain
- Assembly Hardware (screws, gaskets, etc.)

Figure 1: Exploded view diagram showing the main components of the Aurlane LUNAR SQUARE 90 shower cabin, including the pivot door, matte black aluminum profiles, reinforced acrylic tray, and 60mm drain.
4. Setup and Installation
This section outlines the general steps for installing your Aurlane LUNAR SQUARE 90 shower cabin. Refer to the detailed assembly instructions provided with your product for specific diagrams and fastening details. Remember, a minimum installation height of 230 cm is required.
- Prepare the Installation Area: Ensure the floor is level and the wall surfaces are clean and ready for installation. Verify that water supply and drainage connections are correctly positioned.
- Position the Shower Tray: Place the reinforced white acrylic shower tray in its final position. Ensure it is level and properly supported. Connect the 60mm drain to your plumbing system.
- Assemble the Frame: Construct the matte black aluminum frame according to the manufacturer's instructions. This model is designed for assembly without silicone, relying on precise fittings and gaskets for a watertight seal.
- Install Glass Panels: Carefully insert the 4mm tempered glass side and extra-white back panels into the frame profiles. Ensure they are seated correctly and secured.
- Mount the Pivot Door: Attach the 5mm transparent tempered glass pivot door to the frame. Adjust hinges to ensure smooth operation and a secure magnetic closure.
- Install Shower Fixtures: Mount the matte black aluminum faucet frame, mechanical mixer tap, chrome-plated mixer handles, height-adjustable rain shower, anti-limescale hand shower, and shower hose. Connect all water lines.
- Attach Towel Handles: Secure the matte black towel handles to the designated locations.
- Test for Leaks: Before final use, thoroughly test all water connections and seals for any leaks. Run water through the shower system to check functionality.
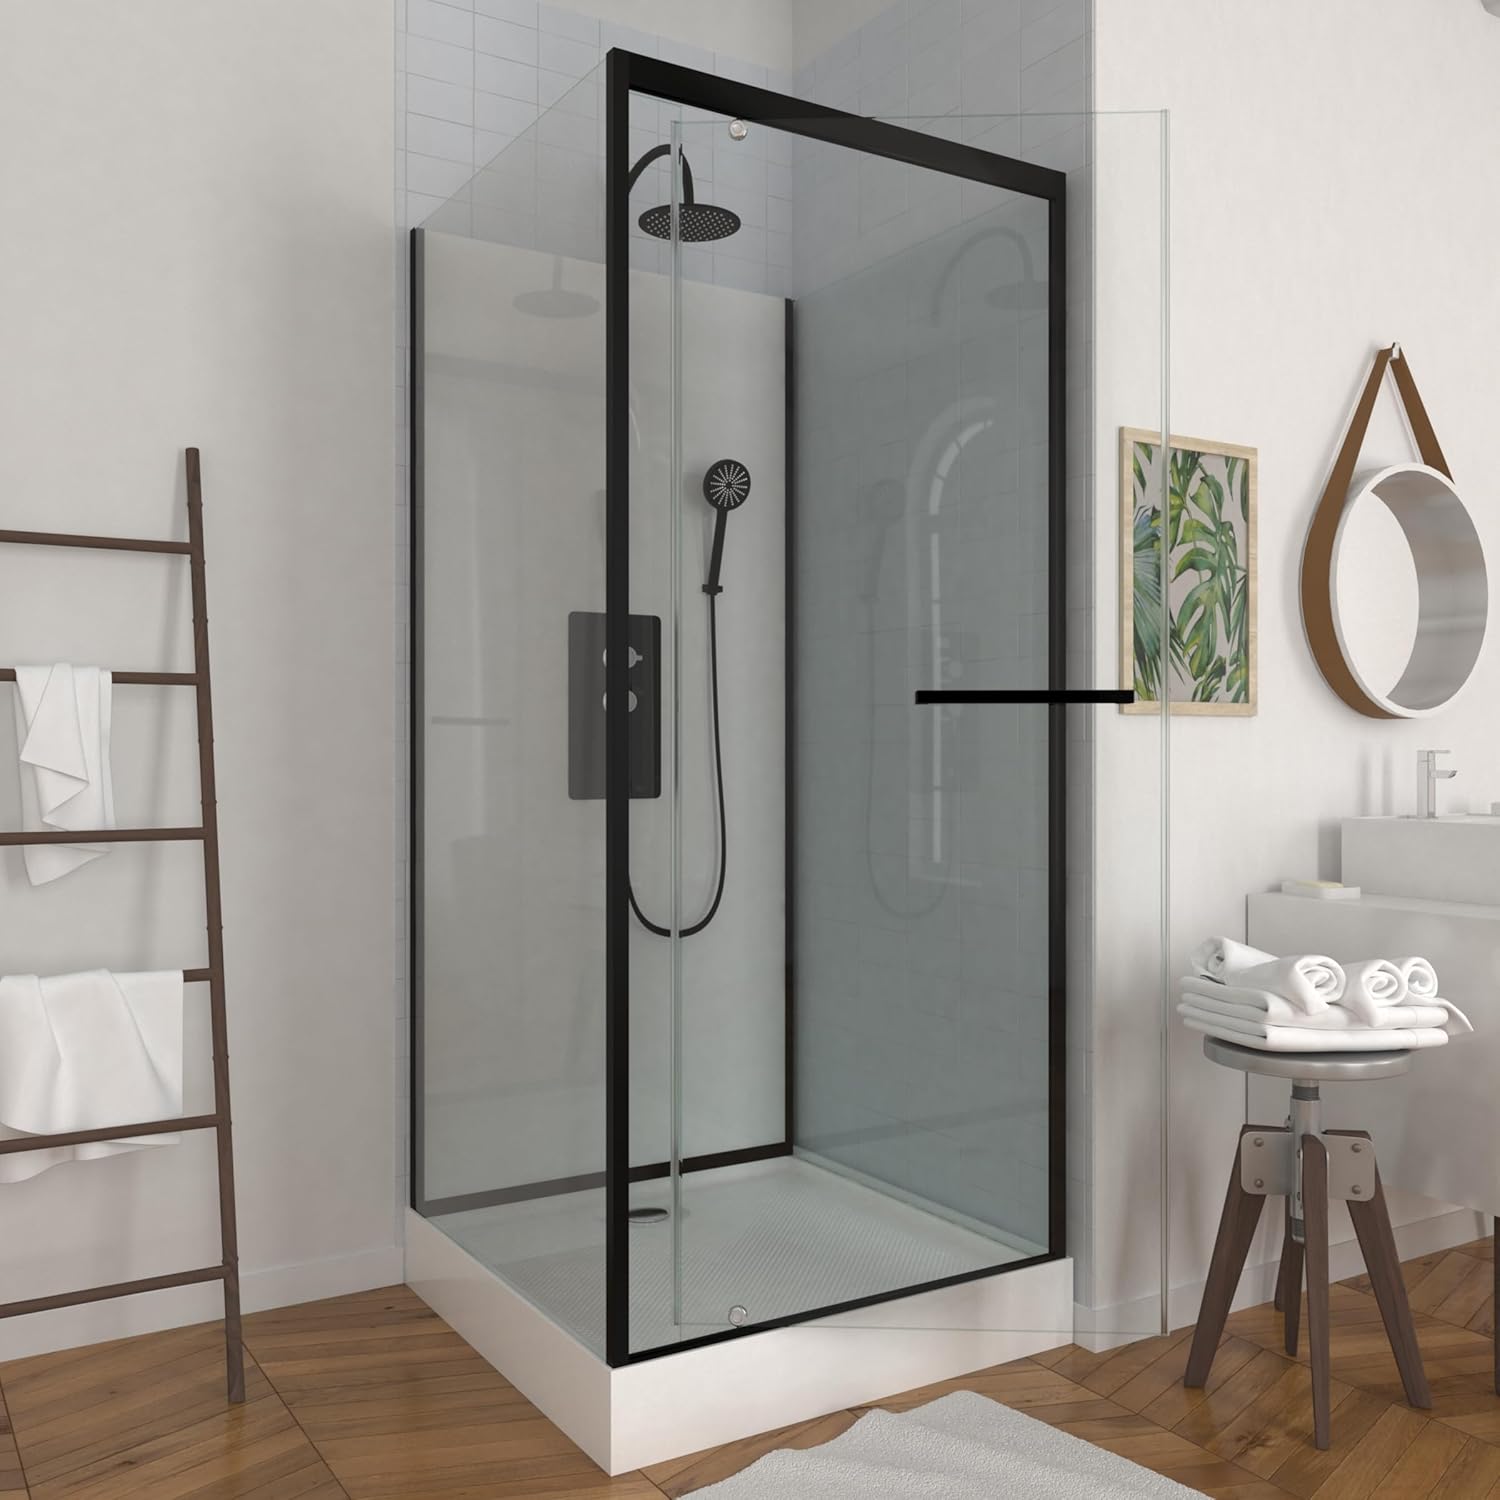
Figure 2: The Aurlane LUNAR SQUARE 90 shower cabin fully installed, showcasing its matte black frame and clear glass panels in a bathroom setting.

Figure 3: Interior view of the Aurlane LUNAR SQUARE 90 shower cabin, highlighting the matte black shower panel with integrated mixer, rain shower, and anti-limescale hand shower.
5. Operating Instructions
Using your Aurlane LUNAR SQUARE 90 shower cabin is straightforward:
- Water Flow: Use the chrome-plated mixer handles to turn the water on and off and to adjust the water temperature.
- Shower Selection: The mechanical mixer tap allows you to switch between the overhead rain shower and the anti-limescale hand shower.
- Hand Shower Adjustment: The hand shower is designed with anti-limescale nozzles for easy cleaning.
- Pivot Door: The pivot door opens smoothly. Ensure it is fully closed for a secure magnetic seal before showering to prevent water leakage.
6. Maintenance
Regular cleaning and maintenance will ensure the longevity and pristine appearance of your shower cabin.
- Glass Panels: Clean glass panels regularly with a soft cloth and a non-abrasive glass cleaner. Avoid harsh chemicals or abrasive sponges that can scratch the glass or damage coatings. For anti-limescale hand shower nozzles, gently rub to dislodge mineral deposits.
- Aluminum Profiles: Wipe matte black aluminum profiles with a soft, damp cloth. Do not use abrasive cleaners or solvents, as these can damage the finish.
- Acrylic Shower Tray: Clean the reinforced white acrylic shower tray with mild soap and water. Avoid abrasive cleaners or brushes that could scratch the surface.
- Drain: Periodically check and clean the 60mm drain to prevent blockages.
- Seals: Inspect door seals and gaskets regularly for wear and tear. Replace if necessary to maintain watertight integrity.
7. Troubleshooting
| Problem | Possible Cause | Solution |
|---|---|---|
| Water leakage from door or seals | Door not fully closed; worn or misaligned seals; improper assembly. | Ensure door is fully closed and magnetic strip engages. Inspect seals for damage or misalignment and adjust or replace as needed. Review assembly instructions for correct panel and frame installation. |
| Low water pressure | Partially closed water supply valve; clogged shower head/hand shower; plumbing issue. | Check that water supply valves are fully open. Clean any limescale from shower heads. Consult a plumber if the issue persists. |
| Drainage issues (slow draining) | Clogged drain. | Remove the drain cover and clear any hair or debris. Use a suitable drain cleaner if necessary. |
| Door not closing smoothly | Hinges need adjustment; debris in track (if applicable); frame misalignment. | Check and adjust door hinges. Ensure the frame is level and square. |
8. Specifications
| Feature | Detail |
|---|---|
| Model Number | CAB203 |
| Dimensions (L x W x H) | 90 x 90 x 230 cm |
| Required Installation Height | 230 cm |
| Frame Material | Matte Black Aluminum |
| Door Type | Pivot Door |
| Door Glass Thickness | 5 mm Tempered Glass (Transparent) |
| Side Panel Glass Thickness | 4 mm Tempered Glass |
| Back Panel Glass Thickness | 4 mm Tempered Glass (Extra White) |
| Shower Tray Material | Reinforced White Acrylic |
| Drain Diameter | 60 mm |
| Shower Head | Height-adjustable Rain Shower (Matte Black) |
| Hand Shower | Anti-Limescale Hand Shower (Matte Black) |
| Mixer Type | Mechanical Mixer Tap with Chrome-plated Handles |
| Assembly Type | Silicone-free assembly, Reversible installation |
| Certifications | Sanitary Conformity Certificate |
9. Warranty and Support
For warranty information and customer support, please refer to the documentation provided at the time of purchase or contact your retailer. Keep your proof of purchase for any warranty claims.
For technical assistance or spare parts, please contact Aurlane customer service through their official website or the contact details provided with your product.