1. Introduction
This manual provides instructions for the NEEWER Photo Studio Light Box, a portable and foldable lighting kit designed for product photography. It features integrated LED lighting with adjustable brightness and multiple shooting angles to enhance image quality.
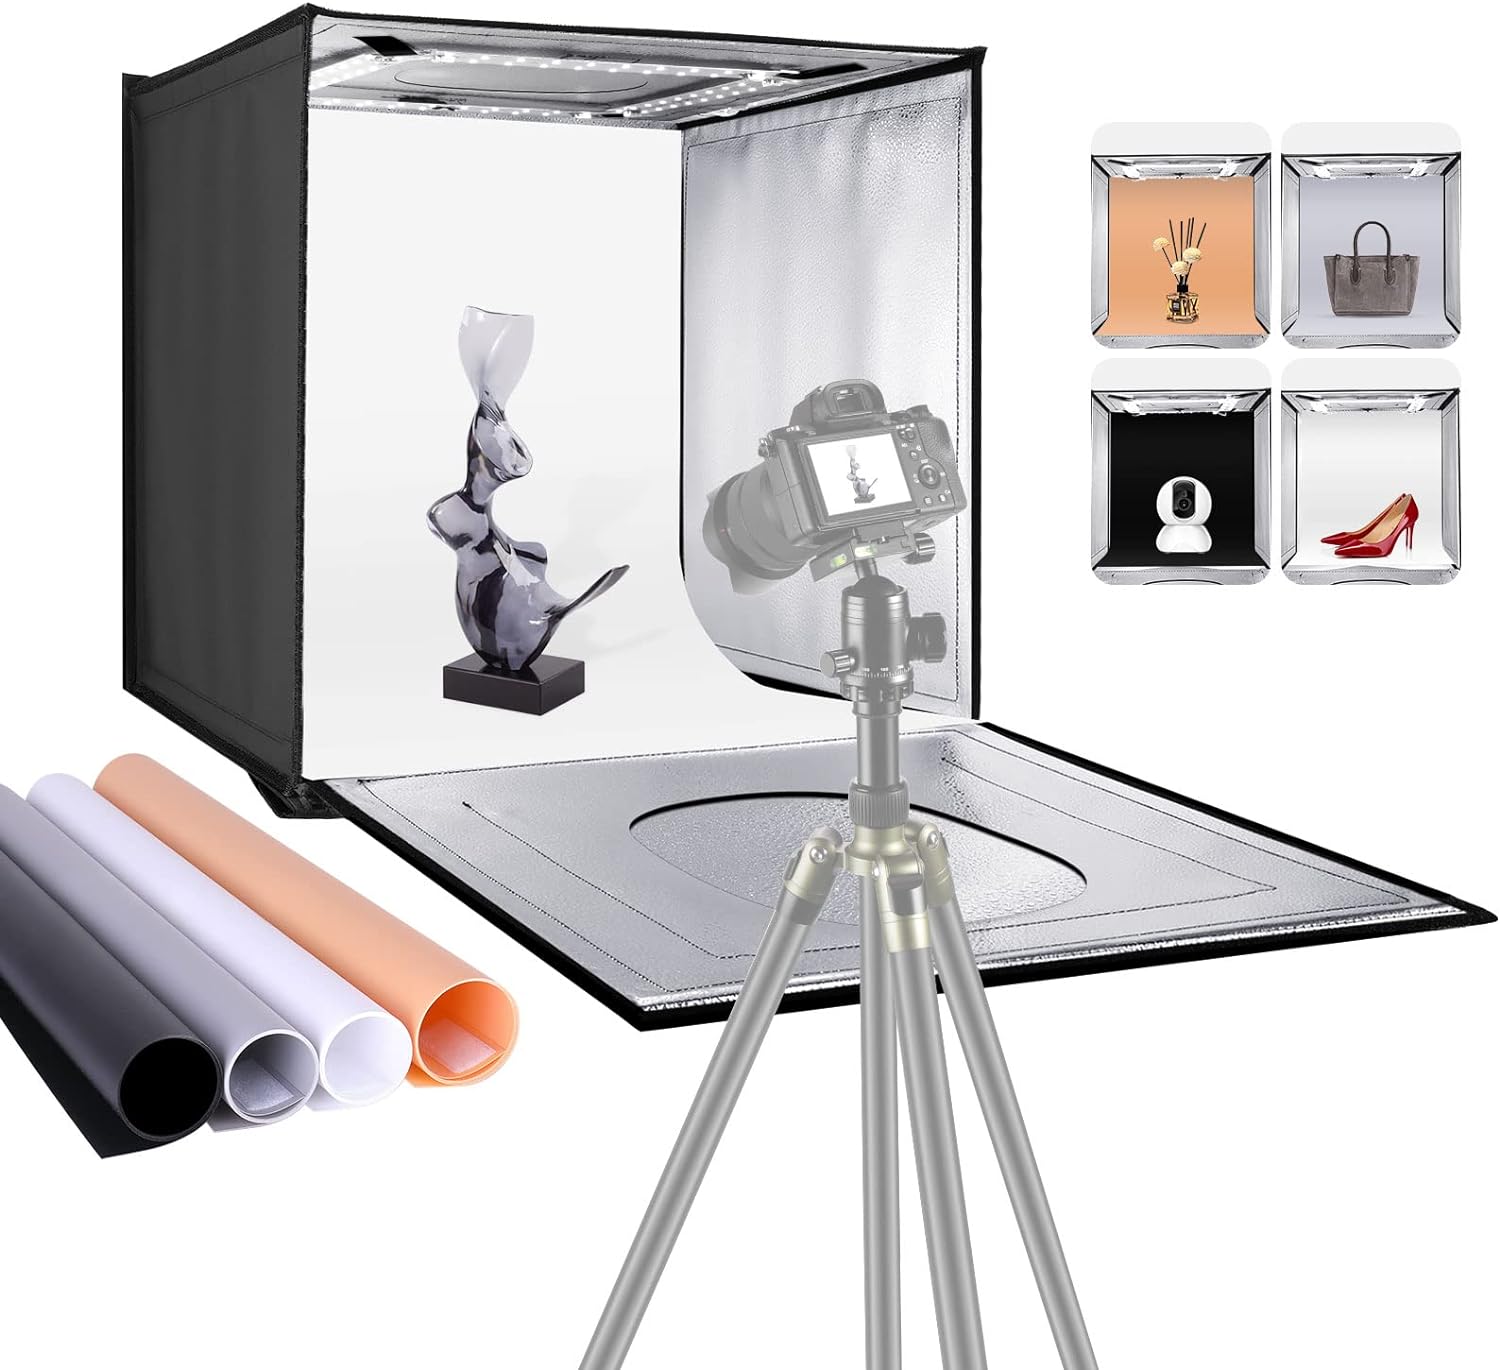
An overview of the NEEWER Photo Studio Light Box, demonstrating its use with a camera and showing the included colored backdrops.
2. Package Contents
Verify that all items are present in the package:
- NEEWER 16" x 16" x 16" Photo Light Box
- Diffusion Cloth
- Four Backdrops (Black, White, Gray, Orange)
- Power Adapter
- User Manual (this document)
3. Setup Instructions
The light box features a one-piece structure for quick and easy assembly without tools.
- Unfold the Light Box: Lay the light box flat. It will expand into a cross shape.
- Form the Cube: Bring the sides up and secure them using the hook-and-loop fasteners on each edge. Ensure all sides are firmly attached to form a stable cube.
- Insert Backdrop: Choose one of the four colored backdrops (black, white, gray, or orange). Insert it into the light box, securing it with the integrated clips or slots to create a seamless background.
- Attach Diffusion Cloth: For softer, more even lighting, attach the diffusion cloth to the inside top of the light box, covering the LED strip. This helps reduce harsh shadows and glare.
- Connect Power: Connect the power adapter to the designated power port on the light box. Plug the adapter into a standard electrical outlet.

Visual guide illustrating the simple, tool-free assembly process of the light box using hook-and-loop fasteners.
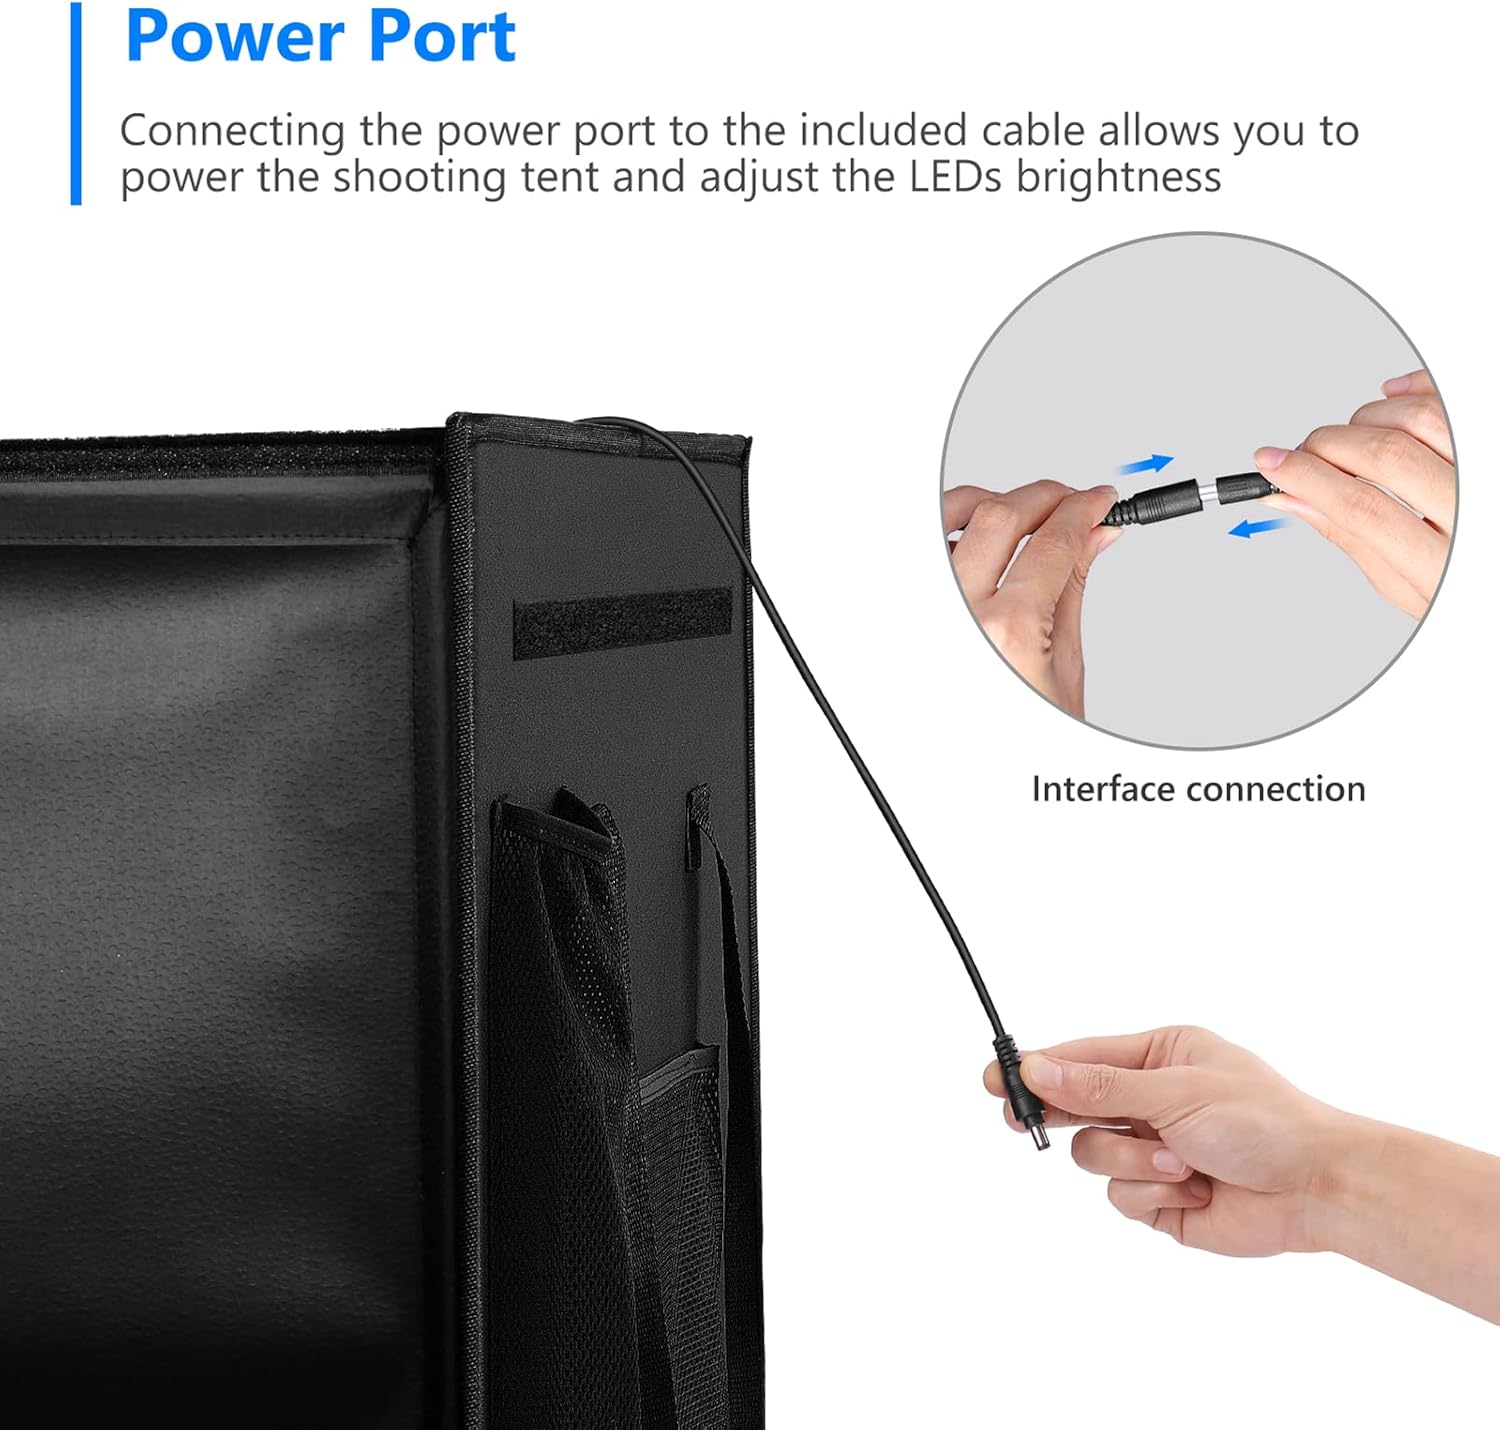
A close-up view of how the power adapter connects to the light box.
4. Operating Instructions
4.1 Powering On and Brightness Adjustment
- Once the power adapter is connected, the built-in 80 LED lights will illuminate.
- Locate the brightness adjustment knob on the power adapter cable.
- Rotate the knob clockwise to increase brightness and counter-clockwise to decrease brightness. The light intensity can be adjusted steplessly from 0% to 100%.

Detail of the integrated 80 LED lights, providing bright and consistent illumination for photography.

The power adapter features a knob for stepless adjustment of the LED light brightness from 0% to 100%.
4.2 Utilizing Multiple Shooting Angles
The light box offers various openings for flexible shooting perspectives:
- Front Opening: The main front panel can be opened in two ways for horizontal shooting, minimizing outside reflections.
- Top Opening: A circular opening on the top allows for bird's-eye view photography, ideal for flat lay or overhead shots.

Demonstration of the included black, white, gray, and orange backdrops, along with various shooting angles available through the front and top openings.
4.3 Changing Backdrops
To change the background color, simply unclip the current backdrop and replace it with another from the included set (black, white, gray, orange). Ensure the new backdrop is smoothly positioned to avoid creases in your photos.
5. Maintenance
- Cleaning: Use a soft, dry cloth to wipe the exterior of the light box. For the interior and backdrops, a slightly damp cloth can be used, ensuring they are completely dry before folding or storing. Avoid abrasive cleaners.
- Storage: When not in use, fold the light box back into its compact, portable form. Store it in a dry, cool place away from direct sunlight.
- LED Care: The LED lights are integrated and do not require replacement. Avoid touching the LED strip directly when powered on.

Illustrates the light box set up as a compact studio and its transformation into a portable carry bag for easy transport.
6. Troubleshooting
- Lights Not Turning On:
- Ensure the power adapter is securely connected to both the light box and the electrical outlet.
- Check if the electrical outlet is functional.
- Verify the brightness knob is not set to 0%.
- Uneven Lighting or Shadows:
- Ensure the diffusion cloth is properly installed over the LED strip.
- Adjust the position of the product inside the light box.
- Increase the brightness using the adjustment knob.
- Backdrops Not Lying Flat:
- Ensure the backdrop is correctly secured with the internal clips.
- If the backdrop has creases from storage, gently roll it in the opposite direction or allow it to hang freely for a period to flatten.
7. Specifications
| Feature | Detail |
|---|---|
| Model Number | ZK-RY-02 |
| Product Dimensions | 16 x 16 x 16 inches (40 x 40 x 40 cm) |
| Item Weight | 5.49 pounds |
| LED Quantity | 80 LEDs |
| Color Temperature | 6000-6500K |
| CRI | 85+ |
| Brightness Adjustment | Stepless (0-100%) |
| Backdrops Included | Black, White, Gray, Orange |
| Material | Plastic |
| Power Cable Length | 263 cm |

Diagram showing the 15.7-inch (40cm) cubic dimensions of the light box and the 263cm power cable length.
8. Warranty and Support
For warranty information and customer support, please refer to the official NEEWER website or contact your retailer. Keep your purchase receipt for warranty claims.
For further assistance, please visit the NEEWER Store on Amazon.


