1. Product Overview
The Obuby Kids Walkie Talkies are designed for children aged 3-12, offering a fun and reliable way to communicate. This set includes two 2-way radios with 22 channels and a range of up to 3 kilometers, making them ideal for both indoor and outdoor adventures. Key features include a backlit LCD, a built-in flashlight, and clear sound quality with anti-interference capabilities.

Image: The Obuby Kids Walkie Talkies set, featuring two units and their packaging.
2. Setup Guide
2.1 Battery Installation
Each walkie talkie requires 4 AAA batteries (not included). Ensure batteries are inserted with correct polarity.
- Locate the battery compartment on the back of the walkie talkie.
- Gently slide the battery cover latch to open the compartment.
- Insert 4 AAA batteries, matching the positive (+) and negative (-) terminals as indicated inside the compartment.
- Close the battery cover securely until it clicks into place.

Image: Visual guide for battery installation.
2.2 Powering On/Off
To power on the walkie talkie, press and hold the Power button ( ) located on the top right side of the device until the LCD screen illuminates. To power off, press and hold the same button until the screen turns off.
3. Operating Instructions
Familiarize yourself with the buttons and functions for optimal use.

Image: Close-up of the walkie talkie's features and buttons.
3.1 Channel Selection
The walkie talkies feature 22 available channels. To change the channel:
- Press the MENU button once. The channel number on the LCD will flash.
- Use the Up (
 ) or Down (
 ) arrow buttons to select your desired channel (1-22).
 - Press the TALK button to confirm your selection and exit the menu, or wait a few seconds for it to auto-confirm.
For communication, both walkie talkies must be set to the same channel.
3.2 Transmitting and Receiving
- To Transmit (Talk): Press and hold the large TALK button located on the front of the device. Speak clearly into the microphone. Release the button when you are finished speaking.
- To Receive: Simply ensure the walkie talkie is powered on and on the same channel as the transmitting unit. No button press is required to receive.
3.3 Monitor Function (MON)
The MON button allows you to temporarily disable the squelch function, enabling you to hear weaker signals or monitor a channel for activity without interference. Press and hold the MON button to activate, release to deactivate.
3.4 Flashlight Operation
The built-in LED flashlight is located at the top of the walkie talkie. Press the LAMP button (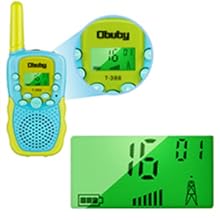 ) to turn the flashlight on or off. This feature is useful in low-light conditions.

Image: Walkie talkie flashlight in use during an outdoor adventure.
3.5 Volume Adjustment
Use the Up () and Down () arrow buttons to adjust the speaker volume. The volume level is displayed on the LCD screen.
3.6 Keypad Lock Function
To prevent accidental changes to settings, you can lock the keypad. Press and hold the MENU button until a key icon ( ) appears on the LCD. To unlock, press and hold the MENU button again until the key icon disappears.
3.7 VOX (Voice Operated Exchange)
The VOX function allows for hands-free operation. When activated, the walkie talkie will automatically transmit when it detects your voice, without needing to press the TALK button. To activate/deactivate VOX:
- Press the MENU button multiple times until "VOX" appears on the LCD.
- Use the Up or Down arrow buttons to select the VOX sensitivity level (e.g., 1-3, with 3 being most sensitive) or "OFF" to disable.
- Press the TALK button to confirm.
3.8 Call Tones
The walkie talkies offer 10 customizable call tones. To select a call tone:
- Press the MENU button multiple times until "CA" (Call Tone) appears on the LCD.
- Use the Up or Down arrow buttons to cycle through the available tones.
- Press the TALK button to confirm.
To send a call tone to another unit, press the Musical Note button ( ) once.
3.9 Roger Beep
The Roger Beep is an audible tone transmitted at the end of your transmission to signal to other users that you have finished speaking. To enable/disable the Roger Beep:
- Press the MENU button multiple times until "RO" (Roger Beep) appears on the LCD.
- Use the Up or Down arrow buttons to select "ON" or "OFF".
- Press the TALK button to confirm.
4. Maintenance
- Cleaning: Wipe the walkie talkies with a soft, damp cloth. Do not use harsh chemicals or abrasive cleaners.
- Battery Care: Remove batteries if the devices will not be used for an extended period to prevent leakage. Replace all batteries at the same time.
- Storage: Store the walkie talkies in a cool, dry place away from direct sunlight and extreme temperatures.
- Water Resistance: The walkie talkies have an IPX5 waterproof rating, meaning they are protected against low-pressure water jets from any direction. They are not designed to be submerged in water.
5. Troubleshooting
| Problem | Possible Cause | Solution |
|---|---|---|
| No power or device not turning on. | Batteries are low, incorrectly installed, or missing. | Replace with fresh AAA batteries, ensuring correct polarity. |
| Cannot communicate with another unit. | Units are on different channels, out of range, or batteries are low. | Ensure both units are on the same channel. Move closer to the other unit. Replace batteries. |
| Poor sound quality or static. | Interference from other electronic devices or obstacles. Unit is at the edge of range. | Move away from sources of interference. Adjust volume. Use the MON button to check for weak signals. |
| Channel changes accidentally. | Buttons are being pressed unintentionally. | Activate the Keypad Lock function by pressing and holding the MENU button. |
| Short battery life. | Frequent use of flashlight or continuous transmission. Low quality batteries. | Use high-quality alkaline or rechargeable AAA batteries. Limit continuous transmission and flashlight use. |
6. Specifications
- Product Dimensions: 5 x 2 x 1.5 inches
- Item Weight: 6.7 ounces
- Model Number: WT1-1
- Batteries: 4 AAA batteries required (per unit)
- Number of Channels: 22
- Frequency Range: UHF (around 400-470 MHz)
- Talking Range Maximum: 3 Kilometers
- Water Resistance Level: IPX5 (Waterproof)
- Special Features: Adjustable Volume, Built-in Flashlight, Backlit LCD, Keypad Lock, VOX
7. Warranty and Support
For warranty information, please refer to the documentation included with your purchase or visit the official OBUBY website. If you encounter any issues or require technical assistance, please contact OBUBY customer support through their official channels.
You can visit the OBUBY Store for more information: OBUBY Store on Amazon.