P SeekPro Chamption RCJ7Y 506027204 506010001
Ignition Coil Module and Spark Plug User Manual
For Husqvarna Brush Cutters and Poulan Chainsaws
Introduction
This manual provides essential information for the installation, operation, and maintenance of your new Ignition Coil Module and Spark Plug. This product is designed as a replacement part for various Husqvarna brush cutters and Poulan chainsaws. Please read this manual thoroughly before installation to ensure proper function and safety.
Product Compatibility
This ignition coil module and spark plug are compatible with the following models:
- Husqvarna Brush Cutter: 250 PS (1996-02) Pruning Saw, PS 50 (1991-12) Pruning Saw, 240EPA (2001-01), 240R (1990-01, 1994-04, 1996-06, 1998-10), 240REPA (2002-08), 245EPA (2001-01), 245R (1990-01, 1994-04, 1996-06, 1998-10), 245REPA (2002-08), 245RX (1990-01, 1994-04, 1996-06, 1998-10, 2002-08), 250R (1994-10, 1995-10, 1997-08), 250RX (1994-10, 1995-10, 1997-08), 252RX (1999-04, 1997-08).
- Poulan Chainsaw: 3000CB Gas Chain Saw, KS412 Gas Chainsaw.
Refer to your equipment's manual for specific part numbers and compatibility verification. This product replaces P/N: 501485402, 587329401, 587329501, 5060272-01, 506027206, 544018301, 5060272-06, 5039012-01, 5440183-01, 5060272-07, 506027203, 506027201, 506027204, 506010001, 503635501, 503901201, 506027207, 501839801, 501839803.
Package Contents
- 1 x Ignition Module
- 1 x Spark Plug (BM6A type)
- 1 x After Sales Service Card (for support inquiries)

Image: The complete package including the ignition coil module, spark plug, and connecting wires.
Setup and Installation
Safety First: Before beginning any installation, ensure the equipment is turned off, cooled down, and the spark plug wire is disconnected to prevent accidental starting. Wear appropriate safety gear, including gloves and eye protection.
- Locate the Existing Ignition System: Identify the current ignition coil and spark plug on your Husqvarna brush cutter or Poulan chainsaw.
- Disconnect Wires: Carefully disconnect all wires connected to the old ignition coil, including the spark plug wire and any kill switch wires. Note their positions for reinstallation.
- Remove Old Components: Unscrew and remove the old ignition coil. Use a spark plug wrench to remove the old spark plug.
- Install New Spark Plug: Thread the new BM6A spark plug into the cylinder head by hand to avoid cross-threading. Once finger-tight, use a spark plug wrench to tighten it an additional 1/4 to 1/2 turn. Do not overtighten.
- Mount New Ignition Coil: Position the new ignition coil module in the same location as the old one. Ensure proper alignment with the flywheel. The air gap between the coil and the flywheel is critical for proper ignition. A typical gap is around 0.010-0.014 inches (0.25-0.35 mm). A business card or feeler gauge can be used to set this gap.
- Secure the Coil: Tighten the mounting screws for the ignition coil.
- Connect Wires: Reconnect the spark plug wire to the new spark plug. Connect any other wires (e.g., kill switch wire) to the new ignition coil as they were on the old unit.
- Final Check: Double-check all connections and ensure all tools are removed from the equipment.

Image: Another view of the ignition coil and spark plug, showing the connecting wires and terminals.
Operating Considerations
After installing the new ignition coil and spark plug, the equipment should start and run smoothly. If you encounter issues, refer to the Troubleshooting section.
- Ensure the spark plug wire is securely attached to the spark plug.
- Verify that the kill switch wire (if applicable) is properly connected and functioning.
- Always use the correct fuel mixture for your 2-stroke engine as specified by the equipment manufacturer.
Maintenance
Regular maintenance of your ignition system components can extend their lifespan and ensure reliable performance.
- Spark Plug Inspection: Periodically remove and inspect the spark plug. Look for signs of wear, carbon buildup, or fouling. Replace if electrodes are worn or if there is heavy fouling.
- Spark Plug Gap: Check the spark plug gap with a feeler gauge and adjust if necessary to the manufacturer's specification (typically around 0.020-0.028 inches or 0.5-0.7 mm for small engines).
- Wire Connections: Ensure all electrical connections to the ignition coil and spark plug are clean, tight, and free from corrosion.
- Cleanliness: Keep the area around the ignition coil and spark plug clean and free of debris, oil, and fuel residue.
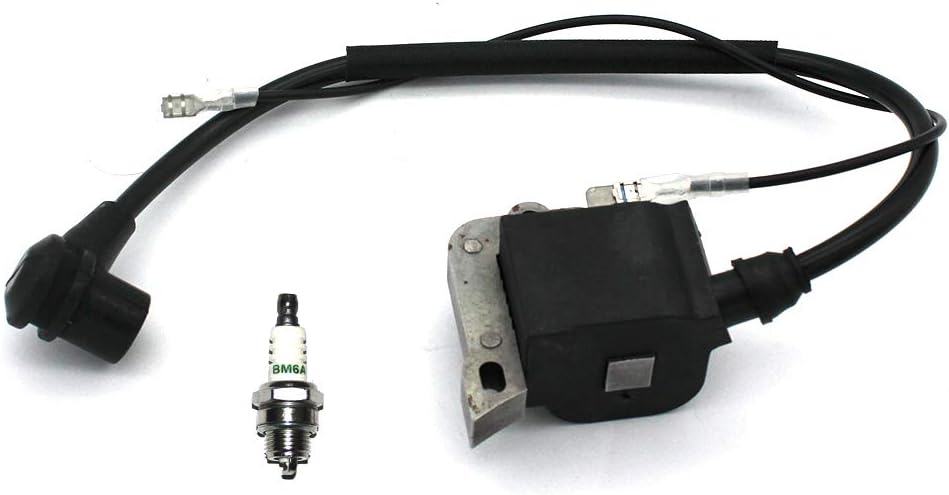
Image: A detailed view of the ignition coil module, highlighting its construction and connection points.
Troubleshooting
If your equipment fails to start or runs poorly after installing the new ignition components, consider the following common issues:
| Problem | Possible Cause | Solution |
|---|---|---|
| Engine does not start (no spark) |
|
|
| Engine starts but runs rough |
|
|
| Intermittent spark |
|
|
If troubleshooting steps do not resolve the issue, it is recommended to consult a qualified service technician or refer to your equipment's specific service manual.
Specifications
- Product Type: Ignition Coil Module with Spark Plug
- Spark Plug Type: BM6A
- Manufacturer Part Number: Chamption RCJ7Y 506027204 506010001 (as listed)
- Item Weight: 8.8 ounces (approx.)
- Product Dimensions: 13.78 x 1.77 x 1.38 inches (approx.)
- Compatibility: Husqvarna Brush Cutters (various models), Poulan Chainsaws (3000CB, KS412)
Warranty and Support
This product is provided with an After Sales Service Card. For any questions, concerns, or support needs, please refer to the contact information provided on the card. The seller, Partscloud, aims to answer questions within 24 hours.
Please note that the IC (Integrated Circuit) is from Japan. Always read the product description and any warnings carefully before purchase and installation.
Related Documents - Chamption RCJ7Y 506027204 506010001
 |
QXDENG Motorcycle Spark Plug Product Manual Product manual and safety information for QXDENG motorcycle spark plugs, including model compatibility for BPMR7A, RCJ6Y, RCJ7Y, and BM6A. |
 |
KOSHIN K100-C0-P (SEV) Engine Parts List and Diagrams Comprehensive parts list and detailed exploded view diagrams for the KOSHIN K100-C0-P (SEV) engine. Includes part numbers, names, quantities, and prices for each component. |
 |
FW Murphy 601 CD Ignition System Installation Instructions Comprehensive installation guide for the FW Murphy 601 CD Ignition System, detailing preparation, connection diagrams, and dimensions for proper setup. |
 |
Partner Chainsaw Manual: P33XT, P351XT, P4-18XT, P4-20XT - Operation and Safety Guide Comprehensive instruction manual for Partner P33XT, P351XT, P4-18XT, and P4-20XT chainsaws, covering safety, operation, maintenance, and troubleshooting. |
 |
Laser Tree LT-40W-AA User Manual: Specifications, Connection, and Settings Comprehensive user manual for the Laser Tree LT-40W-AA 5W laser module. Covers technical specifications, connection diagrams, driver adapter details, cutting and engraving settings, and essential precautions and maintenance guidelines. |
 |
Horizontal Two-Way Coil Installation Instructions | Goodman, Daikin, Amana HVAC Comprehensive installation guide for horizontal two-way evaporator coils manufactured by Goodman Manufacturing Company, L.P., for use with Goodman, Daikin, and Amana HVAC systems. Covers essential safety precautions, pre-installation checks, application details, duct flange attachment, condensate drain piping, refrigerant line installation, flowrator adjustments, and indoor coil cleaning procedures. Includes troubleshooting tips and contact information. |
Ask a question about this manual
Ask about setup, troubleshooting, compatibility, parts, safety, or missing instructions. Manuals+ will review the question and use this page’s manual context to help answer it.