
1. Product Overview
The JEWHITENY Professional Nail Drill Machine is designed for various nail art applications, including grinding, cutting, carving, polishing, and cuticle removal. It features adjustable speed up to 30,000 RPM, forward/reverse rotation, and can be operated via hand or foot pedal. This kit is suitable for both home and salon use.

Image 1.1: Overview of the JEWHITENY Professional Nail Drill Machine, showing the control unit, handpiece, and included drill bits. The control unit features a speed dial, power switch, and mode selection.
2. Package Contents
Verify that all items are included in your package:
- 1 x Main Control Machine
- 1 x Handpiece (Nail Drill Handle)
- 1 x Foot Pedal
- 1 x Nail Brush
- 1 x Nail Buffer
- 56 x Sanding Bands
- 6 x Metal Drill Bits (suitable for 3/32" diameter drill bits)

Image 2.1: The included set of 6 different metal nail drill bits and a box of sanding bands. Each bit has a unique shape for various nail applications.
3. Setup Instructions
3.1 Connecting Components
- Connect the Handpiece: Insert the 5-pin plug of the handpiece into the "MOTOR" jack on the main control unit.
- Connect the Foot Pedal (Optional): If using the foot pedal, insert its plug into the "FOOT" jack on the main control unit.
- Connect Power: Plug the power cord into the main control unit and then into a 110-240V electrical outlet.

Image 3.1: The main control unit showing the "MOTOR" jack for the handpiece, "FOOT" jack for the foot pedal, and the power input. Key controls like the speed dial and FWD/REV switch are also visible.
3.2 Inserting and Changing Drill Bits
The handpiece features a twist-lock system for secure bit changes.
- Ensure Power Off: Always turn off the machine before changing bits.
- Loosen the Chuck: Twist the middle section of the handpiece (marked "R") counter-clockwise until it loosens.
- Remove/Insert Bit: Pull out the current drill bit or insert the desired 3/32" diameter bit into the chuck.
- Lock the Chuck: Twist the middle section of the handpiece (marked "S") clockwise to securely lock the drill bit in place. Ensure the bit is firmly seated before operation.
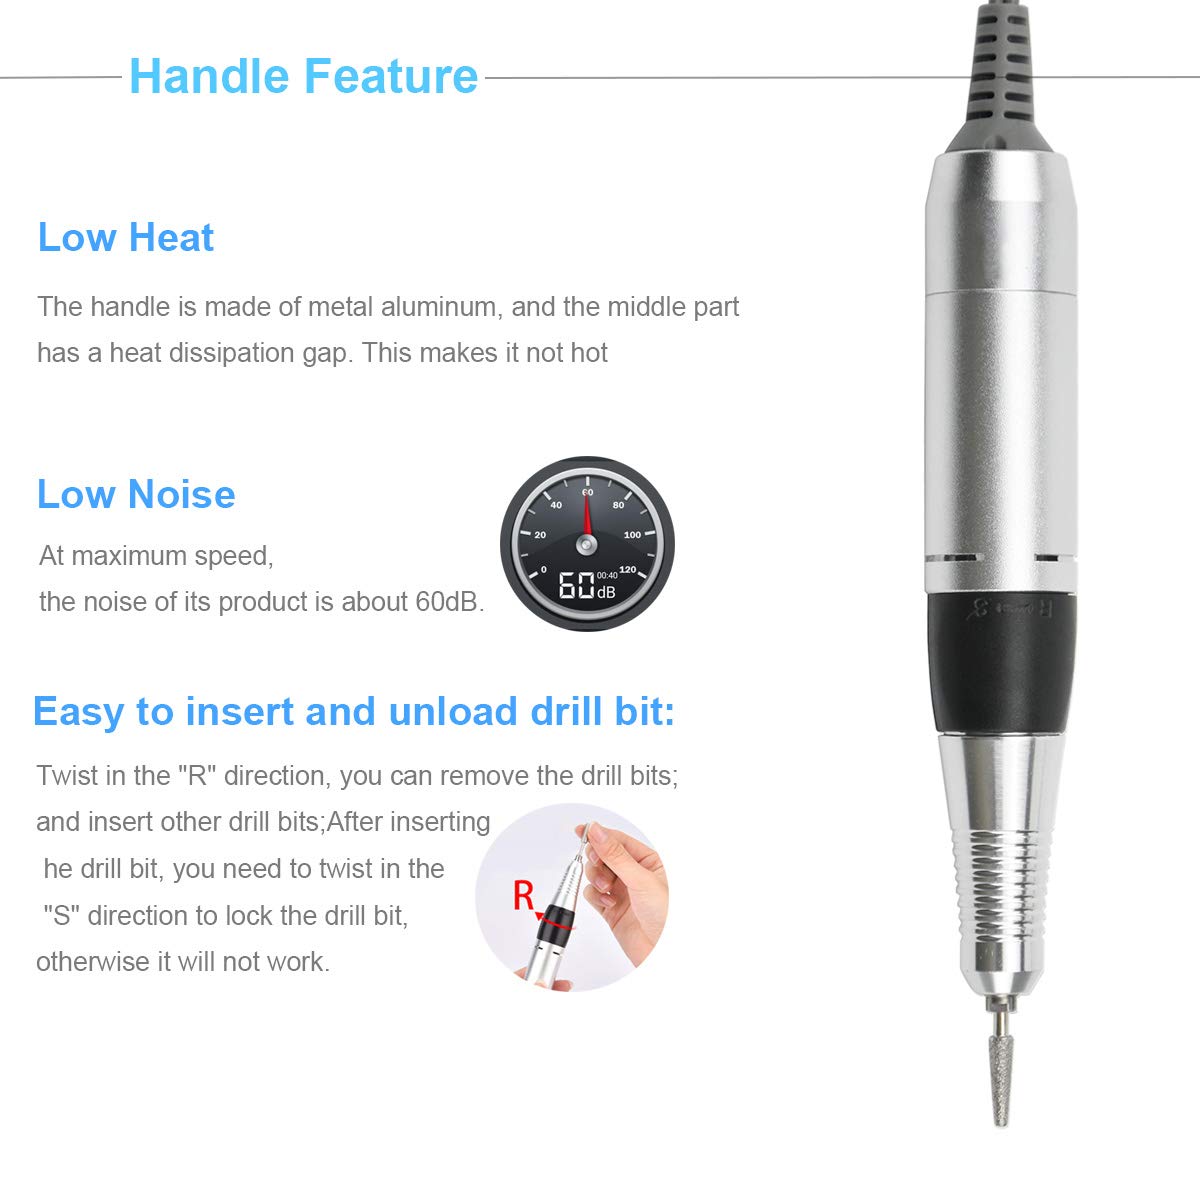
Image 3.2: The handpiece illustrating the twist-lock mechanism for inserting and removing drill bits. The "R" indicates release (counter-clockwise) and "S" indicates lock (clockwise).
4. Operating Instructions
4.1 Power On/Off
- To Power On: Flip the "POWER" switch to the "ON" position. The "ON" indicator light will illuminate.
- To Power Off: Flip the "POWER" switch to the "OFF" position.
4.2 Speed Control (0-30,000 RPM)
Rotate the speed control knob on the main unit to adjust the rotational speed of the drill bit. Turn clockwise to increase speed (MAX) and counter-clockwise to decrease speed (MIN).
Recommendation: Start at lower speeds and gradually increase to the desired level for better control and to prevent damage to nails or the machine.
4.3 Forward/Reverse Rotation
Use the FWD/OFF/REV switch to select the rotation direction of the drill bit. "FWD" is forward rotation, and "REV" is reverse rotation. This allows for comfortable use by both right-handed and left-handed individuals.
4.4 Hand/Foot Pedal Mode
Select the desired control mode using the "FOOT/HAND" switch on the main unit.
- Hand Mode: Set the switch to "HAND". The speed is controlled directly by the speed control knob.
- Foot Mode: Set the switch to "FOOT". The speed is controlled by pressing the foot pedal. The speed knob will set the maximum speed achievable with the foot pedal.

Image 4.1: The foot pedal accessory, which allows hands-free control of the nail drill's rotation when the main unit is set to "FOOT" mode.
5. Maintenance
5.1 Cleaning
Regularly clean the handpiece and drill bits after each use to ensure optimal performance and hygiene. Use a soft brush or cloth to remove dust and debris. Disinfect bits as appropriate for your usage.
5.2 Heat Dissipation
The handpiece is designed with an aluminum body and a heat dissipation gap to manage heat. To prolong the service life of the handpiece, avoid continuous intensive use if it becomes noticeably warm. Allow it to cool down periodically.
5.3 Storage
When not in use, store the nail drill machine and its accessories in a clean, dry place, away from direct sunlight and moisture. Disconnect the power supply for long idle times.
6. Safety Information
- Always disconnect the power supply before cleaning or changing accessories.
- Do not operate the machine with a damaged power cord. Contact customer support for replacement.
- Avoid touching rotating bits during operation.
- Keep the device out of reach of children.
- Do not disassemble or attempt to repair the unit yourself. Refer to qualified service personnel.
- Use appropriate safety eyewear during operation to protect your eyes from dust and debris.
- Avoid applying excessive pressure, which can cause the bit to overheat or damage the nail. Use light, controlled movements.
7. Troubleshooting
| Problem | Possible Cause | Solution |
|---|---|---|
| Machine does not power on | Power cord not properly connected; Power switch is off. | Ensure power cord is securely plugged into the unit and outlet. Flip the power switch to "ON". |
| Handpiece not rotating | Handpiece not connected; Speed knob set to minimum; Mode switch incorrect; Foot pedal not pressed (if in Foot mode). | Check handpiece connection. Increase speed. Ensure correct HAND/FOOT mode. Press foot pedal if in Foot mode. |
| Handpiece overheats | Continuous intensive use; Blocked ventilation. | Allow handpiece to cool down. Avoid prolonged continuous use. Ensure ventilation gaps are clear. |
| Drill bit wobbles or is loose | Bit not properly locked; Incorrect bit size. | Ensure the handpiece chuck is securely locked (twist to "S"). Use only 3/32" diameter drill bits. |
8. Specifications
| Feature | Detail |
|---|---|
| Brand | JEWHITENY |
| Model Number | 402 |
| Input Voltage | 110-240V, 50Hz |
| Output Voltage (Main Unit) | DC0-13V |
| Output Current (Main Unit) | 1.5A |
| Working Voltage (Handpiece) | DC0-12V/18V |
| Rated Current (Handpiece) | 1.5A/2 GA |
| Maximum Rotational Speed | 30,000 RPM |
| Handpiece Material | Aluminum |
| Product Dimensions (Control Unit) | 9.65 x 7.8 x 3.94 inches (24.5 x 19.8 x 10 cm) |
| Handpiece Dimensions (L x W x H) | 1.06"L x 1.06"W x 5.31"H (2.7 x 2.7 x 13.5 cm) |
| Product Weight | 1.54 pounds (0.7 kg) |

Image 8.1: Detailed technical drawing of the handpiece, showing its dimensions and the 5-pin jack connector for the motor cable.

Image 8.2: Diagram illustrating the dimensions of the main control unit in millimeters (135mm length, 90mm width, 100mm height).
9. Warranty and Support
Specific warranty information is not provided in the product details. For any questions, technical support, or warranty claims, please contact JEWHITENY customer service directly through their official channels or the retailer where the product was purchased.
Unauthorized disassembly or repair of the product is prohibited and may void any applicable warranty.