1. Introduction
This manual provides detailed instructions for the installation, configuration, and operation of your WAVLINK AC1200 High Power Outdoor Weatherproof WiFi Range Extender, Wireless Access Point, and Router. This device is designed to provide robust and extended wireless network coverage in outdoor environments.
2. Product Overview
The WAVLINK AC1200 (Model WL-WN572HG3) is a versatile outdoor networking device offering high power transmission and an enhanced receiver for long-distance wireless performance. It features a weatherproof design with a built-in lightning arrester (15kV ESD) to withstand harsh outdoor conditions.
Key features include:
- High transmission power up to 30dBm/1000mW with four external omnidirectional dual-band antennas for extended range.
- Weather-proof RJ45 connector and integrated Passive Power over Ethernet (PoE) for flexible deployment.
- Enhanced antenna gain to amplify WLAN signals and extend outdoor coverage, with automatic channel selection to avoid conflicts.
- Multiple operation modes: Access Point (AP), Router, and Wireless Internet Service Provider (WISP). Under AP Router mode, it supports Access Point, Client, and Client+Repeater functionalities.
- Robust weatherproof casing and 15kV ESD lightning protection.
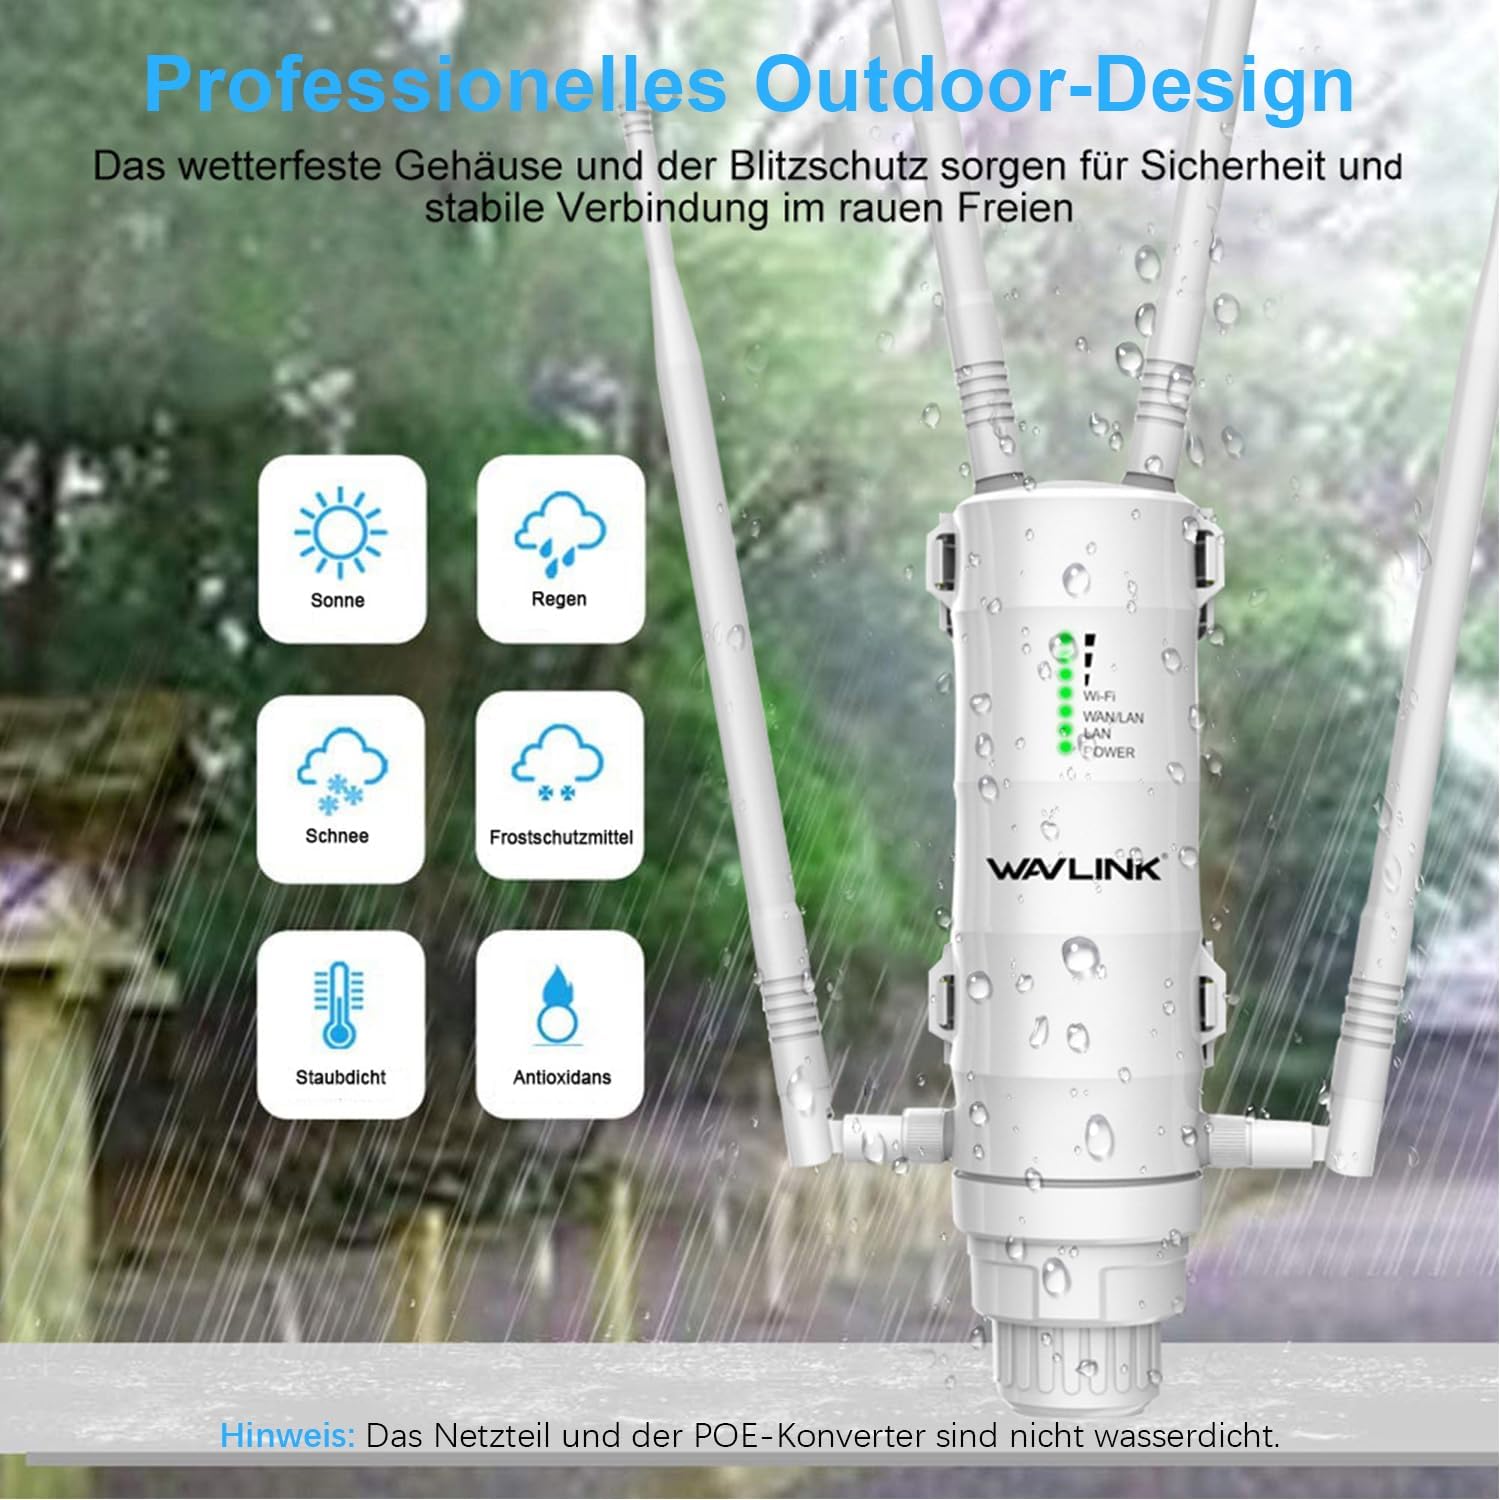
Image 2.1: The WAVLINK AC1200 Outdoor WiFi Extender demonstrating its weatherproof capabilities against sun, rain, snow, frost, dust, and oxidation.
3. Package Contents
Verify that all items are present in your package:
- WAVLINK AC1200 Main Unit
- Four Detachable Omni-Directional Antennas
- Passive PoE Injector
- Ethernet Cable
- Power Adapter
- Mounting Straps
- Screws and Wall Plugs
- Quick Installation Guide
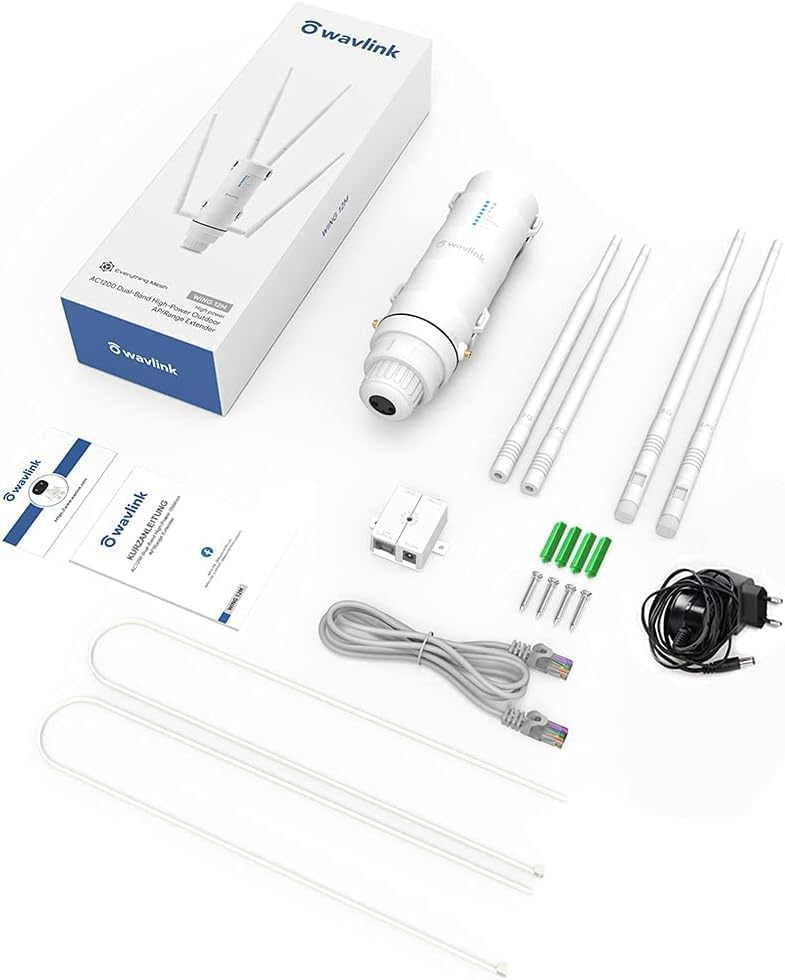
Image 3.1: All components included in the WAVLINK AC1200 product package.
4. Setup and Installation
4.1 Physical Installation
- Attach Antennas: Carefully screw the four detachable antennas onto the corresponding ports on the main unit. Ensure they are securely fastened. Two antennas are for 2.4GHz and two for 5GHz.
- Cable Routing: Thread the Ethernet cable through the spiral cover and rubber gasket, then connect it to the RJ45 port on the device.
- Mounting: Choose a suitable outdoor location for optimal signal coverage. The device can be mounted on a pole or wall using the provided mounting straps, screws, and wall plugs. Ensure the device is positioned vertically with antennas pointing upwards.
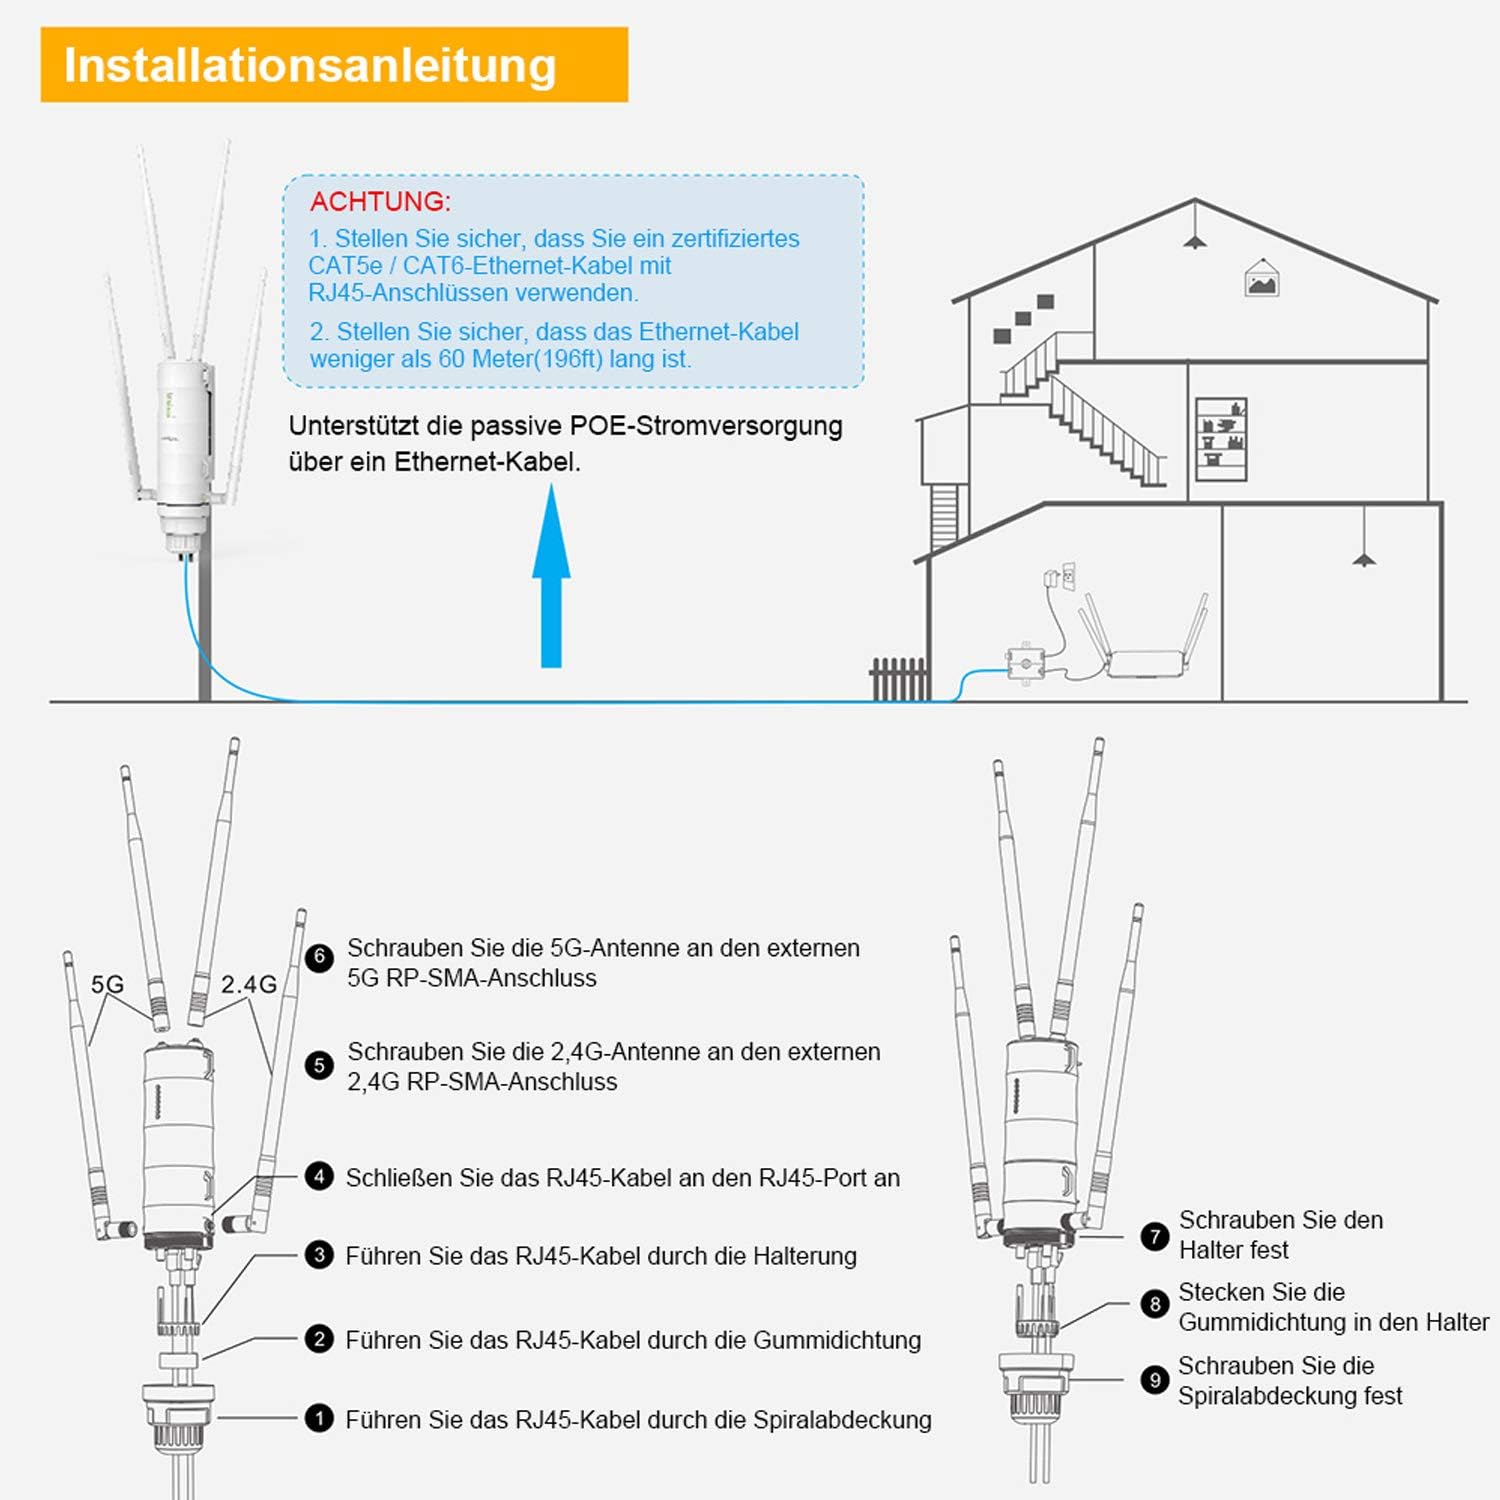
Image 4.1: Step-by-step guide for attaching antennas and routing cables during installation.
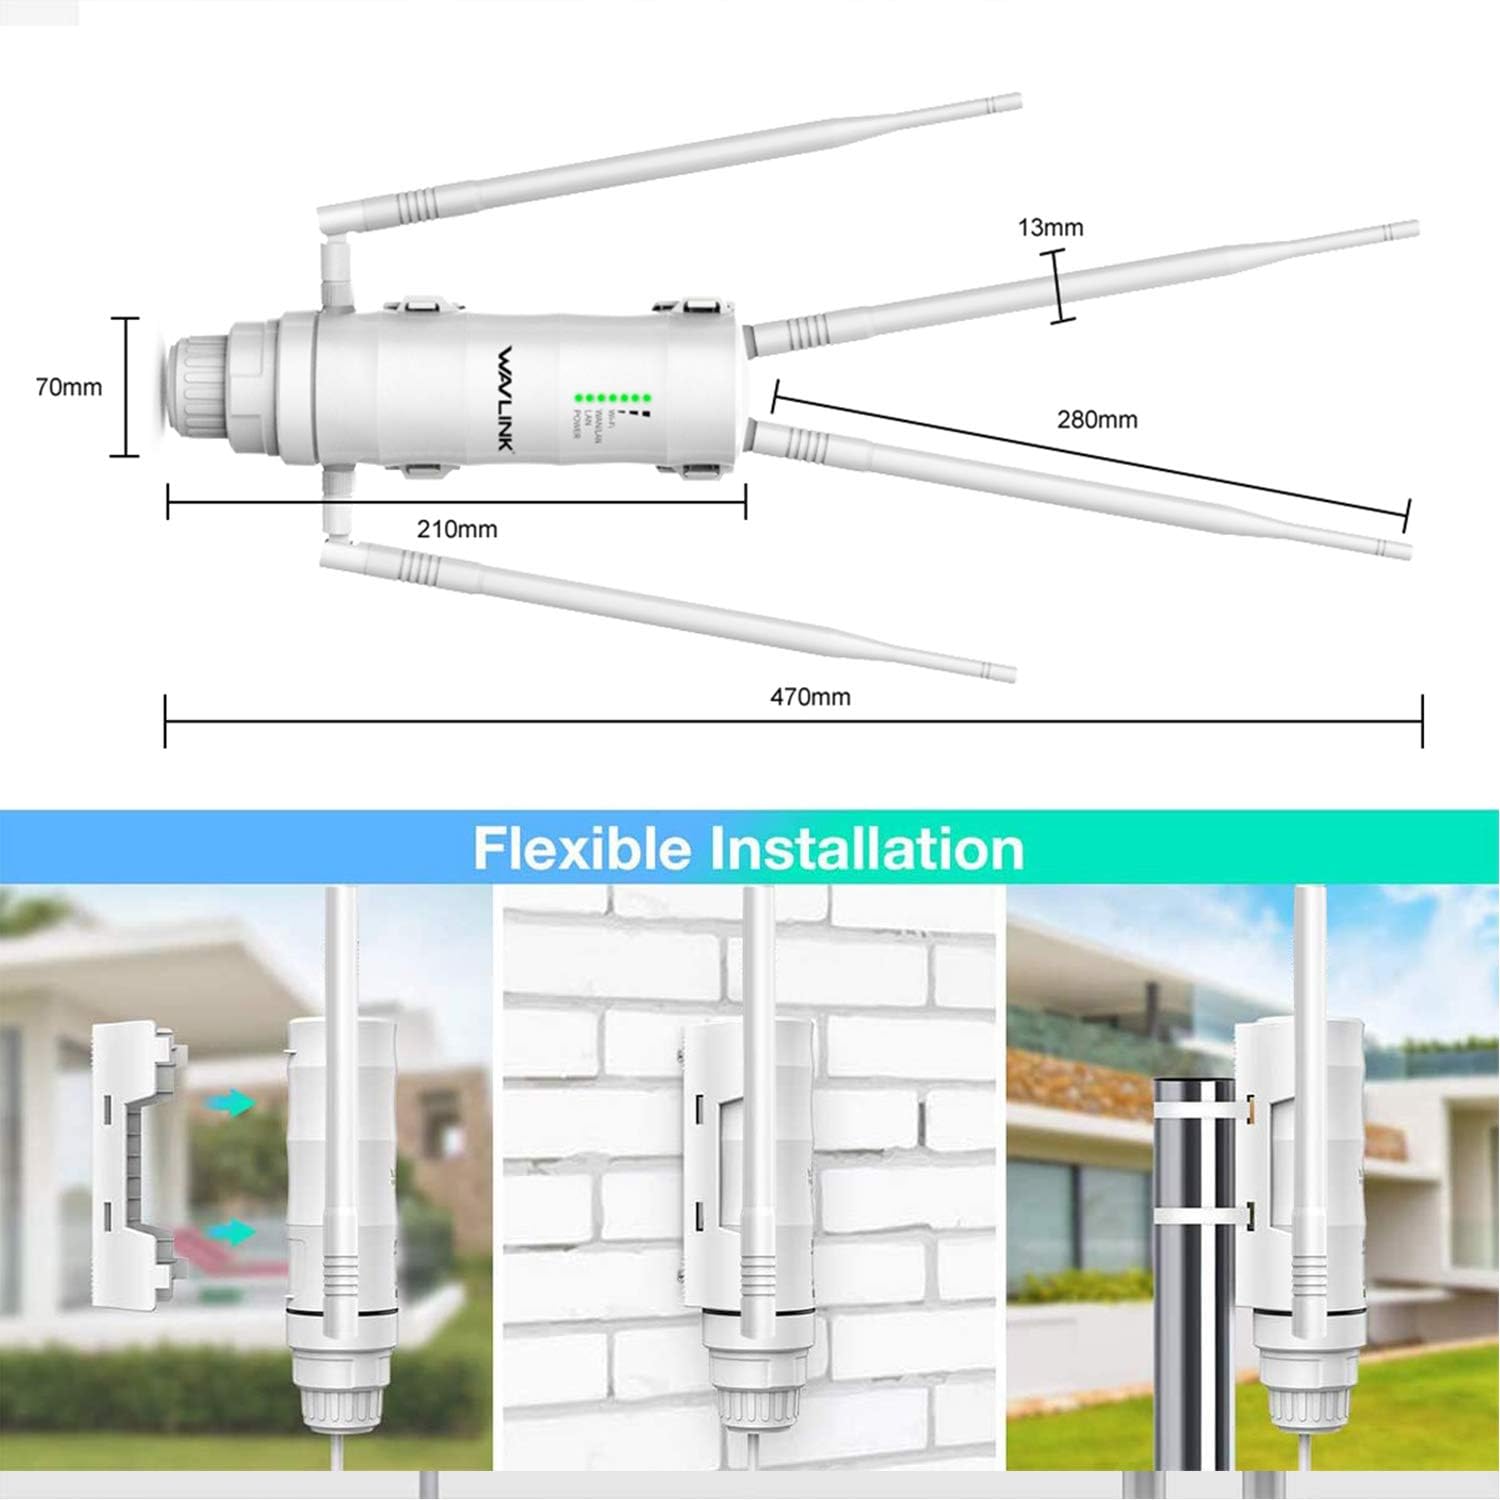
Image 4.2: Examples of flexible installation methods, including wall and pole mounting.
4.2 Power Over Ethernet (PoE) Connection
The device supports Passive PoE, allowing power and data to be transmitted over a single Ethernet cable, simplifying outdoor deployment.
- Connect one end of an Ethernet cable (Cat5e/Cat6 recommended, less than 60 meters/196 feet) to the LAN port of the WAVLINK device.
- Connect the other end of this Ethernet cable to the 'PoE' port on the Passive PoE Injector.
- Connect another Ethernet cable from the 'LAN' port of the PoE Injector to your router or network switch.
- Plug the power adapter into the PoE Injector and then into a power outlet. The device will power on.

Image 4.3: Connection diagram for Power Over Ethernet (PoE) setup.
5. Operating Modes
The WAVLINK AC1200 supports several operating modes to suit various networking needs:
- WISP Mode: Connects wirelessly to an existing Wi-Fi network and shares the internet connection with multiple devices via LAN.
- Repeater Mode: Extends the coverage of an existing Wi-Fi network by repeating its signal.
- Router/AP Mode: Functions as a standard wireless router or an access point, connecting to an ADSL modem or existing network via WAN.
- Client Mode: Allows the device to act as a wireless adapter for a wired device, connecting it to a Wi-Fi network.
- Client+Repeater Mode: Combines client functionality with repeater functionality, extending the network while also providing a wired connection.
Configuration of these modes is typically done via a web-based interface accessible through a connected computer or mobile device. Refer to the Quick Installation Guide for initial access details.
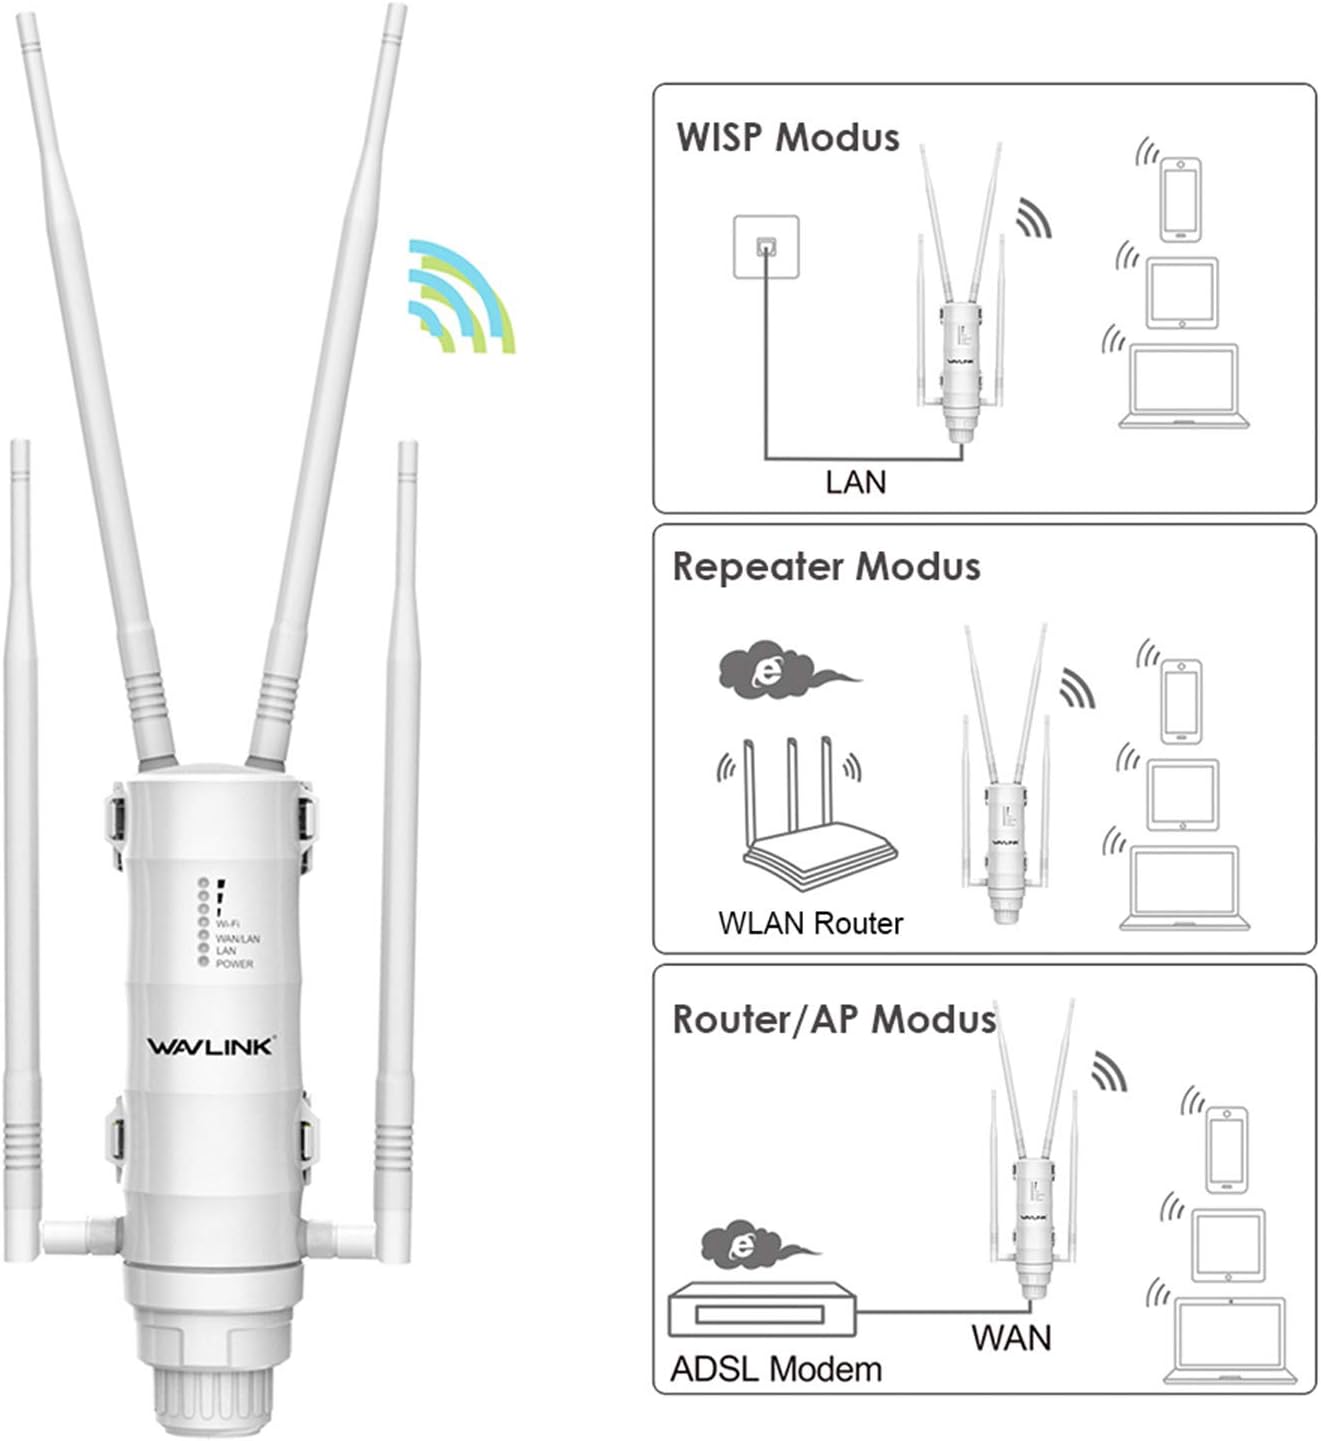
Image 5.1: Visual representation of the WISP, Repeater, and Router/AP operating modes.
6. Specifications
| Feature | Detail |
|---|---|
| Brand | WAVLINK |
| Model Number | WL-WN572HG3 |
| Special Feature | High power, weatherproof design, multiple operation modes |
| Frequency Band Class | Dual-Band (2.4 GHz, 5 GHz) |
| Wireless Communication Standard | 2.4 GHz Radio Frequency, 5 GHz Radio Frequency |
| Data Transfer Rate | 1200 Megabits Per Second |
| Connectivity Technology | Wi-Fi |
| Number of Ports | 2 (LAN/WAN) |
| Control Method | App (Web-based UI) |
| Item Weight | 0.78 Kilograms |
| Included Components | Antenna |
7. Maintenance
To ensure optimal performance and longevity of your WAVLINK AC1200 Outdoor WiFi Extender, follow these maintenance guidelines:
- Regular Inspection: Periodically check the device and its connections for any signs of wear, damage, or loose cables.
- Cleaning: Gently clean the exterior of the device with a soft, dry cloth. Avoid using liquid cleaners or solvents, as these can damage the weatherproof casing.
- Firmware Updates: Check the WAVLINK official website regularly for firmware updates. Keeping the firmware updated ensures the best performance, security, and compatibility.
- Environmental Considerations: While weatherproof, extreme conditions can still impact performance. Ensure the device is securely mounted to prevent movement during high winds.
8. Troubleshooting
If you encounter issues with your WAVLINK AC1200, refer to the following common troubleshooting steps:
- No Power: Ensure the PoE injector is properly connected to the power adapter and a working electrical outlet. Verify the Ethernet cable from the injector to the device is securely connected.
- No Internet Access: Check the connection between the PoE injector's LAN port and your main router/modem. Confirm your main internet connection is active. Verify the operating mode is correctly configured (e.g., Router, WISP).
- Weak Signal/Poor Performance: Adjust the device's position and antenna orientation for better line-of-sight to the desired coverage area or source Wi-Fi network. Check for physical obstructions. Ensure the device is not too far from the source Wi-Fi in Repeater or WISP mode.
- Cannot Access Web Management Interface: Ensure your computer is connected to the device (either directly via Ethernet or wirelessly to its default SSID). Verify you are using the correct default IP address and login credentials (refer to the Quick Installation Guide). Try clearing your browser's cache or using a different browser.
- Device Reset: If configuration issues persist, perform a factory reset by pressing and holding the reset button (usually located near the Ethernet ports) for approximately 10 seconds while the device is powered on. This will revert all settings to factory defaults.
9. Warranty and Support
WAVLINK products typically come with a standard manufacturer's warranty. Please refer to the warranty card included in your package or visit the official WAVLINK website for specific warranty terms and conditions.
For technical support, product inquiries, or warranty claims, you can contact WAVLINK directly:
- Email Support: Contact@wavlink.com
- Phone Support: +1 8889730883 (UTC-5, Monday - Friday, 9 AM - 6 PM)
- Official Website: Visit www.wavlink.com for FAQs, drivers, firmware, and additional support resources.