1. Introduction
Thank you for choosing the ZIPRO Nitro Exercise Bike. This manual provides essential information for the safe and efficient assembly, operation, and maintenance of your new fitness equipment. Please read this manual thoroughly before use and keep it for future reference.

Figure 1.1: The ZIPRO Nitro Exercise Bike, showcasing its sleek design and compact footprint, ideal for home fitness.
Product Overview Video
This video provides a general overview of the ZIPRO product range, demonstrating various fitness equipment in use. While not specific to the Nitro model's assembly, it illustrates the brand's commitment to quality and user experience.
2. Safety Information
Before using the exercise bike, please observe the following safety precautions:
- Consult a physician before starting any new exercise program.
- Keep children and pets away from the equipment during use.
- Place the bike on a flat, stable surface. Ensure adequate space around the bike.
- Wear appropriate exercise clothing and athletic shoes. Avoid loose clothing that could get caught in moving parts.
- Inspect the bike for loose or worn parts before each use. Do not use if damaged.
- Do not exceed the maximum user weight of 150 kg (330 lbs).
- Stop exercising immediately if you feel faint, dizzy, or experience pain.
3. Package Contents
Carefully unpack all components and verify that all parts are present. If any parts are missing or damaged, contact customer support immediately.
Components List:
- Main Frame
- Front Stabilizer
- Rear Stabilizer
- Pedals (Left and Right)
- Seat Post and Seat
- Handlebar Post and Handlebars
- Console/Monitor
- Water Bottle Holder
- Assembly Hardware (bolts, washers, nuts, tools)
4. Assembly Instructions
Follow these steps to assemble your ZIPRO Nitro Exercise Bike. It is recommended to have two people for assembly.
- Attach Stabilizers: Secure the front and rear stabilizers to the main frame using the provided bolts and washers. Ensure they are tightly fastened for stability.
- Install Pedals: Identify the left (L) and right (R) pedals. The left pedal screws counter-clockwise, and the right pedal screws clockwise. Thread them into the crank arms and tighten securely. Pedals are equipped with adjustable straps for foot stability.

Figure 4.1: Pedals with adjustable straps, designed to keep your feet secure during exercise.
- Assemble Seat: Attach the seat to the seat post. Insert the seat post into the main frame and adjust to your desired height. Secure with the adjustment knob. The ergonomic seat offers precise two-level adjustment for comfort during long training sessions.

Figure 4.2: The seat post with multiple adjustment holes for vertical positioning.

Figure 4.3: The seat can also be adjusted horizontally for optimal riding posture.
- Install Handlebar Post and Handlebars: Connect the handlebar post to the main frame. Attach the handlebars to the post. Ensure all connections are secure. The handlebars allow for convenient angle adjustment.

Figure 4.4: The console and handlebars, featuring integrated pulse sensors for heart rate monitoring.
- Attach Console: Mount the console onto the handlebar post. Connect any necessary sensor cables from the main frame to the console. The advanced computer with a clear screen facilitates monitoring your workout and performance.

Figure 4.5: The console includes a convenient holder for your smartphone, allowing for entertainment or fitness app integration during workouts.

Figure 4.6: The console's holder is also suitable for larger devices like tablets, enhancing your workout experience.
- Install Water Bottle Holder: Secure the water bottle holder to the designated spot on the main frame.
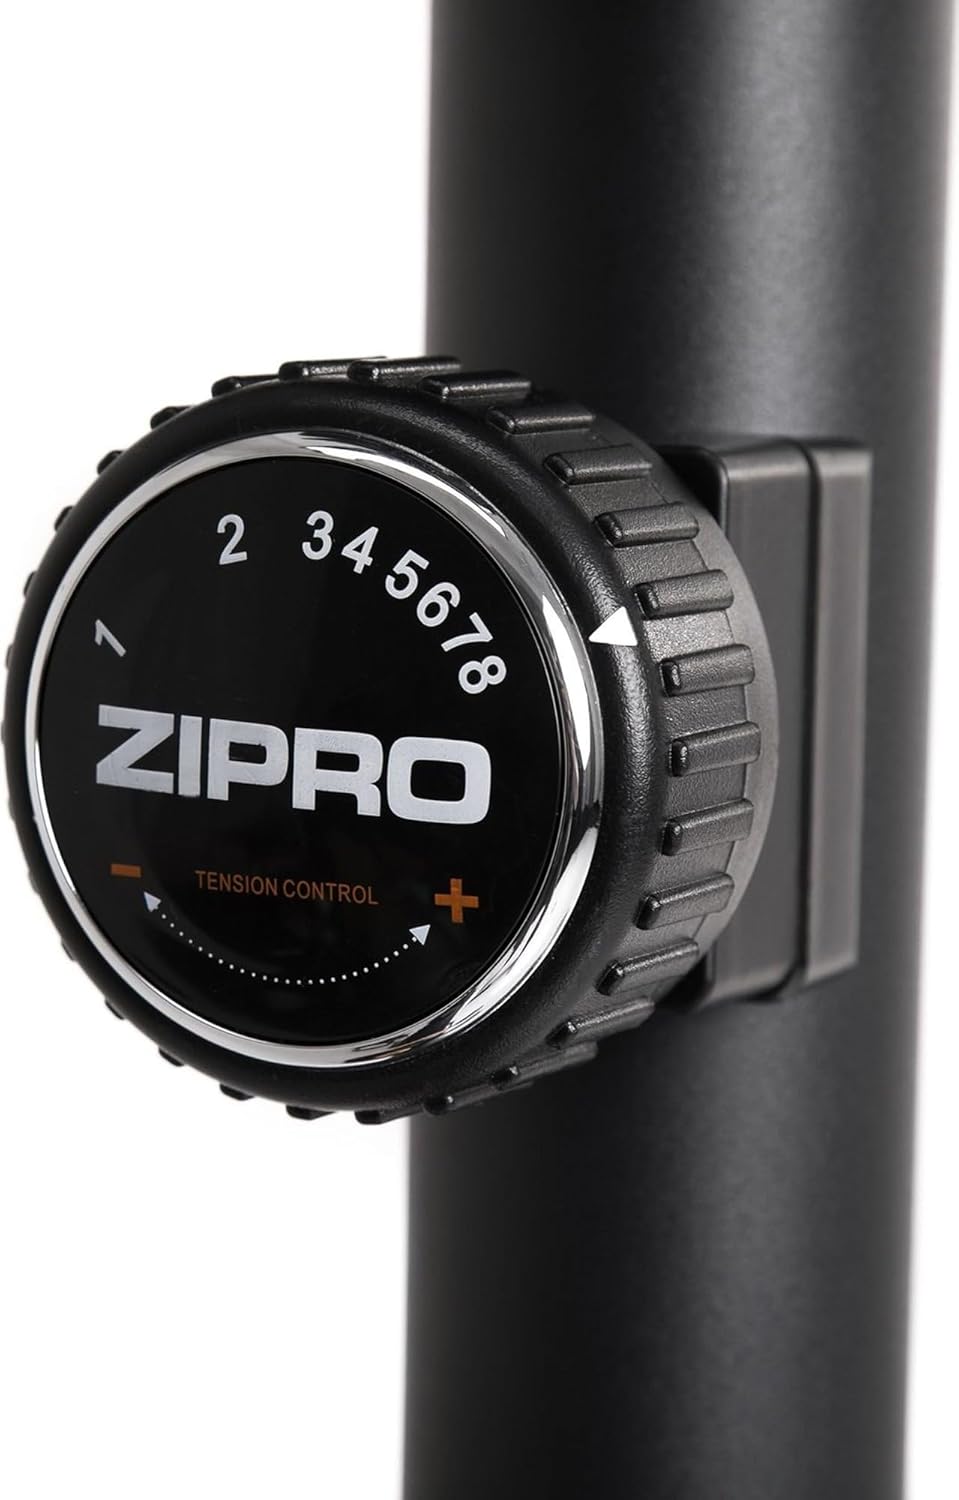
Figure 4.7: A practical water bottle holder ensures hydration is always within reach during your workout.
5. Operating Instructions
5.1. Adjusting Resistance
The ZIPRO Nitro Exercise Bike features 8 levels of magnetic resistance. To adjust the resistance, turn the tension control knob located below the console. Turn clockwise to increase resistance (harder) and counter-clockwise to decrease resistance (easier).

Figure 5.1: The resistance knob allows for easy adjustment of workout intensity across 8 levels.
5.2. Console Functions
The console displays various workout metrics. Use the buttons below the screen to navigate and reset data.
- SCAN: Automatically cycles through display functions.
- TIME: Displays workout duration.
- SPEED: Shows current speed.
- DISTANCE: Tracks distance covered.
- CALORIES: Estimates calories burned.
- ODOMETER (TOTAL DIST): Displays total accumulated distance.
- PULSE: Shows heart rate when hands are on the pulse sensors.
- RESET: Press to clear current workout data.
- MODE: Selects specific display functions.
- SET: Used for setting target values (e.g., time, distance, calories).
5.3. Adjusting Seat and Handlebars
For optimal comfort and effectiveness, adjust the seat and handlebars to your body size.
- Seat Height: Loosen the adjustment knob on the seat post, raise or lower the seat until your leg has a slight bend at the knee when the pedal is at its lowest point. Tighten the knob securely.
- Seat Horizontal Position: Loosen the knob under the seat, slide the seat forward or backward to find a comfortable position relative to the handlebars. Tighten the knob.
- Handlebar Angle: Loosen the adjustment knob on the handlebar post to tilt the handlebars to a comfortable angle. Tighten the knob.
6. Maintenance
Regular maintenance ensures the longevity and safe operation of your exercise bike.
- Cleaning: Wipe down the bike with a damp cloth after each use to remove sweat and dust. Avoid abrasive cleaners.
- Inspection: Periodically check all bolts, nuts, and moving parts for tightness and wear. Tighten any loose fasteners.
- Lubrication: The magnetic resistance system is generally maintenance-free. However, if you notice any squeaking from moving parts (e.g., pedal axles), apply a small amount of silicone-based lubricant.
- Storage: Store the bike in a dry, cool place away from direct sunlight and extreme temperatures.
7. Troubleshooting
This section addresses common issues you might encounter with your exercise bike.
| Problem | Possible Cause | Solution |
|---|---|---|
| Squeaking or grinding noise | Loose bolts; lack of lubrication; internal component issue. | Check and tighten all assembly bolts. Apply lubricant to moving joints if accessible. If noise persists, contact customer support. |
| Console not displaying data | Batteries low or incorrectly installed; loose sensor cable connection. | Replace console batteries (battery operated). Check that the sensor cable from the main frame is securely connected to the console. |
| Resistance not changing | Resistance cable disconnected or damaged; magnetic mechanism issue. | Inspect the resistance cable connection. Ensure the knob turns freely. If the issue persists, contact customer support. |
| Bike wobbles during use | Uneven floor; loose stabilizers. | Adjust the leveling caps on the stabilizers to compensate for uneven surfaces. Ensure stabilizer bolts are tight. |
8. Specifications
Key technical specifications for the ZIPRO Nitro Exercise Bike:
| Feature | Detail |
|---|---|
| Model Name | Nitro |
| Resistance Mechanism | Magnetic |
| Resistance Levels | 8 |
| Maximum User Weight | 150 kg (330 lbs) |
| Product Dimensions (L x W x H) | 92 x 60 x 143 cm (36.2 x 23.6 x 56.3 inches) |
| Product Weight | 28.6 kg (63 lbs) |
| Power Source | Battery Operated (for console) |
| Material | Plastic, Metal |
| Color | Black |

Figure 8.1: Detailed dimensions of the exercise bike, indicating length (115 cm), width (59 cm), and height (145 cm).
9. Warranty and Support
ZIPRO products are designed for durability and performance. For warranty information and customer support, please refer to the warranty card included with your purchase or visit the official ZIPRO website.
If you encounter any issues not covered in this manual or require further assistance, please contact ZIPRO customer service:
- Manufacturer: Morele.net Sp. z o.o.
- Brand: ZIPRO
- Model Number: 5304090
- ASIN: B07T94XY4F
Please have your model number and purchase date ready when contacting support.


