Canon CanoScan 8800F
Canon CanoScan 8800F Color Image Scanner User Manual
Model: CanoScan 8800F | Brand: Canon
1. Introduction to the CanoScan 8800F
The Canon CanoScan 8800F is a versatile color image scanner designed for high-quality scanning of documents, photos, film, and negatives. It features high-luminance white LED lamps for efficient scanning and advanced technologies for image enhancement.

Figure 1.1: Top view of the Canon CanoScan 8800F Color Image Scanner, showing its sleek design and control panel.
2. Important Safety Instructions
Please read all safety instructions before operating the scanner to ensure safe and proper use. Keep this manual for future reference.
- Do not expose the scanner to rain or moisture.
- Do not disassemble the scanner. Refer servicing to qualified personnel.
- Place the scanner on a stable, level surface.
- Ensure proper ventilation around the scanner.
- Use only the power adapter supplied with the scanner.
- Unplug the scanner during lightning storms or when unused for long periods.
3. Package Contents
Verify that all items are present in the package:
- Canon CanoScan 8800F Scanner Unit
- USB Cable
- AC Adapter and Power Cord
- Film Guides (for 35mm film strips, 35mm mounted slides, and 120 film)
- Setup CD-ROM (containing drivers and software)
- Quick Start Guide
4. Setup Guide
4.1. Physical Setup
- Unpack the Scanner: Carefully remove the scanner and all accessories from the packaging.
- Remove Protective Materials: Remove any protective tapes or packing materials from the scanner unit.
- Place the Scanner: Position the scanner on a flat, stable surface near your computer.
- Connect the USB Cable: Connect one end of the USB cable to the scanner's USB port and the other end to an available USB port on your computer.
- Connect the Power Adapter: Connect the AC adapter to the scanner's power input, then plug the power cord into a wall outlet.
- Power On: Press the ON/OFF button on the scanner. The power indicator light should illuminate.

Figure 4.1: Front view of the scanner, highlighting the power button and quick-access function buttons.
4.2. Software Installation
Before using the scanner, you must install the necessary drivers and software.
- Insert the Setup CD-ROM: Insert the provided Setup CD-ROM into your computer's CD/DVD drive.
- Run the Installer: Follow the on-screen instructions to install the scanner drivers and bundled software (e.g., MP Navigator EX, ScanGear). If the installer does not start automatically, browse to the CD-ROM drive and double-click the setup file.
- Restart Computer: After installation is complete, restart your computer if prompted.
- Download Latest Drivers (Optional): For the latest drivers and software updates, visit the official Canon support website and search for "CanoScan 8800F".
5. Operating the Scanner
5.1. Basic Document and Photo Scanning
- Place Document: Open the document cover and place the document or photo face-down on the scanner glass, aligning it with the alignment mark.
- Close Cover: Gently close the document cover.
- Start Scan:
- Using Quick Buttons: Press one of the quick-access buttons on the scanner (e.g., COPY, PDF, PHOTO/FILM, E-MAIL) to initiate a scan with predefined settings.
- Using Software: Launch the scanning software (e.g., MP Navigator EX) on your computer, select the desired scan type, and adjust settings as needed before starting the scan.
- Save File: After the scan is complete, save the image to your desired location and format.

Figure 5.1: Angled view of the scanner, showing the quick-access buttons for various scanning functions.
5.2. Scanning Film and Negatives
The CanoScan 8800F supports batch scanning of up to 4 slides or 12 35mm film frames.
- Open Document Cover: Lift the document cover.
- Remove Document Mat: Remove the white document mat from the inside of the cover to expose the film scanning light source.
- Insert Film Guide: Place the appropriate film guide (for 35mm film strips, 35mm mounted slides, or 120 film) onto the scanner glass, aligning it with the marks.
- Load Film: Carefully insert your film or slides into the film guide slots.
- Close Cover: Gently close the document cover.
- Start Scan: Use the scanning software or the PHOTO/FILM button to initiate the scan. Select film type and adjust settings for optimal results.
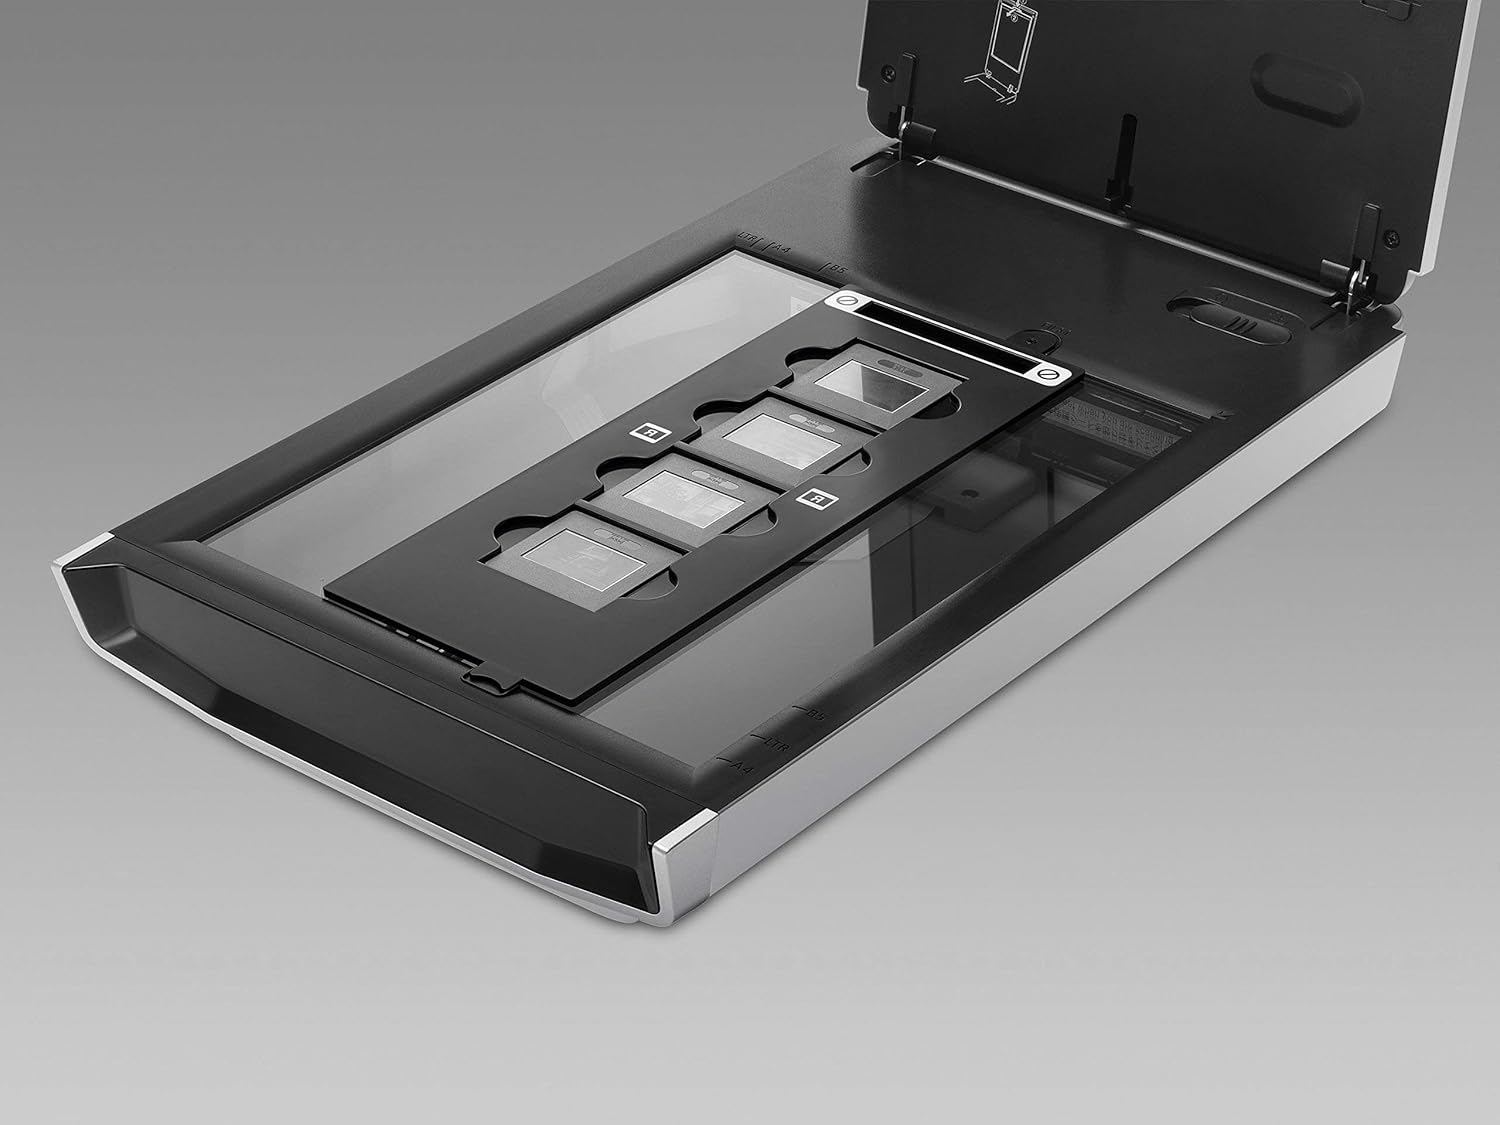
Figure 5.2: Scanner with the lid open, demonstrating the placement of a film holder for scanning negatives or slides.
5.3. Image Enhancement Features
The scanner includes built-in retouching technology to improve image quality:
- Dust and Scratch Removal: Digitally removes dust, scratches, and other imperfections from old or precious photos and film. This feature is typically configured within the scanning software.
- Fading Correction: Restores faded colors in old photographs.
- Grain Reduction: Minimizes graininess in scanned film.
6. Maintenance
Regular cleaning ensures optimal scanning performance.
- Cleaning the Scanner Glass:
- Turn off the scanner and unplug the power cord.
- Wipe the scanner glass with a soft, lint-free cloth lightly dampened with a mild glass cleaner. Do not spray cleaner directly onto the glass.
- Ensure the glass is completely dry before turning the scanner back on.
- Cleaning the Document Cover: Wipe the inside of the document cover (especially the white mat) with a soft, dry cloth.
- Cleaning the Exterior: Wipe the exterior of the scanner with a soft, dry cloth. Avoid abrasive cleaners.
7. Troubleshooting
If you encounter issues, refer to the following common solutions:
| Problem | Solution |
|---|---|
| Scanner does not power on. | Check if the power cord is securely connected to the scanner and the power outlet. Ensure the power outlet is functional. |
| Computer does not recognize the scanner. | Verify the USB cable is securely connected. Reinstall the scanner drivers. Try a different USB port or cable. |
| Scanned images have lines or smudges. | Clean the scanner glass and the white document mat. Ensure the original document is clean. |
| Film/slides scan with poor quality. | Ensure film is correctly placed in the film guide. Clean the film guide and film. Adjust scanning settings (e.g., resolution, color correction) in the software. |
| Software crashes or freezes. | Ensure your operating system and scanner software are up to date. Close other applications. Restart your computer. |
8. Specifications
| Feature | Detail |
|---|---|
| Model | CanoScan 8800F |
| Scanner Type | Flatbed, Film, Photo |
| Connectivity Technology | USB |
| Optical Sensor Technology | CCD |
| Resolution | 600 dpi (Optical) |
| Color Depth | 48-bit input/output |
| Product Dimensions | 18.9 x 10.8 x 4 inches |
| Item Weight | 13.02 pounds |
| Wattage | 18 watts |
| Minimum System Requirements | Windows 7 (Note: Compatibility with newer operating systems may require updated drivers from Canon's website.) |
9. Warranty and Support
For information regarding your product's warranty, please refer to the warranty card included with your purchase or visit the official Canon website. As this product is listed as "Renewed," specific warranty terms may vary. Please consult your seller for details on the renewed product warranty.
For technical support, driver downloads, and additional resources, please visit the Canon support website:
When contacting support, please have your scanner's model number (CanoScan 8800F) and serial number ready.