1. Introduction
This manual provides detailed instructions for the installation, operation, and maintenance of your AMPINVT MPPT Solar Charge Controller. This device is designed to efficiently manage power flow from your solar panels to your battery bank, ensuring optimal charging and system performance. Please read this manual thoroughly before installation and operation to ensure safe and correct usage.
2. Safety Instructions
Adhering to these safety guidelines is crucial for preventing personal injury and damage to the equipment.
- Always connect the battery first to allow the controller to recognize the correct system voltage. Never connect the solar panel array to the controller without a battery. The disassembly sequence is contrary to the wiring order.
- DO NOT connect any inverter, wind turbine, alternator, or charger directly to the charge controller. Connect inverters directly to the battery.
- Ensure solar input voltage is higher than 3V or more than the battery's voltage, and total input power is within the specified range.
- The charging indicator may turn on and off, and the charging current may fluctuate, especially on cloudy days or in low light conditions. This is normal operation.
- If the controller buzzes, it indicates the fan is dissipating heat. This is normal.
- DO NOT install the charging controller in direct sunlight to avoid power loss due to overheating. Ensure adequate ventilation by leaving approximately 20cm of space around the controller for proper airflow.
- Ensure all connections to and from the controller are tight. DO NOT allow the positive (+) and negative (-) terminals of the battery to touch each other.
- Only qualified personnel should perform installation and maintenance.
3. Product Overview
The AMPINVT MPPT Solar Charge Controller is designed for efficient solar power management. It features a robust metal casing and an intuitive LCD display for monitoring system data.

Figure 3.1: Front view of the MPPT Solar Charge Controller.

Figure 3.2: Detailed view of the controller's components and interface.
- 1. Cooling Fan: Ensures optimal operating temperature.
- 2. Hang Bracket: For secure wall mounting.
- 3. LCD Display: Shows real-time operating data and working conditions.
- 4. Menu Button: Accesses the main menu.
- 5. Down Button: Navigates down through menu options or decreases values.
- 6. Up Button: Navigates up through menu options or increases values.
- 7. Enter Button: Confirms selections or enters sub-menus.
- 8. Temperature Interface: For connecting the external temperature sensor.
- 9. Solar Panel Terminals: Connects to the solar panel array.
- 10. Battery Terminals: Connects to the battery bank.
- 11. DC Load Terminals: Connects to DC loads.
- 12. RS485 Port: For communication, including Wi-Fi remote monitoring (requires additional module).
4. Installation
Proper installation is key to the controller's performance and longevity.
- Mounting Location: Choose a cool, dry, and well-ventilated indoor location. Avoid direct sunlight, high temperatures, and humid environments. Ensure at least 20cm of clear space around the controller for proper airflow.
- Mounting: Use the provided hang brackets to securely mount the controller to a vertical surface.
- Wiring Sequence: Follow the wiring diagram carefully. Always connect the battery first, then the solar panels, and finally the DC loads. Disconnect in the reverse order.
- Cable Sizing: Use appropriate gauge wiring for all connections to minimize voltage drop and ensure safe operation. Refer to local electrical codes.
5. Wiring Diagram
The following diagram illustrates the correct wiring connections for the MPPT Solar Charge Controller within a typical solar power system.

Figure 5.1: Standard connection diagram showing solar panels, battery, DC load, and optional Wi-Fi module.
- Connect the battery to the controller's battery terminals (positive to positive, negative to negative).
- Connect the solar panel array to the controller's solar panel terminals (positive to positive, negative to negative).
- Connect your DC loads to the controller's DC load terminals (positive to positive, negative to negative).
- Ensure all connections are secure and tight to prevent loose contacts and potential hazards.
6. Operation
The controller features an LCD display and four buttons for easy navigation and setting adjustments.
Video 6.1: Demonstration of basic operation and menu navigation on the AMPINVT MPPT solar charge controller.
6.1. Display Information
The LCD displays various parameters including:
- PV Input Voltage and Power
- Battery Voltage and Charging Current
- Daily and Total Energy Generation (kWh)
- Load Status and Current
- Battery Temperature
6.2. Button Functions
- MENU: Press to enter or exit the main menu.
- DOWN: Navigate down or decrease value.
- UP: Navigate up or increase value.
- ENTER: Confirm selection or enter sub-menu.
7. Battery Type Settings
The controller supports various battery types. It is crucial to select the correct battery type for optimal charging and battery longevity.
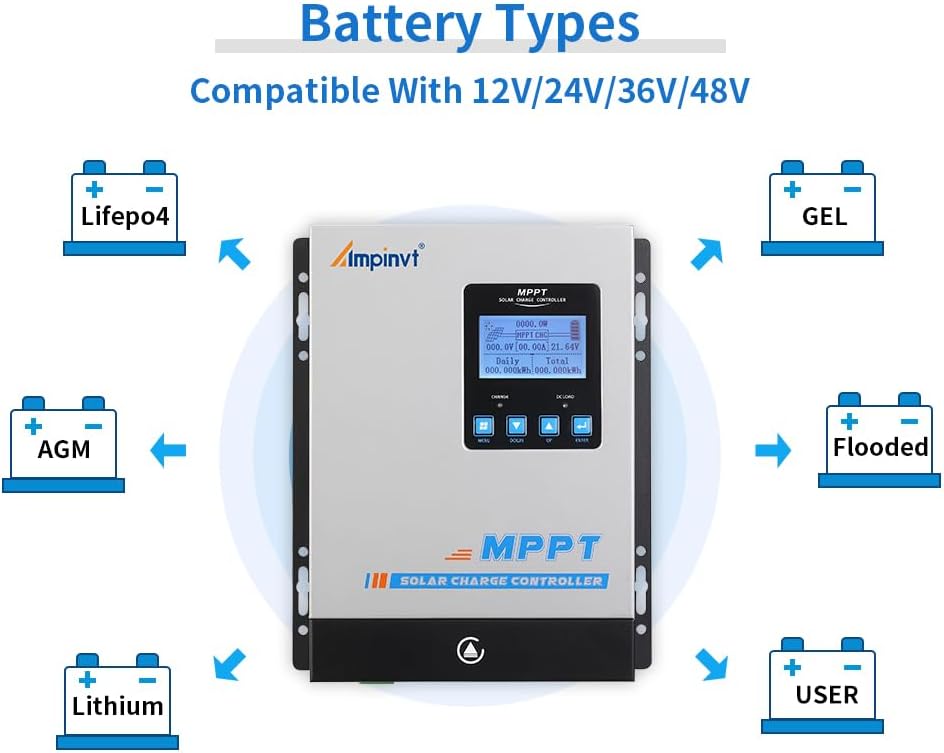
Figure 7.1: The controller is compatible with Sealed, Gel, AGM, Flooded, and Lithium battery types, as well as user-defined settings.
7.1. Setting Procedure
- Press the MENU button to enter the main menu.
- Navigate to the 'Battery Type Setting' option using the UP or DOWN buttons.
- Press ENTER to select.
- Use the UP or DOWN buttons to choose your battery type (e.g., Sealed, Gel, AGM, Flooded, Lithium, User-defined).
- Press ENTER to confirm your selection. For 36V systems, manual adjustment is required.
8. Load Control Modes
The controller offers multiple load control modes to manage your DC loads efficiently. These modes can typically be configured through the menu settings, allowing for timed operation, manual control, or PV-dependent control.
9. Troubleshooting
This section provides solutions to common issues you might encounter.
| Problem | Possible Cause | Solution |
|---|---|---|
| No display on LCD | Battery not connected or low voltage. | Check battery connections and voltage. Ensure battery voltage is above minimum operating voltage. |
| No charging current | Solar panels not connected, insufficient sunlight, or PV voltage too low. | Check solar panel connections. Ensure adequate sunlight. Verify PV voltage is higher than battery voltage. |
| Load not working | Load disconnected, overcurrent, or load control mode setting. | Check load connections. Reduce load if overcurrent. Adjust load control mode settings. |
| Controller overheating | Poor ventilation or excessive load. | Ensure proper airflow around the controller. Reduce load if necessary. |
10. Specifications
Key technical specifications for the MPPT-60A Solar Charge Controller:
| Feature | Specification |
|---|---|
| Model | MPPT-60A (AP-60C) |
| System Voltage | 12V/24V/36V/48V Auto (36V user-adjustable) |
| Max. PV Input Voltage | 150V DC |
| Max. PV Input Power | 900W (12V), 1700W (24V), 2700W (36V), 3400W (48V) |
| MPPT Tracking Efficiency | ≥99% |
| Max. Conversion Rate | >98% |
| Supported Battery Types | Sealed, Gel, AGM, Flooded, Lithium, User-defined |
| Display Type | LCD |
| Product Dimensions | 7.9 x 3.3 x 11 inches (20.07 x 8.38 x 27.94 cm) |
| Item Weight | 8.23 pounds (3.73 kg) |
| Material | Plastic (housing, likely metal chassis) |
| Communication | RS485 (Wi-Fi remote monitoring capable with additional purchase) |
11. Maintenance
Regular maintenance ensures the longevity and optimal performance of your solar charge controller.
- Cleaning: Periodically clean the exterior of the controller with a dry cloth. Ensure ventilation openings are free from dust and debris.
- Connections: Regularly check all wiring connections for tightness. Loose connections can cause overheating and damage.
- Inspection: Inspect the controller for any signs of physical damage, corrosion, or unusual odors.
- Environment: Ensure the installation environment remains within the recommended temperature and humidity ranges.
12. Warranty and Support
For warranty information, technical support, or service inquiries, please refer to the contact details provided by AMPINVT at the time of purchase or visit the official AMPINVT website. Keep your purchase receipt as proof of purchase for warranty claims.