1. Introduction
This manual provides essential information for the installation and use of the Deal4GO Power Button Board with Cable, model LS-E791P. This component is designed as a replacement part for specific HP Pavilion laptop models. It is crucial for the proper functioning of your laptop's power on/off mechanism.
Compatible Models:
- HP Pavilion 15T-BR Series
- HP Pavilion 15Z-BW Series
- HP Pavilion 15-BS Series (e.g., 15-BS020CY, 15-BS024CY, 15-BS014CY, 15-BS070WM, 15-BS020WM, 15-BS013DX, 15-BS015DX, 15-BS061NS, 15-BS046NA, 15-BS060WM, 15-BS212WM, 15-BS062ST, 15-BS053OD, 15-BS113DX, 15-BS069NS, 15-BS027CA, 15-BS033CL, 15-BS157SA)
- HP Pavilion 15-BW Series (e.g., 15-BW011DX, 15-BW006WM, 15-BW008CA, 15-BW004WM, 15-BW034NA, 15-BW069NR, 15-BW083NA)
- HP 250 G6 Series
- HP 255 G6 Series
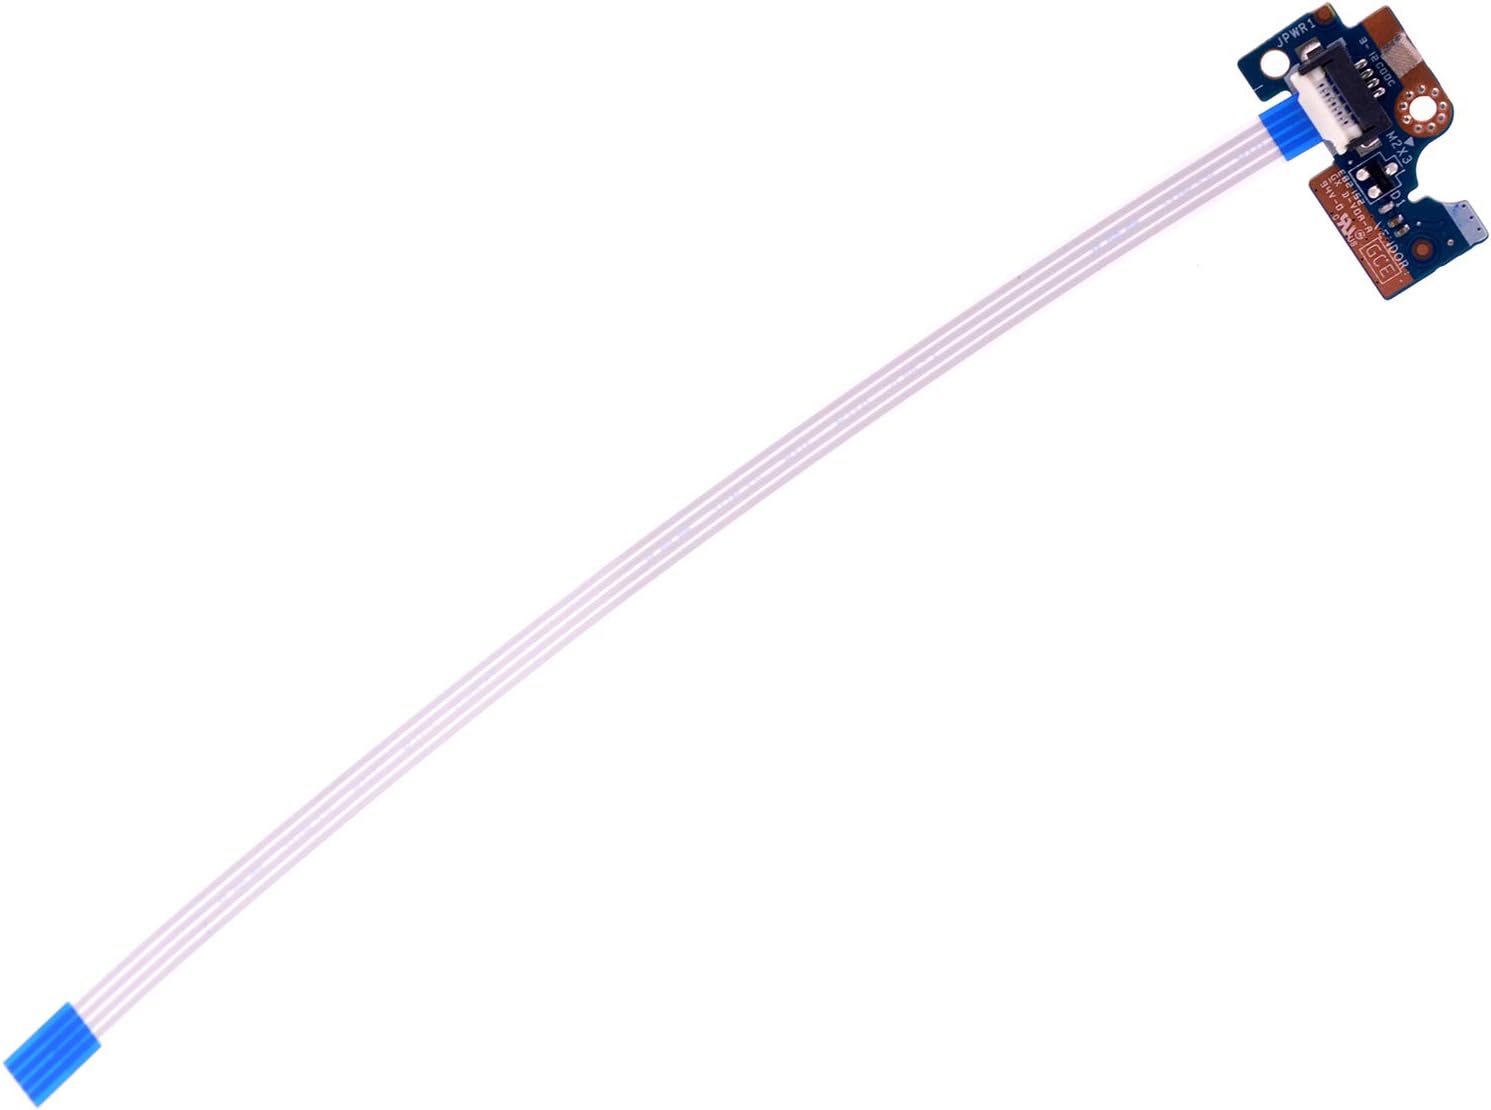
Figure 1: Overview of the Deal4GO Power Button Board with Cable. This image displays the complete power button board assembly, including the button, circuit board, and attached ribbon cable.
2. Safety Information
Please read and understand the following safety precautions before attempting any installation or repair:
- Disconnect Power: Always ensure the laptop is completely powered off and disconnected from the AC adapter. Remove the battery before proceeding with any internal component replacement.
- Static Electricity: Electronic components are sensitive to electrostatic discharge (ESD). Use an anti-static wrist strap or frequently touch a grounded metal object to discharge static electricity from your body.
- Handle with Care: The power button board and its ribbon cable are delicate. Avoid bending, twisting, or applying excessive force to prevent damage.
- Professional Installation: If you are not comfortable performing laptop repairs, it is recommended to seek assistance from a qualified technician.
- Small Parts: Keep small screws and components away from children.
3. Package Contents
The package includes:
- 1 x Deal4GO Power Button Board with Cable (Model: LS-E791P)
4. Setup and Installation
This section outlines the general steps for replacing the power button board. Specific disassembly procedures may vary slightly depending on your exact laptop model. Refer to your laptop's service manual for detailed disassembly instructions.
- Preparation:
- Power off your laptop completely.
- Disconnect the AC adapter and remove the battery.
- Place the laptop on a clean, flat, and static-free surface.
- Disassembly:
- Carefully open the laptop casing to access the internal components. This typically involves removing screws from the bottom cover and gently prying open the case.
- Locate the existing power button board. It is usually situated near the power button on the laptop's top case or palm rest assembly.
- Remove Old Board:
- Gently disconnect the ribbon cable from the motherboard. This usually involves lifting a small locking tab on the connector and then sliding the cable out.
- Remove any screws securing the old power button board to the laptop chassis.
- Carefully lift and remove the old power button board.

Figure 2: Detail view of the ribbon cable connector on the power button board. Note the small locking tab that needs to be lifted to release the cable.
- Install New Board:
- Position the new Deal4GO power button board (LS-E791P) in the same location as the old one.
- Secure it with the screws previously removed.
- Carefully insert the ribbon cable into the connector on the motherboard, ensuring it is fully seated. Gently push down the locking tab to secure the cable.

Figure 3: Rear view of the power button board, showing the ribbon cable attached. Ensure the cable is properly aligned and connected to the motherboard.
- Reassembly and Test:
- Before fully reassembling the laptop, connect the AC adapter and attempt to power on the laptop to verify the new power button board is functioning correctly.
- If the laptop powers on, power it off again, disconnect the AC adapter, and reassemble the laptop casing, ensuring all screws are replaced and connections are secure.
- Reconnect the battery and AC adapter.
5. Operating
Once installed, the power button board functions identically to the original component. Press the power button to turn on your laptop. Press and hold the power button for several seconds to force a shutdown, if necessary.

Figure 4: Close-up view of the power button mechanism on the board. This is the component that registers your press to initiate power functions.
6. Maintenance
The power button board requires minimal maintenance. To ensure its longevity:
- Keep the laptop clean and free from dust and debris, which can accumulate around the power button and potentially affect its operation.
- Avoid spilling liquids near the power button area.
- Handle the laptop with care to prevent physical damage to the power button or internal components.
7. Troubleshooting
If you encounter issues after replacing the power button board, consider the following:
- Laptop Does Not Turn On:
- Ensure the ribbon cable is securely connected to both the power button board and the motherboard. A loose connection is a common cause.
- Verify that the laptop battery is charged and the AC adapter is functioning correctly.
- Double-check that no other cables or components were accidentally disconnected during the installation process.
- Power Button Feels Loose or Unresponsive:
- Ensure the power button board is correctly seated and secured with its screws.
- Inspect the physical button for any obstructions or damage.
- Incorrect Part:
- Confirm that the installed power button board (LS-E791P) is indeed compatible with your specific HP Pavilion model. Refer to the 'Compatible Models' list in the Introduction.
If troubleshooting steps do not resolve the issue, it is advisable to consult a professional laptop repair technician.
8. Specifications
| Part Number | 924994-001 |
| Model Number | LS-E791P (CSL50) |
| Compatible Part Numbers | 4550EL32L01, 71NFE132056 |
| Cable Overall Length | Approx. 14.0 cm / 5.80 inch |
| Product Dimensions | 2.95 x 1.38 x 0.2 inches |
| Item Weight | 0.352 ounces |
| Manufacturer | Deal4Go |
9. Warranty and Support
For warranty information or technical support regarding your Deal4GO Power Button Board, please refer to the seller or manufacturer's official website. Keep your purchase receipt as proof of purchase.
For further assistance, you may contact the Deal4GO customer support channel provided at the point of purchase.