1. Introduction
The Pinell Supersound 501 is a versatile personal digital radio designed to provide a rich audio experience. It supports a wide range of listening options including DAB+, FM, Internet Radio with Spotify Connect, and Bluetooth streaming. Crafted with a blend of aluminum and wood, this radio combines modern technology with elegant design. This manual provides essential information for setting up, operating, and maintaining your Supersound 501 radio.
2. Safety Information
- Read all instructions carefully before use and retain for future reference.
- Do not expose the device to rain, moisture, or extreme temperatures.
- Ensure proper ventilation; do not block any ventilation openings.
- Use only the power adapter supplied with the unit.
- Do not attempt to disassemble or modify the unit. Refer all servicing to qualified personnel.
- Keep the unit away from strong magnetic fields.
- Avoid placing the unit on unstable surfaces.
3. Package Contents
Please check that all items are present and in good condition:
- Pinell Supersound 501 Digital Radio (Black)
- Remote Control (with 2 AAA batteries included)
- Power Adapter
- Quick Start Guide (Note: Manual may be in German, English version available online)
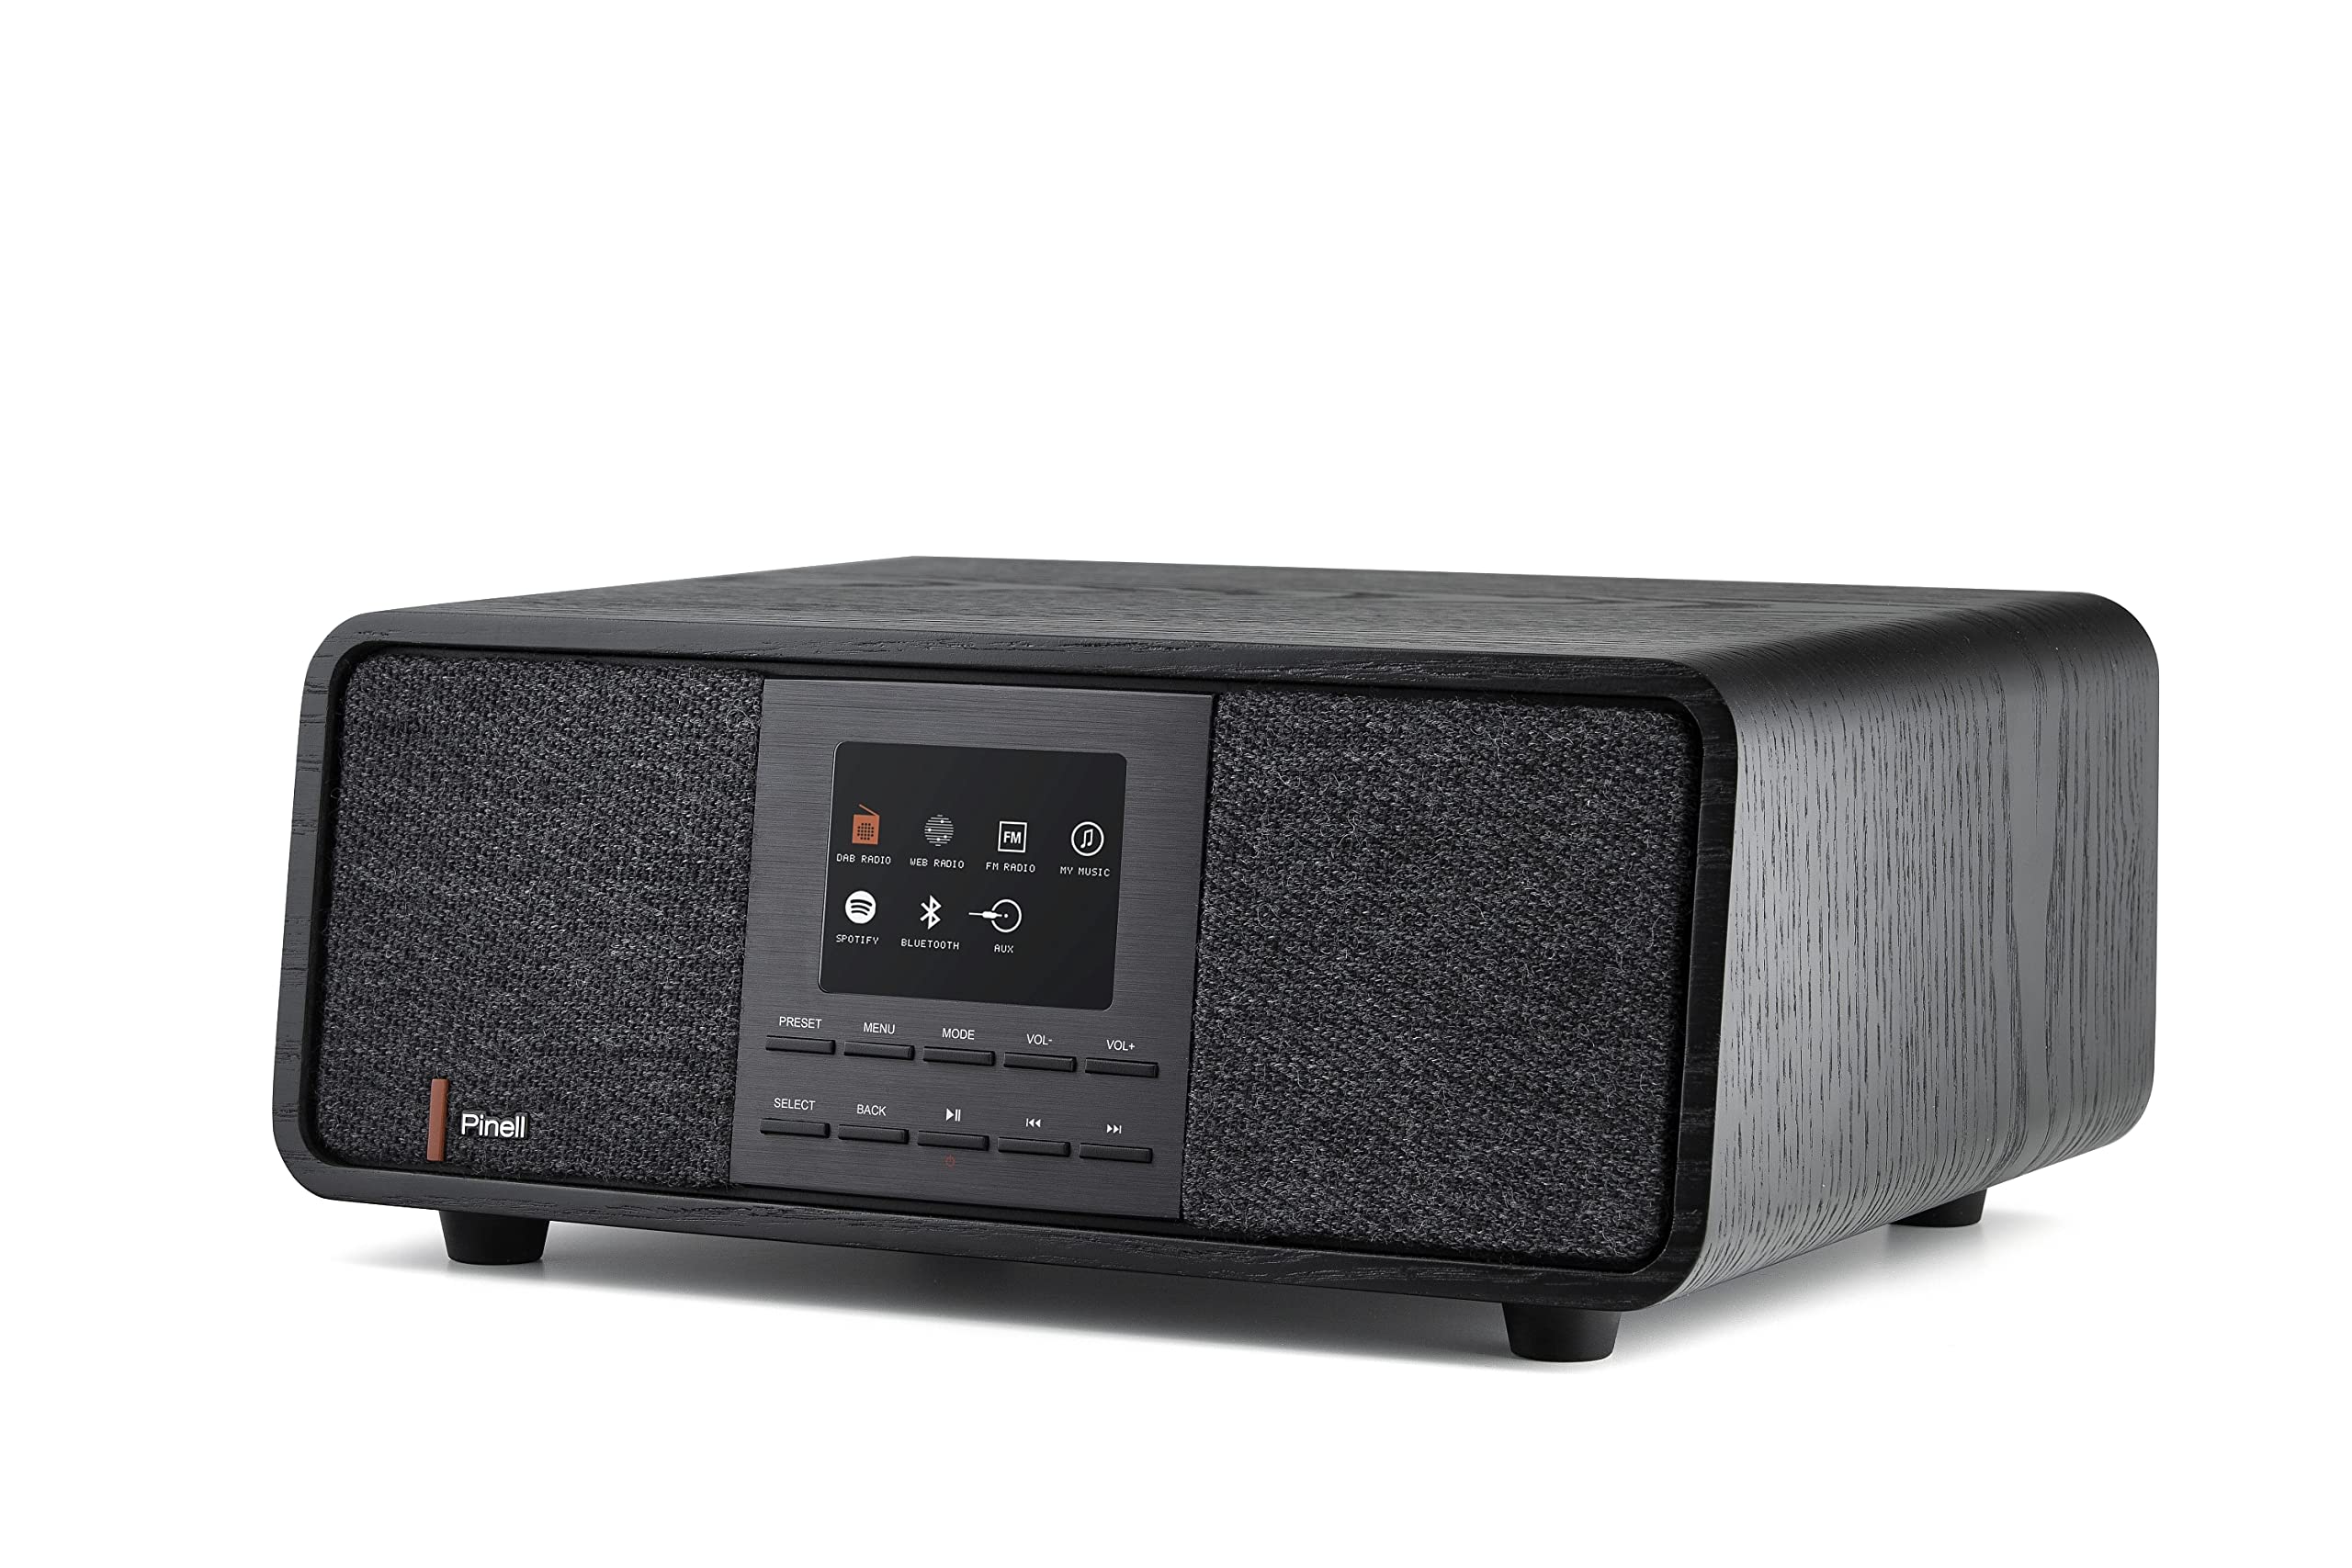
Image: The Pinell Supersound 501 radio with its remote control, showcasing the main unit and included accessories.
4. Product Overview
The Supersound 501 features an integrated display and intuitive controls for easy navigation. The front panel includes the display, control buttons, and speaker grilles. The rear panel houses the power input and auxiliary connections.

Image: Front view of the Pinell Supersound 501, highlighting the central display and control buttons for various functions like DAB, FM, Internet Radio, Spotify, and Bluetooth.
4.1. Front Panel Controls
- Display: TFT color display for station information, menus, and settings.
- Preset Buttons: Store and recall your favorite stations.
- Menu Button: Access the main menu for settings and options.
- Mode Button: Switch between DAB+, FM, Internet Radio, Bluetooth, and AUX modes.
- Volume Control (VOL+/-): Adjust the audio output level.
- Select/OK Button: Confirm selections in menus.
- Back Button: Return to the previous menu or screen.
- Navigation Buttons (Left/Right/Up/Down): Browse through menus and station lists.
4.2. Rear Panel Connections
- DC IN: Power adapter connection.
- AUX IN (3.5mm): Connect external audio devices.
- Headphone Output (3.5mm): For private listening.
5. Setup
5.1. Initial Power-On
- Connect the supplied power adapter to the DC IN port on the rear of the radio and then to a wall outlet.
- The radio will power on automatically or prompt you to press the Power button.
- Follow the on-screen instructions to select your language and region.
5.2. Wi-Fi Network Connection
For Internet Radio and Spotify Connect functionality, the radio requires a Wi-Fi connection.
- Navigate to the Menu and select Settings.
- Choose Network, then Wi-Fi Setup.
- The radio will scan for available networks. Select your network from the list.
- Enter your Wi-Fi password using the navigation and Select buttons.
- Once connected, a Wi-Fi icon will appear on the display.
5.3. Setting the Clock
The radio can automatically set its time via DAB+ or Internet connection. Manual setting is also available.
- Go to Menu > Settings > Time/Date.
- Select Auto Update for automatic synchronization or Set Time/Date for manual adjustment.
6. Operating Instructions
6.1. DAB+ Radio
- Press the Mode button until DAB+ is selected.
- The radio will automatically scan for available DAB+ stations on first use. To perform a full scan manually, go to Menu > Full Scan.
- Use the navigation buttons to browse the station list and press Select to tune in.
- To save a station as a preset, press and hold a Preset button until "Preset Saved" appears.
6.2. FM Radio
- Press the Mode button until FM is selected.
- To auto-scan for stations, press and hold the Select button. The radio will scan and stop at the next strong station.
- Use the navigation buttons to fine-tune the frequency manually.
- Save FM stations using the Preset buttons as described for DAB+.
6.3. Internet Radio & Spotify Connect

Image: The Pinell Supersound 501 radio displaying the Spotify interface, demonstrating its Internet Radio capabilities and integration with streaming services.
- Ensure the radio is connected to a Wi-Fi network (see Section 5.2).
- Press the Mode button and select Internet Radio or Spotify.
- For Internet Radio, you can browse stations by location, genre, or search.
- For Spotify Connect, open the Spotify app on your smartphone or tablet. Select the "Devices Available" icon and choose your Pinell Supersound 501 from the list to stream music directly.
6.4. Bluetooth Streaming
- Press the Mode button until Bluetooth is selected. The radio will enter pairing mode.
- On your smartphone or Bluetooth-enabled device, go to Bluetooth settings and search for available devices.
- Select "Pinell Supersound 501" from the list to pair.
- Once paired, you can play audio from your device through the radio.
6.5. AUX Input
- Connect an external audio device (e.g., MP3 player) to the AUX IN port on the rear of the radio using a 3.5mm audio cable.
- Press the Mode button until AUX is selected.
- Control playback from your external device. The radio's volume control will still function.
7. Maintenance
- Cleaning: Use a soft, dry cloth to clean the radio's surface. Do not use abrasive cleaners or solvents.
- Storage: If storing the radio for an extended period, disconnect it from the power supply.
- Remote Control Batteries: Replace the 2 AAA batteries in the remote control when its range decreases or it stops responding.
8. Troubleshooting
| Problem | Possible Cause | Solution |
|---|---|---|
| No power | Power adapter not connected or faulty. | Ensure the power adapter is securely connected to the radio and a working power outlet. |
| No sound | Volume too low; Mute activated; Incorrect source selected. | Increase volume; Check if mute is active; Ensure correct mode (DAB+, FM, Internet Radio, Bluetooth, AUX) is selected. |
| Poor DAB+/FM reception | Weak signal; Antenna not extended. | Relocate the radio; Fully extend the telescopic antenna (if applicable, though not explicitly mentioned for this model, it's common for portable radios). Perform a full scan. |
| Internet Radio not connecting | No Wi-Fi connection; Incorrect Wi-Fi password. | Check Wi-Fi settings and ensure the radio is connected to your network. Verify the Wi-Fi password. Restart your router. |
| Bluetooth pairing issues | Radio not in pairing mode; Device too far; Already paired with another device. | Ensure the radio is in Bluetooth mode and visible. Move your device closer. Disconnect from other Bluetooth devices. |
9. Specifications
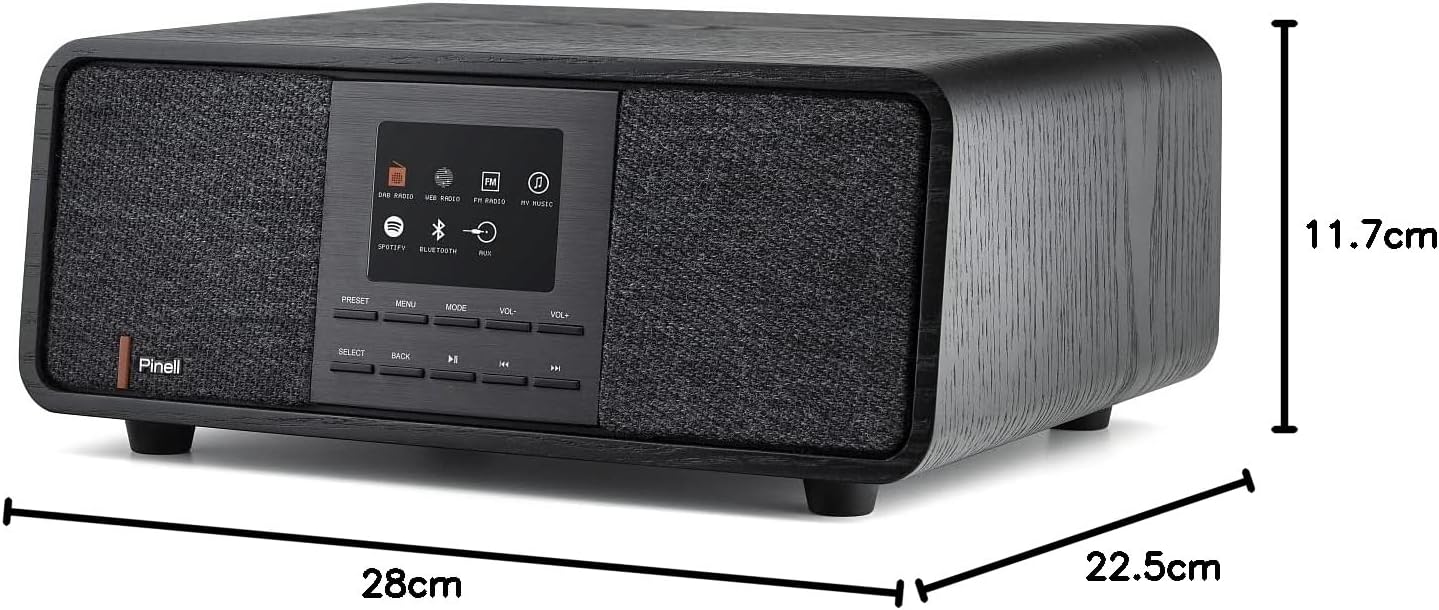
Image: Diagram showing the physical dimensions of the Pinell Supersound 501 radio.
- Model Number: 7090011022064
- Brand: Pinell
- Color: Black
- Radio Bands: DAB+, FM
- Internet Radio: Yes, with Spotify Connect
- Connectivity: Bluetooth 4.0, Wi-Fi (802.11b/g/n), AUX In (3.5mm), Headphone Out (3.5mm)
- Display: Integrated TFT color display
- Speakers: 2 integrated speakers, 10.2 cm (4") subwoofer driver diameter
- Max Power Output: 25 Watts
- Material: Aluminum, Wood
- Dimensions (W x H x D): 280 mm x 117 mm x 225 mm
- Weight: 2900 Grams
- Power Source: AC (Adapter included)
- Remote Control Batteries: 2 x AAA (included)
- Special Features: Integrated clock, Anti-slip feet
10. Warranty and Support
For warranty information and technical support, please refer to the documentation provided with your purchase or visit the official Pinell website. Keep your proof of purchase for warranty claims.
Note: Information regarding spare parts availability and software updates is not explicitly provided in the product details. Please contact Pinell customer service for the most current information.